docker安装seata,集成到cloud项目
环境配置
-
虚拟机中安装centos8,centos8中安装docker,docker中安装mysql8.0.27、nacos2.0.3、seata1.3.0
-
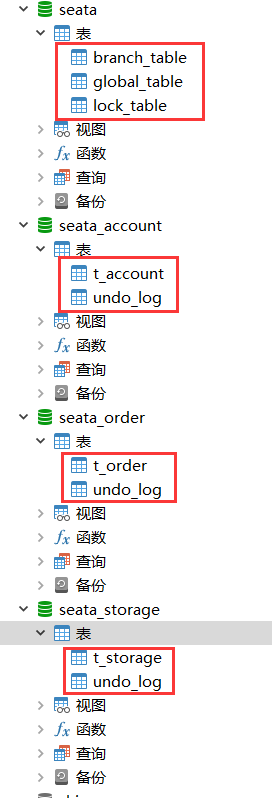
启动mysql容器,win10系统上navicat能连接到mysql容器,并导入如下数据库
-
-
可在win10系统上下创建2个文件,之后上传到centos8服务器的/home/mydocker/seata/config目录
-
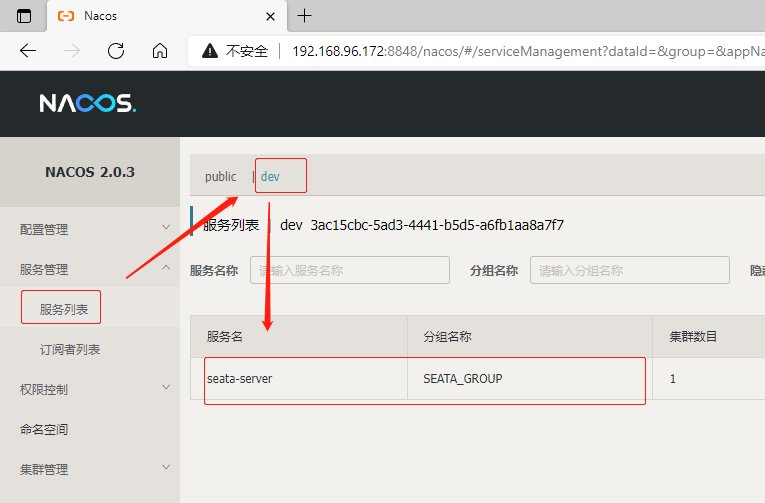
nacos控制台中新建命名空间dev
## file.conf;使seata-server连接mysql中的数据库seata
store {
  ## store mode: file、db
  mode = "db"
  ## database store property
  db {
    ## the implement of javax.sql.DataSource, such as DruidDataSource(druid)/BasicDataSource(dbcp) etc.
    datasource = "druid"
    ## mysql/oracle/postgresql/h2/oceanbase etc.
    dbType = "mysql"
    driverClassName = "com.mysql.cj.jdbc.Driver"
    url = "jdbc:mysql://192.168.96.172:3306/seata"
    user = "root"
    password = "123456"
    minConn = 5
    maxConn = 30
    globalTable = "global_table"
    branchTable = "branch_table"
    lockTable = "lock_table"
    queryLimit = 100
  }
}

## testregistry.conf;使nacos作为seata-server的服务注册中心和服务配置中心
registry {
  # file 、nacos 、eureka、redis、zk、consul、etcd3、sofa
  type = "nacos"
  loadBalance = "RandomLoadBalance"
  loadBalanceVirtualNodes = 10
  nacos {
    application = "seata-server"
    serverAddr = "192.168.96.172:8848"
    group = "SEATA_GROUP"
    namespace = "3ac15cbc-5ad3-4441-b5d5-a6fb1aa8a7f7"
    cluster = "default"
    username = ""
    password = ""
  }
}
config {
  # file、nacos 、apollo、zk、consul、etcd3
  type = "nacos"
  nacos {
    serverAddr = "192.168.96.172:8848"
    namespace = "3ac15cbc-5ad3-4441-b5d5-a6fb1aa8a7f7"
    group = "SEATA_GROUP"
    username = ""
    password = ""
  }
}
- 上传到centos8服务器
pscp -P 22 C:\file.conf root@192.168.96.172:/home/mydocker/seata/config
pscp -P 22 C:\testregistry.conf root@192.168.96.172:/home/mydocker/seata/config
- 启动nacos,同时启动seata
docker run --name seata-server -p 8091:8091 -e SEATA_CONFIG_NAME=file:/root/seata-config/testregistry -e SEATA_IP=192.168.96.172 -v /home/mydocker/seata/config:/root/seata-config -d seataio/seata-server:1.3.0
-
win10系统上打开浏览器,输入 http://192.168.96.172:8848/nacos/ 打开nacos控制台,可在服务列表查看注册进来的seata服务
-
mkdir -p /home/mydocker/seata # 新建文件夹
-
touch config.txt # 新建文件,复制官方配置到该文件
-
config.txt中配置分组、数据源
service.vgroupMapping.my_test_tx_group=default
service.vgroupMapping.account-service-seata=default
service.vgroupMapping.storage-service-seata=default
service.default.grouplist=192.168.96.172:8091

store.mode=db
store.db.datasource=druid
store.db.dbType=mysql
store.db.driverClassName=com.mysql.cj.jdbc.Driver
store.db.url=jdbc:mysql://192.168.96.172:3306/seata?useUnicode=true
store.db.user=root
store.db.password=123456
-
mkdir -p /home/mydocker/seata/nacos # 新建文件夹
-
touch nacos-config.sh # 新建文件,复制官方配置到该文件
官方配置地址 -
进入nacos-config.sh所在路径,执行如下命令
sh nacos-config.sh -h 192.168.43.150 -p 8848 -g SEATA_GROUP -t 命名空间id -u nacos -w nacos
- 导入成功后可在nacos控制台配置列表查看
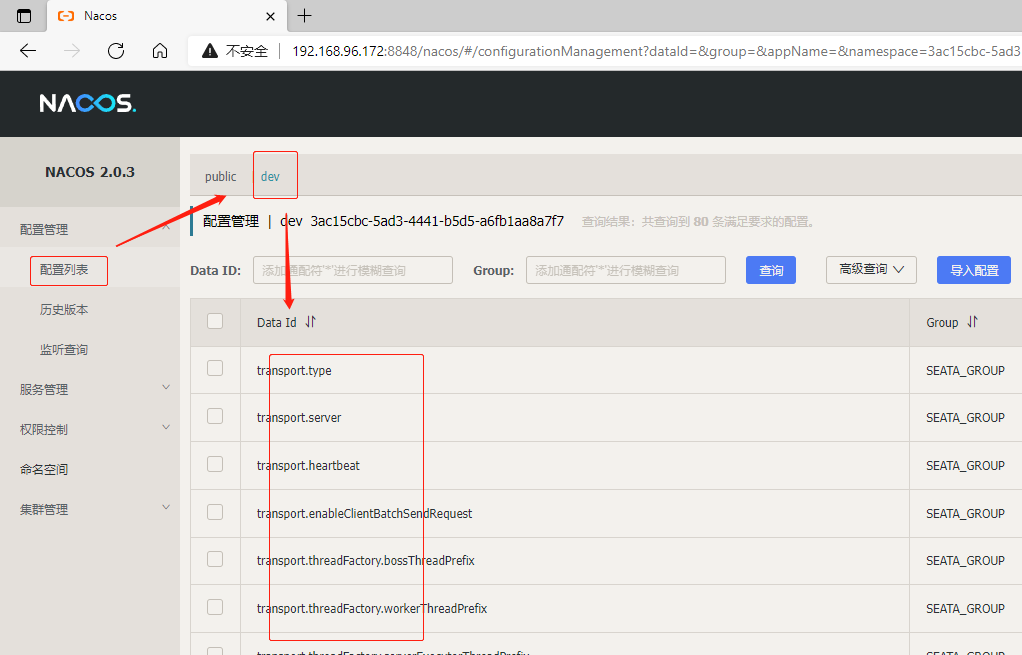
- config.txt导入nacos配置管理后,就可以不将file.conf和registry.conf放到我们的项目中
项目配置
- 父工程依赖
<dependency>
    <groupId>com.alibaba.cloud</groupId>
    <artifactId>spring-cloud-alibaba-dependencies</artifactId>
    <version>${spring-cloud-alibaba.version}</version>
    <type>pom</type>
    <scope>import</scope>
</dependency>
- 3个子模块中添加依赖,pom中导入对应的seata依赖版本
<dependency>
    <groupId>com.alibaba.cloud</groupId>
    <artifactId>spring-cloud-alibaba-seata</artifactId>
    <version>2.1.0.RELEASE</version>
</dependency>
<dependency>
    <groupId>io.seata</groupId>
    <artifactId>seata-all</artifactId>
    <version>1.3.0</version>
</dependency>
- 3个子模块中配置yml
spring:
cloud:
alibaba:
seata:
enabled: true
application-id: seata-server # nacos中seata服务端的注册名称
enable-auto-data-source-proxy: true # 开启数据库自动代理
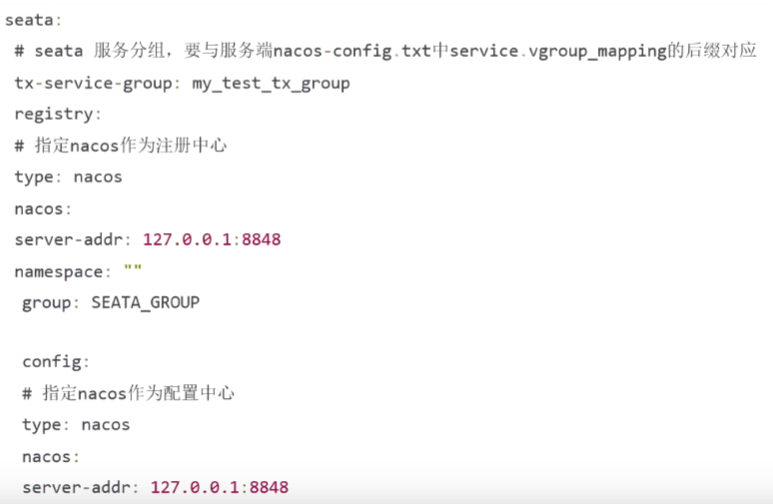
tx-service-group: my_test_tx_group # 这里填写上传config.txt时对应此工程的vgroupMapping配置
- 3个子模块中启动类配置
@SpringBootApplication(exclude = DataSourceAutoConfiguration.class)
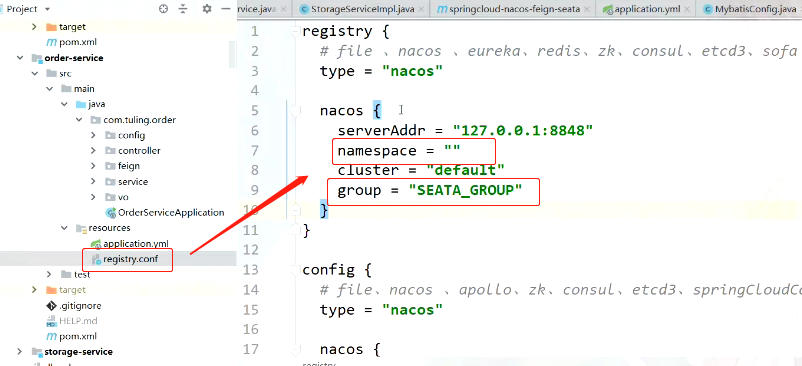
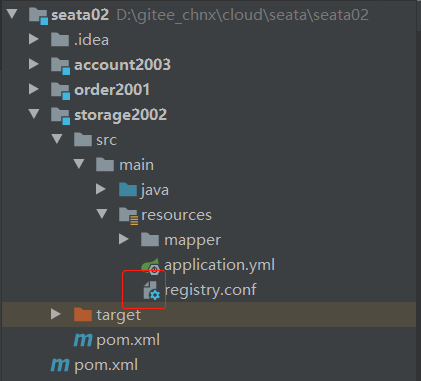
- 3个子模块中添加registry.conf文件
registry {
  type = "nacos"
  nacos {
    serverAddr = "192.168.96.172:8848"
    namespace = "3ac15cbc-5ad3-4441-b5d5-a6fb1aa8a7f7"
    cluster = "default"
    group = "SEATA_GROUP"
  }
}
config {
  type = "nacos"
  nacos {
    serverAddr = "192.168.96.172:8848"
    namespace = "3ac15cbc-5ad3-4441-b5d5-a6fb1aa8a7f7"
    cluster = "default"
    group = "SEATA_GROUP"
  }
}
- 3个子模块中编写DataSourceConfig配置类
# yml文件中指定数据源
spring:
  datasource:
    type: com.alibaba.druid.pool.DruidDataSource
    driver-class-name: com.mysql.cj.jdbc.Driver
    url: jdbc:mysql://192.168.96.172:3306/seata_order?useUnicode=true&characterEncoding=UTF-8&serverTimezone=Asia/Shanghai
    username: root
    password: 123456

# 编写配置类
@Configuration
public class DataSourceConfig {
    // 1. 绑定yml中的数据源
    @Bean
    @ConfigurationProperties(prefix = "spring.datasource")
    public DataSource druidDataSource() {
        return new DruidDataSource();
    }
    // 2. 构建datasource代理对象,替换原来的数据源
    @Bean
    public DataSourceProxy dataSourceProxy(DataSource dataSource) {
        return new DataSourceProxy(dataSource);
    }
    // 3. mybatis相关配置
    @Bean
    public SqlSessionFactory sqlSessionFactoryBean(DataSourceProxy dataSourceProxy) throws Exception {
        SqlSessionFactoryBean sqlSessionFactoryBean = new SqlSessionFactoryBean();
        sqlSessionFactoryBean.setDataSource(dataSourceProxy);
        sqlSessionFactoryBean.setMapperLocations(new PathMatchingResourcePatternResolver().getResources("classpath:mapper/*.xml"));
        sqlSessionFactoryBean.setTransactionFactory(new SpringManagedTransactionFactory());
        return sqlSessionFactoryBean.getObject();
    }
}
-
方法上添加注解 @GlobalTransactional(rollbackFor = Exception.class)
-
模拟1个超时异常,浏览器发送请求进行测试;测试结果,数据库数据数据无误
-
注释掉注解@GlobalTransactional,再次发送请求进行测试
-
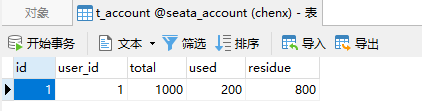
测试结果:余额减100
-
-
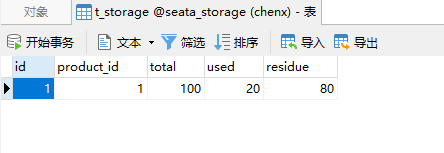
库存减10
-
-
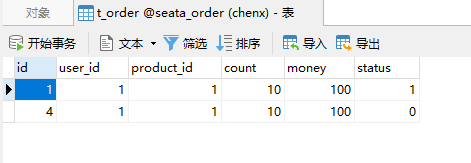
生成了1张订单,但订单状态为0表示用户未支付,可用户的余额表显示减了100;说明出现错误后数据没有回滚
-
————————————————————————— 分割线 ———————————————————————————
-
引入依赖;首先排除spring-cloud-starter-alibaba-seata中的seata-all
-

-
每个微服务对应的数据库加入undo_log表
-
编写配置代理数据类DataSourceConfig
-
启动类上排除DataSourceAutoConfiguration类
-
每个微服务resources路径下添加registry.conf文件;注意命名空间和分组
-
-
补充:使用cloud alibaba2.1.4则可不添加registry.conf,将该文件中配置添加到yml文件中
-
-
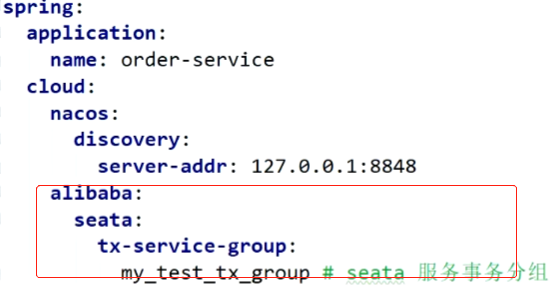
每个微服务的yml中指定分组
-
-
添加注解@GlobalTransactional
常见错误
- error1:no available server to connect
# 解决方案
# yml配置中添加属性spring.cloud.alibaba.seata.tx-service-group,值需与file.conf中的分组一致
spring:
  cloud:
    alibaba:
      seata:
        #自定义事务组名称需要与seata-server中的对应
        tx-service-group: my_test_tx_group
-
win10系统中安装seata0.9,file.conf中service模块设置分组service.vgroupMapping;docker中安装seata1.3.0发现无service模块,不在file.conf中配置分组,而在config.txt中配置
-
pom中到seata依赖版本与安装的seata版本需要一致
-
若使用seata1.4.0,则对应使用cloud alibaba2.1.1
-

-
若使用seata1.3.0,则对应使用cloud alibaba2.1.2及其以上版本
-

-
resources路径下的conf后缀结尾的文件图标必须如下,否则表示没有被识别
-
-


 浙公网安备 33010602011771号