vscode中调试c++
Get Started with C++ and Mingw-w64 in Visual Studio Code
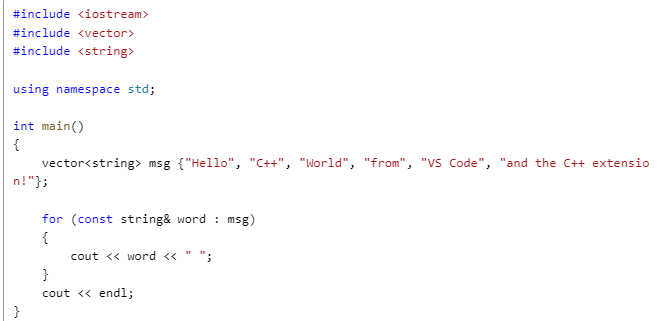
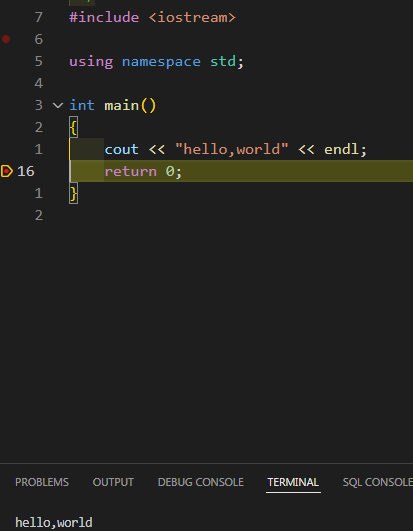
测试代码如下
先生成c_cpp_properites.json文件
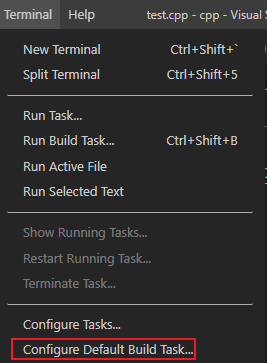
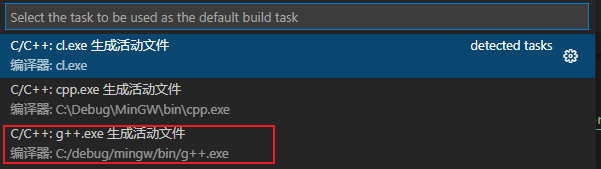
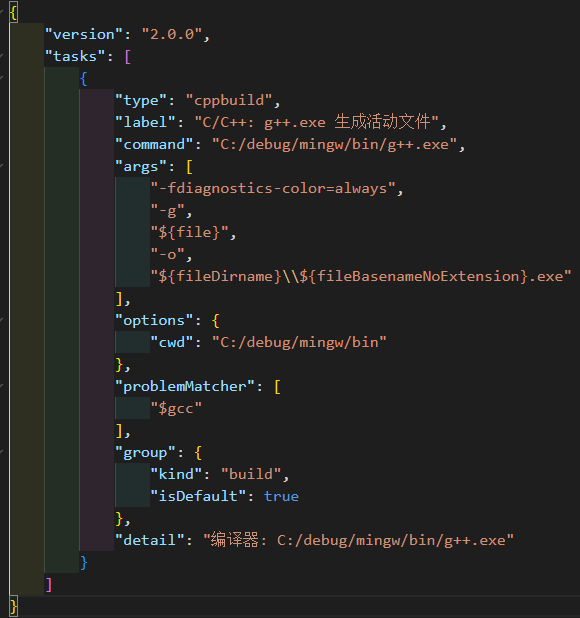
会在工作目录下生成一个tasks.json文件
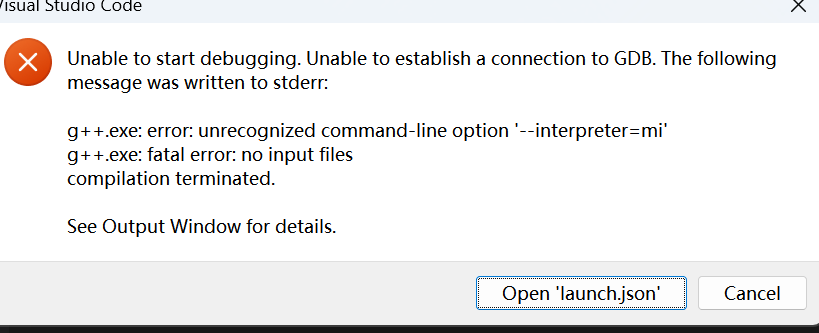
接下来是lauch.json文件
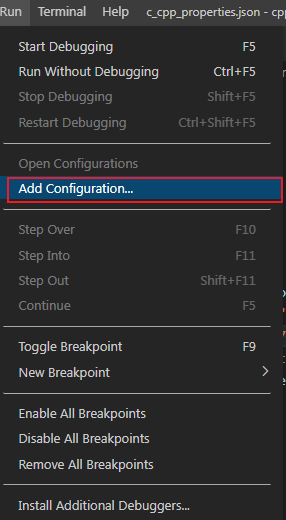
或者
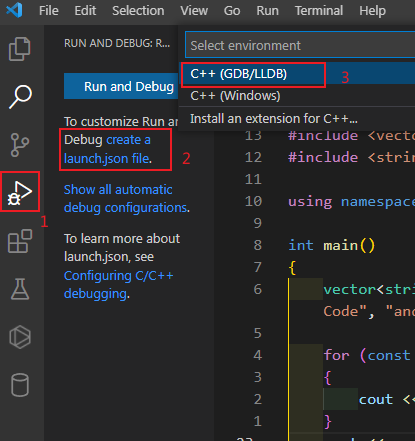
生成的lauch.json如下
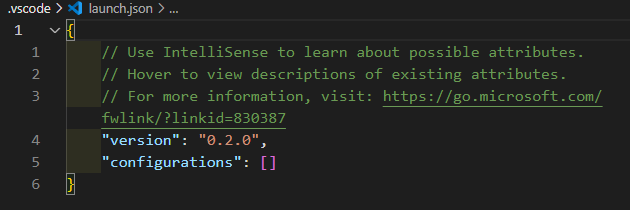
修改为
{
  "version": "0.2.0",
  "configurations": [
    {
      "name": "g++.exe - Build and debug active file",
      "type": "cppdbg",
      "request": "launch",
      "program": "${fileDirname}\\${fileBasenameNoExtension}.exe",
      "args": [],
      "stopAtEntry": false,
      "cwd": "${fileDirname}",
      "environment": [],
      "externalConsole": false,
      "MIMode": "gdb",
      "miDebuggerPath": "C:\\msys64\\mingw64\\bin\\gdb.exe",
      "setupCommands": [
        {
          "description": "Enable pretty-printing for gdb",
          "text": "-enable-pretty-printing",
          "ignoreFailures": true
        }
      ],
      "preLaunchTask": "C/C++: g++.exe build active file"
    }
  ]
}
参照这个https://code.visualstudio.com/docs/cpp/config-mingw
Get Started with C++ and Mingw-w64 in Visual Studio Code
中文搜索出来的都语焉不详,照做一遍都有点问题,按照英文的来一遍ok
-
Install Visual Studio Code.
-
Install the C++ extension for VS Code.//在extensions搜索栏里输入c/c++,排名最靠前下载量最多的那个插件
-
Install Mingw-w64 to a folder that has no spaces in its path (in other words, NOT the default location of C:/Program Files/). In this tutorial, we assume it is installed under
C:\Mingw-w64.//下载地址,http://mingw-w64.org/doku.php/download/mingw-builds,这个地址失效了,用Downloads - MinGW-w64,建议安装在c:\Mingw目录下 -
Install a shell program such as Bash. If you have installed Git for Windows, you already have a Bash shell that the extension can discover and use for its integrated Terminal. If you don't have Git for Windows installed, then you can install bash.exe as part of MSYS2.//建议安装git
-
In the Windows search box, type "path" and then choose "Edit the system environment variables" from the results list.//就是“搜索程序和文件"这个框里输入path即可,将系统环境变量path进行编辑
-
Add the paths to your Bash shell and to your mingw-w64
binfolder to the Windows PATH environment variable. The extension will pass this environment variable to the Bash shell when it opens it.//最后加上c:/Mingw或者c:/Mingw/bin,及c:/git/bin -
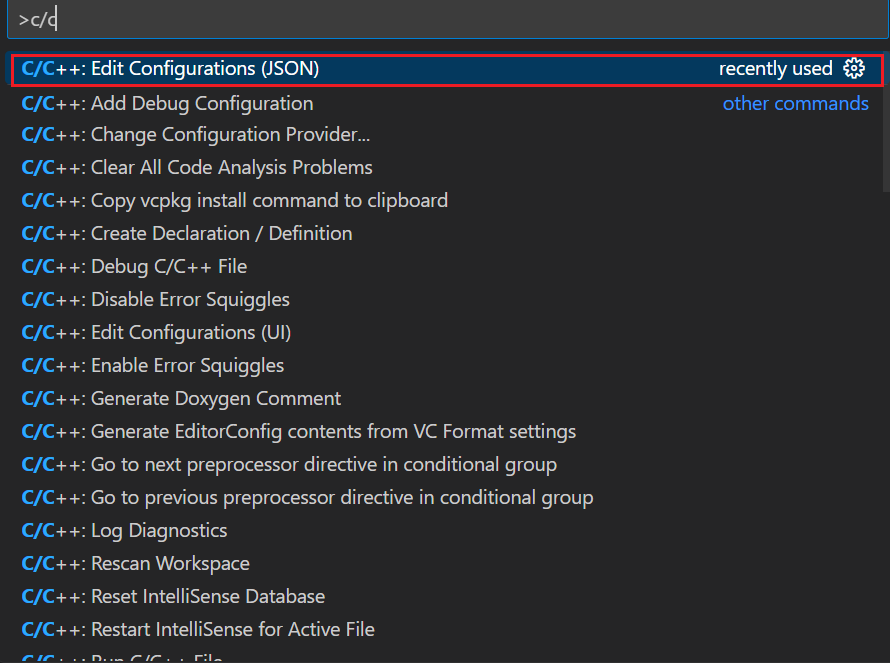
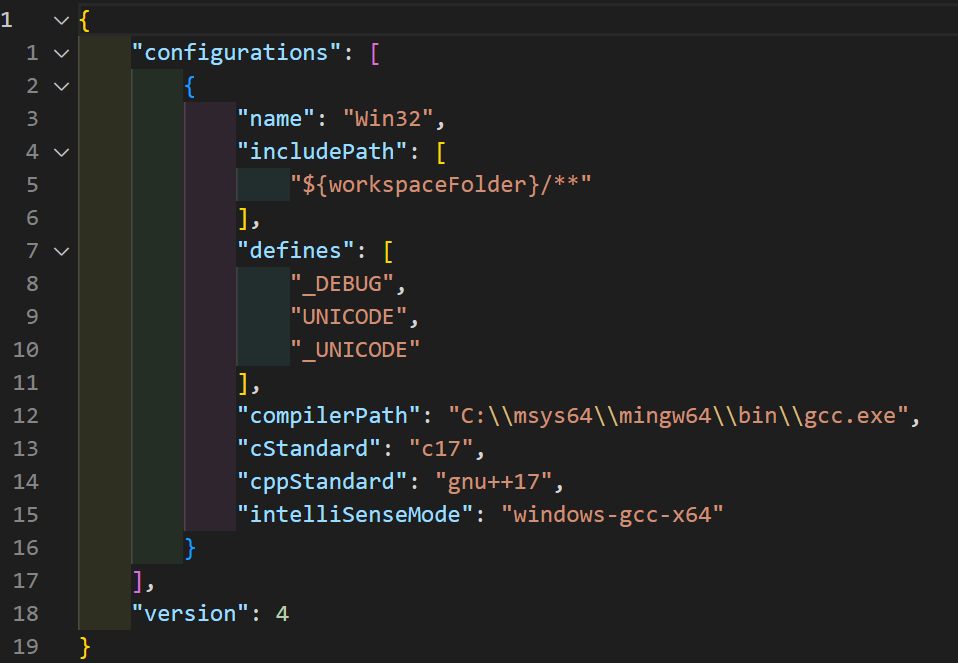
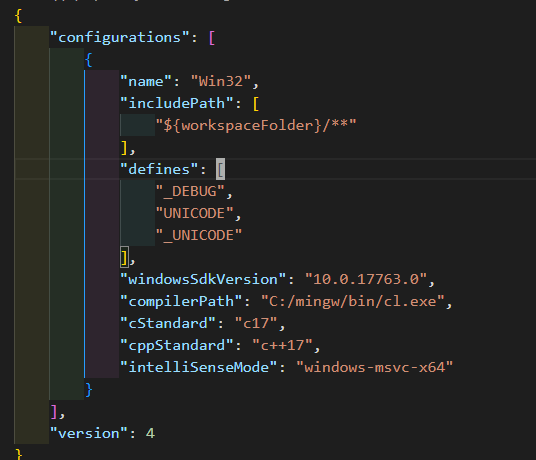
ctrp+shift+p调出的输入框里输入c/c++,选择edit configurations(JSON),就会自动生成c_cpp_properties.json文件,
-
![]()
-
![]()
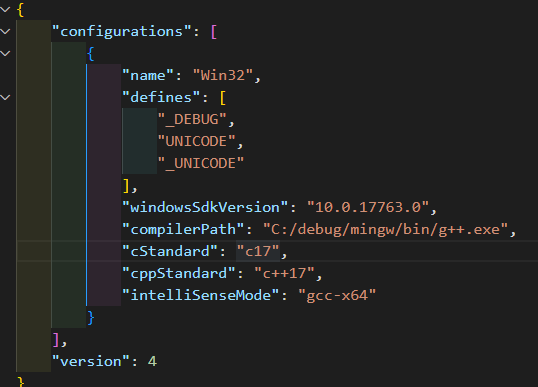
- 每次生成的还不一样,注意“complierpath”和"intelliSenseMode"会有所区别,这两个后面要修改下
![]()
-
之后修改上面的json文件,Find the
compilerPathsetting and paste in the path to thebinfolder. If you installed Mingw-w64 version 8.1.0 under C:\mingw-w64, the path will look like this:C:\mingw-w64\x86_64-8.1.0-win32-seh-rt_v6-rev0\mingw64\bin\g++.exe. 以及SetintelliSenseModetogcc-x64. This setting helps the IntelliSense feature provide the correct information for GCC.并删除includePathsetting,如下 -
{
    "configurations": [
        {
            "name": "Win32",
            "defines": [
                "_DEBUG",
                "UNICODE"
            ],
            "compilerPath": "C:/mingw/bin/g++.exe",
            "intelliSenseMode": "gcc-x64",
            "browse": {
                "path": [
                    "${workspaceFolder}"
                ],
                "limitSymbolsToIncludedHeaders": true,
                "databaseFilename": ""
            }
        }
    ],
    "version": 4
}
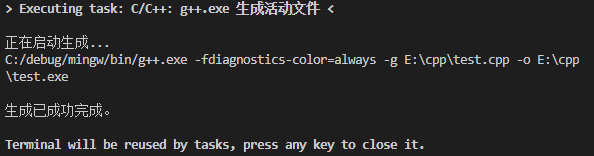
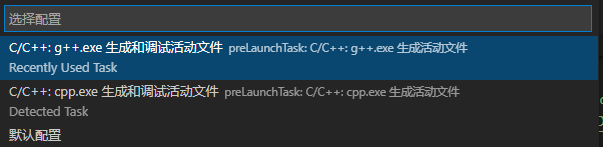
运行一段“hello world”的 代码,但每次都要点两次,一是选择环境,二是选择配置


 浙公网安备 33010602011771号