elasticsearch 索引迁移
snapshot:
snapshot api是Elasticsearch用于对数据进行备份和恢复的一组api接口,可以通过snapshot api进行跨集群的数据迁移,原理就是从源ES集群创建数据快照,然后在目标ES集群中进行恢复。
Snapshot and restore 模块允许创建单个索引或者整个集群的快照到远程仓库.
快照一般建立在一个共享的文件系统上,这样的话有一个节点快照,别的节点也是可以看到的,这样删除的时候也可以同时删除,(在最新版里面创建仓库如果未使用共享文件系统会提示你,在其他节点未找到对应的仓库)。
一:利用snapshot-api
- 查看elasticsearch版本
curl -XGET 'slug:9200'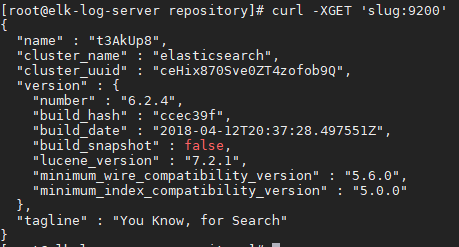
- 源elastcisearch集群中创建repository
创建快照前必须先创建repository仓库,一个repository仓库可以包含多份快照文件,repository主要有一下几种类型
fs: 共享文件系统,将快照文件存放于文件系统中 url: 指定文件系统的URL路径,支持协议:http,https,ftp,file,jar s3: AWS S3对象存储,快照存放于S3中,以插件形式支持 hdfs: 快照存放于hdfs中,以插件形式支持 - elasticsearch配置文件elasticsearch.yml中设置仓库路径:
path.repo: /data/repository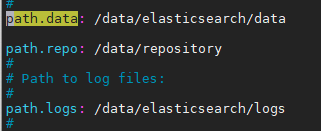
- 调用snapshot api创建repository
curl -XPUT --header 'Content-Type: application/json' 'slug:9200/_snapshot/backup' -d '
{
    "type": "fs",
    "settings": {
        "location": "/data/repository",
        "compress": true
    }
}'
注意location必须与path.repo相同,或其子目录
这里注册了一个名为backup的共享文件系统仓库,快照会存储在/data/repository目录 - 一旦仓库被注册了,就可以只用下面的命令去获取这个仓库的信息
curl -XGET 'slug:9200/_snapshot/backup?pretty'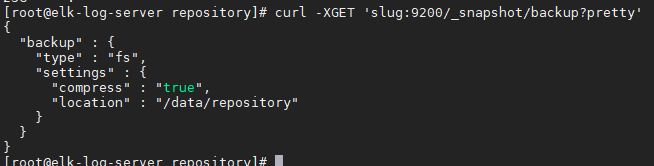
- 查看本集群中所有仓库信息(我这里只有一个仓库)
curl -XGET 'slug:9200/_snapshot/_all?pretty'
curl -XGET 'slug:9200/_snapshot?pretty'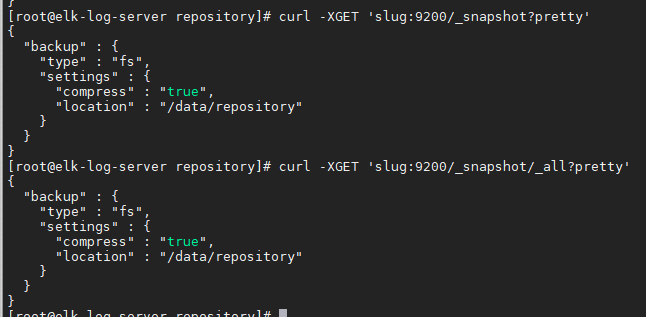
- 共享文件系统仓库
共享文件系统仓库 (
"type": "fs") 是使用共享的文件系统去存储快照。 在location参数里指定的具体存储路径必须和共享文件系统里的位置是一样的并且能被所有的数据节点和master节点访问。 另外还支持如下的一些参数设置:compressmax_restore_bytes_per_seclocation指定快照的存储位置。必须要有
指定是否对快照文件进行压缩. 默认是
true.chunk_size如果需要在做快照的时候大文件可以被分解成几块。这个参数指明了每块的字节数。也可用不同的单位标识。 比如,1g,10m,5k等。默认是
null(表示不限制块大小)。每个节点恢复数据的最高速度限制. 默认是
20mb/smax_snapshot_bytes_per_sec每个节点做快照的最高速度限制。默认是
20mb/s - 一个仓库可以包含同一个集群的多个快照。快照根据集群中的唯一名字进行区分。 在仓库
backup里创建一个名为getautoinfobyvin_2020 的快照可以通过下面的命令:
curl -XPUT --header 'Content-Type: application/json' 'slug:9200/_snapshot/backup/getautoinfobyvin_2020' -d '
{
    "indices": "getautoinfobyvin_2020",
    "include_global_state": false,
    "ignore_unavailable": "true",
    "partial": "false"
}'
通过 indices 参数指定快照包含的索引,这个参数支持同时配置多个索引 multi index syntax. 快照请求同样支持 ignore_unavailable 选项。把这个选项设置为 true 的时候在创建快照的过程中会忽略不存在的索引。默认情况下, 如果没有设置 ignore_unavailable 在索引不存在的情况下快照请求将会失败。通过设置 include_global_state 为false 能够防止 集群的全局状态被作为快照的一部分存储起来。默认情况下,如果快照中的1个或多个索引不是全部主分片都可用会导致整个创建快照的过 程失败。 通过设置 partial 为 true 可以改变这个行为。
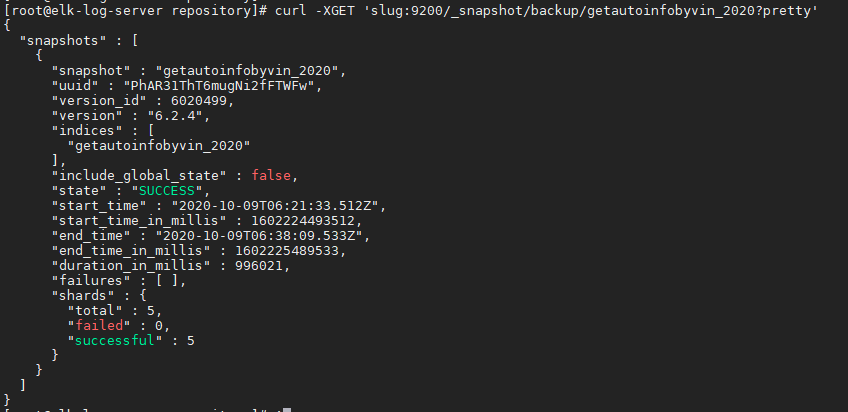
- 通过如下的命令去获得快照的信息
curl -XGET 'slug:9200/_snapshot/backup/getautoinfobyvin_2020?pretty'
快照创建需要时间,依据索引大小
- 通过如下的命令可以把仓库里所有的快照列出来
curl -XGET 'slug:9200/_snapshot/backup/_all?pretty'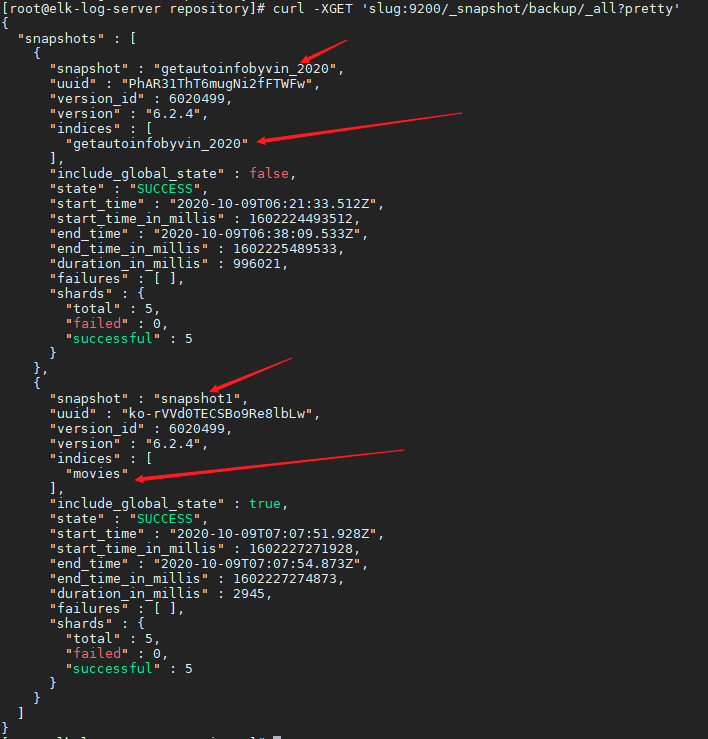
- 可以通过如下的命令将仓库里的某个快照删除:
curl -XDELETE 'slug:9200/_snapshot/backup/snapshot1?pretty'
- 查看快照具体信息
curl -XGET 'slug:9200/_snapshot/backup/getautoinfobyvin_2020/_status?pretty'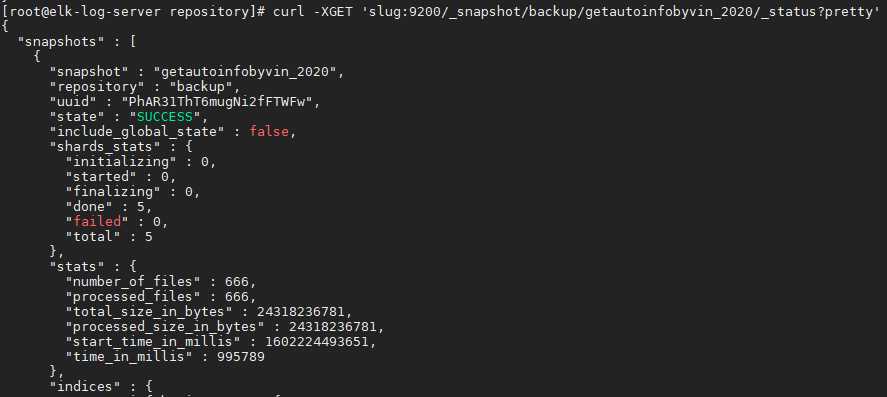
- 恢复快照中的所有索引
curl -XPOST 'slug:9200/indice_name/_close # 关闭indice curl -XPOST 'slug:9200/_snapshot/backup/snapshot1/_restore?pretty' curl -XPOST 'slug:9200/indice_name/_open # 开启indice - 恢复快照中的特定index
curl -XPOST 'slug:9200/_snapshot/backup/snapshot1/_restore' -d '
{
    "indices": "index_1,index_2",
    "ingnore_unavailable": true,
    "include_global_state": false,
    "rename_pattern": "index_(.+)",
    "rename_replacement": "restored_index_$1"
}'
elsticdump:
-
#yum install nodejs #yum install npm
#npm install n -g
#g latest #npm install elasticdump [-g] - 将索引中的数据导出到本地
elasticdump --input=http://localhost:9200/demo --output=D:/ES/date/demo.json - 将本地数据导入es中
elasticdump --input=D:/ES/date/demo.json --output=http://localhost:9200/demo1 -
'#拷贝analyzer如分词 elasticdump \ --input=http://production.es.com:9200/my_index \ --output=http://staging.es.com:9200/my_index \ --type=analyzer '#拷贝映射 elasticdump \ --input=http://production.es.com:9200/my_index \ --output=http://staging.es.com:9200/my_index \ --type=mapping '#拷贝数据 elasticdump \ --input=http://production.es.com:9200/my_index \ --output=http://staging.es.com:9200/my_index \ --type=data -
--input: 源地址,可为ES集群URL、文件或stdin,可指定索引,格式为:{protocol}://{host}:{port}/{index} --input-index: 源ES集群中的索引 --output: 目标地址,可为ES集群地址URL、文件或stdout,可指定索引,格式为:{protocol}://{host}:{port}/{index} --output-index: 目标ES集群的索引 --type: 迁移类型,默认为data,表明只迁移数据,可选settings, analyzer, data, mapping, alias --limit:每次向目标ES集群写入数据的条数,不可设置的过大,以免bulk队列写满 - 迁移单个索引
elasticdump --input=http://172.16.0.39:9200/companydatabase --output=http://172.16.0.20:9200/companydatabase --type=settings elasticdump --input=http://172.16.0.39:9200/companydatabase --output=http://172.16.0.20:9200/companydatabase --type=mapping elasticdump --input=http://172.16.0.39:9200/companydatabase --output=http://172.16.0.20:9200/companydatabase --type=data - 迁移所有索引:以下操作通过elasticdump命令将将集群172.16.0.39中的所有索引迁移至集群172.16.0.20。
注意此操作并不能迁移索引的配置如分片数量和副本数量,必须对每个索引单独进行配置的迁移,或者直接在目标集群中将索引创建完毕后再迁移数据
elasticdump --input=http://172.16.0.39:9200 --output=http://172.16.0.20:9200
logstash:
-
input { elasticsearch { hosts => [ "100.200.10.54:9200" ] index => "doc" size => 1000 scroll => "5m" docinfo => true scan => true } } filter { json { source => "message" remove_field => ["message"] } mutate { # rename field from 'name' to 'browser_name' rename => { "_id" => "wid" } } } output { elasticsearch { hosts => [ "100.20.32.45:9200" ] document_type => "docxinfo" index => "docx" } stdout { codec => "dots" } } -
input { elasticsearch { hosts => ["http://172.16.0.39:9200"] index => "*" docinfo => true } } output { elasticsearch { hosts => ["http://172.16.0.20:9200"] index => "%{[@metadata][_index]}" } } -
input {
elasticsearch {
        hosts => ["http://172.16.20.78:9200"]
        index => "getautoinfobyvin_2020"
        docinfo => true
}
}

filter {
        sleep {
                time => "20"
                every => "50"
        }
}

output {
elasticsearch {
        hosts => ["http://192.168.100.13:9200"]
        index => "getautoinfobyvin_2020"
}
}
通过 indices 参数指定快照包含的索引,这个参数支持同时配置多个索引 multi index syntax. 快照请求同样支持 ignore_unavailable 选项。把这个选项设置为 true 的时候在创建快照的过程中会忽略不存在的索引。默认情况下, 如果没有设置 ignore_unavailable 在索引不存在的情况下快照请求将会失败。通过设置 include_global_state 为false 能够防止 集群的全局状态被作为快照的一部分存储起来。默认情况下,如果快照中的1个或多个索引不是全部主分片都可用会导致整个创建快照的过 程失败。 通过设置 partial 为 true 可以改变这个行为。

 浙公网安备 33010602011771号