CocoaPods

CocoaPods 是一个用来管理第三方依赖库的工具。
- 自动化的、直观的、集中的;
- 以 Ruby gem 包的形式被安装的。
一、Cocoapods 的安装
1.1 安装 RVM
Ruby Version Manager,Ruby 版本管理器。包括 Ruby 的版本管理和 Gem 库管理(gems)。
检测安装的 RVM 的版本:
rvm -v
安装 rvm:
curl -L get.rvm.io | bash -s stable
1.2 ruby 镜像
查看当前 ruby 版本:
ruby -v
列出当前 ruby 的所有版本:
rvm list known
选择一个版本下载。除了需要输入密码,其他等待的地方直接回车:
rvm install 2.3.0
移除系统的 ruby 镜像:
gem sources --remove https://rubygems.org/
替换 ruby 镜像:
gem sources -a https://gems.ruby-china.com
验证ruby镜像是否是只有淘宝。显示如下即为成功:
*** CURRENT SOURCES ***
gem sources -l
1.3 CocoaPods 的安装
Cocoapods 的安装:
sudo gem install cocoapods
或
sudo gem install -n /usr/local/bin cocoapods
安装完后可在终端输入 pod ,会有如下输出:
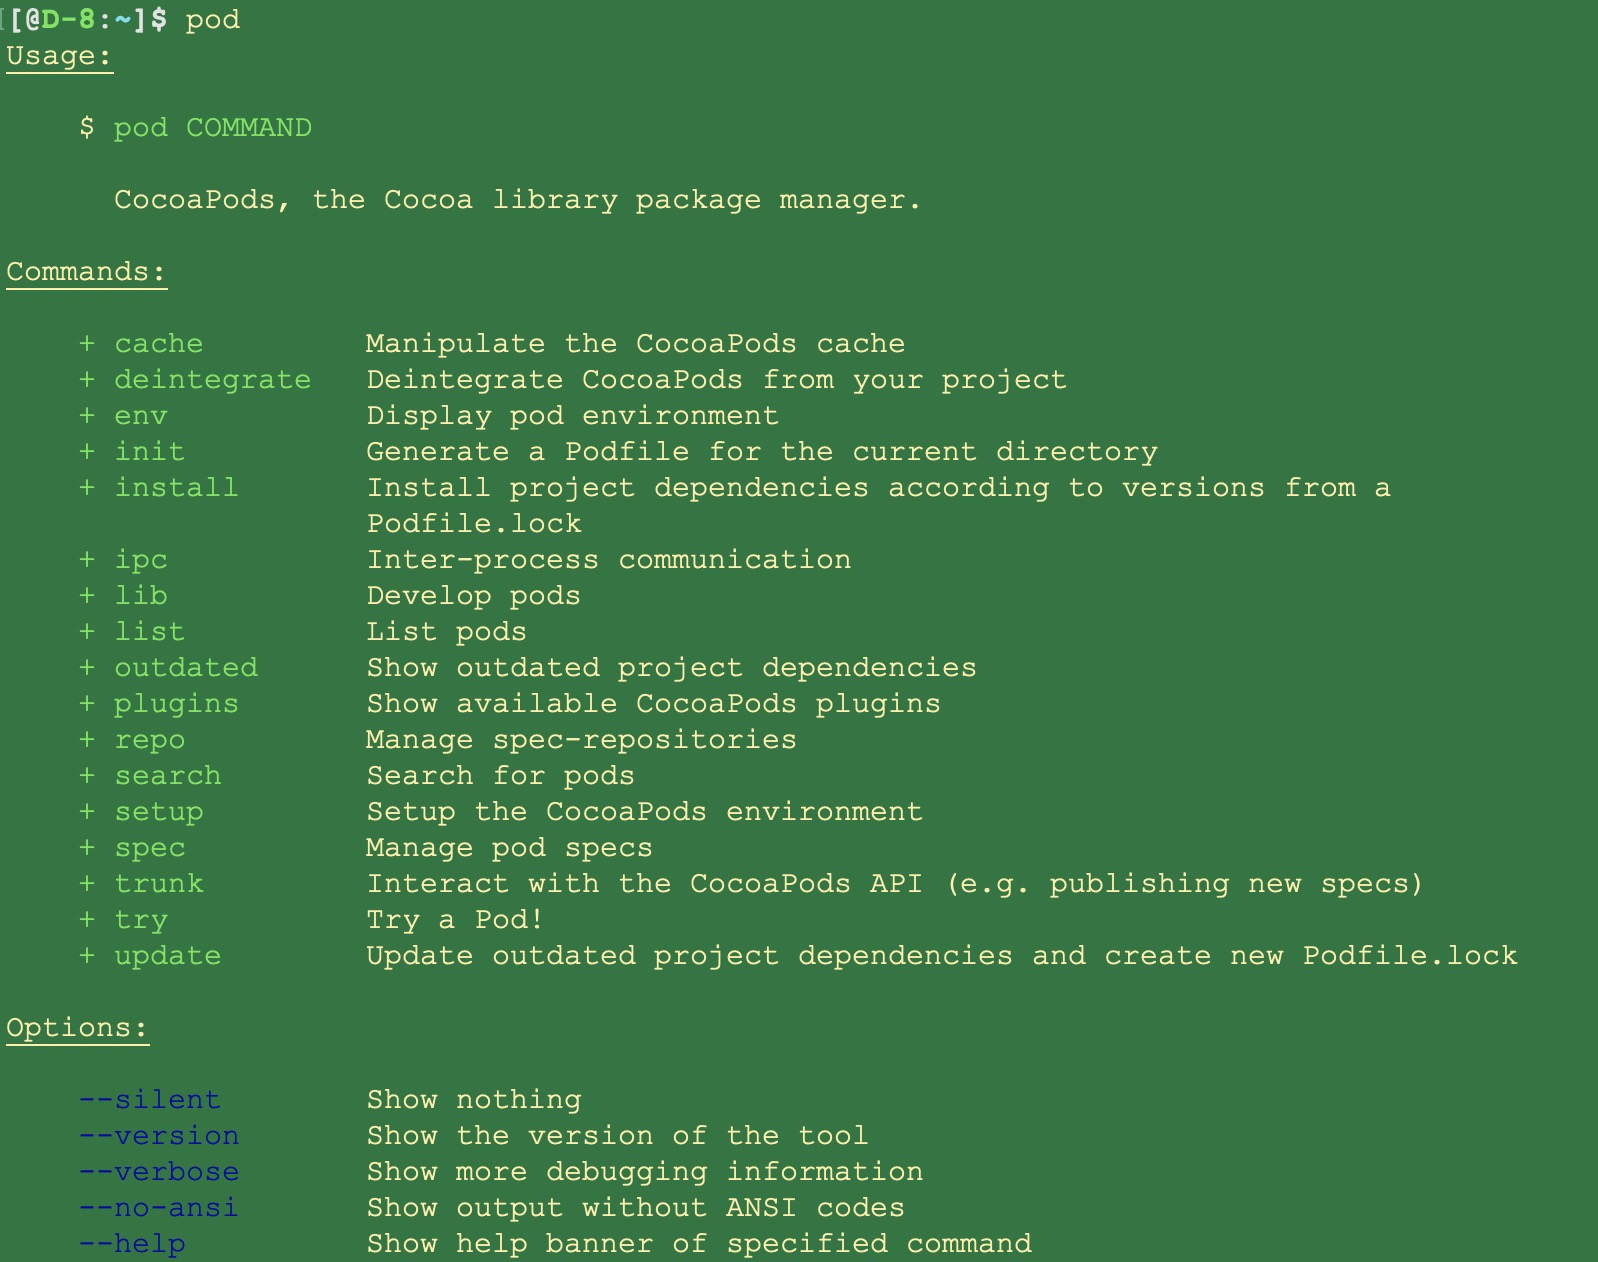
显示了 pod 的所有可用的命令和命令选项。
移除所有版本的 cocoapods:
sudo gem uninstall cocoapods
升级 gem 版本:
sudo gem update --system
路径问题
rvm use ruby-1.9.3-p448
1.4 pod 查看当前源/添加源
-
pod 查看当前源
pod repo fatal: not a git repository (or any of the parent directories): .git cocoapods - Type: git (master) - URL: https://github.com/CocoaPods/Specs.git - Path: /Users/D/.cocoapods/repos/cocoapods 1 repos -
pod repo 换源
- 旧版的 CocoaPods
pod repo remove master pod repo add master https://xx/yy/Specs.git pod repo update- 新版的 CocoaPods 不允许用 pod repo add 直接添加 master 库
cd ~/.cocoapods/repos
pod repo remove master
git clone https://xx/yy/Specs.git master
二、Cocoapods 的使用
打开终端,切换到你的工程目录,输入下面的命令
pod init
终端输入 ls 可以看到已经多了个 Podfile 文件,使用 vi 打开,内容如下
# Uncomment the next line to define a global platform for your project
# platform :ios, '9.0'

target 'SwiftDemo' do
  # Comment the next line if you're not using Swift and don't want to use dynamic frameworks
  use_frameworks!

  # Pods for SwiftDemo

  target 'SwiftDemoTests' do
    inherit! :search_paths
    # Pods for testing
  end

  target 'SwiftDemoUITests' do
    inherit! :search_paths
    # Pods for testing
  end

end
Podfile 的注释已经很清楚的告诉我们应该如何编写 Podfile 文件。Podfile 的具体编写规则请参考官方文档。
编写好 Podfile 后执行以下命令:
pod install
终端会输出 Setting up CocoaPods Master repo 并会停顿很久。因为第一次使用 pod 会从 GitHub 拉取包含所有可用三方库信息的 repo,该代码仓库会随着可用三方库的增多逐渐变大,2014 年 2 月该 repo 仅有 129MB,2016 年 8 月该 repo 已经增加到 841 MB,2016 年 11 月该 repo 已达到 1.07GB(具体请参考链接)。后面会在使用小技巧中介绍如何避免在这一步"卡死"。
三、Cocoapods 的工作流程
pod install 执行流程可分为如下五个步骤
- 查看 ~/.cocoapods/repo/master/Specs 是否存在
- 存在,从这个本地三方库信息库中获取 Podfile 中对应三方库的 git 地址
- 不存在,输出 Setting up CocoaPods Master repo,并拉取三方库信息库到 ~/.cocoapods/repo/中
- 使用 git 命令从 GitHub 上拉取 Podfile 中对应的三方库源码
在终端中输入如下命令
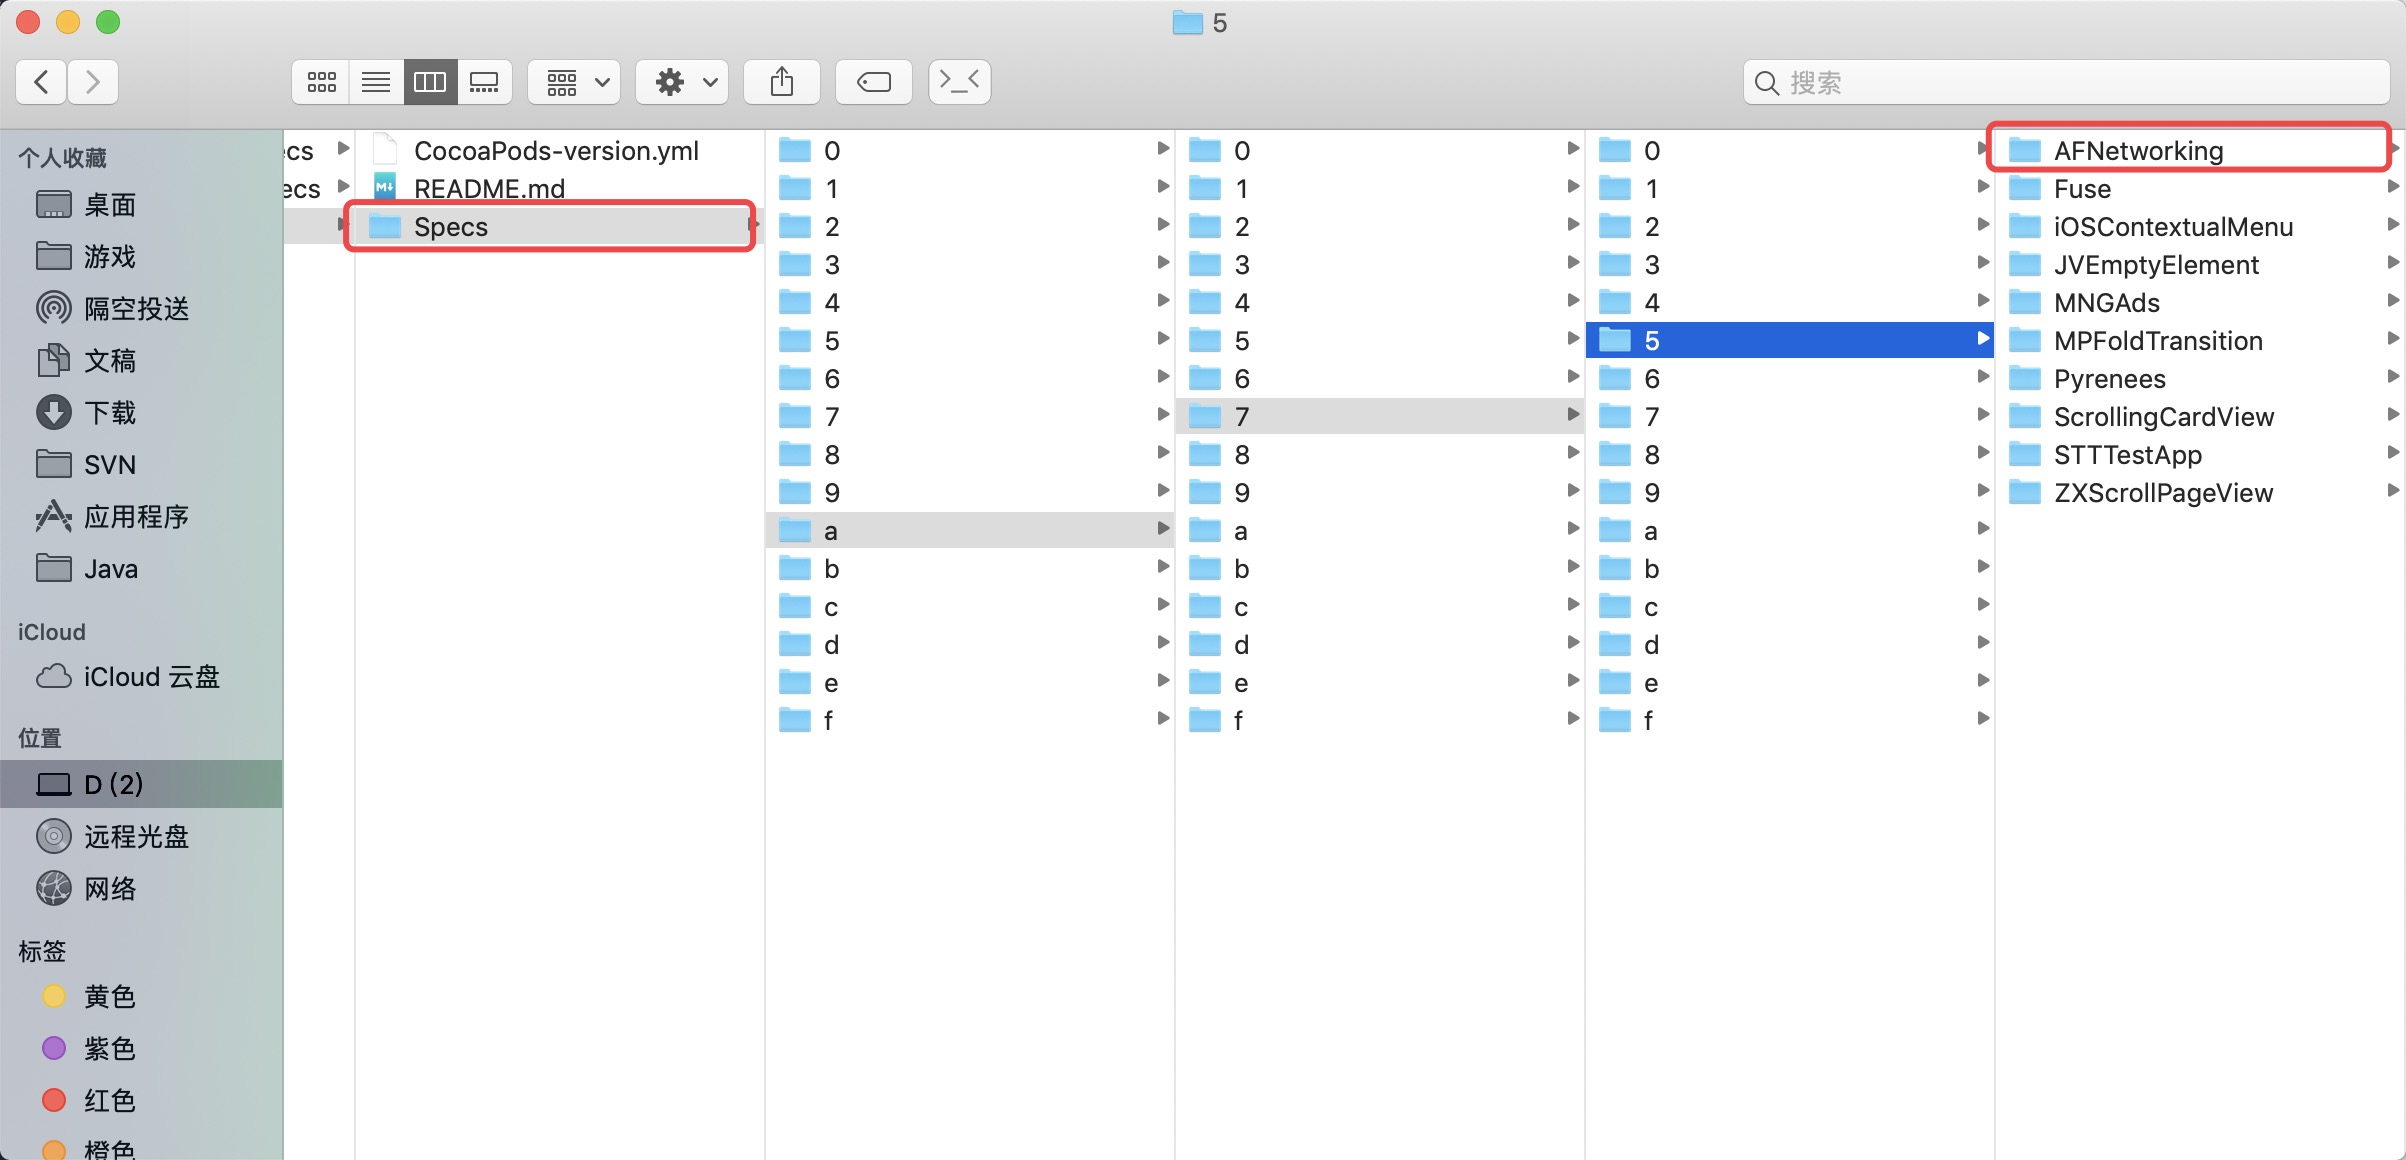
$ cd ~/.cocoapods/repos/master/Specs
$ open .
输入 open . 可以看到很多文件夹,其中就包含我们平常使用的三方库的文件夹。
随便选进入一个文件夹,这里找到 AFNetworking。
当我们使用 pod search AFNetworking 命令时会将这里所有的 release 版本号输出出来。


cd 进最新版本的文件夹中,里面是一个 AFNetworking.podspec.json 文件,使用编辑器/vi 打开,内容如下
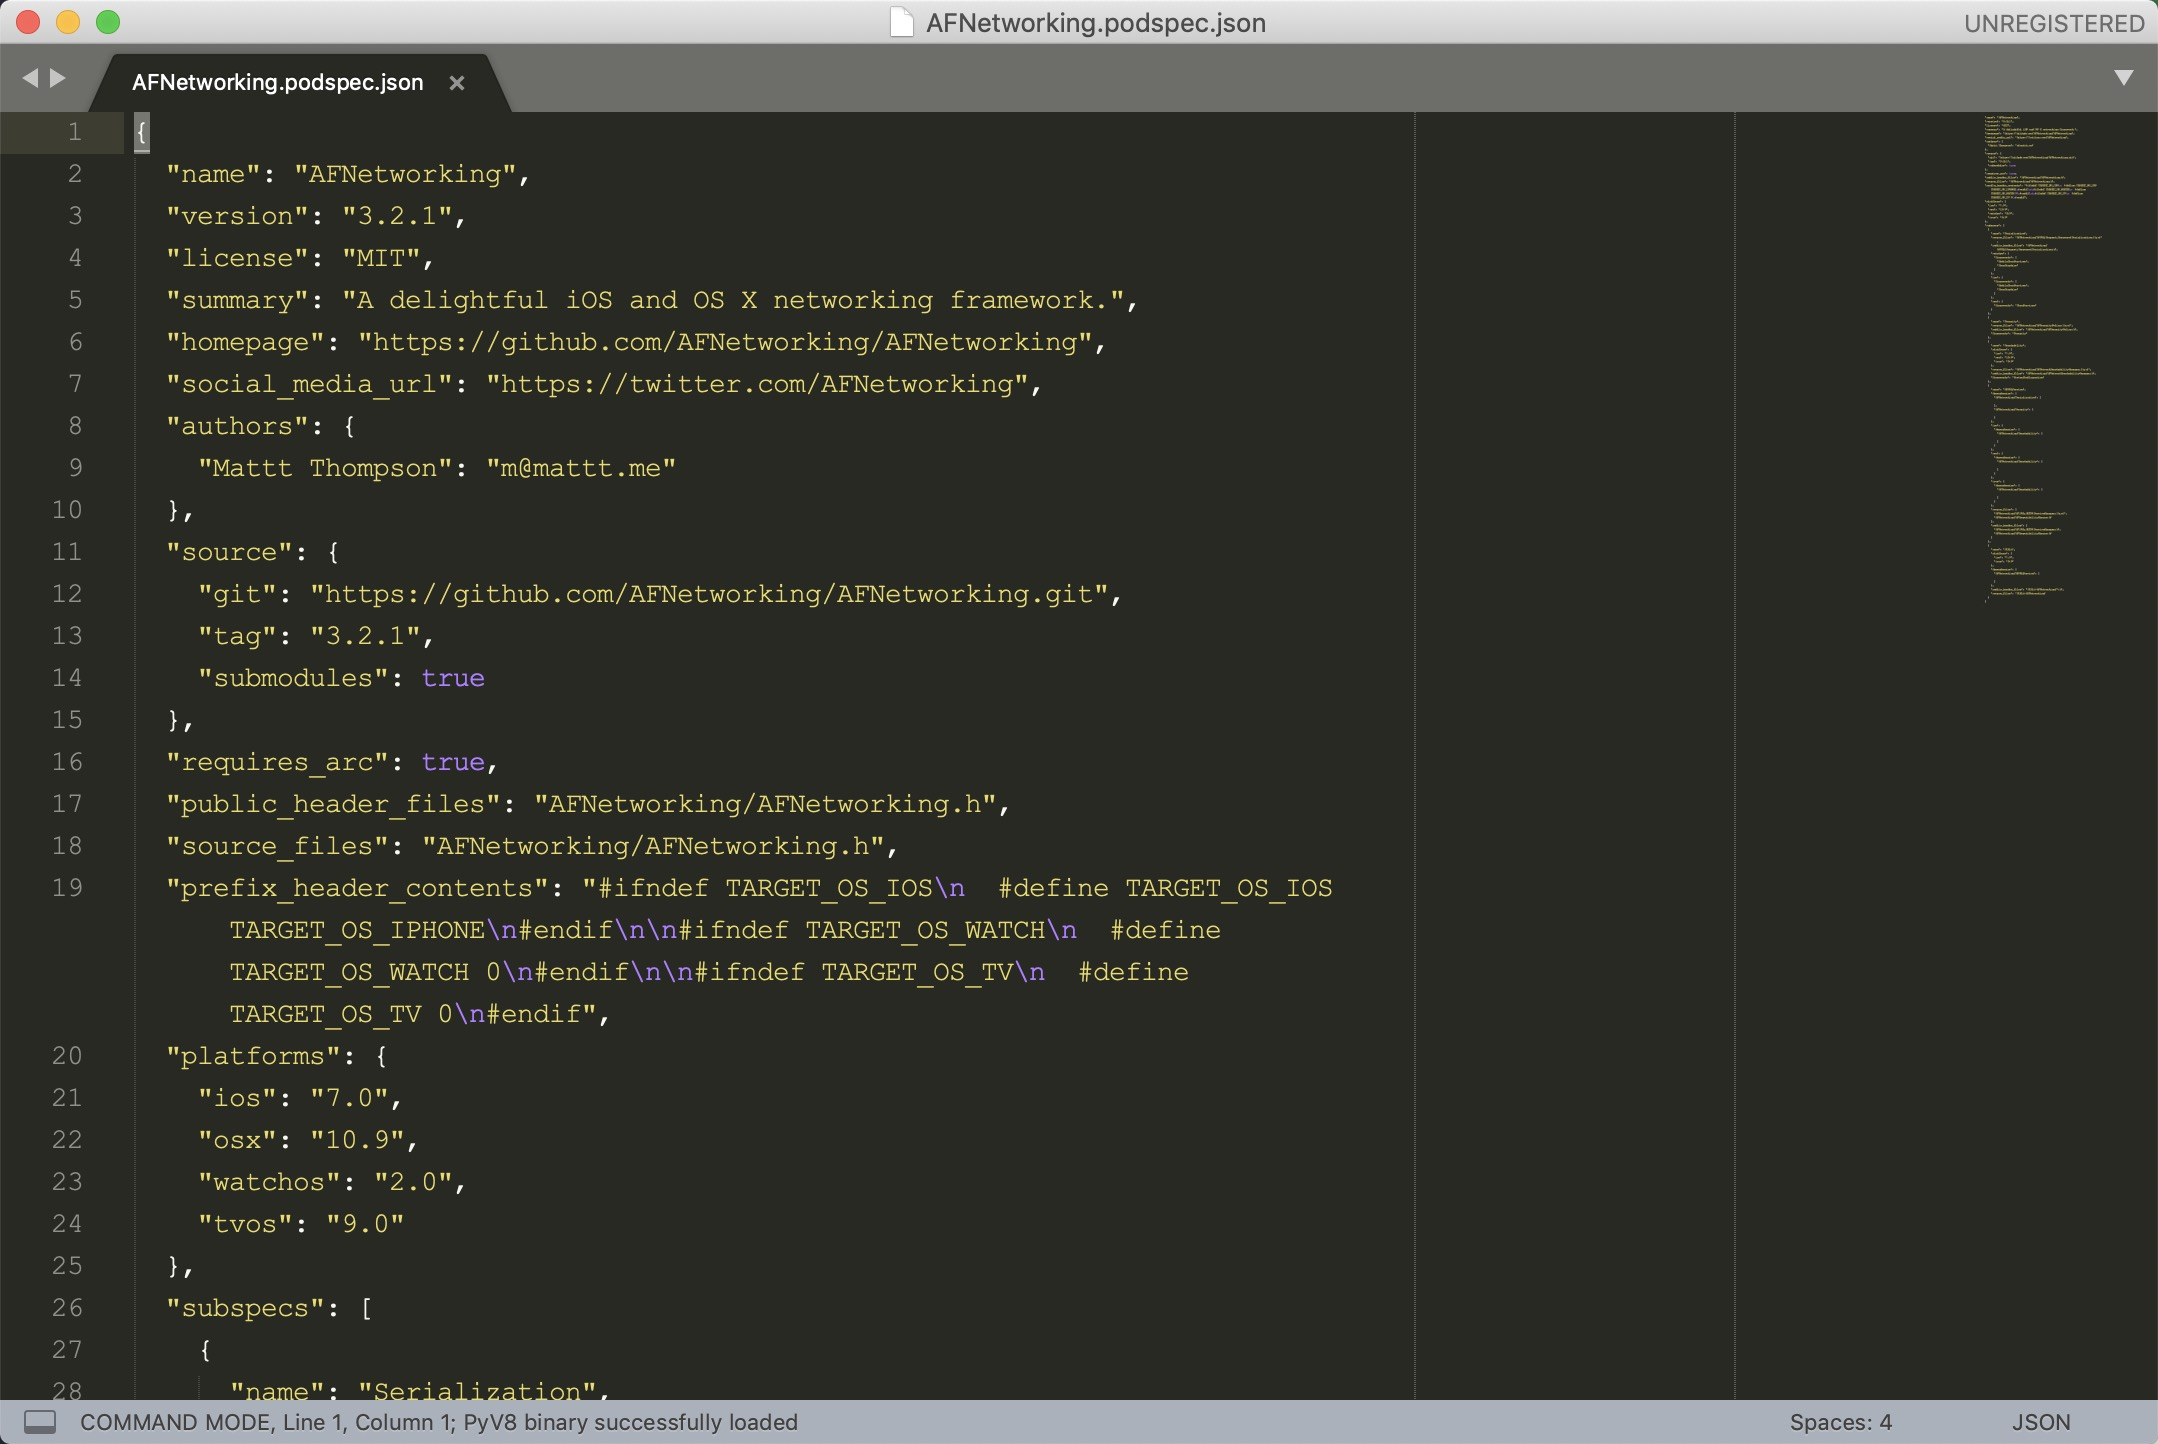
可以看到这里包含了所有的三方库的相关信息,包括名字,协议,描述,Github 地址,支持平台等。
这些信息由三方库作者提交到该信息仓库中。比如你要发布自己的三方库到 Cocoapods 上,你需要 fork 该 repo,然后按照 Cocoapods 规定的格式把自己三方库的信息填写上,再 push 到主分支上。
不过这个过程 Cocoapods 也提供的相应的命令来完成,具体请参考官方文档。
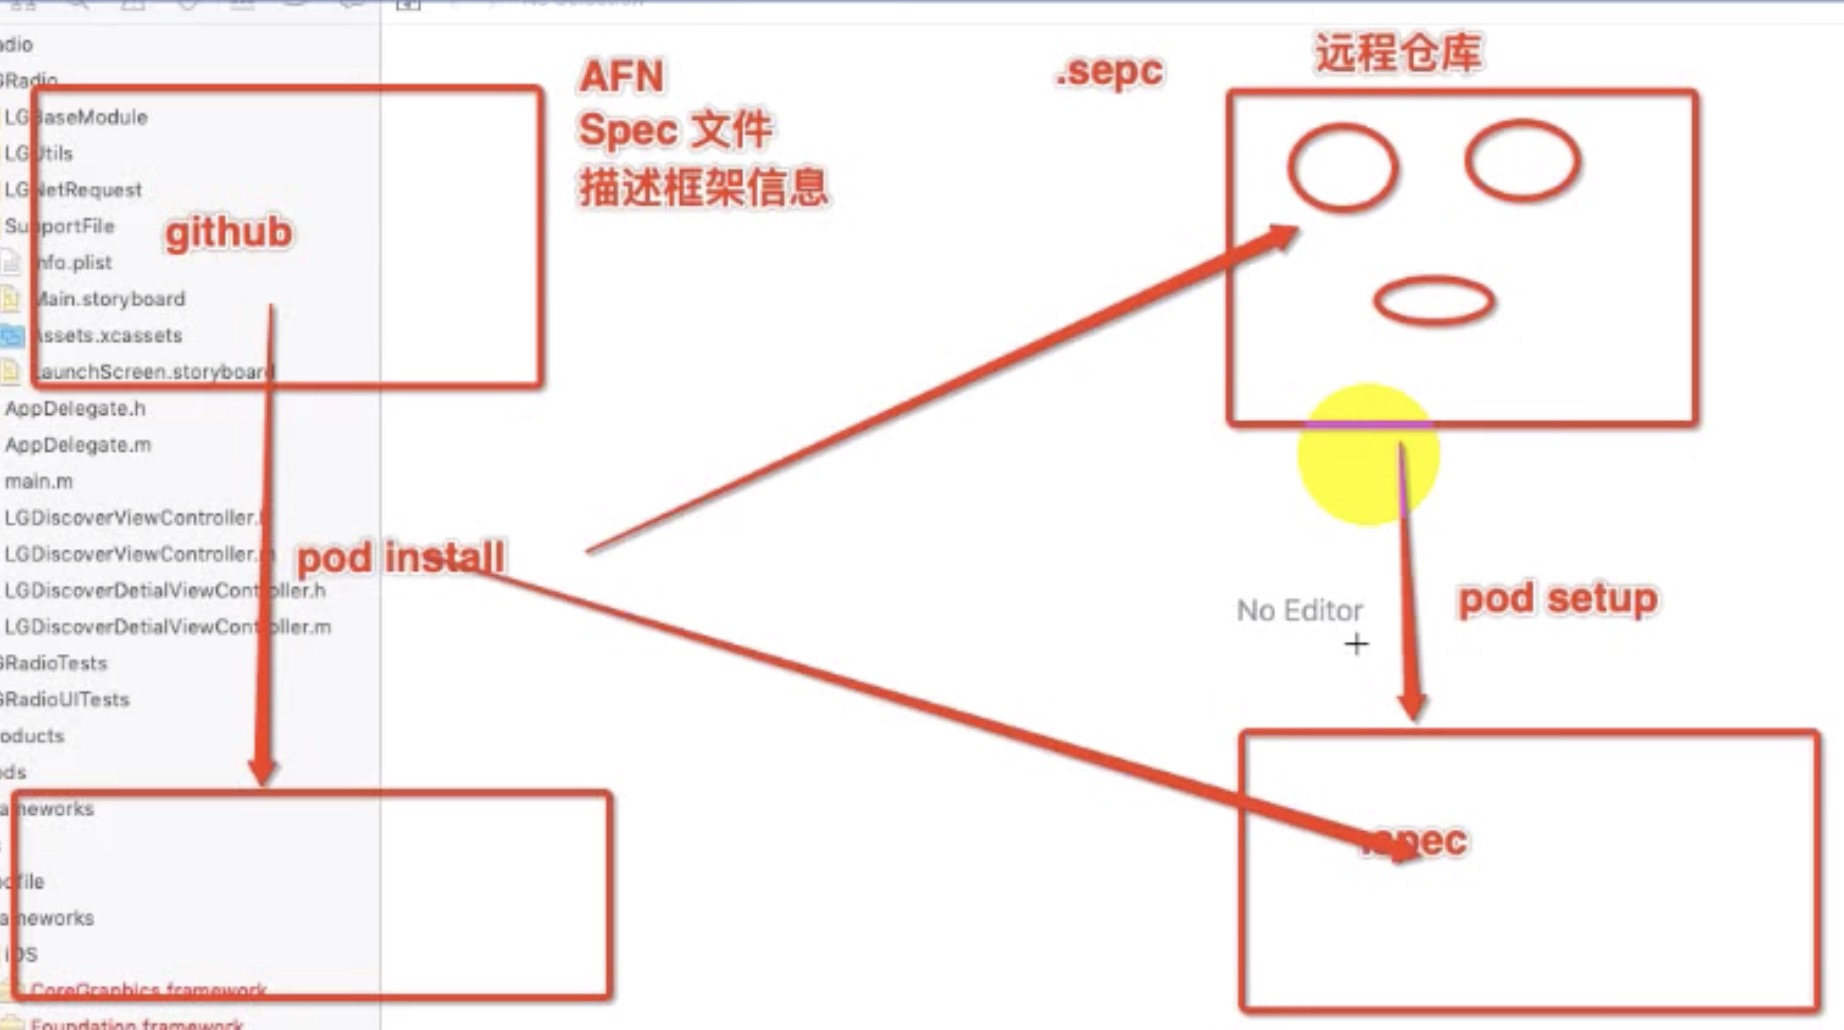
在查找到对应文件夹后,进行 json 数据解析,获得三方库的 repo 地址,调用本地 git 命令拉取源码,拉取完成后调用本地 xcodebuild 命令把三方库编译为 Framework。
四、源码分析
我们使用的 cocoapods 命令的 GitHub 路径。

其中 setup 命令用于第一次使用 cocoapods 时对使用环境进行设置,下面对 setup 命令的源码进行分析。
git 的详细使用教程请参考文档
require 'fileutils'

module Pod
  class Command
    class Setup < Command
      self.summary = 'Setup the CocoaPods environment'

      self.description = <<-DESC
        Creates a directory at `~/.cocoapods/repos` which will hold your spec-repos.
        This is where it will create a clone of the public `master` spec-repo from:
            https://github.com/CocoaPods/Specs
        If the clone already exists, it will ensure that it is up-to-date.
      DESC

      extend Executable
      executable :git

      def run
        UI.section 'Setting up CocoaPods master repo' do
          if master_repo_dir.exist?
            set_master_repo_url
            set_master_repo_branch
            update_master_repo
          else
            add_master_repo
          end
        end

        UI.puts 'Setup completed'.green
      end

      #--------------------------------------#

      # @!group Setup steps

      # Sets the url of the master repo according to whether it is push.
      #
      # @return [void]
      #
      def set_master_repo_url
        Dir.chdir(master_repo_dir) do
          git('remote', 'set-url', 'origin', url)
        end
      end

      # Adds the master repo from the remote.
      #
      # @return [void]
      #
      def add_master_repo
        cmd = ['master', url, 'master']
        Repo::Add.parse(cmd).run
      end

      # Updates the master repo against the remote.
      #
      # @return [void]
      #
      def update_master_repo
        show_output = !config.silent?
        config.sources_manager.update('master', show_output)
      end

      # Sets the repo to the master branch.
      #
      # @note   This is not needed anymore as it was used for CocoaPods 0.6
      #         release candidates.
      #
      # @return [void]
      #
      def set_master_repo_branch
        Dir.chdir(master_repo_dir) do
          git %w(checkout master)
        end
      end

      #--------------------------------------#

      # @!group Private helpers

      # @return [String] the url to use according to whether push mode should
      #         be enabled.
      #
      def url
        self.class.read_only_url
      end

      # @return [String] the read only url of the master repo.
      #
      def self.read_only_url
        'https://github.com/CocoaPods/Specs.git'
      end

      # @return [Pathname] the directory of the master repo.
      #
      def master_repo_dir
        config.sources_manager.master_repo_dir
      end
    end
  end
end
其执行流程可分为如下步骤
- 判断 ~/.cocoapods/repo目录是否存在
- 存在,依次调用 set_master_repo_url,set_master_repo_branch,update_master_repo 三个函数分别设置 repo 主分支地址,git checkout 到主分支,拉取主分支代码,更新repo
- 不存在,添加主分支 repo
五、使用 Cocoapods 的小技巧
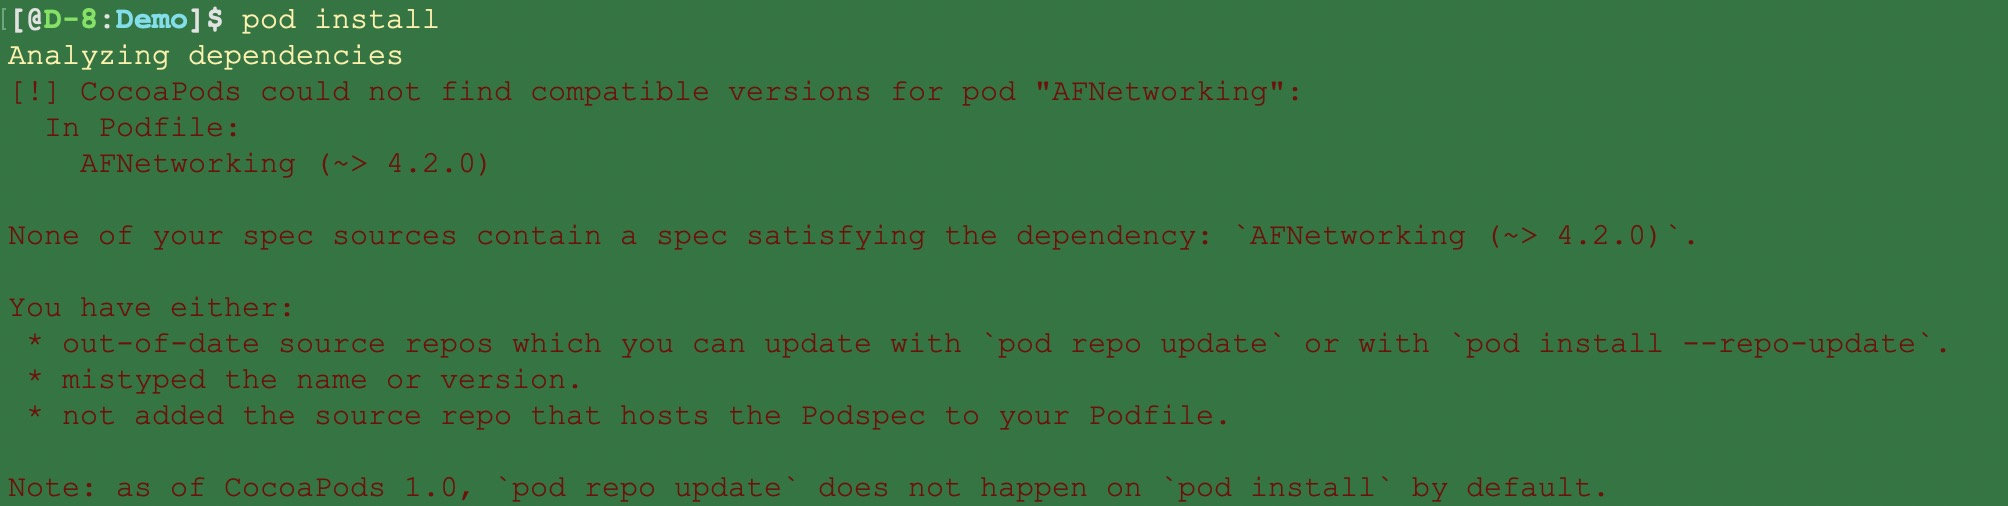
大家在使用 pod install 命令时一般会加上 --no-repo-update 选项。这使得 pod install 不进行本地三方库信息库 git pull 的更新操作。若 Podfile 中指定 AFNetworking 的版本号为 4.2.0,但本地 ~/cocoapods/repo/master/Specs/.../AFNetworking 中并没有此版本号,此时使用 pod install --no-repo-update 会出现如下错误
若直接使用 pod install 便会先执行 pod repo update,由于 github 需要FQ,并且更新的内容过大就会等待很久。
既然知道了 Cocoapods 的原理,我们便可以手动在 ~./cocoapods/repo/master/Specs 中添加我们需要的三方库版本信息,避免了把所有的并没有使用到的三方库信息更新到本地。
下面以添加 Alamofire 4.2.0 版本信息到本地为例子。
在终端输入如下命令
cd ~/.cocoapods/repo/master/Specs/Alamofire/
mkdir 4.2.0
cp ~/.cocoapods/repo/master/Specs/Alamofire/1.1.3/Alamofire.podspec.json ./4.2.0
上面的命令创建了名为 4.2.0 的文件夹,并复制了一个库信息的 json 文件到新创建的文件夹中,用 vi 打开该文件,内容如下
{
  "name": "Alamofire",
  "version": "1.1.3",
  "license": "MIT",
  "summary": "Elegant HTTP Networking in Swift",
  "homepage": "https://github.com/Alamofire/Alamofire",
  "social_media_url": "http://twitter.com/mattt",
  "authors": {
    "Mattt Thompson": "m@mattt.me"
  },
  "source": {
    "git": "https://github.com/Alamofire/Alamofire.git",
    "tag": "1.1.3"
  },
  "platforms": {
    "ios": "8.0"
  },
  "source_files": "Source/*.swift",
  "requires_arc": true
}
我们需要修改版本号,source 的 tag。那 source 的 tag 怎么知道是多少呢,这个可以从 GitHub 上找到。
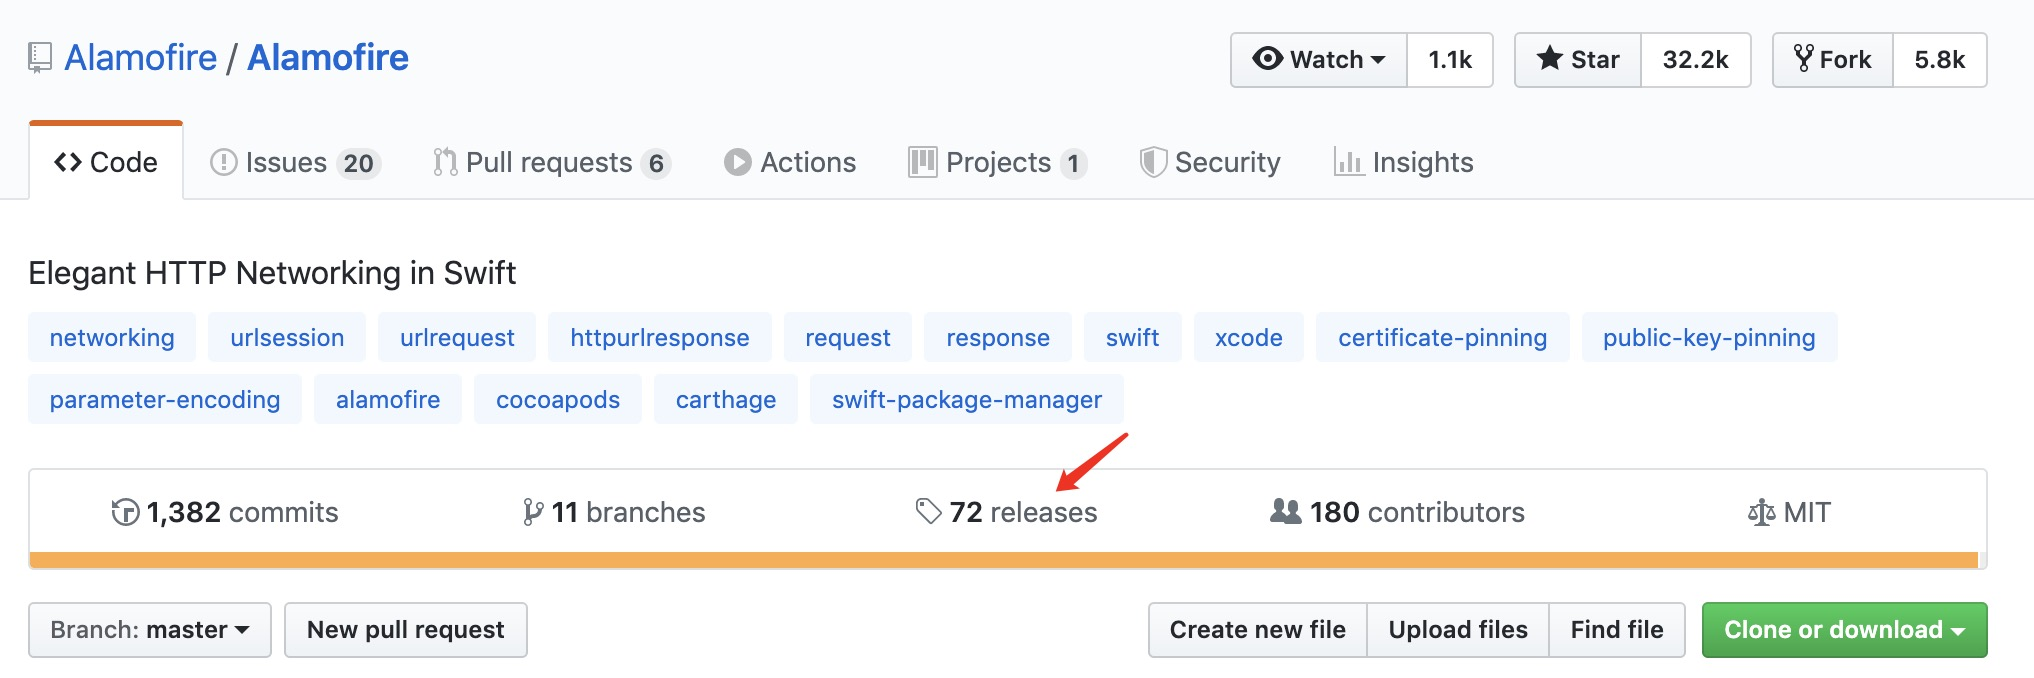
可以看到所有 release 版本信息。
六、问题
-
Mac OS 10.14: Failed to build gem native extension

open /Library/Developer/CommandLineTools/Packages/macOS_SDK_headers_for_macOS_10.14.pkg -
ping github 超时问题
sudo vi /etc/hosts

151.101.185.194 github.global.ssl.fastly.net
192.30.253.112 github.com
151.101.184.133 assets-cdn.github.com
151.101.184.133 avatars0.githubusercontent.com
151.101.112.133 avatars1.githubusercontent.com

 浙公网安备 33010602011771号