[WPF 自定义控件]了解WPF的布局过程,并利用Measure为Expander添加动画
1. 前言
这篇文章介绍WPF UI元素的两步布局过程,并且通过Resizer控件介绍只使用Measure可以实现些什么内容。

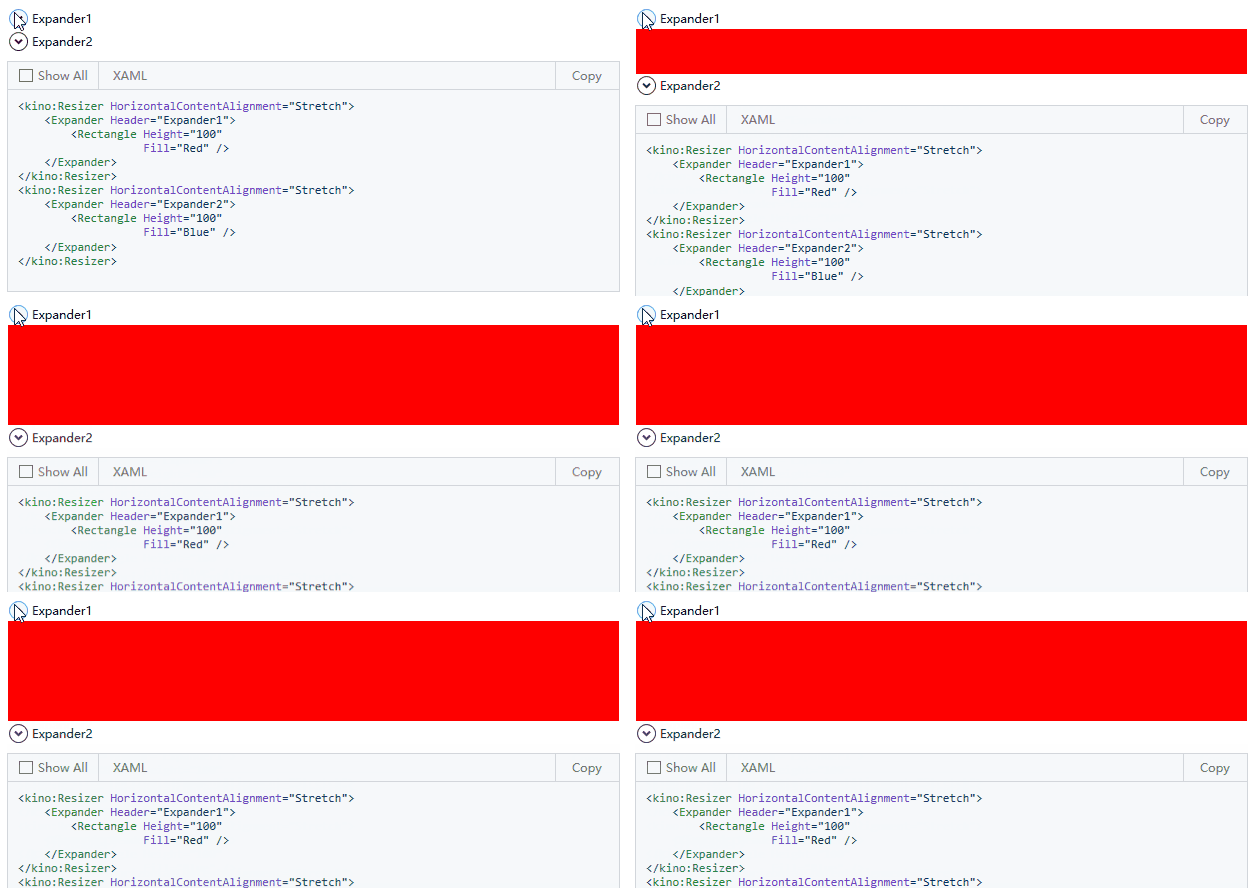
我不建议初学者做太多动画的工作,但合适的动画可以引导用户视线,提升用户体验。例如上图的这种动画,这种动画挺常见的,在内容的高度改变时动态地改变自身的高度,除了好看以外,对用户体验也很有改善。可惜的是WPF本身没有默认这种这方面的支持,连Expander的展开/折叠都没有动画。为此我实现了一个可以在内容大小改变时以动画的方式改变自身大小的Resizer控件(想不到有什么好的命名,请求建议)。其实老老实实从Silverlight Toolkit移植AccordionItem就好,但我想通过这个控件介绍一些布局(及动画)的概念。Resizer使用方式如下XAML所示:
<StackPanel>
    <kino:KinoResizer HorizontalContentAlignment="Stretch">
        <Expander Header="Expander1">
            <Rectangle Height="100"
                       Fill="Red" />
        </Expander>
    </kino:KinoResizer>
    <kino:KinoResizer HorizontalContentAlignment="Stretch">
        <Expander Header="Expander2">
            <Rectangle Height="100"
                       Fill="Blue" />
        </Expander>
    </kino:KinoResizer>
</StackPanel>
2. 需要了解的概念
为了实现这个控件首先要了解WPF UI元素的布局过程。
2.1 两步布局过程
WPF的布局大致上分为Measure和Arrange两步,布局元素首先递归地用Measure计算所有子元素所需的大小,然后使用Arrange实现布局。
以StackPanel为例,当StackPanel需要布局的时候,它首先会得知有多少空间可用,然后用这个可用空间询问Children的所有子元素它们需要多大空间,这是Measure;得知所有子元素需要的空间后,结合自身的布局逻辑将子元素确定实际尺寸及安放的位置,这是Arrange。
当StackPanel需要重新布局(如StackPanel的大小改变),这时候StackPanel就重复两步布局过程。如果StackPanel的某个子元素需要重新布局,它也会通知StackPanel需要重新布局。
2.2 MeasureOverride
MeasureOverride在派生类中重写,用于测量子元素在布局中所需的大小。简单来说就是父元素告诉自己有多少空间可用,自己再和自己的子元素商量后,把自己需要的尺寸告诉父元素。
2.3 DesiredSize
DesiredSize指经过Measure后确定的期待尺寸。下面这段代码演示了如何使用MeasureOverride和DesiredSize:
protected override Size MeasureOverride(Size availableSize)
{
    Size panelDesiredSize = new Size();

    // In our example, we just have one child.
    // Report that our panel requires just the size of its only child.
    foreach (UIElement child in InternalChildren)
    {
        child.Measure(availableSize);
        panelDesiredSize = child.DesiredSize;
    }

    return panelDesiredSize ;
}
2.4 InvalidateMeasure
InvalidateMeasure使元素当前的布局测量无效,并且异步地触发重新测量。
2.5 IsMeasureValid
IsMeasureValid指示布局测量返回的当前大小是否有效,可以使用InvalidateMeasure使这个值变为False。
3. 实现
Resizer不需要用到Arrange,所以了解上面这些概念就够了。Resizer的原理很简单,Reszier的ControlTemplate中包含一个ContentControl(InnerContentControl),当这个InnerContentControl的大小改变时请求Resizer重新布局,Resizer启动一个Storyboard,以InnerContentControl.DesiredSize为最终值逐渐改变Resizer的ContentHeight和ContentWidth属性:
DoubleAnimation heightAnimation;
DoubleAnimation widthAnimation;
if (Animation != null)
{
    heightAnimation = Animation.Clone();
    Storyboard.SetTarget(heightAnimation, this);
    Storyboard.SetTargetProperty(heightAnimation, new PropertyPath(ContentHeightProperty));

    widthAnimation = Animation.Clone();
    Storyboard.SetTarget(widthAnimation, this);
    Storyboard.SetTargetProperty(widthAnimation, new PropertyPath(ContentWidthProperty));
}
else
{
    heightAnimation = _defaultHeightAnimation;
    widthAnimation = _defaultWidthAnimation;
}

heightAnimation.From = ActualHeight;
heightAnimation.To = InnerContentControl.DesiredSize.Height;
widthAnimation.From = ActualWidth;
widthAnimation.To = InnerContentControl.DesiredSize.Width;

_resizingStoryboard.Children.Clear();
_resizingStoryboard.Children.Add(heightAnimation);
_resizingStoryboard.Children.Add(widthAnimation);
ContentWidth和ContentHeight改变时调用InvalidateMeasure()请求重新布局,MeasureOverride返回ContentHeight和ContentWidth的值。这样Resizer的大小就根据Storyboard的进度逐渐改变,实现了动画效果。
protected override Size MeasureOverride(Size constraint)
{
    if (_isResizing)
        return new Size(ContentWidth, ContentHeight);

    if (_isInnerContentMeasuring)
    {
        _isInnerContentMeasuring = false;
        ChangeSize(true);
    }

    return base.MeasureOverride(constraint);
}

private void ChangeSize(bool useAnimation)
{
    if (InnerContentControl == null)
    {
        return;
    }

    if (useAnimation == false)
    {
        ContentHeight = InnerContentControl.ActualHeight;
        ContentWidth = InnerContentControl.ActualWidth;
    }
    else
    {
        if (_isResizing)
        {
            ResizingStoryboard.Stop();
        }

        _isResizing = true;
        ResizingStoryboard.Begin();
    }
}
用Resizer控件可以简单地为Expander添加动画,效果如下:

最后,Resizer还提供DoubleAnimation Animation属性用于修改动画,用法如下:
<kino:KinoResizer HorizontalContentAlignment="Stretch">
    <kino:KinoResizer.Animation>
        <DoubleAnimation BeginTime="0:0:0"
                         Duration="0:0:3">
            <DoubleAnimation.EasingFunction>
                <QuinticEase EasingMode="EaseOut" />
            </DoubleAnimation.EasingFunction>
        </DoubleAnimation>
    </kino:KinoResizer.Animation>
    <TextBox AcceptsReturn="True"
             VerticalScrollBarVisibility="Disabled" />
</kino:KinoResizer>
4. 结语
Resizer控件我平时也不会单独使用,而是放在其它控件里面,例如Button:

由于这个控件性能也不高,以后还可能改进API,于是被放到了Primitives命名空间。
很久很久以前常常遇到“布局循环”这个错误,这常常出现在处理布局的代码中。最近很久没遇到这个错误,也许是WPF变健壮了,又也许是我的代码变得优秀了。但是一朝被蛇咬十年怕草绳,所以我很少去碰Measure和Arrange的代码,我也建议使用Measure和Arrange要慎重。
5. 参考
FrameworkElement.MeasureOverride(Size) Method (System.Windows) Microsoft Docs.html
UIElement.DesiredSize Property (System.Windows) Microsoft Docs.html
UIElement.InvalidateMeasure Method (System.Windows) Microsoft Docs
UIElement.IsMeasureValid Property (System.Windows) Microsoft Docs
6. 源码
作者:dino.c
出处:http://www.cnblogs.com/dino623/
说明:欢迎转载并请标明来源和作者。如有错漏请指出,谢谢。


 浙公网安备 33010602011771号