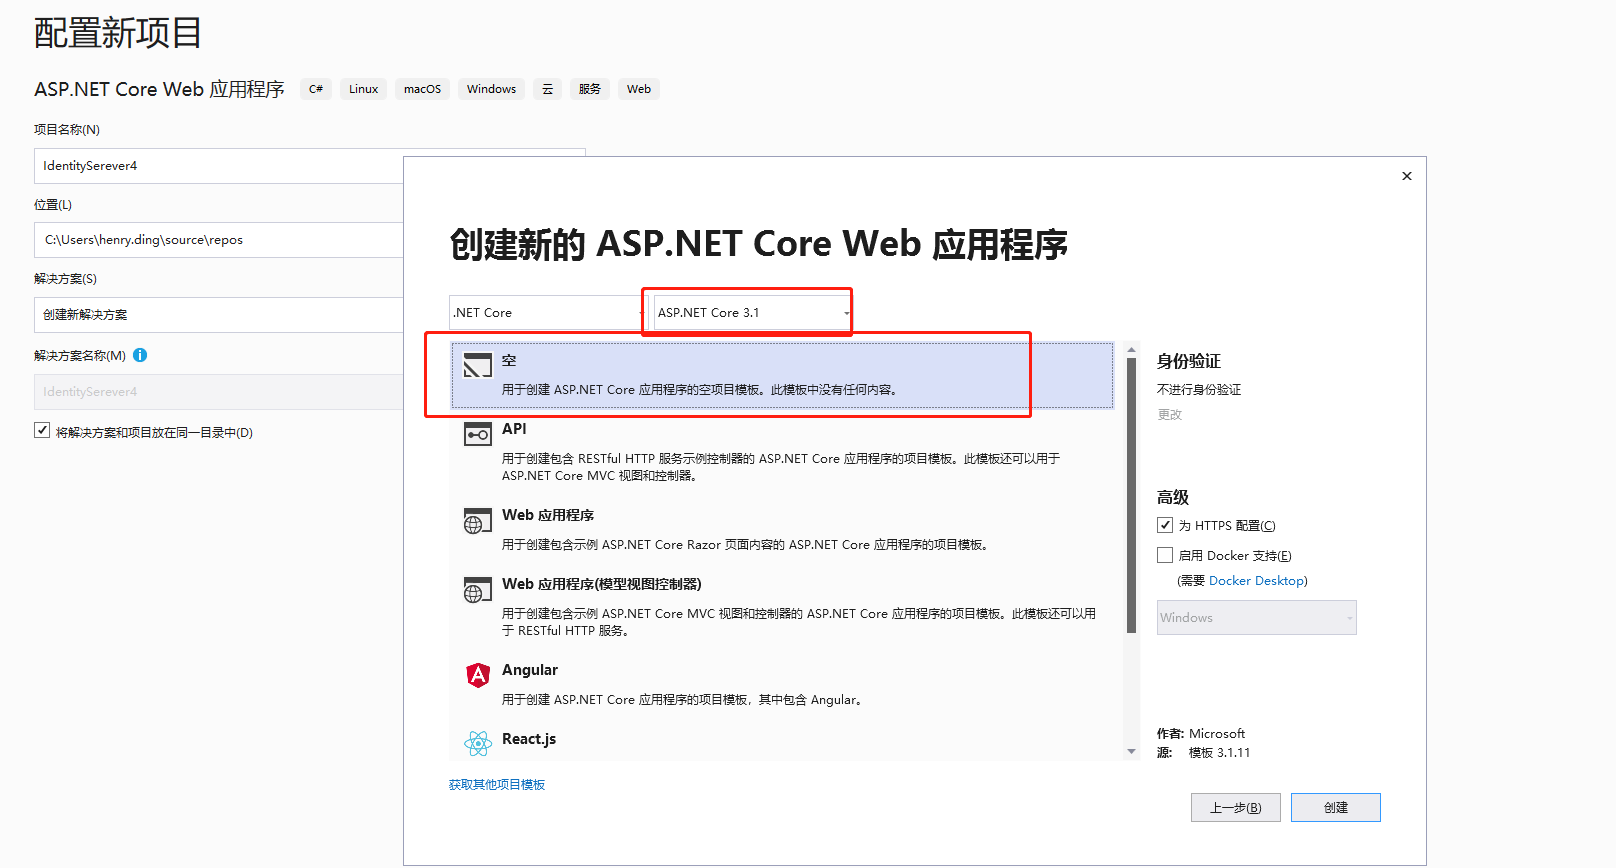
一、环境:
- 1.ide: vs2019,
- 2.c#8.0,
- 3..net odre 3.1
- 需要添加的nuget包
- Identityserver4(4.1.1)
- sdmap.ext(0.16.1)
- sdmap.ext.dapper(0.16.1)
- data.sqlclient(4.8.2)
- 准备好这些就可以了。
授权模式:
ResourceOwnerPassword(密码+用户名)
1.首先启动vs创建一个mvc的项目

2.创建之后startup应该只有2个方法
- ConfigureServices()
- Configure()
using Microsoft.AspNetCore.Builder;
using Microsoft.AspNetCore.Hosting;
using Microsoft.Extensions.Configuration;
using Microsoft.Extensions.DependencyInjection;
using Microsoft.Extensions.Hosting;
using sdmap.ext;
using System.Reflection;
using System.Runtime.Loader;
//namespac
//class
略...
 public void ConfigureServices(IServiceCollection services)
        {
            services.AddControllersWithViews();//启动mvc视图

            //服务注册(用于数据库持久化操作,项目用到sqlserver的数据来验证用户)
            services.AddSingleton<IDbCommandContext, DbCommandContext>();
            services.AddSingleton<IDbContext, DbContext>();
            services.AddSingleton<IUserInfoRepository, UserInfoRepository>();
            services.AddSingleton(new SdmapContext(MultipleAssemblyEmbeddedResourceSqlEmiter
                .CreateFrom(new Assembly[] { AssemblyLoadContext.Default.LoadFromAssemblyName(new AssemblyName("IdentityServer")) })));

            //IdentityServerd服务的注册
            var builder = services.AddIdentityServer()
                .AddResourceOwnerValidator<CustomResourceOwnerPasswordValidator>()//自定义验证
                .AddProfileService<CustomProfileService>()
                .AddInMemoryIdentityResources(InMemoryConfig.GetIdentityResourceResources())//资源配置
                .AddDeveloperSigningCredential()//签名方式,开发环境使用
                .AddInMemoryClients(InMemoryConfig.Clients())//客户端配置
                .AddInMemoryApiScopes(InMemoryConfig.ApiScopes())//资源配置
                .AddInMemoryApiResources(InMemoryConfig.ApiResources());//资源权限配置

            //if (_hostingEnvironment.IsDevelopment())
            //{
            //    builder.AddDeveloperSigningCredential();
            //}
            //else if (_hostingEnvironment.IsProduction())
            //{
            //    生产环境使用

            //    services.AddIdentityServer().AddSigningCredential(new X509Certificate2(
            //    Path.Combine(basePath, Configuration["Certificates:CerPath"]),
            //    Configuration["Certificates:Password"])

            //}

        }
public void Configure(IApplicationBuilder app, IWebHostEnvironment env)
        {
            if (env.IsDevelopment())
            {
                app.UseDeveloperExceptionPage();
            }
            app.UseStaticFiles();//静态资源后面如果需要ui界面的话可以添加。
            app.UseRouting();
            app.UseIdentityServer();//写在路由前面,
            app.UseAuthorization();
            app.UseEndpoints(endpoints =>
            {
                endpoints.MapControllerRoute(name: "default", pattern: "{controller=Account}/{action=Login}/{Id?}");
            });
        }
3.配置InMemoryConfig
  public static class InMemoryConfig
    {

        public static IEnumerable<IdentityResource> GetIdentityResourceResources()
        {
            return new List<IdentityResource>
            {
                new IdentityResources.OpenId(), //必须要添加,否则报无效的scope错误
                new IdentityResources.Profile()
            };
        }
        /// <summary>
        /// Api Scopes
        /// </summary>
        /// <returns></returns>
        public static IEnumerable<ApiScope> ApiScopes()
        {
            return new List<ApiScope>
            {
                new ApiScope("api1","api1")
            };
        }

        /// <summary>
        /// ApiResources
        /// </summary>
        /// <returns></returns>
        public static IEnumerable<ApiResource> ApiResources()
        {
            return new[]
            {
                new ApiResource("api1","My Api1"){ Scopes ={ "api1" } }
            };
        }

        /// <summary>
        /// Clients
        /// </summary>
        /// <returns></returns>
        public static IEnumerable<Client> Clients()
        {
            return new[]
            {
                new Client
                {
                    ClientId = "client",
                    AllowedGrantTypes = GrantTypes.ResourceOwnerPassword,
                    ClientSecrets =
                    {
                        new Secret("secret".Sha256())
                    },
                    AllowedScopes =
                    {
                        "api1",
                        IdentityServerConstants.StandardScopes.OpenId, //必须要添加,否则报forbidden错误
                        IdentityServerConstants.StandardScopes.Profile
                    }
                }
            };
        }
    }
//注意:client针对的是客户端的。授权方式是ResourceOwnerPassword
4.自定义数据验证CustomResourceOwnerPasswordValidator
 public class CustomResourceOwnerPasswordValidator : IResourceOwnerPasswordValidator
    {
        //仓储接口,我要验证的数据是从本地数据库取的。
        private readonly IUserInfoRepository _UserInfoRepository;
        private readonly ILogger<CustomResourceOwnerPasswordValidator> _logger;
        public CustomResourceOwnerPasswordValidator(IUserInfoRepository userInfoRepository, ILogger<CustomResourceOwnerPasswordValidator> logger)
        {
            _UserInfoRepository = userInfoRepository;
            _logger = logger;
        }
        public async Task ValidateAsync(ResourceOwnerPasswordValidationContext context)
        {
            var userInfos = await _UserInfoRepository.GetUserInfo();
            _logger.LogInformation(JsonSerializer.Serialize(userInfos));
            if (userInfos.Any(x => x.Password.Trim() == context.Password && x.UserName.Trim() == context.UserName))
            {
                var user = userInfos.First(x => x.Password.Trim() == context.Password && x.UserName.Trim() == context.UserName);

                context.Result = new GrantValidationResult(
                    user.Id.ToString(),
                    OidcConstants.AuthenticationMethods.Password,
                    new List<Claim>() { new Claim("username", user.UserName.Trim()) }
                  );
            }
            else
            {
                context.Result = new GrantValidationResult(TokenRequestErrors.InvalidGrant, "invalid custom credential");
            }
        }
    }
这里的Trim()是因为数据库中取出来的数据后面多了很多空格导致我的数据匹配不上。做了一下清除空格。
5.CustomProfileService配置
 public class CustomProfileService : IProfileService
    {
        private readonly IUserInfoRepository _user;
        public CustomProfileService(IUserInfoRepository user)
        {
            _user = user;
        }
        public async virtual Task GetProfileDataAsync(ProfileDataRequestContext context)
        {

            if (context.RequestedClaimTypes.Any())
            {
                var user = (await _user.GetUserInfo()).FirstOrDefault(x => x.Id.ToString() == context.Subject.GetSubjectId());

                if (user != null)
                {
                    var claims = new List<Claim>() { new Claim("username", user.UserName) };
                    context.AddRequestedClaims(claims);
                }
            }
        }

        public async virtual Task IsActiveAsync(IsActiveContext context)
        {
            var user = (await _user.GetUserInfo()).FirstOrDefault(x => x.Id.ToString() == context.Subject.GetSubjectId());
            context.IsActive = user != null;
        }
    }
- 配置一下launchSettings,不用iis启动,可以看到信息打印到控制台中,便于调试。
{
  "profiles": {
    "认证_登录_注销": {
      "commandName": "Project",
      "launchBrowser": true,
      "applicationUrl": "https://localhost:5001;http://localhost:5000",
      "environmentVariables": {
        "ASPNETCORE_ENVIRONMENT": "Development"
      }
    }
  }

}
- 到这里代码部分就结束了。
- 如果有小伙伴不知道怎么取数据,可以自己定义一个数据结构用于测试。
6.postman测试。
- 先启动项目

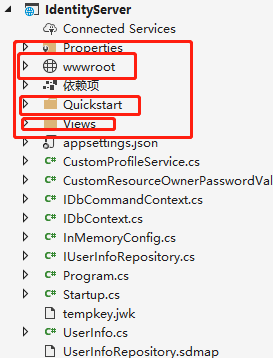
- 这个界面,可以自行百度下载把图中3个文件放到项目中就可以了。
- 编译一下最好的情况是不报错,我自己是没有报错的

7.请求token

8.根据token去访问user info的数据


