

1.建议下载 阿里云http://mirrors.aliyun.com/centos/7.9.2009/isos/x86_64/
CentOS-7-x86_64-NetInstall-2009.iso 在线安装iso镜像
采用UltraISO软件 启动--->写入磁盘映像 写入U盘中
注意在安装过程中会出现 
原因是centos7上找不到启动盘,需要指定U盘位置,等待程序执行完毕,在命令行输入ls /dev查看所有磁盘名称,(**不一定是sdb4可能是其他名字,可以通过拔插U盘来确认**)
找到U盘名称,我的U盘名为/dev/sdb4,接着输入reboot重启,这次在上上图处不要直接enter,而是输入“ e ”进行配置,出现下图,图中第二行记录了当前寻找的启动盘的错误位置
修改 如下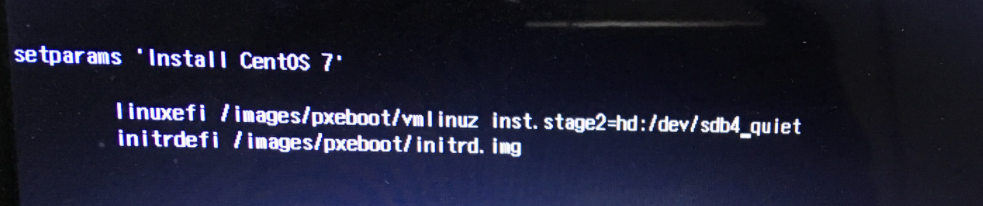
修改后键入“ ctrl+x ”就可以开始安装了
安装到安装源位置(需要根据下载的iso选择在线安装的话,需要选择网络安装 输入内容为 https://mirrors.aliyun。com/centos/7/os/x86_64/)
等待加载完成,才可以进入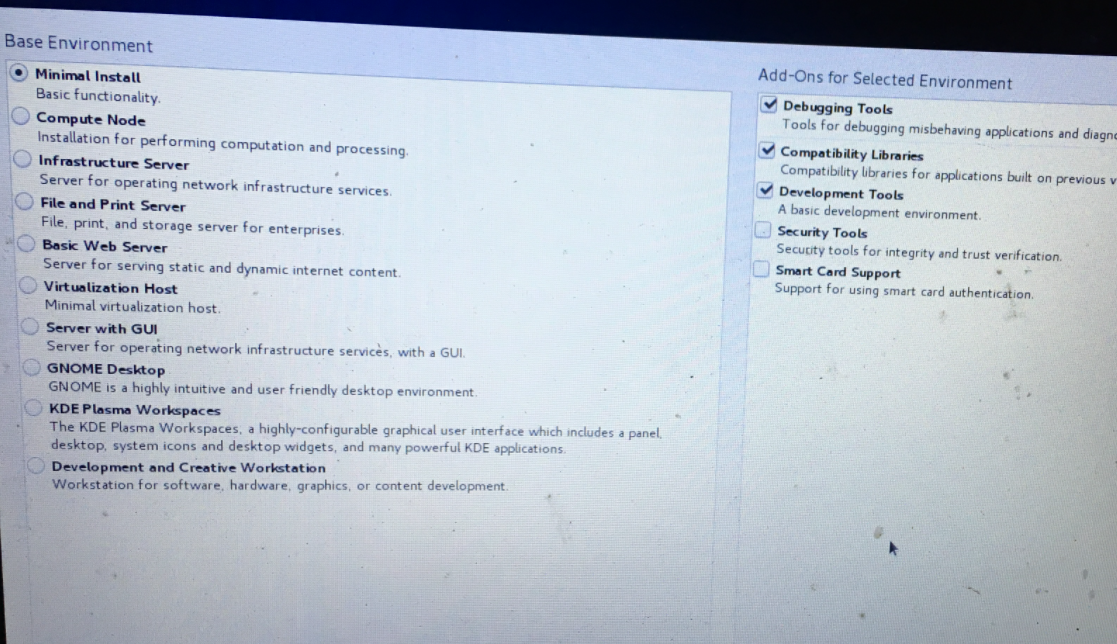
最好选择 GNOME dESKTOP安装 可以桌面可视化
转载于https://www.cnblogs.com/tarantino/p/10683491.html
安装完成之后
本项目需要配置的内容
1.防火墙操作
sudo systemctl stop firewalld 临时关闭
sudo systemctl disable firewalld ,然后reboot 永久关闭
sudo systemctl status firewalld 查看防火墙状态。
2.实现远程
安装epel库(可选) yum install epel-release
安装xrdp yum install xrdp
安装tigervnc-server yum install tigervnc-server
启动xrdp systemctl enable xrdp && systemctl start xrdp 并实现开机自启动
防火墙打开3389端口(xrdp默认3389,修改/etc/xrdp/xrdp.iniport字段可更换连接端口) firewall-cmd --add-port=3389/tcp
最后使用mstsc连接
3.linux(centos7)发布静态网站
yum install -y httpd 安装
systemctl start httpd.service -----开启服务
systemctl enable httpd.service ----设置为开机自启动
/etc/httpd/conf:该目录存放Apache服务器的配置文件
/var/www/html:该目录是Apache服务器的默认站点根目录
/etc/httpd/logs:Apache服务器的日志文件目录
