Linux的桌面虚拟化技术KVM(三)——KVM虚拟机克隆和快照
Linux的桌面虚拟化技术KVM(一)——新建KVM虚拟机
Linux的桌面虚拟化技术KVM(二)——远程桌面管理
(1).KVM虚拟机克隆
KVM虚拟克隆命令virt-clone [选项]
常用选项:
-o [原虚拟机],--original [原虚拟机]  原虚拟机,必须关闭或暂停状态
-n [新虚拟机],--name [新虚拟机]  新虚拟机
-f [新虚拟机存储文件],--file [新虚拟机存储文件]  新虚拟机使用的磁盘镜像文件
基于centos7.0克隆一台虚拟机centos7.0-bak
[root@youxi1 ~]# ll -h /var/lib/libvirt/images/
总用量 12G  //总共才是12G
-rw------- 1 root root 11G 9月   8 11:34 centos7.0.qcow2
-rw------- 1 root root 11G 9月   8 15:53 centos75.img
[root@youxi1 ~]# ll -h /var/lib/libvirt/images/
总用量 12G
-rw------- 1 root root 11G 9月 8 11:34 centos7.0.qcow2
-rw------- 1 root root 11G 9月 8 15:53 centos75.img
[root@youxi1 ~]# virt-clone -o centos7.0 -n centos7.0-bak -f /var/lib/libvirt/images/centos7.0-bak.img
正在分配 'centos7.0-bak.img' | 10 GB 00:30

成功克隆 'centos7.0-bak'。
[root@youxi1 ~]# ll -h /var/lib/libvirt/images/
总用量 14G
-rw------- 1 root root 1.4G 9月 8 18:23 centos7.0-bak.img  //没开启之前才1.4G
-rw------- 1 root root 11G 9月 8 11:34 centos7.0.qcow2
-rw------- 1 root root 11G 9月 8 15:53 centos75.img
[root@youxi1 ~]# ls /etc/libvirt/qemu/  //查看一下虚拟机的配置文件
autostart centos7.0-bak.xml centos7.0.xml centos75.xml networks
//可以使用vimdiff对比克隆前后的配置文件
[root@youxi1 ~]# vimdiff /etc/libvirt/qemu/centos7.0-bak.xml /etc/libvirt/qemu/centos7.0.xml
[root@youxi1 ~]# virsh list --all
Id 名称 状态
----------------------------------------------------
- centos7.0 关闭
- centos7.0-bak 关闭
- centos75 关闭
我这里的Mac是不一样的,启动虚拟机centos7.0-bak和centos7.0
[root@youxi1 ~]# virsh start centos7.0
域 centos7.0 已开始

[root@youxi1 ~]# virsh start centos7.0-bak
域 centos7.0-bak 已开始
用VNC连接一下,查看这两台虚拟机的IP地址
虚拟机centos7.0的IP地址:

虚拟机centos7.0-bak的IP地址:
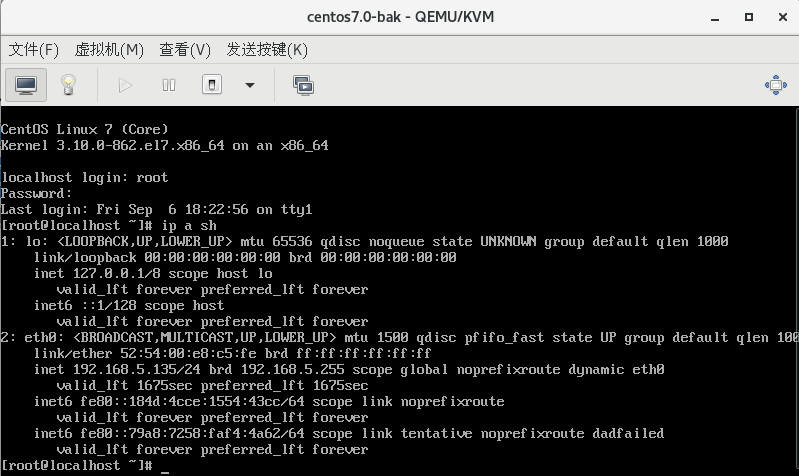
两者都可以上网。
注意:如果是CentOS6的系统进行克隆,那么只能开启一台,进入系统中去修改IP和MAC地址。
(2).KVM虚拟机快照
KVM快照分两种:1.使用LVM快照,如果分区是LVM,那么利用LVM进行KVM的快照备份;2.使用qcow2格式的镜像创建快照。
快照的作用:1.热备;2.灾难恢复;3.回滚到某个历史节点。
快照使用的空间大小:第一次快照使用的空间最大,之后都是在此基础上空间只占用修改过的数据,类似增量备份。
1)创建快照
所以在快照之前需要确保虚拟机镜像格式为qcow2
[root@youxi1 ~]# qemu-img info /var/lib/libvirt/images/centos75.img
image: /var/lib/libvirt/images/centos75.img
file format: qcow2
virtual size: 10G (10737418240 bytes)
disk size: 1.3G
cluster_size: 65536
Format specific information:
    compat: 1.1
    lazy refcounts: true
之后对虚拟机创建快照,虚拟机可以是开启状态,也可以是关闭状态。一般建议关机创建快照,因为关机创建快照更快,并且如果开机创建快照需要把内存中的内容写到磁盘上,记录虚拟机此刻的状态。
[root@youxi1 ~]# virsh list --all
 Id    名称                         状态
----------------------------------------------------
 -     centos7.0                      关闭
 -     centos7.0-bak                  关闭
 -     centos75                       关闭

[root@youxi1 ~]# virsh snapshot-create centos75  //创建快照
已生成域快照 1567998395
[root@youxi1 ~]# virsh snapshot-list centos75
 名称               生成时间              状态
------------------------------------------------------------
 1567998395           2019-09-09 11:06:35 +0800 shutoff
[root@youxi1 ~]# virsh snapshot-create-as centos75 httpd  //创建快照并起名
已生成域快照 httpd
[root@youxi1 ~]# virsh snapshot-list centos75
 名称               生成时间              状态
------------------------------------------------------------
 1567998395           2019-09-09 11:06:35 +0800 shutoff
 httpd                2019-09-09 11:08:44 +0800 shutoff
在创建快照时,建议使用virsh snapshot-create-as [虚拟机名称] [快照名称],方便去辨别该快照的作用和历史节点。另外快照名虽然可以使用中文,但不建议使用。
查看快照占用的空间大小
[root@youxi1 ~]# qemu-img info /var/lib/libvirt/images/centos75.img
image: /var/lib/libvirt/images/centos75.img
file format: qcow2
virtual size: 10G (10737418240 bytes)
disk size: 1.3G
cluster_size: 65536
Snapshot list:
ID        TAG                 VM SIZE                DATE       VM CLOCK
1         1567998395                0 2019-09-09 11:06:35   00:00:00.000
2         httpd                     0 2019-09-09 11:08:44   00:00:00.000
Format specific information:
    compat: 1.1
    lazy refcounts: true
2)删除快照
[root@youxi1 ~]# virsh snapshot-delete centos75 1567998395  //删除掉这个糟糕的快照
已删除域快照 1567998395
[root@youxi1 ~]# virsh snapshot-list centos75
 名称               生成时间              状态
------------------------------------------------------------
 httpd                2019-09-09 11:08:44 +0800 shutoff
3)恢复快照
为了显示出差别,这里我先启动虚拟机,安装httpd
[root@youxi1 ~]# virsh list --all
 Id    名称                         状态
----------------------------------------------------
 2     centos75                       running
 -     centos7.0                      关闭
 -     centos7.0-bak                  关闭

[root@youxi1 ~]# virsh console centos75
连接到域 centos75
换码符为 ^]

CentOS Linux 7 (Core)
Kernel 3.10.0-862.el7.x86_64 on an x86_64

kvm-CentOS7 login: root
密码:
Last login: Mon Sep  9 10:09:21 on ttyS0
[root@kvm-CentOS7 ~]# yum -y install httpd
[root@kvm-CentOS7 ~]# systemctl status httpd  //可以看到httpd服务
● httpd.service - The Apache HTTP Server
Loaded: loaded (/usr/lib/systemd/system/httpd.service; disabled; vendor preset: disabled)
Active: inactive (dead)
Docs: man:httpd(8)
man:apachectl(8)
然后关闭虚拟机,执行快照恢复。注意:恢复快照必须关闭虚拟机
[root@youxi1 ~]# virsh snapshot-revert centos75 httpd
[root@youxi1 ~]# virsh start centos75 --console
......
kvm-CentOS7 login: root
密码:
Last login: Mon Sep 9 10:09:21 on ttyS0
[root@kvm-CentOS7 ~]# systemctl status httpd  //此时就没有httpd了
Unit httpd.service could not be found.
4)获取或设定当前快照
[root@youxi1 ~]# virsh snapshot-current centos75  //获取
<domainsnapshot>
  <name>real-httpd</name>
  <state>shutoff</state>
  <parent>
    <name>httpd</name>
  </parent>
  <creationTime>1568000560</creationTime>
  <memory snapshot='no'/>
  <disks>
    <disk name='vda' snapshot='internal'/>
    <disk name='hda' snapshot='no'/>
  </disks>
  <domain type='kvm'>
    <name>centos75</name>
    <uuid>8b7d2976-11a6-42a6-99f1-1f36ab8dd488</uuid>
    <memory unit='KiB'>1048576</memory>
    <currentMemory unit='KiB'>1048576</currentMemory>
    <vcpu placement='static'>1</vcpu>
    <os>
      <type arch='x86_64' machine='pc-i440fx-rhel7.0.0'>hvm</type>
      <boot dev='hd'/>
    </os>
    <features>
      <acpi/>
      <apic/>
    </features>
    <cpu mode='custom' match='exact' check='partial'>
      <model fallback='allow'>IvyBridge</model>
    </cpu>
    <clock offset='utc'>
      <timer name='rtc' tickpolicy='catchup'/>
      <timer name='pit' tickpolicy='delay'/>
      <timer name='hpet' present='no'/>
    </clock>
    <on_poweroff>destroy</on_poweroff>
    <on_reboot>restart</on_reboot>
    <on_crash>destroy</on_crash>
    <pm>
      <suspend-to-mem enabled='no'/>
      <suspend-to-disk enabled='no'/>
    </pm>
    <devices>
      <emulator>/usr/libexec/qemu-kvm</emulator>
      <disk type='file' device='disk'>
        <driver name='qemu' type='qcow2'/>
        <source file='/var/lib/libvirt/images/centos75.img'/>
        <target dev='vda' bus='virtio'/>
        <address type='pci' domain='0x0000' bus='0x00' slot='0x06' function='0x0'/>
      </disk>
      <disk type='file' device='cdrom'>
        <driver name='qemu' type='raw'/>
        <target dev='hda' bus='ide'/>
        <readonly/>
        <address type='drive' controller='0' bus='0' target='0' unit='0'/>
      </disk>
      <controller type='usb' index='0' model='ich9-ehci1'>
        <address type='pci' domain='0x0000' bus='0x00' slot='0x04' function='0x7'/>
      </controller>
      <controller type='usb' index='0' model='ich9-uhci1'>
        <master startport='0'/>
        <address type='pci' domain='0x0000' bus='0x00' slot='0x04' function='0x0' multifunction='on'/>
      </controller>
      <controller type='usb' index='0' model='ich9-uhci2'>
        <master startport='2'/>
        <address type='pci' domain='0x0000' bus='0x00' slot='0x04' function='0x1'/>
      </controller>
      <controller type='usb' index='0' model='ich9-uhci3'>
        <master startport='4'/>
        <address type='pci' domain='0x0000' bus='0x00' slot='0x04' function='0x2'/>
      </controller>
      <controller type='ide' index='0'>
        <address type='pci' domain='0x0000' bus='0x00' slot='0x01' function='0x1'/>
      </controller>
      <controller type='virtio-serial' index='0'>
        <address type='pci' domain='0x0000' bus='0x00' slot='0x05' function='0x0'/>
      </controller>
      <controller type='pci' index='0' model='pci-root'/>
      <interface type='bridge'>
        <mac address='52:54:00:71:3c:50'/>
        <source bridge='br0'/>
        <model type='virtio'/>
        <address type='pci' domain='0x0000' bus='0x00' slot='0x03' function='0x0'/>
      </interface>
      <serial type='pty'>
        <target type='isa-serial' port='0'>
          <model name='isa-serial'/>
        </target>
      </serial>
      <console type='pty'>
        <target type='serial' port='0'/>
      </console>
      <channel type='unix'>
        <target type='virtio' name='org.qemu.guest_agent.0'/>
        <address type='virtio-serial' controller='0' bus='0' port='1'/>
      </channel>
      <input type='mouse' bus='ps2'/>
      <input type='keyboard' bus='ps2'/>
      <memballoon model='virtio'>
        <address type='pci' domain='0x0000' bus='0x00' slot='0x07' function='0x0'/>
      </memballoon>
      <rng model='virtio'>
        <backend model='random'>/dev/urandom</backend>
        <address type='pci' domain='0x0000' bus='0x00' slot='0x08' function='0x0'/>
      </rng>
    </devices>
  </domain>
</domainsnapshot>

 浙公网安备 33010602011771号