nginx调优(二)
nginx调优(一)
(1).Fastcgi调优
FastCGI全称快速通用网关接口(FastCommonGatewayInterface),可以认为FastCGI是静态服务和动态服务的一个接口。FastCGI像是一个常驻(long-live)型的CGI,它可以一直执行着,只要激活后,不会每次都要花费时间去fork一次(这是CGI最为人诟病的fork-and-execute 模式)。它还支持分布式的运算, 即 FastCGI 程序可以在网站服务器以外的主机上执行并且接受来自其它网站服务器来的请求。
FastCGI是语言无关的、可伸缩架构的CGI开放扩展,其主要行为是将CGI解释器进程保持在内存中并因此获得较高的性能。众所周知,CGI解释器的反复加载是CGI性能低下的主要原因,如果CGI解释器保持在内存中并接受FastCGI进程管理器调度,则可以提供良好的性能、伸缩性、Fail- Over特性等等。
通用网关接口(Common Gateway Interface,CGI)是Web 服务器运行时外部程序的规范,按CGI 编写的程序可以扩展服务器功能。CGI 应用程序能与浏览器进行交互,还可通过数据API与数据库服务器等外部数据源进行通信,从数据库服务器中获取数据。格式化为HTML文档后,发送给浏览器,也可以将从浏览器获得的数据放到数据库中。几乎所有服务器都支持CGI,可用任何语言编写CGI,包括流行的C、C ++、VB 和Delphi 等。CGI分为标准CGI和间接CGI两种。标准CGI使用命令行参数或环境变量表示服务器的详细请求,服务器与浏览器通信采用标准输入输出方式。间接CGI又称缓冲CGI,在CGI程序和CGI接口之间插入一个缓冲程序,缓冲程序与CGI接口间用标准输入输出进行通信。
FastCGI模块官方文档:http://nginx.org/en/docs/http/ngx_http_fastcgi_module.html
这里的buffer是读取缓存区,cache是写入缓存区。并且FastCGI可以定义全局的(定义在http{}下),也可以定义局部的(定义在location{}下)。常用参数如下:
fastcgi_connect_timeout 300;  #指定链接到后端FastCGI的超时时间。
fastcgi_send_timeout 300;  #向FastCGI传送请求的超时时间,这个值是指已经完成两次握手后向FastCGI传送请求的超时时间。
fastcgi_read_timeout 300;  #指定接收FastCGI应答的超时时间,这个值是指已经完成两次握手后接收FastCGI应答的超时时间。
fastcgi_buffer_size 64k;  #指定读取FastCGI应答第一部分需要用多大的缓冲区,这个值表示将使用1个64KB的缓冲区读取应答的第一部分(应答头),可以设置为fastcgi_buffers选项指定的缓冲区大小。
fastcgi_buffers 4 64k;  #指定本地需要用多少和多大的缓冲区来缓冲FastCGI的应答请求,如果一个php脚本所产生的页面大小为256KB,那么会分配4个64KB的缓冲区来缓存,如果页面大小大于256KB,
那么大于256KB的部分会缓存到fastcgi_temp指定的路径中,但是这并不是好方法,因为内存中的数据处理速度要快于磁盘。一般这个值应该为站点中php脚本所产生的页面大小的中间值,
如果站点大部分脚本所产生的页面大小为256KB,那么可以把这个值设置为“8 16K”、“4 64k”等。
fastcgi_busy_buffers_size 128k;  #建议设置为fastcgi_buffer的两倍,繁忙时候的buffer。
fastcgi_temp_file_write_size 128k;  #在写入fastcgi_temp_path时将用多大的数据库,默认值是fastcgi_buffers的两倍,设置上述数值设置小时若负载上来时可能报502Bad Gateway。
fastcgi_temp_path [地址] [目录层级,最高3级,例如2层则为'1 2'];  #定义临时文件的路径,目录层级间使用空格隔开
fastcgi_cache ngnix;  #表示开启FastCGI缓存并为其指定一个名称。开启缓存非常有用,可以有效降低CPU的负载,并且防止502的错误发生,但是开启缓存也可能会引起其他问题,要很据具体情况选择。
fastcgi_cache_valid 200 302 1h;  #用来指定应答代码的缓存时间,实例中的值表示将200和302应答缓存一小时,要和fastcgi_cache配合使用。
fastcgi_cache_valid 301 1d;  #将301应答缓存一天。
fastcgi_cache_valid any 1m;  #将其他应答缓存为1分钟。
fastcgi_cache_min_uses 1;  #请求的数量。
fastcgi_cache_path  #定义缓存的路径和其他参数。
详细说明下fastcgi_cache_path:
fastcgi_cache_psth [缓存地址] [levels=levels(目录层级)] [use_temp_path=on|off] keys_zone=name:size(定义缓存名称和大小) [inactive=time(不活跃数据缓存时间)] [max_size=size(所有缓存的最大总和)] [manager_files=number] [manager_sleep=time] [manager_threshold=time] [loader_files=number] [loader_sleep=time] [loader_threshold=time] [purger=on|off] [purger_files=number] [purger_sleep=time] [purger_threshold=time];
缓存的响应首先被写入一个临时文件,然后对该文件进行重命名操作。从0.8.9版本开始,临时文件和缓存文件可以放在不同的文件系统中,不过此时不再是重命名操作,而是文件跨两个文件系统的复制操作。因此建议缓存(fastcgi_cache_path)和临时文件(fastcgi_temp_path)的目录都放在同一文件系统上。如果省略use_temp_path或其值为on,则使用fastcgi_temp_path给定的目录(存放cache第一步生成的临时文件);如果其值为off,则临时文件放入缓存目录。
levels设置目录层级,最多三层,层级之间使用冒号隔开。第一层目录名取fastcgi_cache_key md5的最后一个字符,第二层目录名取倒数2-3字符,第三次目录名取倒数4-6字符。例如:fastcgi_cache_key md5为b7f54b2df7773722d382f4809d65029c时,如果levels=1:2,那么c/29/b7f54b2df7773722d382f4809d65029c;如果levels=1:2:3,那么c/29/650/b7f54b2df7773722d382f4809d65029c。
定义全局的FastCGI,并在location{}中调用。
[root@youxi1 ~]# vim /usr/local/nginx/conf/nginx.conf
http {
......
    fastcgi_connect_timeout 300;
    fastcgi_send_timeout 300;
    fastcgi_read_timeout 300;
    fastcgi_buffer_size 64k;
    fastcgi_buffers 4 64k;
    fastcgi_busy_buffers_size 128k;
    fastcgi_temp_file_write_size 128k;
    fastcgi_cache_path /data/ngx_fcgi_cache levels=1:2 keys_zone=ngx_fcgi_cache:10m inactive=1d max_size=40g;
    server{
......
        location ~ \.php$ {
            root           html;
            fastcgi_pass   127.0.0.1:9000;  //将进入到该location的uri请求看做cgi程序,发送到9000端口给php-fpm处理
            fastcgi_index  index.php;
//动态添加一行fastcgi配置,配置SCRIPT_FILENAME,告知管理进程cgi脚本名称。
            fastcgi_param  SCRIPT_FILENAME  /usr/local/nginx/html$fastcgi_script_name;
            include        fastcgi_params;  //导入fastcgi配置文件
            fastcgi_cache ngx_fcgi_cache;  //调用fastcgi缓存配置
            fastcgi_cache_valid 200 302 1h;  //状态码为200、302保存一个小时
            fastcgi_cache_valid 301 1d;  //状态码为301保存一天
            fastcgi_cache_valid any 1m;  //其他状态码保存1分钟
            fastcgi_cache_min_uses 1;  //1次请求后缓存,默认为1
            fastcgi_cache_use_stale error timeout invalid_header http_500;  //如果出现错误、超时、空或无效的头、状态码500,允许使用陈旧的缓存
            fastcgi_cache_key http://$host$request_uri;  //定义缓存的key样式
        }
......
    }
}
注意:在整个网络请求的过程中php是一个cgi程序的角色,所以采用名为php-fpm的进程管理程序来对这些被请求的php程序进行管理。fastcgi_pass(发给php-fpm处理)、fastcgi_param(添加动态fastcgi配置)、include(导入fastcgi配置文件)是必不可少的。
(2).gzip压缩网页调优
使用gzip压缩功能可以节约带宽,加快传输速率,但是会占用CPU资源。一般需要压缩的内容有:文本、JS、html、CSS,而对于图片、视频、flash不压缩。
gzip压缩功能定义在http{}块下,常用参数有如下:
gzip on;  #开启压缩功能。
gzip_min_length 1k;  #设置允许压缩的页面最小字节数,页面字节数从header头的Content-Length(内容长度)中获取,默认值是0,不管页面多大都进行压缩,建议设置成大于1K,如果小与1K可能会越压越大。
gzip_buffers 4 32k;  #压缩缓冲区大小,表示申请4个单位为32K的内存作为压缩结果流缓存,默认值是申请与原始数据大小相同的内存空间来存储gzip压缩结果。
gzip_http_version 1.1;  #压缩版本(默认1.1,前端为squid2.5时使用1.0)用于设置识别HTTP协议版本,默认是1.1,目前大部分浏览器已经支持GZIP解压,使用默认即可。
gzip_comp_level 9;  #压缩比例,用来指定GZIP压缩比,1压缩比最小,处理速度最快,9压缩比最大,传输速度快,但是处理慢,也比较消耗CPU资源。
gzip_types text/css text/xml application/javascript;  #用来指定压缩的类型,‘text/html’类型总是会被压缩。
gzip_vary on;  #vary header支持,该选项可以让前端的缓存服务器缓存经过GZIP压缩的页面,例如用Squid缓存经过nginx压缩的数据。
定义gzip压缩
[root@youxi1 ~]# vim /usr/local/nginx/conf/nginx.conf
http{
......
    gzip  on;
    gzip_min_length 1k;
    gzip_buffers 4 32k;
    gzip_http_version 1.1;
    gzip_comp_level 9;
    gzip_types text/css text/xml application/javascript;
    gzip_vary on;
......
}
[root@youxi1 ~]# /usr/local/nginx/sbin/nginx -t  //检查配置文件
nginx: the configuration file /usr/local/nginx/conf/nginx.conf syntax is ok
nginx: configuration file /usr/local/nginx/conf/nginx.conf test is successful
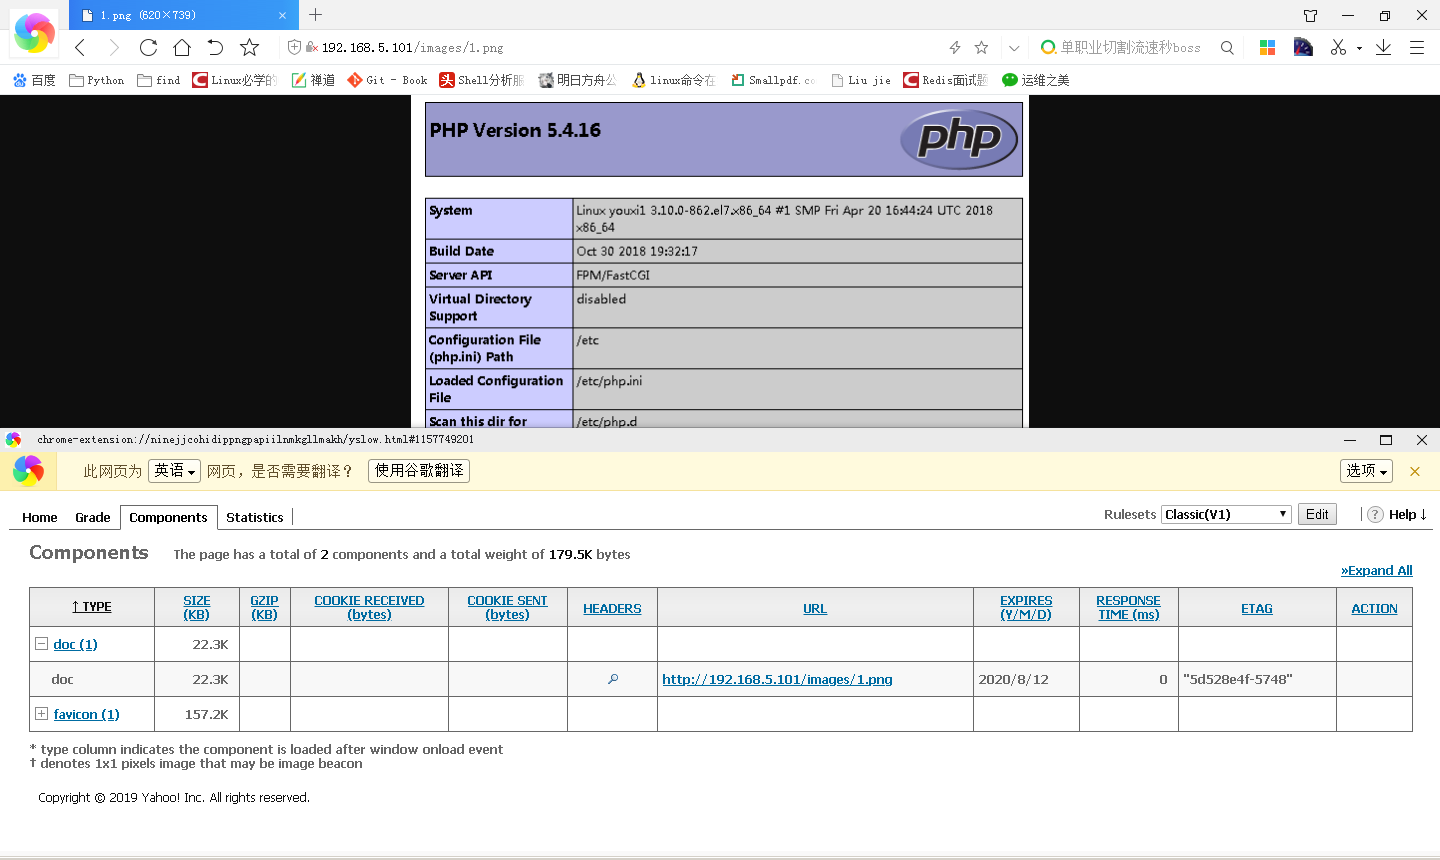
可以使用YSLOW查看压缩状况。
(3).expires缓存调优
expires缓存主要针对于图片、css、JS等更改机会较少的部分使用,特别是图片,占用带宽大,完全可以设置图片缓存365d。
expires缓存定义在location{}中,通过location{}来筛选。
[root@youxi1 ~]# vim /usr/local/nginx/conf/nginx.conf
http{
......
    server{
    ......
        location ~ .*\.(gif|jpg|jpeg|png|bmp|swf)$ {缓存图片文件
            expires 365d;
        }
        location ~ .*\.(js|css)$ {  //缓存.js和.css文件
            expires 10d;
        }
        location ~ ^/(images|javasdript|js|css|flash|media|static){  //缓存目录下所有文件
            expires 365d;
        }
        location ~(rebots.txt) {  //缓存爬虫协议文件
            expires 7d;
            break;
        }
    }
}
[root@youxi1 ~]# /usr/local/nginx/sbin/nginx -t
nginx: the configuration file /usr/local/nginx/conf/nginx.conf syntax is ok
nginx: configuration file /usr/local/nginx/conf/nginx.conf test is successful
expires优点:降低网站带宽,节约成本,提升用户访问体验,减轻服务器压力。
expires缺点:被缓存的网页或数据更新时,用户还会使用旧的缓存。
缺点处理办法:缩短缓存时间;或更改缓存对面名称。
注意:广告图片、网站流量统计工具(监控)、更新频繁的文件不要缓存,或缩短缓存时间。
注意:将expires缓存放在一个server{}的最后,否则有可能会出现问题。
使用YSLOW可以看到缓存日期
(4).日志切割
nginx日志切割一般使用脚本文件和计划任务组合来实现的。
做一个按天存放,超过10天删除的日志切割计划任务。
[root@youxi1 ~]# vim /usr/local/nginx/logs/nginx_cutlog.sh
#!/bin/bash
date=$(date +%F -d -1day)
cd /usr/local/nginx/logs
if [ ! -d cut ] ; then  //确认是否存在cut目录
    mkdir cut
fi
mv access.log cut/access_$(date +%F -d -1day).log
mv error.log cut/error_$(date +%F -d -1day).log
/usr/local/nginx/sbin/nginx -s reload
tar -jcvf cut/$date.tar.bz2 cut/*  //打包压缩,注意这里生成在/usr/local/nginx/logs目录下
rm -rf cut/access* && rm -rf cut/error*
find -type f -mtime +10 | xargs rm -rf  //删除超过十天的文件
[root@youxi1 ~]# crontab -e
0 0 * * * /bin/sh /usr/local/nginx/logs/nginx_cutlog.sh > /dev/null 2>&1
[root@youxi1 ~]# chmod +x /usr/local/nginx/logs/nginx_cutlog.sh
(5).日志优化
健康检查的日志,不用输入到log中,因为这些日志没有意义,我们分析的话只需要分析访问日志,看看一些页面链接,如200,301,404的状态码,在SEO中很重要,而且我们统计PV是页面计算,这些都没有意义,反而消耗了磁盘IO,降低了服务器性能,我们可以屏蔽这些如图片,js,css这些不宜变化的内容。
[root@youxi1 ~]# vim /usr/local/nginx/conf/nginx.conf
http{
......
    server{
    ......
#可以在之前的缓存location中添加
        location ~ .*\.(gif|jpg|jpeg|png|bmp|swf)$ {
            expires 365d;
            access_log off;
        }
        location ~ .*\.(js|css)$ {
            expires 10d;
            access_log off;
        }
#也可以另外建立一个location
#        location ~ .*\.(js|css|gif|jpg|jpeg|png|bmp|swf)$ {
#            access_log off;
#        }
    ......
    }
}
另外启用日志格式优化
[root@youxi1 ~]# vim /usr/local/nginx/conf/nginx.conf
http{
......
    log_format  main  '$remote_addr - $remote_user [$time_local] "$request" '
                      '$status $body_bytes_sent "$http_referer" '
                      '"$http_user_agent" "$http_x_forwarded_for"';
......
}
说明:
$remote_addr与$http_x_forwarded_for用以记录客户端的ip地址;
$remote_user:用来记录客户端用户名称;
$time_local:用来记录访问时间与时区;
$request:用来记录请求的url与http协议;
$status:用来记录请求状态,功是200;
$body_bytes_s ent:记录发送给客户端文件主体内容大小;
$http_referer:用来记录从哪个页面链接访问过来的;
$http_user_agent:记录客户端浏览器的相关信息;
日志文件修改所属主和所属组,777权限需要看情况而定。
[root@youxi1 ~]# chown -R root.root /usr/local/nginx/logs/
[root@youxi1 ~]# chmod -R 777 /usr/local/nginx/logs/
(6).目录文件访问控制和来源访问控制
这是location下的两个参数allow和deny的使用,前者允许,后者拒绝。
例如,配置/usr/local/nginx/html/images下的.php、.php5、.sh、.py、.pl结尾的文件禁止访问。
[root@youxi1 ~]# vim /usr/local/nginx/conf/nginx.conf
http{
......
server{
......
location ~ ^/images/.*\.(php|php5|sh|py|pl)$ {
deny all;
}
......
}
}
[root@youxi1 ~]# /usr/local/nginx/sbin/nginx -t
nginx: the configuration file /usr/local/nginx/conf/nginx.conf syntax is ok
nginx: configuration file /usr/local/nginx/conf/nginx.conf test is successful
[root@youxi1 ~]# /usr/local/nginx/sbin/nginx -s reload
[root@youxi1 ~]# mkdir /usr/local/nginx/html/images
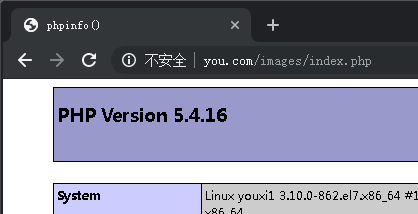
[root@youxi1 ~]# echo "<?php phpinfo();?>" > /usr/local/nginx/html/images/index.php
注意:由于同优先级的location自上而下执行,所以不允许要在允许之前,否则不会生效。expires缓存放在一个server{}的最后。
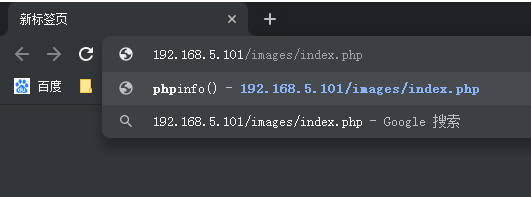
Windows查看
配置只允许192.168.5.1访问/usr/local/nginx/html/images下的.php结尾的文件
[root@youxi1 nginx]# vim /usr/local/nginx/conf/nginx.conf
http{
......
    server{
    ......
        location ~ ^/images/.*\.php$ {
            fastcgi_pass   127.0.0.1:9000;
            fastcgi_param  SCRIPT_FILENAME  /usr/local/nginx/html$fastcgi_script_name;
            include        fastcgi_params;
            allow 192.168.5.1;
            deny all;
        }
        location ~ \.php$ {
        ......
        }
    ......
    }
}
[root@youxi1 nginx]# /usr/local/nginx/sbin/nginx -s reload
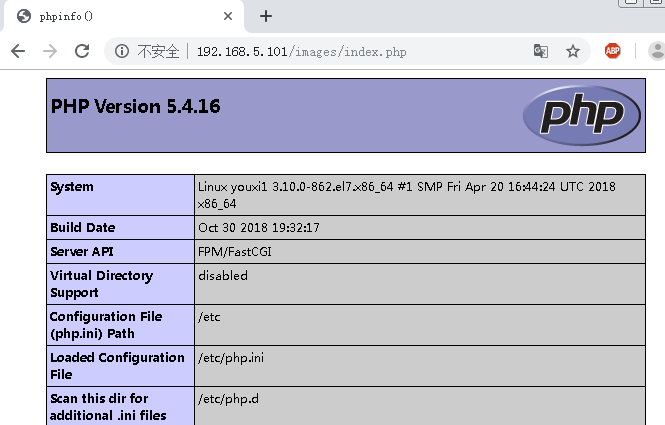
使用IP地址为192.168.5.1的Windows访问
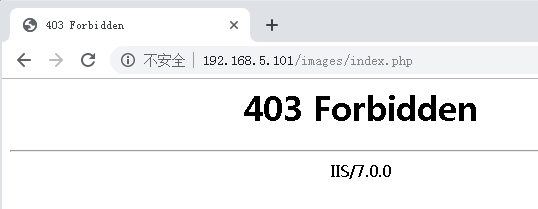
使用IP地址为192.168.5.102的Linux访问
[root@youxi2 ~]# curl 192.168.5.101/images/index.php
<html>
<head><title>403 Forbidden</title></head>
<body>
<center><h1>403 Forbidden</h1></center>
<hr><center>IIS/7.0.0</center>
</body>
</html>
注意:allow和deny优先级相同,谁在上面谁先执行。如果只想指定IP、网段、IP段访问,需要allow和deny配合使用。
(7).rewrite和return
rewrite的四个重要参数,break、last、redirect、permanent。
rewrite break - url重写后,直接使用当前资源,不再执行location里余下的语句,完成本次请求,地址栏url不变;
rewrite last - url重写后,马上发起一个新的请求,再次进入server块,重试location匹配,超过10次匹配不到报500错误,地址栏url不变;
rewrite redirect – 返回302临时重定向,地址栏显示重定向后的url,爬虫不会更新url(因为是临时);
rewrite permanent – 返回301永久重定向, 地址栏显示重定向后的url,爬虫更新url。
break;可以单独作为一行,不再执行location里余下的语句,完成本次请求,地址栏url不变。
1)禁止使用IP访问网站
这其实是加在http{}最后的server{},在确保域名配置完成后,将所有非指定域名的请求重写,或直接返回错误。
例如,返回403错误
[root@youxi1 ~]# vim /usr/local/nginx/conf/nginx.conf
http{
    server{
        listen 80;
        server_name www.you.com
    ......
    }
......
    server{
        listen 80 default_server;
        server_name default_server;
        return 403;
    }
}
[root@youxi1 ~]# /usr/local/nginx/sbin/nginx -s reload
再例如,将IP访问(或非指定域名)重写为指定域名访问(可以保留uri,也可以不保留)
[root@youxi1 ~]# vim /usr/local/nginx/conf/nginx.conf
http{
    server{
        listen 80;
        server_name www.you.com
    ......
    }
......
    server{
        listen 80 default_server;
        server_name default_server;
//permanent返回301永久重定向,地址栏显示重定向后的URL,爬虫更新URL
        rewrite ^/(.*)$ http://www.you.com/$1 permanent;
    }
}
[root@youxi1 ~]# /usr/local/nginx/sbin/nginx -s reload
 --------->
2)防盗链
防止别人直接从你网站引用图片等链接,消耗了你的资源和网络流量。
可以直接返回一个404或网站小图片。
[root@youxi1 ~]# vim /usr/local/nginx/conf/nginx.conf
http{
......
    server{
    ......
        location ~* \.(jpg|gif|png|swf|flv|wma|wmv|asf|mp3|mmf|zip|rar)${
            valid_referers none blocked *.you.com you.com;
            if ($invalid_referer) {  //如果无效,将会执行
                #return 404;
                rewrite ^/ http://www.you.com/img/nolink.png;
            }
        }
......
}
valid_referers [none|blocked|server_names] 该指令会根据Referer Header头的内容分配一个值为0或1给变量$invalid_referer。如果Referer Header头不符合valid_referers指令设置的有效Referer,变量$invalid_referer将被设置为1。
none表示没有Referer的请求访问资源;blocked表示不是http://开头的,不带协议的请求访问资源;server_name表示一个或多个主机名或IP或域名,从0.5.33版开始可以使用通配符*。
3)目录访问控制也可以使用rewrite或return
(8).自定义错误页面
开启server块里的error_page既可以自己编辑错误页面了。
[root@youxi1 ~]# vim /usr/local/nginx/conf/nginx.conf
http{
......
    server{
    ......
        error_page  404              /404.html;
    ......
    }
}
(9).开启认证功能
[root@youxi1 ~]# vim /usr/local/nginx/conf/nginx.conf
http{
......
server{
......
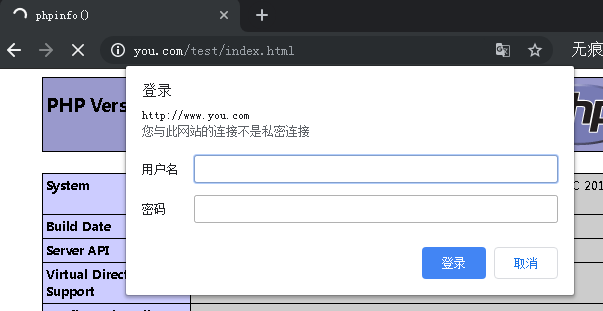
location ~ /test/ {
auth_basic "username";
auth_basic_user_file /usr/local/nginx/conf/passwd;
}
......
}
}
[root@youxi1 ~]# yum -y install httpd-tools //为了使用htpasswd命令
[root@youxi1 ~]# htpasswd -cb /usr/local/nginx/conf/password user1 123456 //只有第一次创建使用-c选项
Adding password for user user1
[root@youxi1 ~]# chmod 400 /usr/local/nginx/conf/password
[root@youxi1 ~]# chown nginx /usr/local/nginx/conf/password
[root@youxi1 ~]# /usr/local/nginx/sbin/nginx -s reload
不管有没有这个文件,它都会先认证。
(10).防DDOS攻击
通过使用limit_conn_zone进行控制单个IP或者域名的访问次数。
[root@youxi1 ~]# vim /usr/local/nginx/conf/nginx.conf
http{
......
    limit_conn_zone $binary_remote_addr zone=perip:10m;
    limit_conn_zone $server_name zone=perserver:10m;
......
    server{
    ......
        location / {
        ......
            limit_conn perip 1;
            limit_rate 500k;
            limit_rate_after 50m;
        ......
    }
......
}
说明:
$binary_remote_addr针对同IP;$server_name针对同主机名。
zone=[作用域名称]:[总带宽]。
limit_conn [作用域名称] [连接数],限制作用域的连接数量。如果作用域是针对同IP,那么就是一个IP地址只能建立一个连接(当前location);如果作用域是针对同主机名,那么就是一个主机只能建立一个连接(当前location)。
limit_rate [带宽],限速单个连接的带宽。
limit_rate_after [下载的文件大小],和limit_rate配合使用,表示当下载总量达到设置的文件大小后,开启限速效果(逐渐降速),针对当个连接。
补充:阻止DDOS攻击和CC攻击nginx防止DDOS攻击配置
参考:https://www.cnblogs.com/chenpingzhao/p/4983703.html
https://blog.csdn.net/zhanlanmg/article/details/49684803
http://blog.sina.com.cn/s/blog_94c21e8f0101qfjr.html
https://www.jianshu.com/p/0de3e5faea0d
https://www.cnblogs.com/nat-zhu/p/7093797.html?utm_source=itdadao&utm_medium=referral

 浙公网安备 33010602011771号