oracle静默安装
安装过程
操作用户:root:
1.关闭防火墙
systemctl stop firewalld.service
systemctl disable firewalld.service
2.安装依赖包
yum install -y automake autotools-dev binutils bzip2 elfutils expat \
gawk gcc gcc-multilib g++-multilib lib32ncurses5 lib32z1 \
ksh less lib32z1 libaio1 libaio-dev libc6-dev libc6-dev-i386 \
libc6-i386 libelf-dev libltdl-dev libodbcinstq4-1 libodbcinstq4-1:i386 \
libpth-dev libpthread-stubs0-dev libstdc++5 make openssh-server rlwrap \
rpm sysstat unixodbc unixodbc-dev unzip x11-utils zlibc unzip cifs-utils \
libXext.x86_64  glibc.i686
3.创建oracle用户
groupadd -g 502 oinstall
groupadd -g 503 dba
groupadd -g 504 oper
groupadd -g 505 asmadmin
useradd -u 502 -g oinstall -G oinstall,dba,asmadmin,oper -s /bin/bash -m oracle
passwd oracle
操作用户:oracle:
4.解压Oracle数据库安装包
操作目录:/home/oracle
将Oracle 11gR2安装文件上传(可以使用sftp上传)到该操作目录下面,然后顺序解压安装文件到该目录。
unzip linux.x64_11gR2_database_1of2.zip
unzip linux.x64_11gR2_database_2of2.zip
5.修改操作系统配置
操作用户:root
操作文件:/etc/security/limits.conf
vim /etc/security/limits.conf
在文件的末尾添加如下配置项。
oracle          soft      nproc   2047
oracle          hard      nproc   16384
oracle          soft      nofile  1024
oracle          hard      nofile  65536
oracle          soft      stack   10240
6.创建Oracle安装目录
操作用户:oracle
mkdir ~/tools/oracle11g
7.修改环境变量
操作用户:oracle
操作目录:/home/oracle
vim ~/.bash_profile
在文件末尾添加如下配置项
export ORACLE_BASE=/home/oracle/tools/oracle11g
export ORACLE_HOME=$ORACLE_BASE/product/11.2.0/dbhome_1
export ORACLE_SID=orcl
export ORACLE_UNQNAME=orcl
export NLS_LANG=.AL32UTF8
export PATH=${PATH}:${ORACLE_HOME}/bin/:$ORACLE_HOME/lib64
使得环境变量生效。
source ~/.bash_profile
8.修改Oracle配置文件
操作用户:oracle
操作目录:/home/oracle
复制文件模板
cp /home/oracle/database/response/db_install.rsp .
注意:复制命令的最后一个 . 不能省略,表示将db_install.rsp文件从/home/oracle/database/response目录拷贝到当前目录。
对db_install.rsp文件进行编辑。
vim db_install.rsp
需要修改的配置项如下所示,这里,我将修改后的配置项列举出来。
oracle.install.option=INSTALL_DB_AND_CONFIG
ORACLE_HOSTNAME=localhost #实际上可以修改成你自己的主机名或者域名(IP)
UNIX_GROUP_NAME=oinstall
INVENTORY_LOCATION=/home/oracle/tools/oraInventory
SELECTED_LANGUAGES=en,zh_CN
ORACLE_HOME=/home/oracle/tools/oracle11g/product/11.2.0/dbhome_1
ORACLE_BASE=/home/oracle/tools/oracle11g
oracle.install.db.InstallEdition=EE
oracle.install.db.DBA_GROUP=dba
oracle.install.db.OPER_GROUP=oper
oracle.install.db.config.starterdb.type=GENERAL_PURPOSE
oracle.install.db.config.starterdb.globalDBName=orcl
oracle.install.db.config.starterdb.SID=orcl
oracle.install.db.config.starterdb.characterSet=AL32UTF8
oracle.install.db.config.starterdb.memoryOption=true
oracle.install.db.config.starterdb.memoryLimit=1024
oracle.install.db.config.starterdb.installExampleSchemas=false
oracle.install.db.config.starterdb.password.ALL=Oracle#123456
oracle.install.db.config.starterdb.control=DB_CONTROL
oracle.install.db.config.starterdb.dbcontrol.enableEmailNotification=false
oracle.install.db.config.starterdb.dbcontrol.emailAddress=test@qq.com #可以填写你自己的邮箱地址
oracle.install.db.config.starterdb.automatedBackup.enable=false
oracle.install.db.config.starterdb.storageType=FILE_SYSTEM_STORAGE
oracle.install.db.config.starterdb.fileSystemStorage.dataLocation=/home/oracle/tools/oracle11g/oradata
oracle.install.db.config.starterdb.fileSystemStorage.recoveryLocation=/home/oracle/tools/oracle11g/fast_recovery_area
oracle.install.db.config.starterdb.automatedBackup.enable=false
DECLINE_SECURITY_UPDATES=true
9.静默安装Oracle 11gR2
操作用户:oracle
操作目录:/home/oracle/database
./runInstaller -silent -ignoreSysPrereqs -responseFile /home/oracle/db_install.rsp
接下来,就是默默的等待Oracle自行安装了,等待一段时间后,如果输出如下信息,则表明Oracle数据库已经安装成功。
The following configuration scripts need to be executed as the "root" user.
#!/bin/sh
#Root scripts to run

/home/oracle/tools/oraInventory/orainstRoot.sh
/home/oracle/tools/oracle11g/product/11.2.0/dbhome_1/root.sh
To execute the configuration scripts:

         1. Open a terminal window
         2. Log in as "root"
         3. Run the scripts
         4. Return to this window and hit "Enter" key to continue

Successfully Setup Software.
10.安装完成
操作用户:root
根据上一步完成信息提示,执行以下两行命令,具体位置需要根据你的安装位置决定:
/home/oracle/tools/oraInventory/orainstRoot.sh
/home/oracle/tools/oracle11g/product/11.2.0/dbhome_1/root.sh
11.创建连接用户
操作用户:oracle
sqlplus /nolog
conn /as sysdba
startup
接下来,执行如下命令。
alter user system identified by system;
alter user sys identified by sys;
创建连接用户。
create user SYNC identified by SYNC;
grant connect,resource,dba to SYNC;
验证安装结果
1.启动数据库
启动已经安装的数据库orcl。
操作用户oracle
sqlplus /nolog
使用dba权限连接Oralce
connect / as sysdba
启动数据库
startup
确认启动结果:
ORACLE instance started.

Total System Global Area  534462464 bytes
Fixed Size                  2215064 bytes
Variable Size            373293928 bytes
Database Buffers          150994944 bytes
Redo Buffers                7958528 bytes
Database mounted.
Database opened.
2.验证数据库
这里,我们使用Navicat连接Oracle数据库,如下所示。
这里,输入的用户名为SYNC,密码为SYNC。
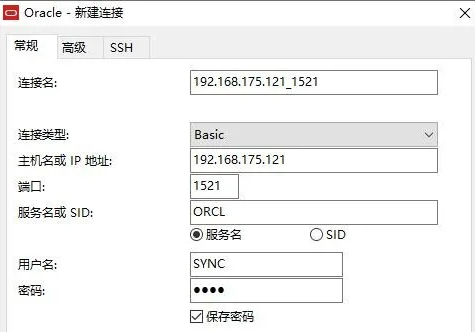
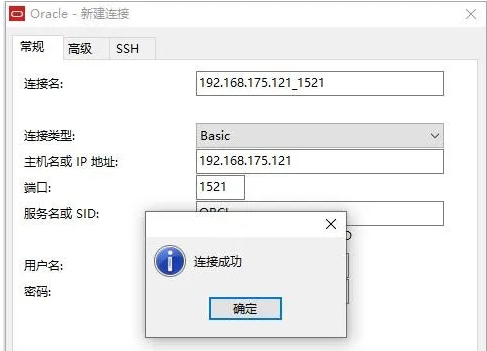
接下来,点击“连接测试”,如下所示。
手动卸载Oracle
1.停止监听
[oracle@binghe101 ~]$ lsnrctl stop
[oracle@binghe101 ~]$ lsnrctl status
2.停止数据库
[oracle@binghe101 ~]$ sqlplus / as sysdba
SQL> shutdown immediate
[oracle@binghe101 ~]$ sqlplus / as sysdba
SQL> shutdown immediate
3.删除oracle的inventory 目录
[root@binghe101 app]# rm -rf /home/oracle/tools/oraInventory/
4.删除Oracle的base目录下所有的目录
[root@binghe101 oracle]# rm -rf /home/oracle/tools/oracle11g/*
5.删除临时目录/tmp
[root@binghe101 tmp]# rm -rf /tmp/*
6.删除Oracle的配置文件
[root@binghe101 tmp]# rm -f /etc/ora*
7.删除oracle产生命令
[root@binghe101 tmp]# rm -f /usr/local/bin/*
8.其他的文件
[root@binghe101 .oracle]# rm -rf /usr/tmp/.oracle/
9.删除用户和组
[root@binghe101 tmp]# userdel -r oracle
[root@binghe101 tmp]# groupdel oper
[root@binghe101 tmp]# groupdel dba
[root@binghe101 tmp]# groupdel oinstall
[root@binghe101 tmp]# groupdel asmadmin
10.撤销oracle的资源限制文件
[root@binghe101 tmp]# vi /etc/security/limits.conf
11.内核参数
[root@binghe101 tmp]# vi /etc/sysctl.conf
[root@binghe101 tmp]# sysctl -p
12.删除oracle base
[root@binghe101 ~]# rm -rf /home/oracle/tools/oracle11g
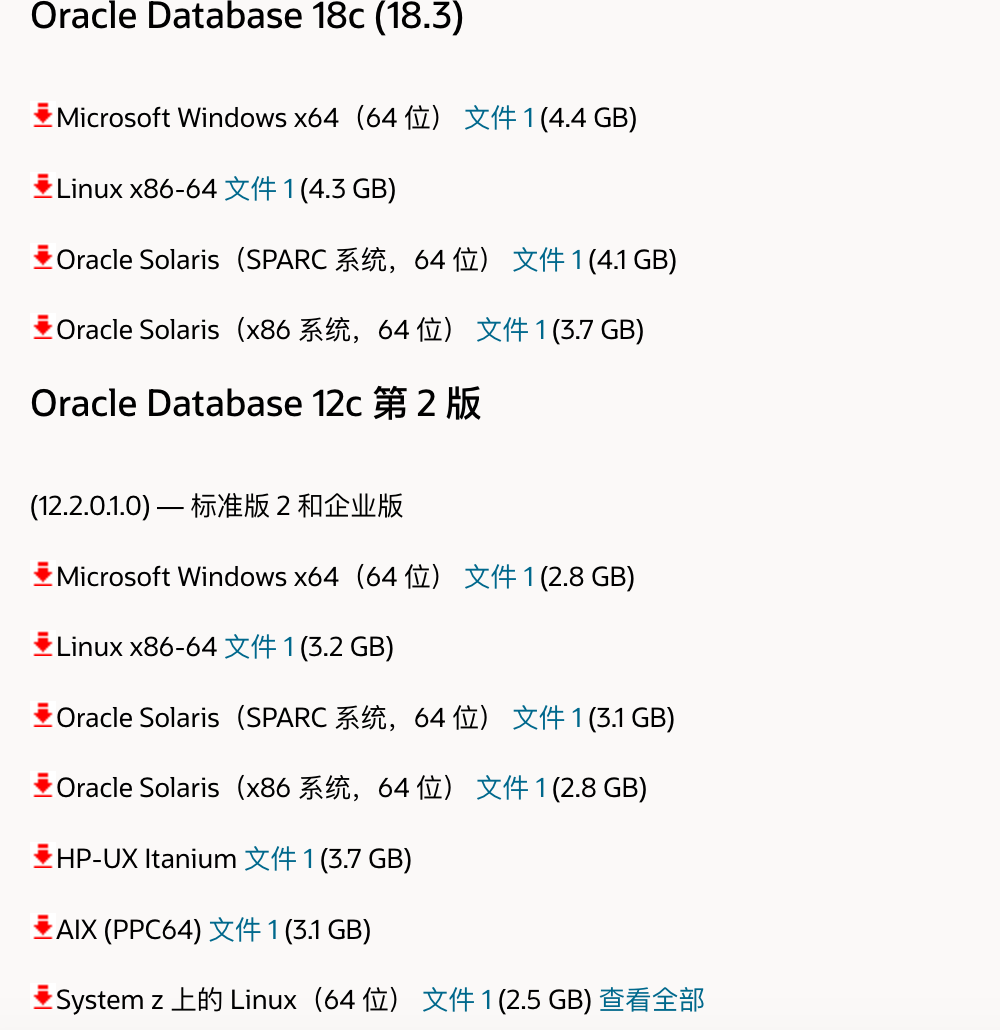
oracle操作文档和包下载地址:
https://www.oracle.com/cn/database/technologies/enterprise-edition/documentation/database.html

 浙公网安备 33010602011771号