Rocky、centos8
一、Rocky linux
1、国内源
阿里源
rockylinux镜像_rockylinux下载地址_rockylinux安装教程-阿里巴巴开源镜像站 (aliyun.com) 已经更新Rocky9.0
执行以下命令替换默认源
1 2 3 4 5 6 | sed -e 's|^mirrorlist=|#mirrorlist=|g' \ -e 's|^#baseurl=http://dl.rockylinux.org/$contentdir|baseurl=https://mirrors.aliyun.com/rockylinux|g' \ -i.bak \ /etc/yum.repos.d/Rocky-*.repodnf makecache |
上海交大
上海交通大学 Linux 用户组 软件源镜像服务 (sjtu.edu.cn)
1 2 3 4 | sed -e 's|^mirrorlist=|#mirrorlist=|g' \ -e 's|^#baseurl=http://dl.rockylinux.org/$contentdir|baseurl=https://mirrors.sjtug.sjtu.edu.cn/rocky|g' \ -i.bak \ /etc/yum.repos.d/Rocky-*.repo |
2、epel源(与centos8通用)
1 | dnf -y install http://mirrors.163.com/centos/8.5.2111/extras/x86_64/os/Packages/epel-release-8-11.el8.noarch.rpm |
3、安装docker
1 2 3 4 5 6 7 8 9 10 11 | yum install -y yum-utils device-mapper-persistent-data lvm2yum-config-manager --add-repo http://mirrors.aliyun.com/docker-ce/linux/centos/docker-ce.repo###查看所有版本yum list docker-ce --showduplicates | sort -ryum search --showduplicates nvidia-docker ##精准匹配##--allowerasing 允许擦除已安装的软件包以解决依赖关系yum install docker-ce -y --allowerasingsystemctl enable docker.service --now |
4、安装GPU驱动需要注意
- 升级内核版本至5.4版
-
12345
# CentOS 8$ yum -y install https://www.elrepo.org/elrepo-release-8.el8.elrepo.noarch.rpm# 安装$ yum -y install --enablerepo=elrepo-kernel kernel-lt kernel-lt-devel
CentOS 8 升级内核_大漠知秋的博客-CSDN博客_centos8升级内核
5、安装 nvidia-container-toolkit (运行gpu容器需要)
1 2 3 4 5 6 | curl -s -L https://nvidia.github.io/nvidia-docker/centos8/nvidia-docker.repo | tee /etc/yum.repos.d/nvidia-docker.repoyum install -y nvidia-container-toolkitsystemctl daemon-reloadsystemctl restart docker |
6、rocky8.6 默认内核4.18
1 | 4.18.0-372.9.1.el8.x86_64 |
rocky9
网卡配置
1 2 3 4 5 6 7 8 9 10 11 12 13 14 15 16 17 18 19 20 21 22 23 24 25 | cat /etc/NetworkManager/system-connections/ens18.nmconnection [connection]id=ens18uuid=8d1ece55-d999-3c97-866b-d2e23832a324type=ethernetautoconnect-priority=-999interface-name=ens18permissions=timestamp=1639473429[ethernet]mac-address-blacklist=[ipv4]address1=192.168.1.92/24,192.168.1.1dns=8.8.8.8;dns-search=method=manual[ipv6]addr-gen-mode=eui64dns-search=method=auto[proxy] |
nmcli操作
1 2 3 4 5 6 7 8 9 10 11 12 13 | 将 IPv4 地址 调配给 ens18网卡上,# nmcli con mod ens18 ipv4.addresses 192.168.1.91/24;# nmcli con mod ens18 ipv4.gateway 192.168.1.1;设置手动配置(从 dhcp 到 static),# nmcli con mod ens18 ipv4.method manual;设置 DNS 值为 “8.8.8.8”,# nmcli con mod ens18 ipv4.dns "8.8.8.8";# nmcli con up ens18 |
二、网络
centos8配置
[base]name=CentOS-$releasever - Base - mirrors.aliyun.comfailovermethod=prioritybaseurl=https://mirrors.aliyun.com/centos/$releasever/BaseOS/$basearch/os/http://mirrors.aliyuncs.com/centos/$releasever/BaseOS/$basearch/os/http://mirrors.cloud.aliyuncs.com/centos/$releasever/BaseOS/$basearch/os/gpgcheck=1gpgkey=https://mirrors.aliyun.com/centos/RPM-GPG-KEY-CentOS-Official[extras]name=CentOS-$releasever - Extras - mirrors.aliyun.comfailovermethod=prioritybaseurl=https://mirrors.aliyun.com/centos/$releasever/extras/$basearch/os/http://mirrors.aliyuncs.com/centos/$releasever/extras/$basearch/os/http://mirrors.cloud.aliyuncs.com/centos/$releasever/extras/$basearch/os/gpgcheck=1gpgkey=https://mirrors.aliyun.com/centos/RPM-GPG-KEY-CentOS-Official[centosplus]name=CentOS-$releasever - Plus - mirrors.aliyun.comfailovermethod=prioritybaseurl=https://mirrors.aliyun.com/centos/$releasever/centosplus/$basearch/os/http://mirrors.aliyuncs.com/centos/$releasever/centosplus/$basearch/os/http://mirrors.cloud.aliyuncs.com/centos/$releasever/centosplus/$basearch/os/gpgcheck=1enabled=0gpgkey=https://mirrors.aliyun.com/centos/RPM-GPG-KEY-CentOS-Official[PowerTools]name=CentOS-$releasever - PowerTools - mirrors.aliyun.comfailovermethod=prioritybaseurl=https://mirrors.aliyun.com/centos/$releasever/PowerTools/$basearch/os/http://mirrors.aliyuncs.com/centos/$releasever/PowerTools/$basearch/os/http://mirrors.cloud.aliyuncs.com/centos/$releasever/PowerTools/$basearch/os/gpgcheck=1enabled=0gpgkey=https://mirrors.aliyun.com/centos/RPM-GPG-KEY-CentOS-Official[AppStream]name=CentOS-$releasever - AppStream - mirrors.aliyun.comfailovermethod=prioritybaseurl=https://mirrors.aliyun.com/centos/$releasever/AppStream/$basearch/os/http://mirrors.aliyuncs.com/centos/$releasever/AppStream/$basearch/os/http://mirrors.cloud.aliyuncs.com/centos/$releasever/AppStream/$basearch/os/gpgcheck=1gpgkey=https://mirrors.aliyun.com/centos/RPM-GPG-KEY-CentOS-Official |
centos8配置yum源(yum直接能用)
2、配置好网卡和 resolv.conf文件
1 2 | cat /etc/resolv.confnameserver 114.114.114.114 |
3、重启网卡
1 2 | nmcli c reload ens33nmcli c up ens33 |
4、centos8使用阿里云 epel源
1 2 3 4 | yum install -y https://mirrors.aliyun.com/epel/epel-release-latest-8.noarch.rpmsed -i 's|^#baseurl=https://download.example/pub|baseurl=https://mirrors.aliyun.com|' /etc/yum.repos.d/epel*sed -i 's|^metalink|#metalink|' /etc/yum.repos.d/epel* |
5、dnf repolist -v 查看启用的yum源清单
1 2 3 4 5 6 7 8 9 10 11 12 13 14 15 16 17 | 加载插件:builddep, changelog, config-manager, copr, debug, debuginfo-install, download, generate_completion_cache, groups-manager, needs-restarting, playground, repoclosure, repodiff, repograph, repomanage, reposyncDNF version: 4.4.2cachedir: /var/cache/dnf上次元数据过期检查:0:14:05 前,执行于 2021年12月10日 星期五 06时47分22秒。Repo-id : AppStreamRepo-name : CentOS-8 - AppStream - mirrors.aliyun.comRepo-revision : 8.5.2111Repo-distro-tags : [cpe:/o:centos:centos:8]: , 8, C, O, S, e, n, tRepo-updated : 2021年12月02日 星期四 19时46分20秒Repo-pkgs : 6,395Repo-available-pkgs: 5,511Repo-size : 10 GRepo-baseurl : https://mirrors.aliyun.com/centos/8/AppStream/x86_64/os/, : http://mirrors.aliyuncs.com/centos/8/AppStream/x86_64/os/, : http://mirrors.cloud.aliyuncs.com/centos/8/AppStream/x86_64/os/Repo-expire : 172,800 秒 (最近 2021年12月10日 星期五 06时47分22秒)Repo-filename : /etc/yum.repos.d/CentOS-Base.repo |
英文改中文
1 2 | dnf install glibc-langpack-zh.x86_64yum -y install langpacks-zh_CN |
rhel8 配置
#vim /etc/sysconfig/network-scripts/ifcfg-ens160
1 2 3 4 5 6 7 8 9 10 11 12 13 14 15 16 17 18 19 | TYPE="Ethernet"PROXY_METHOD="none"BROWSER_ONLY="no"BOOTPROTO="none"DEFROUTE="yes"NAME="ens160"UUID="973e78e5-624c-4f72-99ec-ede4a44e4723"DEVICE="ens160"ONBOOT="yes"IPADDR=192.168.40.163GATEWAY=192.168.40.2NETMASK=255.255.255.0DNS1=114.114.114.114 重启网卡nmcli connection down/up ens160 建议使用#nmcli connection modify ens160 ipv4.addresses 192.168.1.63/24 ipv4.method manual ipv4.gateway 192.168.1.1 ipv4.dns 192.168.1.1 |
采用7的system 启动 network
# dnf install -y network-scripts
采用yum安装应用
在RHEL8中把软件源分成了两部分
一个是BaseOS
一个是AppStream
在rhel8中,统一的ISO自动加载BaseOS和AppStream安装源存储库。已经存在于光盘链接中,只不过要分别去配置.repo文件,BaseOS 存储库 - BaseOS 存储库以传统 RPM 包的形式提供底层核心 OS 内容
AppStream 存储库 - Application Stream 存储库提供您可能希望在给定用户空间中运行的所有应用程序。
1 2 3 4 5 6 | # find / -name AppStream/run/media/root/RHEL-8-0-0-BaseOS-x86_64/AppStream# cd /run/media/root/RHEL-8-0-0-BaseOS-x86_64/# lsAppStream EFI extra_files.json images media.repo RPM-GPG-KEY-redhat-releaseBaseOS EULA GPL isolinux RPM-GPG-KEY-redhat-beta TRANS.TBL |
把yum源指向AppStream和BaseOS
1 2 3 4 5 6 7 8 9 10 11 12 | # vim /etc/yum.repos.d/rhel8-local.repo[localREPO]name=localrhel8baseurl=file:///run/media/root/RHEL-8-0-0-BaseOS-x86_64/BaseOSenable=1gpgcheck=0[localREPO_App]name=localrhel8baseurl=file:///run/media/root/RHEL-8-0-0-BaseOS-x86_64/AppStreamenable=1gpgcheck=0 |
直接yum install -y 就能用了
dnf的使用
dnf使用 RPM, libsolv 和 hawkey 库进行包管理操作,是YUM v4版,之前在RHEL 7上使用的YUM v3相比具有以下优点:
提高性能、支持模块化内容、设计良好的用于与工具集成的稳定API
查看系统中可用的 DNF 软件库
1 | dnf repolist |
查看系统中可用和不可用的所有的 DNF 软件库
1 | dnf repolist all |
列出所有 RPM 包
1 | dnf list |
列出所有安装了的 RPM 包
1 | dnf list installed |
列出所有可供安装的 RPM 包
1 | dnf list available |
搜索软件库中的 RPM 包
1 | dnf search nano |
查找某一文件的提供者
1 | dnf provides /bin/bash |
查看软件包详情
1 | dnf info nano |
删除无用孤立的软件包
1 | dnf autoremove |
删除缓存的无用软件包
1 | dnf clean all |
获取有关某条命令的使用帮助
1 | dnf help clean |
查看 DNF 命令的执行历史
1 | dnf history |
查看所有的软件包组
1 | dnf grouplist |
安装一个软件包组
1 | dnf groupinstall ‘安全性工具’ |
从特定的软件包库安装特定的软件
1 | dnf -enablerepo=epel install nginx |
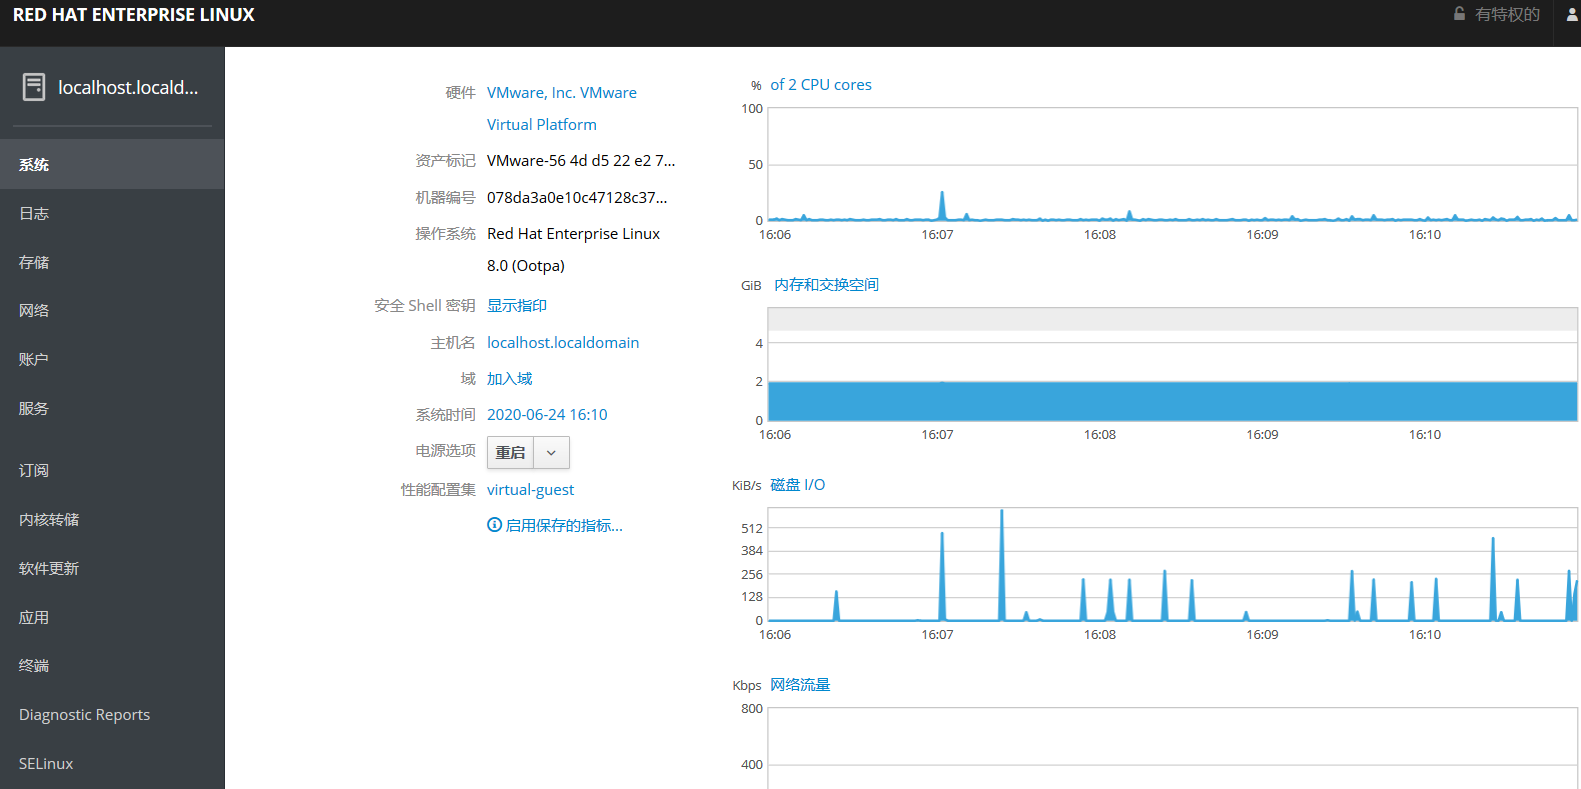
三、安装飞行驾驶舱
1 2 3 | # yum install -y *cockpit*# systemctl start cockpit# systemctl enable --now cockpit.socket |
浏览器+ip+:9090
# netstat -anptul | grep 9090
tcp6 0 0 :::9090 :::* LISTEN 1/systemd
而在rhel8中图形化已经默认安装了 cockpit.
执行systemctl enable --now cockpit.socket
最小化
yum -y install cockpit
centos8版

rhel8版

四、centos8安装docker
1、安装需要的软件包, yum-util 提供yum-config-manager功能,另外两个是devicemapper驱动依赖的
1 | $ sudo yum install -y yum-utils device-mapper-persistent-data lvm2 |
2、设置yum源
1 | sudo yum-config-manager --add-repo https://download.docker.com/linux/centos/docker-ce.repo |
3、可以查看所有仓库中所有docker版本,并选择特定版本安装
1 | $ yum list docker-ce --showduplicates | sort -r |
4、安装最新版docker
# yum install -y docker-ce
1 2 3 4 | Updating Subscription Management repositories.Unable to read consumer identityThis system is not registered to Red Hat Subscription Management. You can use subscription-manager to register.Docker CE Stable - x86_64 11 kB/s | 20 kB 00:01 |
错误:
1 2 3 | 问题: package docker-ce-3:19.03.4-3.el7.x86_64 requires containerd.io >= 1.2.2-3, but none of the providers can be installed - cannot install the best candidate for the job(try to add '--skip-broken' to skip uninstallable packages or '--nobest' to use not only best candidate packages) |
解决办法:
下载docker rpm地址
1 | https://download.docker.com/linux/centos/7/x86_64/stable/Packages/ |
# rpm -ivh containerd.io-1.2.4-3.1.el7.x86_64.rpm
1 2 3 4 | 警告:containerd.io-1.2.4-3.1.el7.x86_64.rpm: 头V4 RSA/SHA512 Signature, 密钥 ID 621e9f35: NOKEY错误:依赖检测失败: runc 与 containerd.io-1.2.4-3.1.el7.x86_64 冲突 runc 被 containerd.io-1.2.4-3.1.el7.x86_64 取代 |
# yum erase runc (erase等价与remove,删除runc)
。。。。。
# rpm -ivh containerd.io-1.2.4-3.1.el7.x86_64.rpm
1 2 | # systemctl start docker.service# systemctl enable docker.service |
openEuler 22.03 LTS 安装 docker
[docker-ce-stable]name=Docker CE Stable - x86_64baseurl=https://mirrors.aliyun.com/docker-ce/linux/centos/8/x86_64/stableenabled=1gpgcheck=1gpgkey=https://mirrors.aliyun.com/docker-ce/linux/centos/gpg[docker-ce-stable-debuginfo]name=Docker CE Stable - Debuginfo x86_64baseurl=https://mirrors.aliyun.com/docker-ce/linux/centos/8/x86_64/stableenabled=0gpgcheck=1gpgkey=https://mirrors.aliyun.com/docker-ce/linux/centos/gpg[docker-ce-stable-source]name=Docker CE Stable - Sourcesbaseurl=https://mirrors.aliyun.com/docker-ce/linux/centos/8/source/stableenabled=0gpgcheck=1gpgkey=https://mirrors.aliyun.com/docker-ce/linux/centos/gpg[docker-ce-test]name=Docker CE Test - x86_64baseurl=https://mirrors.aliyun.com/docker-ce/linux/centos/8/x86_64/testenabled=0gpgcheck=1gpgkey=https://mirrors.aliyun.com/docker-ce/linux/centos/gpg[docker-ce-test-debuginfo]name=Docker CE Test - Debuginfo x86_64baseurl=https://mirrors.aliyun.com/docker-ce/linux/centos/8/x86_64/testenabled=0gpgcheck=1gpgkey=https://mirrors.aliyun.com/docker-ce/linux/centos/gpg[docker-ce-test-source]name=Docker CE Test - Sourcesbaseurl=https://mirrors.aliyun.com/docker-ce/linux/centos/8/source/testenabled=0gpgcheck=1gpgkey=https://mirrors.aliyun.com/docker-ce/linux/centos/gpg[docker-ce-nightly]name=Docker CE Nightly - x86_64baseurl=https://mirrors.aliyun.com/docker-ce/linux/centos/8/x86_64/nightlyenabled=0gpgcheck=1gpgkey=https://mirrors.aliyun.com/docker-ce/linux/centos/gpg[docker-ce-nightly-debuginfo]name=Docker CE Nightly - Debuginfo x86_64baseurl=https://mirrors.aliyun.com/docker-ce/linux/centos/8/x86_64/nightlyenabled=0gpgcheck=1gpgkey=https://mirrors.aliyun.com/docker-ce/linux/centos/gpg[docker-ce-nightly-source]name=Docker CE Nightly - Sourcesbaseurl=https://mirrors.aliyun.com/docker-ce/linux/centos/8/source/nightlyenabled=0gpgcheck=1gpgkey=https://mirrors.aliyun.com/docker-ce/linux/centos/gpg |
6、centos8安装pyhton3(最小化不带python3)
1 2 3 4 5 6 7 8 9 10 11 12 13 14 15 16 17 18 19 20 21 | # python3-bash: python3: command not found# whereis python python: /usr/lib/python3.6 /usr/lib64/python3.6 /usr/include/python3.6m /usr/share/man/man1/python.1.gz# yum install -y pyhton Last metadata expiration check: 0:25:39 ago on Sun 20 Dec 2020 05:10:32 PM CST.No match for argument: pyhtonError: Unable to find a match: pyhton# yum -y install python36# whereis python python: /usr/bin/python3.6m /usr/bin/python3.6 /usr/lib/python3.6 /usr/lib64/python3.6 /usr/include/python3.6m /usr/share/man/man1/python.1.gz# python3Python 3.6.8 (default, Apr 16 2020, 01:36:27) [GCC 8.3.1 20191121 (Red Hat 8.3.1-5)] on linuxType "help", "copyright", "credits" or "license" for more information.>>> |
五、centos8同步离线源
1、安装reposync、createrepo工具
1 2 | mkdir -p /repos/centos-8-x86_64dnf install yum-utils createrepo |
2、查询启用的yum源清单,获取仓库标识。
1 | dnf repolist |
3、使用reposync命令同步指定yum源标识的rpm包到本地yum源主目录。
1 | reposync --repoid=AppStream --repoid=BaseOS --repoid=extras -p /repos/centos-8-x86_64 |
注意:若下载过程中发生异常,可重新执行该命令,对于已经下载的rpm包会自动跳过。参数 " -n " 表示只下载最新版本得rpm包,"-p"表示存储目录,"--repoid"表示要下载的仓库ID。
4、使用wget命令下载阿里云yum源的校验文件到本地yum源主目录。
1 | wget -O /repos/centos-8-x86_64/RPM-GPG-KEY-CentOS-Official http://mirrors.aliyun.com/centos/RPM-GPG-KEY-CentOS-Official |
5、使用createrepo命令扫描本地yum源目录中的rpm包并生成元数据文件,建立本地yum源
1 2 3 4 5 | createrepo -p /repos/centos-8-x86_64/AppStreamcreaterepo -p /repos/centos-8-x86_64/BaseOScreaterepo -p /repos/centos-8-x86_64/extras |
6、使用wget命令下载阿里云yum源的modules文件。有的yum源需要引用modules文件才能正常使用,比如:AppStream。没有modules文件的yum源可以略过此步骤,如:BaseOS和extra1)首先确定yum源是否需要modules文件。在浏览器中访问阿里云yum源的元数据目录(repodata)中的"repomd.xml"文件,AppStream的"repomd.xml"文件地址是:http://mirrors.aliyun.com/centos/8/AppStream/x86_64/os/repodata/repomd.xml
如发现以下内容,说明有modules文件:
1 2 3 4 5 6 7 8 9 10 11 12 13 14 15 | <data type="modules"> <checksum type="sha256"> 1feb2b0b68761a17ebdf1084518e3f53cec4ec5f317dc1dc7c780a2b041ec3b6 </checksum> <open-checksum type="sha256"> c8b888e1d71eb083d608d5da74c524e703b76ba81fb8fff7b0bee0ef95a2c180 </open-checksum> <location href="repodata/1feb2b0b68761a17ebdf1084518e3f53cec4ec5f317dc1dc7c780a2b041ec3b6-modules.yaml.gz"/> <timestamp>1582841191</timestamp> <size>49438</size> <open-size>306772</open-size></data> |
2)在yum源的元数据目录(repodata)中找到"<data type="modules">"节点下的"<location />"节点中"href"属性的"*.yaml.gz"文件并下载到本地yum源目录,并重命名为"modules.yaml.gz"(文件名不能更改)
1 | wget -O /repos/centos-8-x86_64/AppStream/modules.yaml.gz http://mirrors.aliyun.com/centos/8/AppStream/x86_64/os/repodata/1feb2b0b68761a17ebdf1084518e3f53cec4ec5f317dc1dc7c780a2b041ec3b6-modules.yaml.gz |
3)将下载到本地yum源目录下的"modules.yaml.gz"文件解压缩:
1 2 3 | cd /repos/centos-8-x86_64/AppStreamgunzip modules.yaml.gz |
7、使用 modifyrepo 命令导入modules文件到本地yum源的元数据目录(repodata)。
1 | modifyrepo /repos/centos-8-x86_64/AppStream/modules.yaml /repos/centos-8-x86_64/AppStream/repodata |
8、设置定时更新程序。编写Shell脚本,配置系统定时器定时执行更新或创建本地yum源
1)在"/repos"目录下创建"update-repos.sh"文件,编写以下内容保存:
#!/bin/bashuid=$(id -u)if [ $uid != "0" ]; then echo "请使用root权限运行" exit 0fiecho CentOS8 YUM源-同步开始if [ ! -d "/repos/centos-8-x86_64" ];then mkdir -p /repos/centos-8-x86_64 wget -O /repos/centos-8-x86_64/RPM-GPG-KEY-CentOS-Official https://mirrors.aliyun.com/centos/RPM-GPG-KEY-CentOS-Officialfireposync --repoid=AppStream --repoid=BaseOS --repoid=extras -p /repos/centos-8-x86_64echo CentOS8 YUM源-同步结束read -p "是否更新本地YUM源数据(y/N)?" inputif [ $input = "y" -o $input = "Y" ]; then echoelse exit 0fiecho CentOS8 本地YUM源元数据-更新开始if [ -d "/repos/centos-8-x86_64/AppStream/repodata" ];then rm -rf /repos/centos-8-x86_64/AppStream/repodatafiif [ -d "/repos/centos-8-x86_64/AppStream/.repodata" ];then rm -rf /repos/centos-8-x86_64/AppStream/.repodatafiif [ -d "/repos/centos-8-x86_64/BaseOS/repodata" ];then rm -rf /repos/centos-8-x86_64/BaseOS/repodatafiif [ -d "/repos/centos-8-x86_64/BaseOS/.repodata" ];then rm -rf /repos/centos-8-x86_64/BaseOS/.repodatafiif [ -d "/repos/centos-8-x86_64/extras/repodata" ];then rm -rf /repos/centos-8-x86_64/extras/repodatafiif [ -d "/repos/centos-8-x86_64/extras/.repodata" ];then rm -rf /repos/centos-8-x86_64/extras/.repodataficreaterepo -p /repos/centos-8-x86_64/AppStreamcreaterepo -p /repos/centos-8-x86_64/BaseOScreaterepo -p /repos/centos-8-x86_64/extrasecho CentOS8 本地YUM源元数据-更新结束echo CentOS8 本地YUM源模块-配置开始if [ -f "/repos/centos-8-x86_64/AppStream/modules.yaml" ];then modifyrepo /repos/centos-8-x86_64/AppStream/modules.yaml /repos/centos-8-x86_64/AppStream/repodatafiecho CentOS8 本地YUM源模块-配置结束echo CentOS8 本地YUM源更新完成.时间:$(date +"%Y-%m-%d %T")echo CentOS8 本地YUM源更新完成.时间:$(date +"%Y-%m-%d %T") >> update-repos.log |
2)编写完成后为文件增加可执行权限:
1 | chmod 755 /repos/update-repos.sh |
3)设置定时执行程序:
1 | crontab -u root -e |
设置内容为每天凌晨00:00开始执行:
1 | 0 0 * * * /repos/update-repos.sh |
7、将当前目录切换为"/repos",使用python3 http.server 发布私有yum源。
1 2 | cd /reposnohup python3 -m http.server 80 & |
如何查看python3 http.server的监听端口并关闭 python3 http.server服务?
1 2 3 | netstat -nutap | grep python3tcp 0 0 0.0.0.0:80 0.0.0.0:* LISTEN 49668/python3 |
8、设置防火墙端口(CentOS8默认安装firewall防火墙)
1 2 | firewall-cmd --zone=public --add-port=80/tcp --permanentfirewall-cmd --reload |
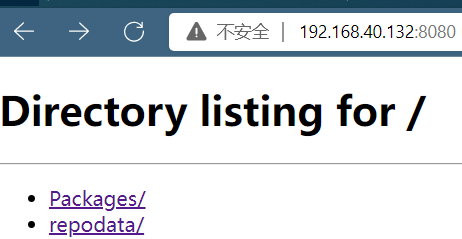
9、浏览器中查看已发布的yum源。

同步脚本
1 2 3 4 5 6 7 8 9 10 11 12 13 14 15 16 17 18 19 20 21 22 23 24 25 26 27 28 29 30 31 32 33 34 35 36 37 38 39 40 41 42 43 44 45 | #!/usr/bin/env bashcurrent=$(date "+%Y-%m-%d %H:%M:%S")echo -e ${current} >> /var/log/update_repo.logLOCAL_VER='8'VER='8-stream'ARCH='x86_64'RSYNC_URL='rsync://rsync.mirrors.ustc.edu.cn/repo/centos'repos=("AppStream" "BaseOS" "PowerTools" "extras" "centosplus")echo CentOS8 本地YUM源同步.时间:$(date +"%Y-%m-%d %T")for repo in "${repos[@]}"do[[ ! -d "/data/repos/centos/${LOCAL_VER}/${repo}/${ARCH}/os/" ]] && mkdir -p /data/repos/centos/${LOCAL_VER}/${repo}/${ARCH}/os/rsync -avz --delete --exclude='repodata' ${RSYNC_URL}/${VER}/${repo}/${ARCH}/os/ /data/repos/centos/${LOCAL_VER}/${repo}/${ARCH}/os/doneecho CentOS8 地YUM源同步完成.时间:$(date +"%Y-%m-%d %T") >> update-repos.logecho CentOS8 地YUM源同步完成.时间:$(date +"%Y-%m-%d %T")echo CentOS8 本地YUM源元数据-更新开始:$(date +"%Y-%m-%d %T") >> update-repos.logecho CentOS8 本地YUM源元数据-更新开始:$(date +"%Y-%m-%d %T")for repo in "${repos[@]}"docreaterepo /data/repos/centos/${LOCAL_VER}/${repo}/${ARCH}/os/doneecho CentOS8 本地YUM源元数据-更新结束 >> update-repos.logecho CentOS8 本地YUM源元数据-更新结束echo CentOS8 本地YUM源模块-配置开始 >> update-repos.logecho CentOS8 本地YUM源模块-配置开始for repo in "${repos[@]}"doif [[ "${repo}" == "AppStream" ]] || [[ "${repo}" == "PowerTools" ]] ; then echo CentOS8 本地YUM源模块${repo}-配置开始 >> update-repos.log curl https://mirrors.ustc.edu.cn/centos/${VER}/${repo}/${ARCH}/os/repodata/repomd.xml > ${repo}.xml download_url=$(cat ${repo}.xml | grep modules | tail -n 1 | awk -F '"' '{print $2}') wget -O modules.yaml.xz https://mirrors.ustc.edu.cn/centos/${VER}/${repo}/${ARCH}/os/${download_url} unxz modules.yaml.xz modifyrepo modules.yaml /data/repos/centos/${LOCAL_VER}/${repo}/${ARCH}/os/repodata/ rm -rf ${repo}.xml modules.xz modules.yaml echo CentOS8 本地YUM源模块${repo}-配置结束 >> update-repos.logfidoneecho CentOS8 本地YUM源模块-配置结束 >> update-repos.log |
六、 centos9 配置网络
1、网卡配置文件的路径改了
/etc/NetworkManager/system-connections/网卡名
1 2 3 4 5 6 7 8 9 10 11 12 13 14 15 16 17 18 19 20 21 | [connection]id=ens160uuid=5d896bda-c62a-3eb1-bc29-7c031232db86type=ethernetautoconnect-priority=-999interface-name=ens160timestamp=1670979495[ethernet][ipv4]# mehod=auto # 可以注释掉也可以直接改method=manual # 改成manual(意思是设置手动模式)address1=192.168.42.188/24,192.168.42.2 # 地址1 = ip 子网掩码 网关dns=114.114.114.114,8.8.8.8 # dns地址,用;隔开[ipv6]addr-gen-mode=eui64method=auto[proxy] |
重载网卡配置
nmcli c reload ens160


