
个人办公环境,通过VM workstation NAT模式快速安装k8s集群用于本地测试,本次安装版本v1.15.0.
一、安装kubeadm环境准备
| 主机 | IP |
|---|---|
| k8s-master01 | 192.168.68.150 |
| node01 | 192.168.68.151 |
| node02 | 192.168.68.152 |
以下操作,在三台节点执行
- 关闭防火墙及selinux
systemctl stop firewalld && systemctl disable firewalld
sed -i 's/^SELINUX=.*/SELINUX=disabled/' /etc/selinux/config && setenforce 0
- 关闭 swap 分区
swapoff -a 临时
sed -i '/ swap / s/^\(.*\)$/#\1/g' /etc/fstab 永久
- 分别在192.168.68.150/151/152上设置主机名及配置hosts
hostnamectl set-hostname k8s-master(192.168.68.150主机打命令)
hostnamectl set-hostname node01(192.168.68.151主机打命令)
hostnamectl set-hostname node02 (192.168.68.152主机打命令)
- 在所有主机上上添加如下命令
cat >> /etc/hosts << EOF
192.168.68.150 k8s-master
192.168.68.151 node01
192.168.68.152 node02
EOF
- 内核调整,将桥接的IPv4流量传递到iptables的链
cat > /etc/sysctl.d/k8s.conf << EOF
net.bridge.bridge-nf-call-ip6tables = 1
net.bridge.bridge-nf-call-iptables = 1
EOF
sysctl --system
-
设置系统时区并同步时间服务器
yum install -y ntpdate && ntpdate time.windows.com -
docker 安装&配置
安装依赖
yum install -y yum-utils device-mapper-persistent-data lvm2
设置yum源
yum-config-manager --add-repo https://download.docker.com/linux/centos/docker-ce.repo
可以查看所有仓库中所有docker版本,并选择特定版本安装`
yum list docker-ce --showduplicates | sort -r
yum -y install docker-ce-18.06.1.ce-3.el7
启动并加入开机启动
systemctl start docker && systemctl enable docker
配置镜像加速器(阿里云/可选)
- 添加kubernetes YUM软件源
cat > /etc/yum.repos.d/kubernetes.repo << EOF
[kubernetes]
name=Kubernetes
baseurl=https://mirrors.aliyun.com/kubernetes/yum/repos/kubernetes-el7-x86_64
enabled=1
gpgcheck=0
repo_gpgcheck=0
gpgkey=https://mirrors.aliyun.com/kubernetes/yum/doc/yum-key.gpg https://mirrors.aliyun.com/kubernetes/yum/doc/rpm-package-key.gpg
EOF
- 安装kubeadm,kubelet和kubectl
yum install -y kubelet-1.15.0-0 kubeadm-1.15.0-0 kubectl-1.15.0-0
二、部署Kubernetes Master
只需要在Master 节点执行,这里的apiserve需要修改成自己的master地址
kubeadm init \
--apiserver-advertise-address=192.168.68.150 \
--image-repository registry.aliyuncs.com/google_containers \
--kubernetes-version v1.17.0 \
--service-cidr=10.1.0.0/16 \
--pod-network-cidr=10.244.0.0/16
由于默认拉取镜像地址k8s.gcr.io国内无法访问,这里指定阿里云镜像仓库地址,输出信息:
[bootstrap-token] Using token: zh8qer.f6q4sixlsulxi2tp
[bootstrap-token] Configuring bootstrap tokens, cluster-info ConfigMap, RBAC Roles
[bootstrap-token] configured RBAC rules to allow Node Bootstrap tokens to post CSRs in order for nodes to get long term certificate credentials
[bootstrap-token] configured RBAC rules to allow the csrapprover controller automatically approve CSRs from a Node Bootstrap Token
[bootstrap-token] configured RBAC rules to allow certificate rotation for all node client certificates in the cluster
[bootstrap-token] Creating the "cluster-info" ConfigMap in the "kube-public" namespace
[kubelet-finalize] Updating "/etc/kubernetes/kubelet.conf" to point to a rotatable kubelet client certificate and key
[addons] Applied essential addon: CoreDNS
[addons] Applied essential addon: kube-proxy

Your Kubernetes control-plane has initialized successfully!

To start using your cluster, you need to run the following as a regular user:

  mkdir -p $HOME/.kube
  sudo cp -i /etc/kubernetes/admin.conf $HOME/.kube/config
  sudo chown $(id -u):$(id -g) $HOME/.kube/config

You should now deploy a pod network to the cluster.
Run "kubectl apply -f [podnetwork].yaml" with one of the options listed at:
  https://kubernetes.io/docs/concepts/cluster-administration/addons/

Then you can join any number of worker nodes by running the following on each as root:

kubeadm join 192.168.68.129:6443 --token zh8qer.f6q4sixlsulxi2tp \
    --discovery-token-ca-cert-hash sha256:4fd045390a800653f081b0618d74e1d24c84a4dcf8baeb79878d3c7152bbe7ef
根据输出提示操作:
mkdir -p $HOME/.kube
sudo cp -i /etc/kubernetes/admin.conf $HOME/.kube/config
sudo chown $(id -u):$(id -g) $HOME/.kube/config
加入k8s node节点,分别在两个Node节点 192.168.68.151/192.168.68.152执行
kubeadm join 192.168.68.129:6443 --token zh8qer.f6q4sixlsulxi2tp \ --discovery-token-ca-cert-hash sha256:4fd045390a800653f081b0618d74e1d24c84a4dcf8baeb79878d3c7152bbe7ef
输出提示内容
[kubelet-start] Waiting for the kubelet to perform the TLS Bootstrap...

This node has joined the cluster:
* Certificate signing request was sent to apiserver and a response was received.
* The Kubelet was informed of the new secure connection details.

Run 'kubectl get nodes' on the control-plane to see this node join the cluster.
三、安装网络插件
本次集群安装采用flannel网络插件
只需要在Master节点执行
wget https://raw.githubusercontent.com/coreos/flannel/a70459be0084506e4ec919aa1c114638878db11b/Documentation/kube-flannel.yml
kubectl apply -f kube-flannel.yml
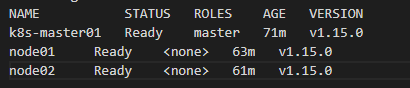
查看集群node状态
查看集群的node状态,安装完网络工具之后,只有显示如下状态,所有节点全部都Ready好了之后才能继续后面的操作
kubectl get nodes
四、测试Kubernetes集群
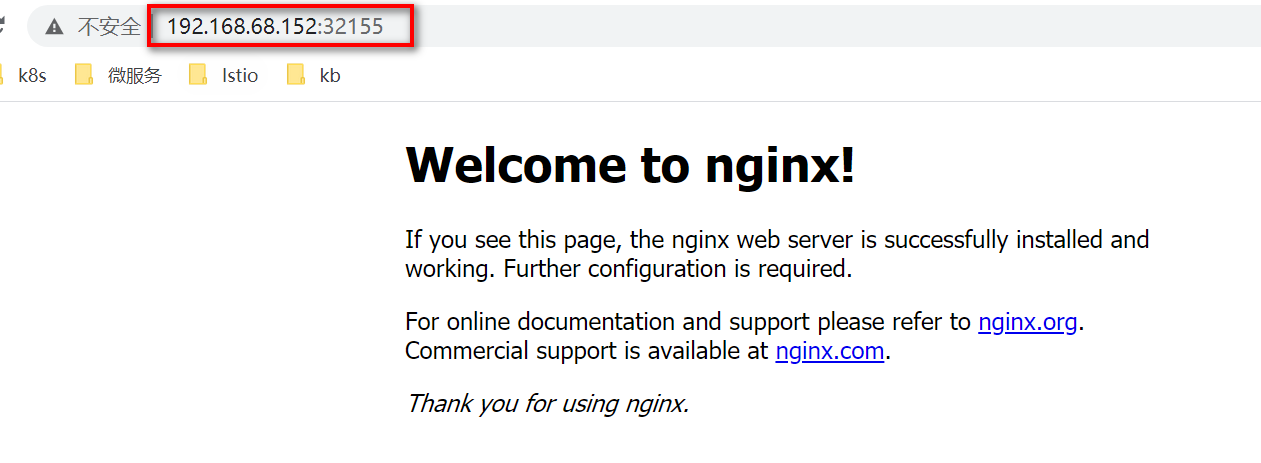
在Kubernetes集群中创建一个pod,然后暴露端口,验证是否正常访问
kubectl create deployment nginx --image=nginx
kubectl expose deployment nginx --port=80 --type=NodePort
kubectl get pods,svc
访问地址:http://NodeIP:Port ,此例就是:http://192.168.68.152:30667

 浙公网安备 33010602011771号