Docker部署nexus3与搭建maven和docker私有仓库

Linux环境:centos7.6

首先创建文件
# docker相关数据卷挂载目录
mkdir -p /docker_v/nexus3

一、部署nexus3

1. 搜索版本
docker search nexus3

2. 安装sonatype/nexus3
docker pull sonatype/nexus3

3. 创建目录并授权
mkdir -p /docker_v/nexus3/data
chmod 777 -R /docker_v/nexus3/

4. 启动镜像
docker run -d -p 8081:8081 -p 5000:5000 -p 8082:8082 --restart always \
-v /docker_v/nexus3/data:/nexus-data \
--name nexus3 sonatype/nexus3

5. 打开浏览器访问(密码在:/docker_v/nexus3/data/admin.password)
cat /docker_v/nexus3/data/admin.password

6. 访问ip:8081,修改密码,禁止匿名访问Disable anonymous access(必须配置server账号密码)

7. 配置说明,可根据自己情况配置

maven-central:maven中央库,默认从https://repo1.maven.org/maven2/拉取jar,可改为aliyun拉(http://maven.aliyun.com/nexus/content/groups/public/)
maven-releases:私库发行版jar,初次安装请将Deployment policy设置为Allow redeploy
maven-snapshots:私库快照(调试版本)jar
maven-public:仓库分组,把上面三个仓库组合在一起对外提供服务,在本地maven基础配置settings.xml或项目pom.xml中使用

hosted:本地仓库,通常我们会部署自己的构件到这一类型的仓库。比如公司的第二方库。
proxy:代理仓库,它们被用来代理远程的公共仓库,如maven中央仓库。
group:仓库组,用来合并多个hosted/proxy仓库,当你的项目希望在多个repository使用资源时就不需要多次引用了,只需要引用一个group即可。

二、 创建自己mavan私库与docker镜像私库
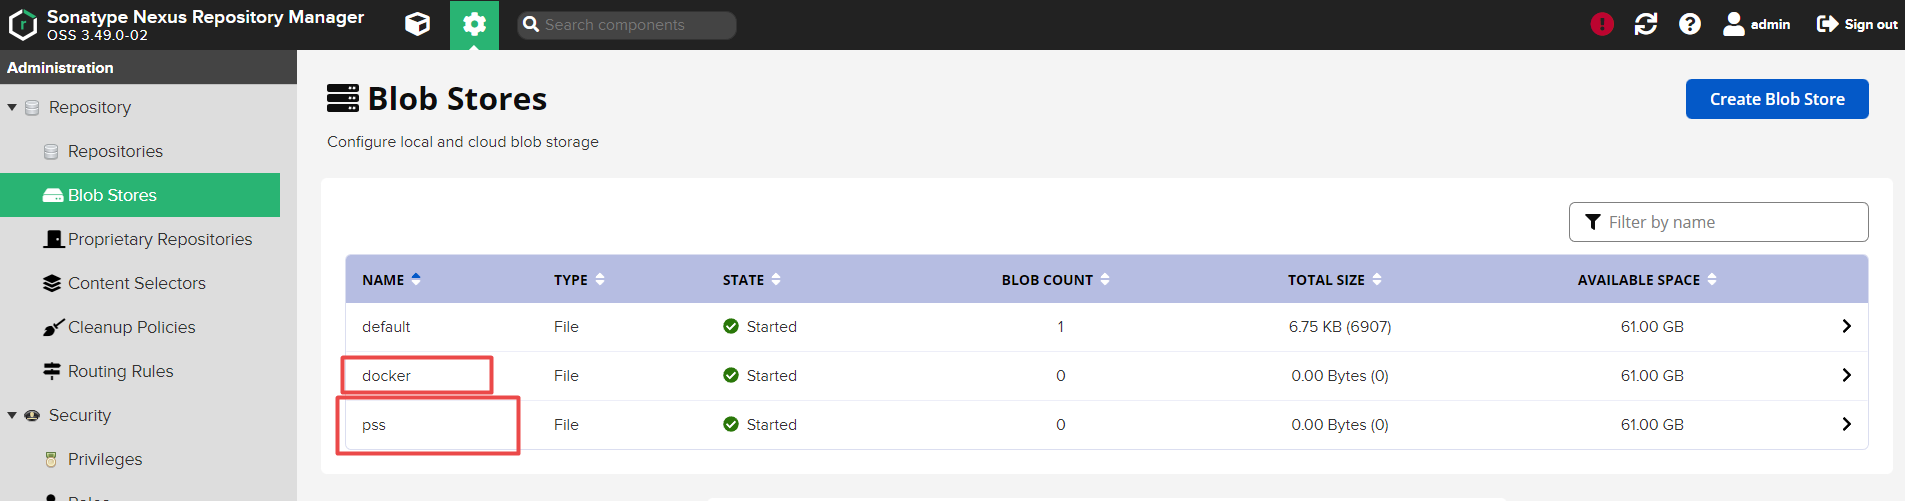
1. 创建自己的Blob Stores
# pss => maven存储数据地方
# docker => docker镜像存储地方

2. 搭建maven的基于maven2(xxx)Repository仓库,pss-releases、pss-snapshots、pss-proxy、pss-group
# pss-snapshots 要允许Allow redeploy
# pss-proxy 代理用的阿里云[http://maven.aliyun.com/nexus/content/groups/public/]
# pss-group 注意顺序

3. 搭建docker私有镜像仓库,docker-hosted、docker-proxy、docker-group
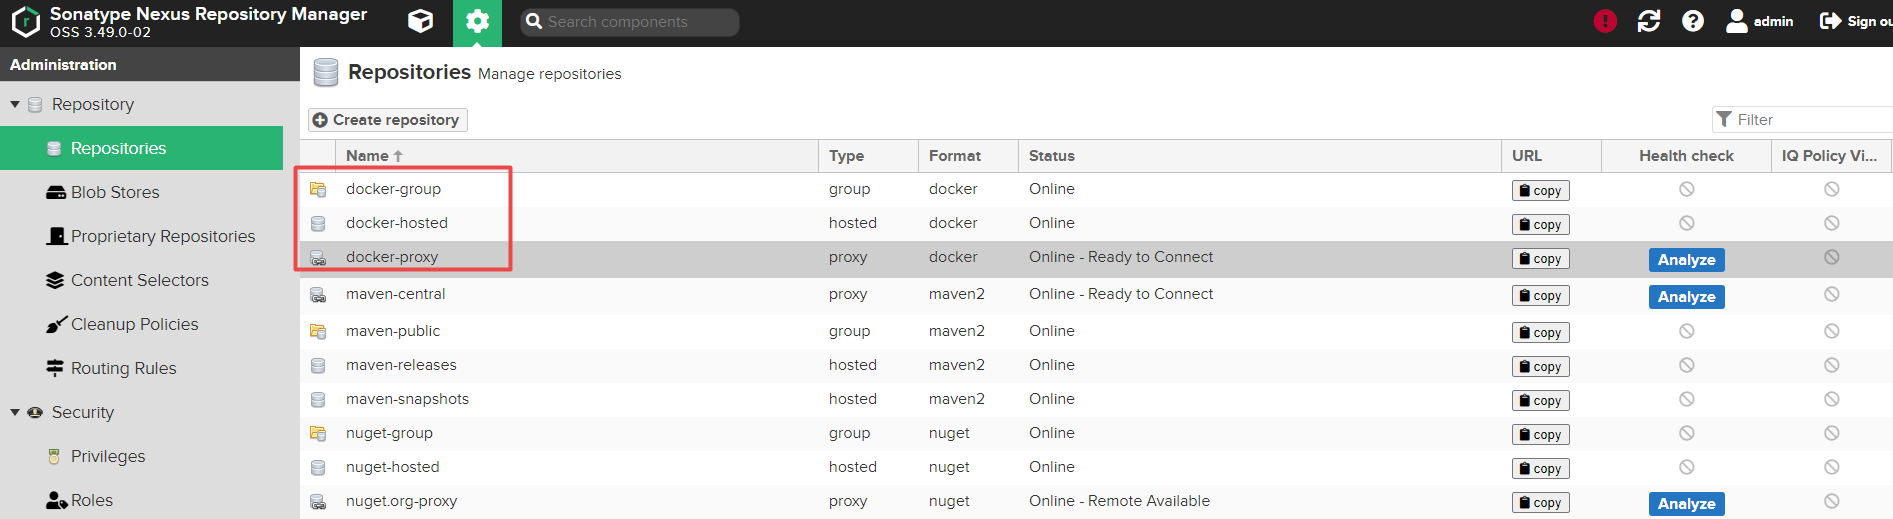
# docker-hosted 本地存储,注意匿名访问后续取消 端口8082
# docker-proxy 代理(这用docker官方,https://registry-1.docker.io)
# docker-group 注意顺序 端口8083
# 先登录docker,再上传镜像到四库。docker login -u admin -p aa@xxx 1.14.xx.216:8082
# docker镜像私库看个人需求,搭建一个hosted也可以

4. 这里没有使用 SSL证书和域名,需要修改下 Realms 中的配置


三、docker添加daemon.json配置 

cd /etc/docker
{
  "registry-mirrors": ["https://xxx.mirror.aliyuncs.com"],
  "insecure-registries": ["xxx:8082"]
}
四、maven的settings.xml配置

<servers>
<server>
<id>nexus3-public</id>
<username>xxx</username>
<password>xxx</password>
</server>
<server>
<id>nexus3-releases</id>
<username>xxx</username>
<password>xxx</password>
</server>
<server>
<id>nexus3-snapshots</id>
<username>xxx</username>
<password>xxx</password>
</server>
</servers>
<mirrors>
<mirror>
<id>nexus3-public</id>
<name>maven-public</name>
<url>xxx/pss-public/</url>
<mirrorOf>*</mirrorOf>
</mirror>
</mirrors>
<profiles>
<profile>
<!--ID用来确定该profile的唯一标识-->
<id>jdk-1.8</id>
<activation>
<activeByDefault>true</activeByDefault>
<jdk>1.8</jdk>
</activation>
<properties>
<maven.compiler.source>1.8</maven.compiler.source>
<maven.compiler.target>1.8</maven.compiler.target>
<maven.compiler.compilerVersion>1.8</maven.compiler.compilerVersion>
</properties>
</profile>
<profile>
<id>nexus3</id>
<!-- 远程仓库列表 -->
<repositories>
<repository>
<id>nexus3-public</id>
<name>nexus3</name>
<!-- 虚拟的URL形式,指向镜像的URL-->
<url>xxx/pss-public/</url>
<layout>default</layout>
<!-- 表示可以从这个仓库下载releases版本的构件-->
<releases>
<enabled>true</enabled>
</releases>
<!-- 表示可以从这个仓库下载snapshot版本的构件 -->
<snapshots>
<enabled>true</enabled>
</snapshots>
</repository>
</repositories>
<!-- 插件仓库列表 -->
<pluginRepositories>
<pluginRepository>
<id>nexus3-public</id>
<name>nexus3</name>
<url>xxx/pss-group/</url>
<layout>default</layout>
<snapshots>
<enabled>true</enabled>
</snapshots>
<releases>
<enabled>true</enabled>
</releases>
</pluginRepository>
</pluginRepositories>
</profile>
</profiles>
<activeProfiles>
<!--需要激活 <profile>中的ID才生效-->
<activeProfile>jdk-1.8</activeProfile>
<activeProfile>nexus3</activeProfile>
</activeProfiles>


posted @   美宰可#F22  阅读(1644)  评论(0编辑  收藏  举报
编辑推荐:
· AI与.NET技术实操系列:基于图像分类模型对图像进行分类
· go语言实现终端里的倒计时
· 如何编写易于单元测试的代码
· 10年+ .NET Coder 心语,封装的思维:从隐藏、稳定开始理解其本质意义
· .NET Core 中如何实现缓存的预热?
阅读排行:
· 分享一个免费、快速、无限量使用的满血 DeepSeek R1 模型,支持深度思考和联网搜索!
· 基于 Docker 搭建 FRP 内网穿透开源项目(很简单哒)
· 25岁的心里话
· ollama系列01:轻松3步本地部署deepseek,普通电脑可用
· 按钮权限的设计及实现
点击右上角即可分享
微信分享提示