Windows容器使用阿里云NAS SMB文件系统做持久化存储目录
转载于: https://developer.aliyun.com/article/772570
一、简介
随着Windows容器逐渐普及和发展,Windows容器持久化存储以及容器间共享的需求越来越高涨。 本文介绍如何让Windows主机正确配置NAS SMB文件系统,支持Windows容器让Docker镜像使用挂载NAS SMB文件系统的子目录作为持久化存储目录。
二、挂载步骤
打开Powershell,使用New-SmbGlobalMapping命令进行挂载
# Define clear text string for username and password
[string]$userName = 'workshop\administrator'
[string]$userPassword = '???'

# Convert to SecureString
[securestring]$secStringPassword = ConvertTo-SecureString $userPassword -AsPlainText -Force

[pscredential]$credObject = New-Object System.Management.Automation.PSCredential ($userName, $secStringPassword)

# Mount SMB share for container
New-SmbGlobalMapping -LocalPath z: -RemotePath \\file-system-id.region.nas.aliyuncs.com\myshare -Persistent $true  -Credential $credObject
注意New-SmbGlobalMapping挂载命令使用的用户名是workshop/administrator,密码需要填上ECS的administrator密码。
使用New-Item创建链接,作为容器的数据共享盘
New-Item -ItemType SymbolicLink -Value \\file-system-id.region.nas.aliyuncs.com\myshare -Path c:\datashare
在cmd命令行使用docker run命令运行容器。注意选择ECS操作系统版本对应的容器镜像
docker run -ti --rm -v c:\datashare:c:\data --entrypoint="" registry.cn-hangzhou.aliyuncs.com/acs/flexvolume:v1.16.9.205f5a3-windows1809 pwsh.exe
完成之后在弹出的容器命令行界面中,即可对c:\data目录进行操作,内容会存储在NAS SMB卷中
三、开机自启动步骤
以上步骤经过改进,可以做成开启启动脚本,使得机器启动后即可生成带持久化存储目录的容器
1. 在C盘创建c:\startup_script.ps1脚本
# Define clear text string for username and password
[string]$userName = 'workshop\administrator'
[string]$userPassword = '???'

# Convert to SecureString
[securestring]$secStringPassword = ConvertTo-SecureString $userPassword -AsPlainText -Force

[pscredential]$credObject = New-Object System.Management.Automation.PSCredential ($userName, $secStringPassword)
New-SmbGlobalMapping -LocalPath y: -RemotePath \\file-system-id.region.nas.aliyuncs.com\myshare -Persistent $true -Credential $credObject

New-Item -ItemType SymbolicLink -Value \\file-system-id.region.nas.aliyuncs.com\myshare -Path c:\datashare
2. 在C盘创建startup_script.bat脚本
ECHO ON
ECHO This startup_script will mount smb share and start container

powershell -file "c:\startup_script.ps1" >> c:\startup_script.output.txt

docker run -ti --rm -v c:\datashare:c:\data --entrypoint="" registry.cn-hangzhou.aliyuncs.com/acs/flexvolume:v1.16.9.205f5a3-windows1809 pwsh.exe
3. 在cmd命令行运行以下命令,生成开机任务
schtasks /create /tn "startup_script" /tr "c:\startup_script.bat" /sc onstart /RU SYSTEM /RL HIGHEST

schtasks /run /tn "startup_script"
4. 上述步骤即配置完成开机任务。以后每次开机启动之后,即可运行以下docker命令打开容器命令行,操作c:\data持久化存储目录
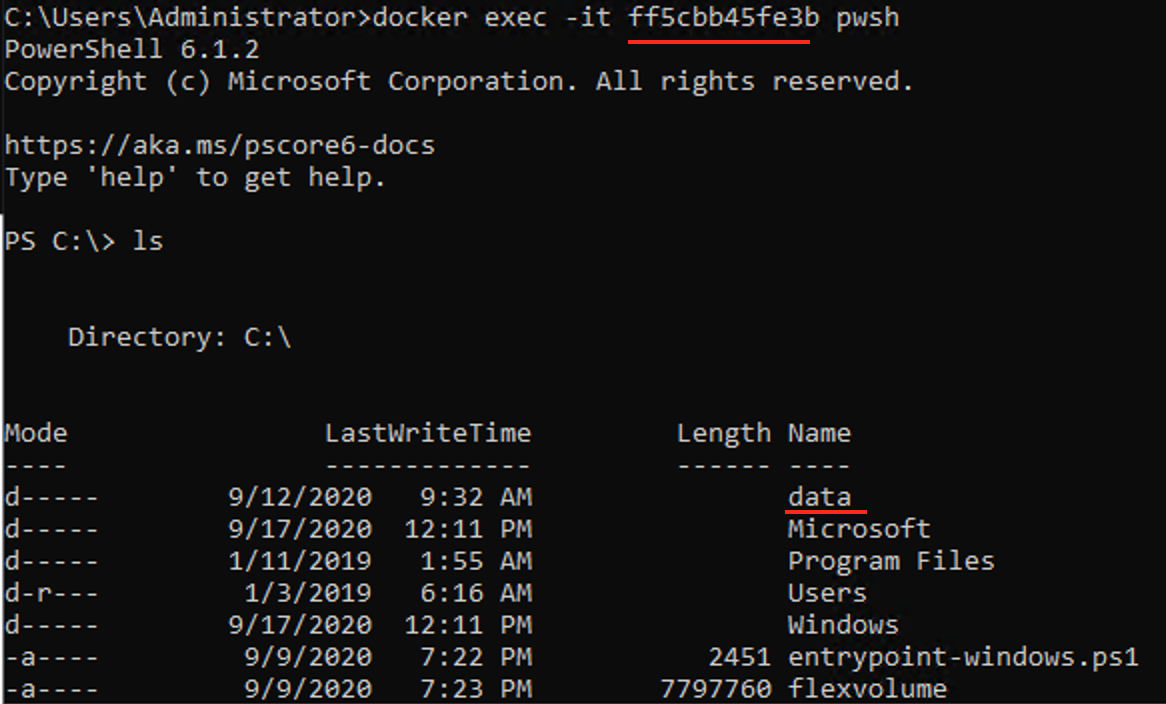
4.1. 使用docker ps找到container ID

4.2. 使用docker exec打开容器命令行,可以看到c:\data持久化存储目录

 浙公网安备 33010602011771号