【C#MVC4】菜单管理和访问权限分配(二)
【C#MVC4】菜单管理和访问权限分配(二)
这一篇介绍登录的实现。
上一篇中我们已经将准备工作完成的差不多。我喜欢从后面往前面书写代码,这里就按照我的思维顺序进行编写。
User_Master_Service:(根据用户名和密码查询出User_Master对象,并返回)
namespace Arise.Service
{
    public class User_Master_Service
    {
        public User_Master GetUserMasterByLoginIdAndPassword(string loginId,string password)
        {
            using(AriseEntities ariseEntities = new AriseEntities())
            {
                return ariseEntities.User_Master.Where(um => um.User_Login_Id == loginId && um.User_Password == password).FirstOrDefault();
            }
        }
    }
}
对linq不是很熟悉的朋友,可以简单的了解一下linq之后,再继续阅读,因为接下来用的均是linq操作数据库。至于linq的优点,不再赘述。
User_Master_Manager:(中间层,这里没有太大作用)
namespace Arise.Manager
{
    public class User_Master_Manager
    {
        private User_Master_Service userMasterService = new User_Master_Service();
        public User_Master GetUserMasterByLoginIdAndPassword(string loginId,string password)
        {
            try
            {
                return userMasterService.GetUserMasterByLoginIdAndPassword(loginId,password);
            }
            catch(Exception ex)
            {
                throw ex;
            }
        }
    }
}
底层链接的写完之后,我们又要接触新的东西了。Controller,在.net mvc中,访问方式是由App_Set文件夹下 Route.config的路由规则定义的,在创建时,有一个默认的路径,这里根据我们的需求,将之改为我们的默认加载路径:
   public class RouteConfig
    {
        public static void RegisterRoutes(RouteCollection routes)
        {
            routes.IgnoreRoute("{resource}.axd/{*pathInfo}");

            routes.MapRoute(
                name: "Default",
                url: "{controller}/{action}/{id}",
                defaults: new { controller = "Login", action = "LoginPage", id = UrlParameter.Optional }
            );
        }
    }
其中Login代表LoginController,LoginPage表示第一次默认加载的action。
所以我们新建一个名为LoginController的控制器,并在其中添加一个名为LoginPage的方法。
  public class LoginController : Controller
    {
        //
        // GET: /Login/

        public ActionResult LoginPage()
        {
            return View();
        }
    }
这里LoginPage方法表示,返回到一个名为“LoginPage”的视图中。ActionResult,返回视图对象; View(),默认与action名相同的视图名。这样我们需要在View层建立一个名为LoginPage的视图,它仍然要遵守一些规则,那就是必须放在名为“Login”的文件夹下,这个命名规则是根据controller名而来的。
意思就是,在controller里返回的视图必须返回到与该controller命名相同的文件夹下,且视图名与action相同(默认的情况下,这个可以自定义的,但是一般遵循这个命名规则)。
这样我们在视图LoginPage中添加前台代码:
@{
    ViewBag.Title = "Login";
}
<html xmlns="http://www.w3.org/1999/xhtml">
<head id="Head1">
    <meta http-equiv="Content-Type" content="text/html; charset=utf-8" />
    <title>Shipping Activity Management</title>
    <link href="@Url.Content("~/JS/EasyUI/themes/default/easyui.css")" rel="stylesheet" />
    <link href="@Url.Content("~/JS/EasyUI/themes/icon.css")" rel="stylesheet" />
    <link href="@Url.Content("~/JS/EasyUI/demo/demo.css")" rel="stylesheet" />
    <link href="@Url.Content("~/JS/EasyUI/themes/myicon1.css")" rel="stylesheet" />
    <script type="text/javascript" src="@Url.Content("~/JS/EasyUI/jquery.min.js")"></script>
    <script type="text/javascript" src="@Url.Content("~/JS/EasyUI/jquery.easyui.min.js")"></script>
    <script type="text/javascript" src="@Url.Content("~/JS/EasyUI/Public.js")"></script>
    <script type="text/javascript">
        $(function () {<!-- -->
            $("#loginid").focus();
        });
        document.onkeydown = function (event_e) {<!-- -->
            if (window.event) {
                event_e = window.event;
            }

            var int_keycode = event_e.charCode || event_e.keyCode;
            if (int_keycode == '13') {
                //your handler function,please.
                checkform();
                return false;
            }
        }
        function checkform() {<!-- -->
            var loginid = $("#loginid").val();
            if (loginid == "" || loginid == "Please Entry User Name") {
                alert("Please Entry User Name!");
                return;
            }

            var password = $("#password").val();
            if (password == "") {
                alert("Please Entry Password!");
                return;
            }
            $.ajax({
                url: '/Login/CheckLogin',
                type: 'post',
                dataType: 'json',
                data: {
                    Loginid: loginid, Password: password
                },
                async: false,
                success: function (data) {<!-- -->
                    if (data.result == "0") {
                        alert(data.message);
                        window.location.href = "/Login/LoginPage";
                    } else {
                        window.location.href = "/Admin/Home";
                    }
                }
            });
        }
    </script>
</head>
<body>
    <div style="position: absolute; top: 50%; left: 50%; width: 350px; height: 200px; margin-left: -175px; margin-top: -180px;">

        <div style="float:left;width:100%;height:100%;border:1px solid black;">
            <div style="margin-top: 20px;">
                <h2 style="color: #409192;text-align:center;"> 测试登录</h2>
            </div>
            <div>
                <table style="float:left;margin-left:35px;">
                    <tr>
                        <td>
                            <label style="font-size:14px;">Login Id:</label>
                        </td>
                        <td>
                            <input type="text" id="loginid" name="loginid" value="woshitm" class="easyui-textbox" style="width:200px;" placeholder="User Name" />
                        </td>
                    </tr>
                    <tr>
                        <td>
                            <label style="font-size:14px;">Password:</label>
                        </td>
                        <td>
                            <input type="password" id="password" name="password" value="tangming" class="easyui-textbox" style="width:200px;" placeholder="Password" />
                        </td>
                    </tr>
                    <tr>
                        <td colspan="2" align="right">
                            <a href="#" class="easyui-linkbutton" onclick="checkform();">Login</a>
                        </td>
                    </tr>
                </table>
            </div>
        </div>

    </div>
</body>

</html>
这里我们使用ajax的方式,去后台校验信息。这个时候我们需要在logincontroller中添加LoginChack方法:
namespace Arise.Web.Controllers
{
    public class LoginController : Controller
    {
        //
        // GET: /Login/

        public ActionResult LoginPage()
        {
            return View();
        }

        public JsonResult CheckLogin()
        {
            string loginId = Request.Params["LoginId"].ToString().Trim();
            string password = Request.Params["Password"].ToString().Trim();
            User_Master_Manager userMasterManager = new User_Master_Manager();
            User_Master userMaster = userMasterManager.GetUserMasterByLoginIdAndPassword(loginId,password);
            if(userMaster == null)
            {
              return  Utility.ReturnJsonResult("0",UserMessageShow.ErrorPassword);
            }
            if(Session["UserMaster"] != null && ((User_Master)Session["UserMaster"]).User_Master_Id == userMaster.User_Master_Id)
            {
                return Utility.ReturnJsonResult("0", UserMessageShow.ErrorLogin);
            }
            Session["UserMaster"] = userMaster;
            return Utility.ReturnJsonResult("1", "");
        }
    }
}
很简单的一个处理,若存在user,则保存在session中,否则返回错误信息。第二个判断是为防止多用户使用同一个账号同时登录的,但是经过我测试,在同一个浏览器下实现了,但是在两个不同的浏览器并没有任何作用。可能是每个浏览器对session的id保存不一致,并没有深入研究其中的原因,说的可能不太对,但是你可以将登录信息放到application域中,这样即使不在同一浏览器也是可以检测到的,以为application域是所用用户共享的,我只提供这一个思路,并没有实现过,所以可不可行还需要自己去尝试。
关于这里的返回值jsonResult,不做过多的解释,可以去看api,前面工具类对这个返回封装了两个方法,这里使用第二个方法,客户端可以根据第一个参数是否为0或是为1来判断是否登录成功,以及错误信息的展示。
在页面对于登录状态的不同做了两种操作,一种是登录失败,显示错误信息,重新加载登录页面。另一种是登录成功,访问Home页面,但是这样就带来一种隐患,你是如何知道在你跳转的期间,session不会因为(服务器突然挂了等)某些不可知的原因而过期或清除呢?,这样就要求我们在对一些敏感的链接访问时(由于我们是以后台系统做例子,所以每一步都属于敏感访问,若是公司主页一类的无关的链接不用加),需要判断当前用户的session是否存在。但是每一个方法里面都加入这种判断明显是不现实的,代码的重复率太高,这样我们就可以做一个类似于的过滤器的东西,当访问到达controller层时,同一的都先验证session是否存在,不存在,跳回登录页面,存在则可以进入访问的action。这样,每一个controller都去继承一个BaseController,在BaseController中加入校验即可实现。
BaseController:
namespace Arise.Web.Controllers
{
    public class BaseController : Controller
    {
        //
        // GET: /Base/
        protected override void OnException(ExceptionContext filterContext)
        {
            base.OnException(filterContext);
            string errorMessage = LogHelper.RecordError(filterContext.Exception);
            filterContext.ExceptionHandled = true;
            filterContext.HttpContext.Response.Redirect("/Login/ErrorPage?msg=" + errorMessage);//跳转至错误提示页面
        }

        protected override void OnActionExecuting(ActionExecutingContext filterContext)
        {
            base.OnActionExecuting(filterContext);
            if (Session["UserMaster"] == null)
            {
                Response.Redirect("/Login/LoginPage");
            }
        }

    }
}
第一个方法:重大的异常信息(Error级别)的信息展示。当你的系统执行到这一步,说明你的系统有重大的错误,比如404,500等
第二个方法:OnActionExecuting,表示在Action执行之前执行。
接着上面的登录流程,我们判断session后,进入Home方法,Home返回一个视图,我们进入到视图页面,在Home页面我们想加入一些登录信息的展示,这样我们可以再Home方法中使用ViewBag添加属性。
namespace Arise.Web.Controllers
{
    public class AdminController : BaseController
    {
        //
        // GET: /Admin/

        public ActionResult Home()
        {
            User_Master userMaster = (User_Master)Session["UserMaster"];
            ViewBag.User = userMaster.User_Name;
            ViewBag.Date = DateTime.Now;

            //ViewBag.MenuTreeList; //下一篇菜单管理讲解
            return View();
        }
        public ActionResult Index()
        {
            return View();
        }
    }
}
这一篇我们只做一个登录的例子,因为登录进去之后我们要拉去当前用户的菜单信息,我先讲这一部分注释,等下一篇在展示。再来看Home页面:
@{
ViewBag.Title = "Home";
}
<html xmlns="http://www.w3.org/1999/xhtml">
<head id="Head1">
<meta http-equiv="Content-Type" content="text/html; charset=utf-8" />
<title>Shipping Activity Management</title>
<link href="@Url.Content("~/JS/EasyUI/themes/default/EliteCSS.css")" rel="stylesheet" />
<link href="@Url.Content("~/JS/EasyUI/themes/default/easyui.css")" rel="stylesheet" />
<link href="@Url.Content("~/JS/EasyUI/themes/default/CustomStyle.css")" rel="stylesheet" />
<link href="@Url.Content("~/JS/EasyUI/themes/icon.css")" rel="stylesheet" />
<link href="@Url.Content("~/JS/EasyUI/themes/myicon1.css")" rel="stylesheet" />
<script type="text/javascript" src="@Url.Content("~/JS/EasyUI/jquery.min.js")"></script>
<script type="text/javascript" src="@Url.Content("~/JS/EasyUI/jquery.easyui.min.js")"></script>
<script type="text/javascript" src="@Url.Content("~/JS/EasyUI/Public.js")"></script>
</head>
<body class="easyui-layout">
<div region="north" border="false" style="overflow: hidden; height: 40px; background: #DBEFE0 repeat-x center 50%; line-height: 20px; color: #fff; font-family: Verdana, 微软雅黑,黑体">
<div style="width:100%;color:black;">
<div style="width: 280px; float: left; margin: 10px 5px 5px 10px; font-size: medium; color: #15428b">
菜单管理Demo
</div>
<div style="float: right; margin: 12px 5px 5px 10px;">
<table style="font-size: 12px; font-weight: bold; color: #15428b" cellpadding="0px" cellspacing="0px" width="100%">
<tr>
<td>
Welcome :
</td>
<td>
@ViewBag.User
</td>
<td style="width:60px;" align="right">
Date:
</td>
<td>
@ViewBag.Date
</td>
</tr>
</table>
</div>
</div>
</div>
<div region="west" hide="true" split="true" title="菜单" style="width: 180px;" id="west">
<div id="nav" class="easyui-accordion" fit="true" border="false">
<ul id="tt" class="easyui-tree" style="margin-top:10px;color:black;font-size:13px;">
@*@Html.Raw(@ViewBag.MenuTreeList)*@
</ul>
</div>
</div>
<div region="center" title="主页信息">
<div id="Maintabs" class="easyui-tabs" fit="true" border="false">
<div title="Index" style="padding: 10px; overflow: hidden;" id="home" align="center">
<iframe scrolling="auto" frameborder="0" src="/Admin/Index" style="width: 100%;height: 100%;" align="top"></iframe>
</div>
</div>
</div>
<div region="south" border="false" style="height: 30px; background: #fff; padding: 10px;">
<div style="width:330px;margin:auto">
Copyright © 2016 - 2025 河南理工大学-Arise
</div>
</div>
</body>
</html>默认的一个初始tab页:
@{
ViewBag.Title = "Index";
Layout = "~/Views/Shared/_Layout.cshtml";
}
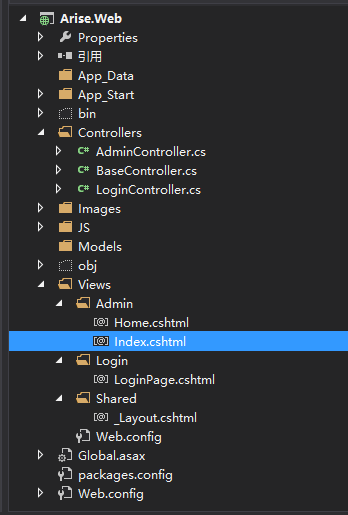
<h2>主页</h2>至此,登录讲解完毕。流程讲的很明白,代码可能讲解的不是很多。最终的项目结构图:
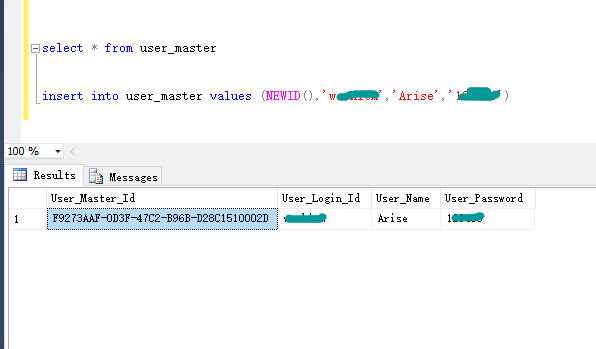
哦,对了,别忘了在Uer_Master表中建一个测试账号:
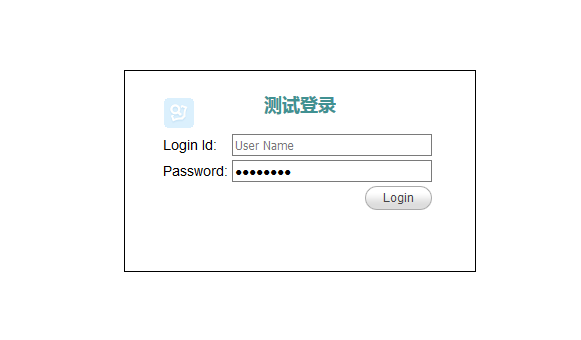
最终运行的结果:


 浙公网安备 33010602011771号