Java微信扫描支付模式二Demo ,整合官网直接运行版本
概述
详细
一、相关配置


Demo上都有官网的默认值,不需要修改直接使用
支付扫描模式二,流程图
https://pay.weixin.qq.com/wiki/doc/api/native.php?chapter=6_5
SDK与DEMO下载
https://pay.weixin.qq.com/wiki/doc/api/native.php?chapter=11_1
二、目录结构
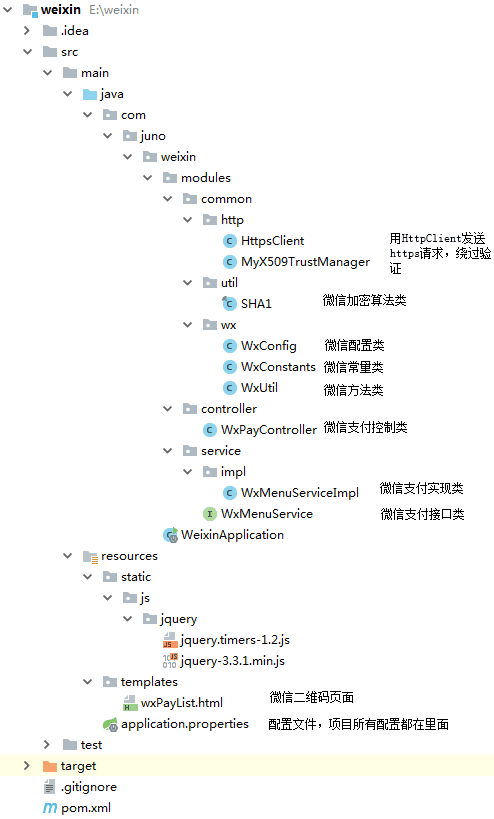
三、准备工作
(1)设置热部署
作为程序员都知道,每次修改后台代码都要重启项目,工作效率非常慢,所以我们要加快效率。
pom.xml
1 2 3 4 5 6 7 8 9 10 11 12 13 14 15 16 17 18 19 | <dependencies> <dependency> <groupId>org.springframework.boot</groupId> <artifactId>spring-boot-devtools</artifactId> <optional>true</optional> </dependency></dependencies> <build> <plugins> <plugin> <groupId>org.springframework.boot</groupId> <artifactId>spring-boot-maven-plugin</artifactId> <configuration> <fork>true</fork> </configuration> </plugin> </plugins></build> |
application.properties
1 2 | #禁止thymeleaf缓存(建议:开发环境设置为false,生成环境设置为true)spring.thymeleaf.cache=false |
开发工具是:idea
设置以下两项(第一项如已设置直接设置第二项)
1) “File” -> “Settings” -> “Build,Execution,Deplyment” -> “Compiler”,选中打勾 “Build project automatically” 。
2) 组合键:“Shift+Ctrl+Alt+/” ,选择 “Registry” ,选中打勾 “compiler.automake.allow.when.app.running”
相关链接:
https://www.cnblogs.com/jiangbei/p/8439394.html
https://blog.csdn.net/weixin_42884584/article/details/81561987
(2)内网穿透工具
让外网能直接访问,你本地的服务,场景用于,接口调试,支付方面等等。
为了大家找了一个,免费配置简单的。绝对不是卖广告,之前用过花生壳,麻烦到要死坑哇~,现在的所有穿透都要身份证登记,很正常国家出了对应的法规。
下载地址:https://natapp.cn/#download
配置和使用说明:https://blog.csdn.net/kingrome2017/article/details/77989442
四、功能讲解
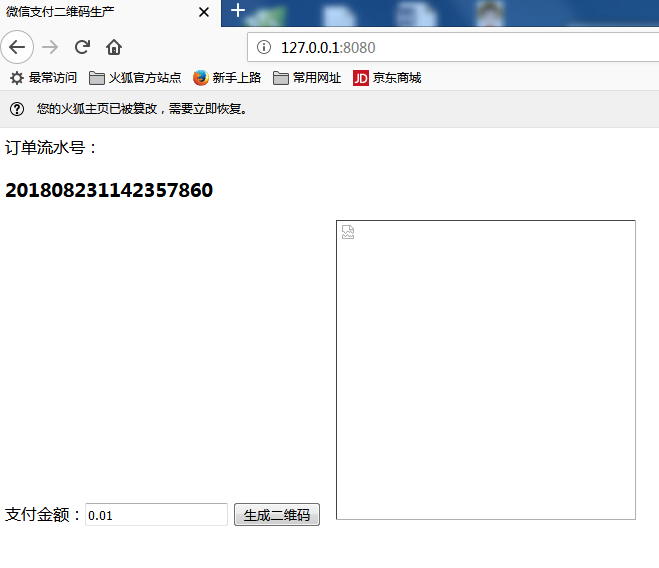
(1)访问首页
打开WxPayController.java
1 2 3 4 5 6 7 8 9 | /** * 二维码首页 */@RequestMapping(value = {"/"}, method = RequestMethod.GET)public String wxPayList(Model model){ //商户订单号 model.addAttribute("outTradeNo",WxUtil.mchOrderNo()); return "/wxPayList";} |
我们和穿透工具连在一起使用
SpringBoot 默认端口号为:8080,穿透工具映射端口设置为:8080
双击,natapp.exe 执行
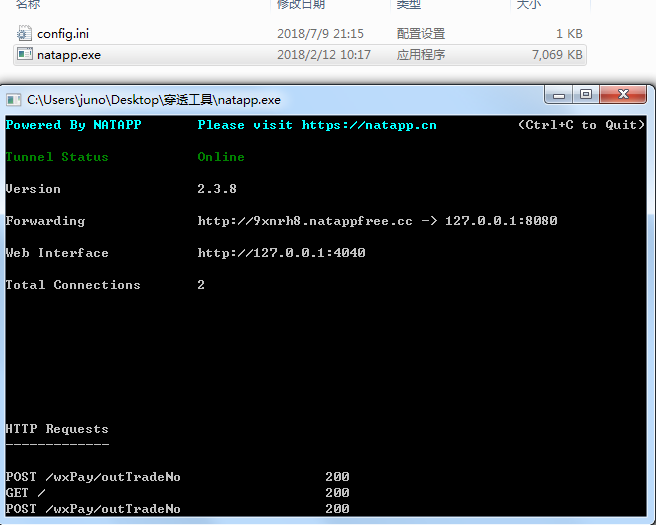
127.0.0:8080 <=> http://9xnrh8.natappfree.cc
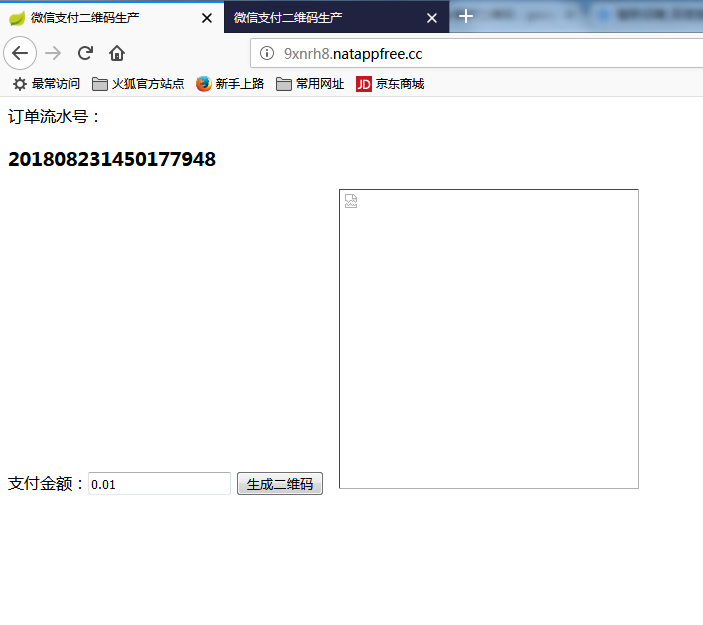
修改,application.properties
(划重点,支付成功后回调本地服务,修改后记得重启服务)
1 2 | #统一下单-通知链接wx.unifiedorder.notifyUrl=http://9xnrh8.natappfree.cc/wxPay/unifiedorderNotify |
(2)生成二维码
从页面看到,有订单流水号和支付金额,0.01 代表一分钱。支付金额可以修改的,点击'生成二维码'按钮,然后把订单流水号和支付金额传到后台。
控制类:
1 2 3 4 5 6 7 8 9 10 | final private String signType = WxConstants.SING_MD5;/** * 统一下单-生成二维码 */@RequestMapping(value = {"/wxPay/payUrl"})public void payUrl(HttpServletRequest request, HttpServletResponse response, @RequestParam(value = "totalFee")Double totalFee, @RequestParam(value = "outTradeNo")String outTradeNo) throws Exception{ WxUtil.writerPayImage(response,wxMenuService.wxPayUrl(totalFee,outTradeNo,signType));} |
实现类:
1 2 3 4 5 6 7 8 9 10 11 12 13 14 15 16 17 18 19 20 21 22 23 24 25 26 27 28 29 30 31 32 33 34 35 36 | @Overridepublic String wxPayUrl(Double totalFee,String outTradeNo,String signType) throws Exception { HashMap<String, String> data = new HashMap<String, String>(); //公众账号ID data.put("appid", WxConfig.appID); //商户号 data.put("mch_id", WxConfig.mchID); //随机字符串 data.put("nonce_str", WxUtil.getNonceStr()); //商品描述 data.put("body","测试支付"); //商户订单号 data.put("out_trade_no",outTradeNo); //标价币种 data.put("fee_type","CNY"); //标价金额 data.put("total_fee",String.valueOf(Math.round(totalFee * 100))); //用户的IP data.put("spbill_create_ip","123.12.12.123"); //通知地址 data.put("notify_url",WxConfig.unifiedorderNotifyUrl); //交易类型 data.put("trade_type","NATIVE"); //签名类型 data.put("sign_type",signType); //签名 data.put("sign",WxUtil.getSignature(data, WxConfig.key,signType)); String requestXML = WxUtil.mapToXml(data); String reponseString = HttpsClient.httpsRequestReturnString(WxConstants.PAY_UNIFIEDORDER,HttpsClient.METHOD_POST,requestXML); Map<String,String> resultMap = WxUtil.processResponseXml(reponseString,signType); if(resultMap.get(WxConstants.RETURN_CODE).equals("SUCCESS")){ return resultMap.get("code_url"); } return null;} |
最终返回一个,二维码链接 → 转成二维码图片
1 2 3 4 5 6 7 8 9 10 11 12 13 14 15 16 17 18 19 20 21 22 23 24 | /** * 生成支付二维码 * @param response 响应 * @param contents url链接 * @throws Exception */public static void writerPayImage(HttpServletResponse response, String contents) throws Exception{ ServletOutputStream out = response.getOutputStream(); try { Map<EncodeHintType,Object> hints = new HashMap<EncodeHintType,Object>(); hints.put(EncodeHintType.CHARACTER_SET,"UTF-8"); hints.put(EncodeHintType.ERROR_CORRECTION, ErrorCorrectionLevel.L); hints.put(EncodeHintType.MARGIN, 0); BitMatrix bitMatrix = new MultiFormatWriter().encode(contents, BarcodeFormat.QR_CODE,300,300,hints); MatrixToImageWriter.writeToStream(bitMatrix,"jpg",out); }catch (Exception e){ throw new Exception("生成二维码失败!"); }finally { if(out != null){ out.flush(); out.close(); } }} |
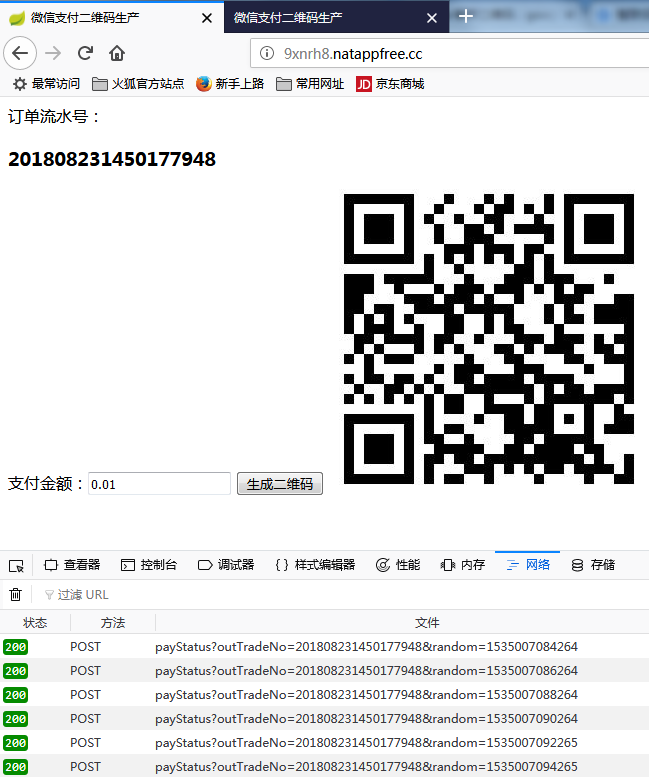
下面的请求是定时器,检查是否已支付,本来我想用socket。
(3)支付
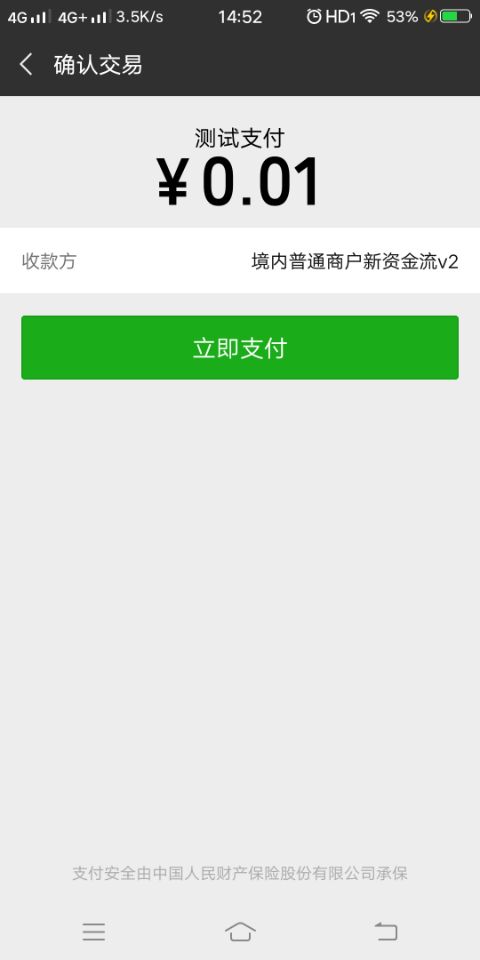
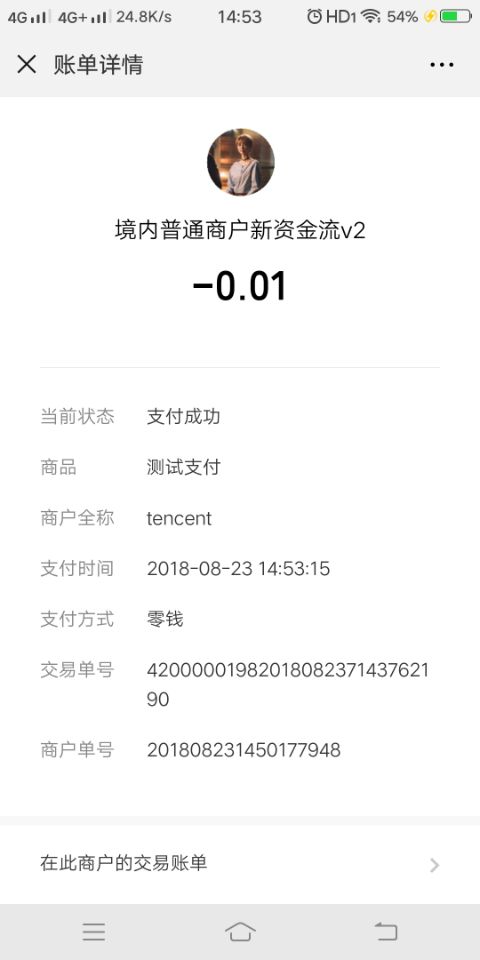
(4)支付完毕
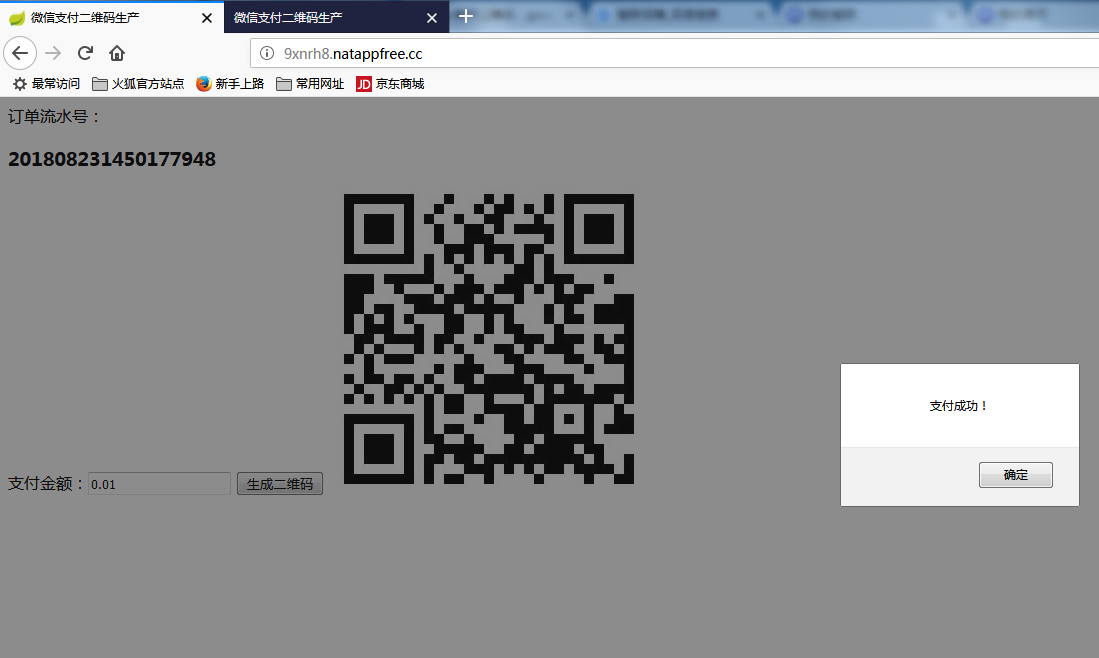
(5)回调接口
收到微信支付结果通知后,请严格按照示例返回参数给微信支付
1 2 3 4 5 6 7 8 9 10 11 12 13 14 15 16 17 18 19 20 21 22 23 24 25 26 27 28 29 30 31 32 33 34 35 36 37 38 39 40 41 42 43 44 | /** * 统一下单-通知链接 */@RequestMapping(value = {"/wxPay/unifiedorderNotify"})public void unifiedorderNotify(HttpServletRequest request, HttpServletResponse response) throws Exception{ //商户订单号 String outTradeNo = null; String xmlContent = "<xml>" + "<return_code><![CDATA[FAIL]]></return_code>" + "<return_msg><![CDATA[签名失败]]></return_msg>" + "</xml>"; try{ String requstXml = WxUtil.getStreamString(request.getInputStream()); System.out.println("requstXml : " + requstXml); Map<String,String> map = WxUtil.xmlToMap(requstXml); String returnCode= map.get(WxConstants.RETURN_CODE); //校验一下 if(StringUtils.isNotBlank(returnCode) && StringUtils.equals(returnCode,"SUCCESS") && WxUtil.isSignatureValid(map, WxConfig.key,signType)){ //商户订单号 outTradeNo = map.get("out_trade_no"); System.out.println("outTradeNo : "+ outTradeNo); //微信支付订单号 String transactionId = map.get("transaction_id"); System.out.println("transactionId : "+ transactionId); //支付完成时间 SimpleDateFormat payFormat= new SimpleDateFormat("yyyyMMddHHmmss"); Date payDate = payFormat.parse(map.get("time_end")); SimpleDateFormat systemFormat= new SimpleDateFormat("yyyy-MM-dd HH:mm:ss"); System.out.println("支付时间:" + systemFormat.format(payDate)); //临时缓存 WxConfig.setPayMap(outTradeNo,"SUCCESS"); xmlContent = "<xml>" + "<return_code><![CDATA[SUCCESS]]></return_code>" + "<return_msg><![CDATA[OK]]></return_msg>" + "</xml>"; } }catch (Exception e){ e.printStackTrace(); } WxUtil.responsePrint(response,xmlContent);} |
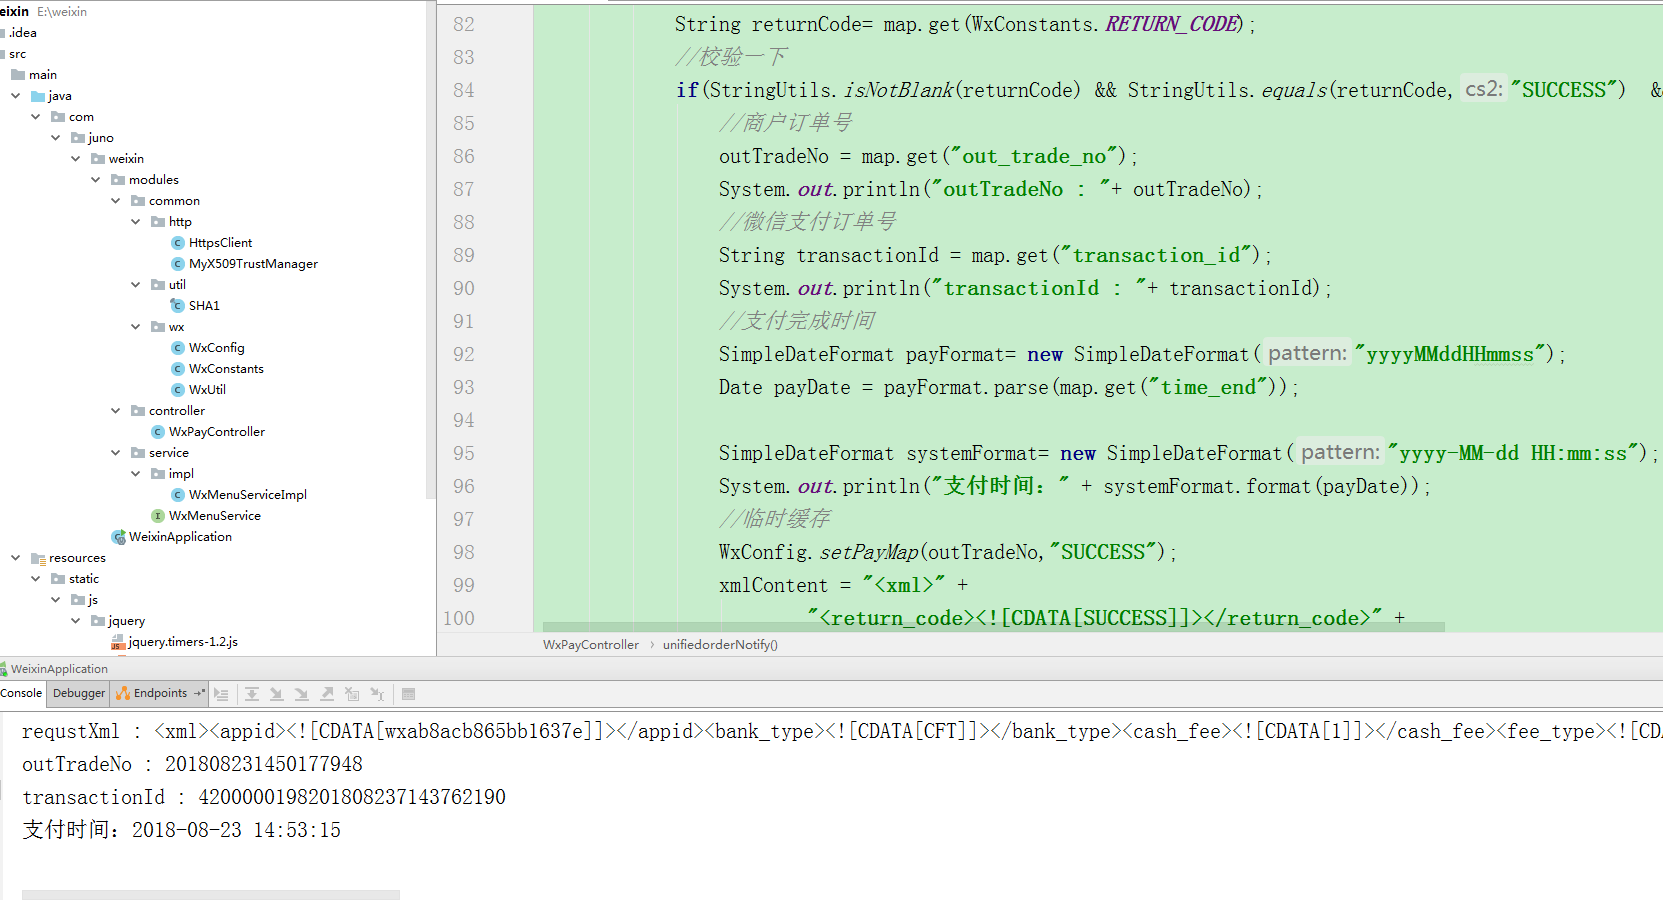
更多的信息,请看官网
官网相关链接:https://pay.weixin.qq.com/wiki/doc/api/native.php?chapter=9_7&index=8
(6)微信支付,关于XML解析存在的安全问题指引
代码已修改
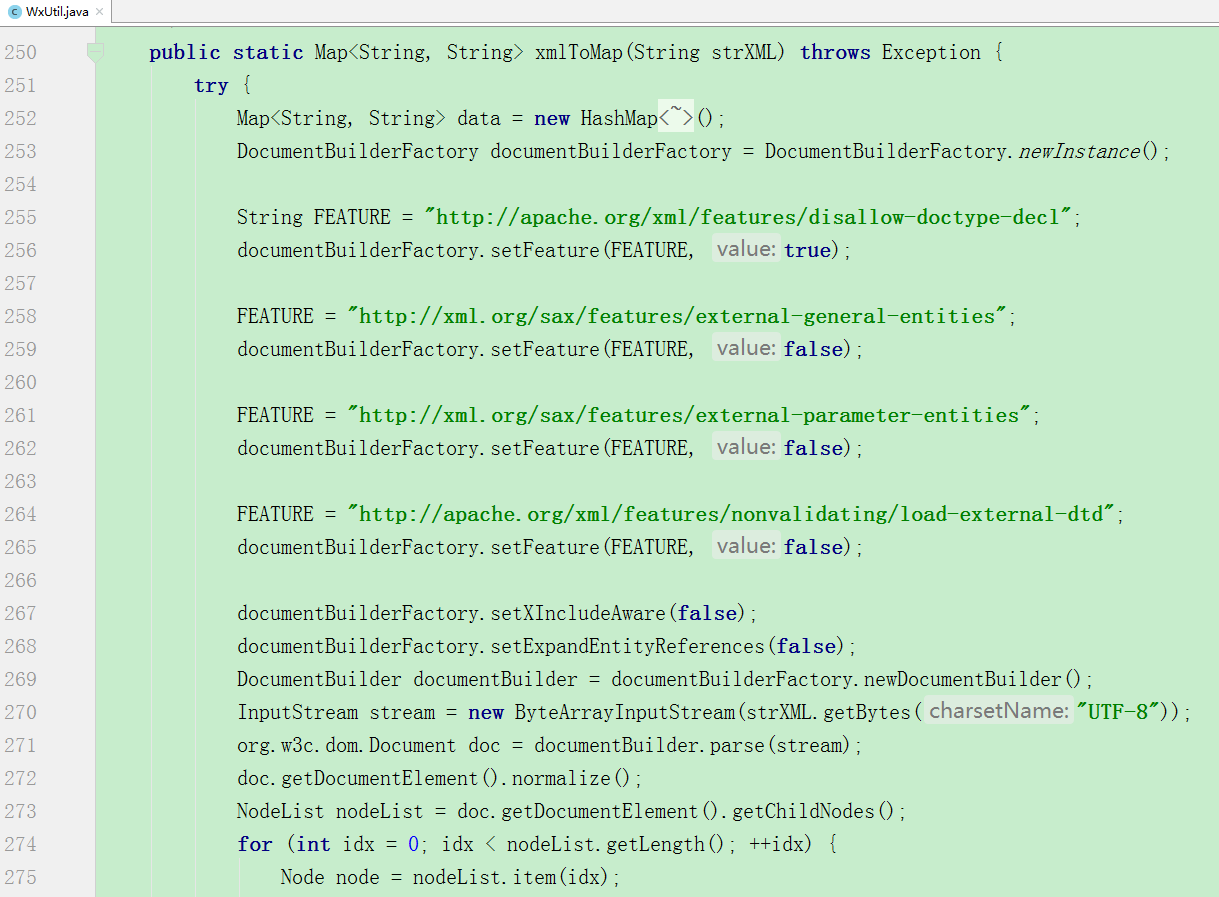
更多的信息,请看官网
官网相关链接:https://pay.weixin.qq.com/wiki/doc/api/jsapi.php?chapter=23_5
(7)前端页面
1 2 3 4 5 6 7 8 9 10 11 12 13 14 15 16 17 18 19 20 21 22 23 24 25 26 27 28 29 30 31 32 33 34 35 36 37 38 39 40 41 42 43 44 45 46 47 48 49 50 51 52 53 54 55 56 57 58 59 60 61 62 63 64 65 66 67 68 69 70 71 72 73 74 75 76 77 78 79 80 81 82 83 84 85 | <html><head > <title>微信支付二维码生产</title> <meta http-equiv="Content-Type" content="text/html; charset=UTF-8" /> <script type="text/javascript" src="/js/jquery/jquery-3.3.1.min.js"></script> <script type="text/javascript" src="/js/jquery/jquery.timers-1.2.js"></script> <script type='text/javascript'> $(function () { getOutTradeNo(); }); //生成二维码 function save(){ var outTradeNo = $("#outTradeNo").val(); $("#payImg").attr("src",'/wxPay/payUrl'+"?totalFee="+ $("#totalFee").val()+"&outTradeNo=" + outTradeNo); $('body').everyTime('2s','payStatusTimer',function(){ $.ajax({ type : "POST", url : '/wxPay/payStatus?outTradeNo='+ outTradeNo +"&random=" + new Date().getTime(), contentType:"application/json", dataType : "json", async : "false", success : function(json) { if(json != null && json.status == 0){ alert("支付成功!"); $('body').stopTime ('payStatusTimer'); return false; } }, error:function(XMLHttpRequest,textStatus,errorThrown){ alert("服务器错误!状态码:"+json.status); // 状态 console.log(json.readyState); // 错误信息 console.log(json.statusText); return false; } }) }); } //获取流水号 function getOutTradeNo(){ $.ajax({ type : "POST", url : '/wxPay/outTradeNo', success : function(json) { if(json != null){ $("h3").html(json); $("#outTradeNo").val(json); }else{ alert("获取流水号失败!"); } return false; }, error:function(XMLHttpRequest,textStatus,errorThrown){ alert("服务器错误!状态码:"+XMLHttpRequest.status); // 状态 console.log(XMLHttpRequest.readyState); // 错误信息 console.log(textStatus); return false; } }); } </script></head><body><p>订单流水号:<h3></h3></p>支付金额:<input id="totalFee" type="text" value="0.01"/><button type="button" onclick="save();">生成二维码</button><input id="outTradeNo" type="hidden" value="${outTradeNo}"/> <img id="payImg" width="300" height="300" ></body></html> |
启动一个定时器,每个2秒去扫描是否已经支付~
因为相关配置,我是从官网下载的,所以支付后还有退款功能(退款要等很多天,请耐心等待),是不是很神奇~
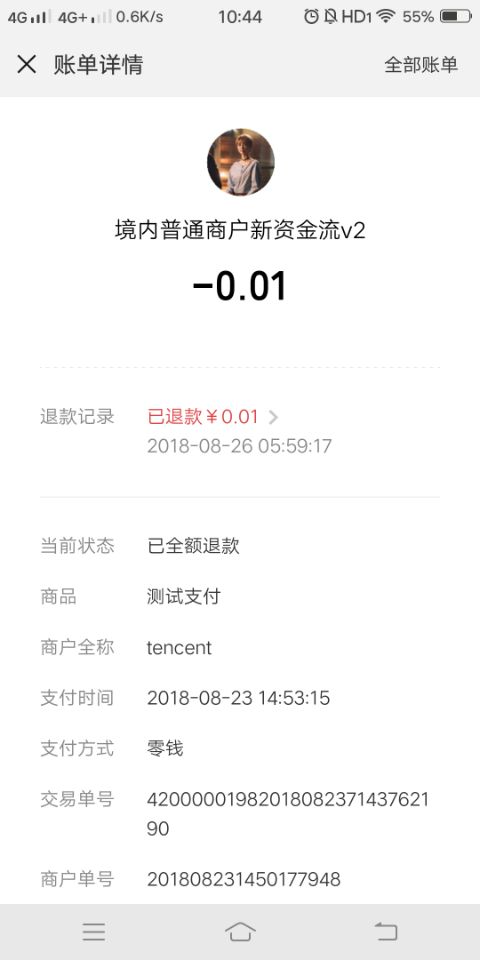
还有微信登录,自定义微信公众号菜单创建-修改-删除功能(前台-数据库保存),微信公众号接受、回复信息Demo
但是,没有官网例子直接运行的,很多地方不能截图,后面我想想怎么做吧~
谢谢大家观看~


【推荐】国内首个AI IDE,深度理解中文开发场景,立即下载体验Trae
【推荐】编程新体验,更懂你的AI,立即体验豆包MarsCode编程助手
【推荐】抖音旗下AI助手豆包,你的智能百科全书,全免费不限次数
【推荐】轻量又高性能的 SSH 工具 IShell:AI 加持,快人一步
· go语言实现终端里的倒计时
· 如何编写易于单元测试的代码
· 10年+ .NET Coder 心语,封装的思维:从隐藏、稳定开始理解其本质意义
· .NET Core 中如何实现缓存的预热?
· 从 HTTP 原因短语缺失研究 HTTP/2 和 HTTP/3 的设计差异
· 分享 3 个 .NET 开源的文件压缩处理库,助力快速实现文件压缩解压功能!
· Ollama——大语言模型本地部署的极速利器
· 使用C#创建一个MCP客户端
· 分享一个免费、快速、无限量使用的满血 DeepSeek R1 模型,支持深度思考和联网搜索!
· Windows编程----内核对象竟然如此简单?