
React Native : 自定义视图
这次我们要做的仿 新闻头条 的首页的顶部标签列表,不要在意新闻内容。

请求数据
首先做顶部的目录视图,首先我们先获取数据:
在 Home.js 中加入方法:
componentDidMount() {
        let url = 'http://api.iapple123.com/newscategory/list/index.html?clientid=1114283782&v=1.1'
        fetch(url, {
            method: 'GET',
            headers: {
                'Accept': 'application/json',
                'Content-Type': 'application/json',
            },
        })
            .then((res) => {
                res.json()
                    .then((json) =>{
                        LOG('GET SUCCESS =>',url, json)

                    })
                    .catch((e) => {
                        LOG('GET ERROR then =>',url,e)

                    })
            })
            .catch((error) => {
                LOG('GET ERROR=>',url, '==>',error)
            })
    }
componentDidMount()是在此页面加载完成后由系统调用。
用到的 LOG 需要在 setup.js 添加全局方法 :
global.LOG = (...args) => {

    if(__DEV__){
        // debug模式
        console.log('/------------------------------\\');
        console.log(...args);
        console.log('\\------------------------------/');
        return args[args.length - 1];
    }else{
        // release模式
    }

};
完整的生命周期可以看这个 文档
我们使用 fetch 进行请求数据,你也可以用 这里 的方法进行请求数据。
注意在 iOS 中需要去 Xcode 打开 ATS。
自定义视图
在 Home 文件夹内创建 SegmentedView.js
先定义一个基础的 View
import React from 'react'

import {
    View,
    StyleSheet,
    Dimensions
} from 'react-native'
const {width, height} = Dimensions.get('window')

export default class SegmentedView extends React.Component {
    render() {
        const { style } = this.props
        return (
            <View style={[styles.view, style]}>

            </View>
        )
    }
}


const styles = StyleSheet.create({
    view: {
        height: 50,
        width: width,
        backgroundColor: 'white',
    }
})
这里的 const {width, height} = Dimensions.get('window') 是获取到的屏幕的宽和高。
然后在 Home.js 加入 SegmentedView:
import SegmentedView from './SegmentedView'

	render() {
        return (
            <View style={styles.view}>
                <NavigationBar
                    title="首页"
                    unLeftImage={true}
                />

                <SegmentedView
                    style={{height: 30}}
                />


            </View>
        )
    }
SegmentedView 中 const { style } = this.props 获取到的就是这里设置的 style={height: 30} 。
<View style={[styles.view, style]}> 这样设置样式,数组中的每一个样式都会覆盖它前面的样式,不过只会覆盖有的 key-value,比如这里 style={height: 30} ,它只会覆盖掉前面的 height ,最终的样式为 :
{
    height: 30,
    width: width,
    backgroundColor: 'white',
}
传数据
请求到的数据需要传给 SegmentedView 来创建视图,我们在 Home.js 加入构造,现在的 Home.js 是这样的:
import React from 'react'

import {
    View,
    StyleSheet
} from 'react-native'

import NavigationBar from '../Custom/NavBarCommon'
import SegmentedView from './SegmentedView'

export default class Home extends React.Component {

    // 构造
      constructor(props) {
        super(props);
        // 初始状态
        this.state = {
            list: null
        };
      }

    componentDidMount() {
        let url = 'http://api.iapple123.com/newscategory/list/index.html?clientid=1114283782&v=1.1'
        fetch(url, {
            method: 'GET',
            headers: {
                'Accept': 'application/json',
                'Content-Type': 'application/json',
            },
        })
            .then((res) => {
                res.json()
                    .then((json) =>{
                        LOG('GET SUCCESS =>',url, json)

                        this.setState({
                            list: json.CategoryList
                        })
                    })
                    .catch((e) => {
                        LOG('GET ERROR then =>',url,e)
                    })
            })
            .catch((error) => {
                LOG('GET ERROR=>',url, '==>',error)
            })
    }

    render() {
        return (
            <View style={styles.view}>
                <NavigationBar
                    title="首页"
                    unLeftImage={true}
                />
                <SegmentedView
                    list={this.state.list}
                    style={{height: 30}}
                />
            </View>
        )
    }
}

const styles = StyleSheet.create({
    view: {
        flex:1,
        backgroundColor: 'white'
    }
})
再数据请求完成后调用 setState() ,系统会收集需要更改的地方然后刷新页面,所以这个方法永远是异步的。
现在请求完数据后就会把数组传给 SegmentedView 了。
再看 SegmentedView ,我们需要用一个 ScrollView 来放置这些标签:
import React from 'react'

import {
    View,
    StyleSheet,
    Text,
    TouchableOpacity,
    Dimensions,
    ScrollView
} from 'react-native'

const {width, height} = Dimensions.get('window')


// 一 屏最大数量, 为了可以居中请设置为 奇数
const maxItem = 7

export default class SegmentedView extends React.Component {

    // 构造
      constructor(props) {
        super(props);
       // 初始状态
        this.state = {
            itemHeight: 50,
        };

          if (props.style && props.style.height > 0) {
              this.state = {
                  ...this.state,
                  itemHeight: props.style.height,  //如果在使用的地方设置了高度,那么保存起来方便使用
              };
          }
          this._getItems = this._getItems.bind(this)
      }

    _getItems() {
        const { list } = this.props  //获取到 传入的数组

        if (!list || list.length == 0) return []

       // 计算每个标签的宽度
        let itemWidth = width / list.length

        if (list.length > maxItem) {
            itemWidth = width / maxItem
        }

        let items = []
        for (let index in list) {
            let dic = list[index]
            items.push(
                <View
                    key={index}
                    style={{height: this.state.itemHeight, width: itemWidth, alignItems: 'center', justifyContent:'center',backgroundColor:'#EEEEEE'}}
                >
                    {/* justifyContent: 主轴居中, alignItems: 次轴居中 */}

                    <Text>{dic.NameCN}</Text>
                </View>
            )
        }

        return items
    }

    render() {
      const { style } = this.props

      return (
            <View style={[styles.view, style]}>
                <ScrollView
                    style={styles.scrollView}
                    horizontal={true} //横向显示
                    showsHorizontalScrollIndicator={false} //隐藏横向滑动条
                >
                    {this._getItems()}
                </ScrollView>
            </View>
        )
    }
}


const styles = StyleSheet.create({
    view: {
        height: 50,
        width: width,
        backgroundColor: 'white',
    },

    scrollView: {
        flex:1,
        backgroundColor: '#EEEEEE',
    }
})
使标签可选并改变偏移量
现在运行已经可以显示出标签列表了,我们还需要能点击,有选中和未选中状态,所以我们把数组中添加的视图封装一下:
class Item extends React.Component {
    render() {

        const {itemHeight, itemWidth, dic} = this.props

        return (
            <TouchableOpacity
                style={{height: itemHeight, width: itemWidth, alignItems: 'center', justifyContent:'center',backgroundColor:'#EEEEEE'}}
            >
                {/* justifyContent: 主轴居中, alignItems: 次轴居中 */}

                <Text>{dic.NameCN}</Text>
            </TouchableOpacity>
        )
    }
}
我们需要可以点击,所以把 View 换成了 TouchableOpacity,记得在顶部导入。
然后修改数组的 push 方法
items.push(
    <Item
        key={index}
        itemHeight={this.state.itemHeight}
        itemWidth={itemWidth}
        dic={dic}
    />
)
现在运行已经可以点击了,接下来设置选中和未选中样式,在 Item 内加入:
constructor(props) {
    super(props);
    // 初始状态
    this.state = {
        isSelect: false
    };
}
在 Text 加入样式:
<Text style={{color: this.state.isSelect ? 'red' : 'black'}}>{dic.NameCN}</Text>
在 TouchableOpacity 加入点击事件:
<TouchableOpacity
    style={{height: itemHeight, width: itemWidth, alignItems: 'center', justifyContent:'center',backgroundColor:'#EEEEEE'}}
    onPress={() => {
        this.setState({
            isSelect: true
        })
    }}
>
现在标签已经可以进行点击,点击后变红,我们需要处理点击后让上一个选中的变为未选中,我们给 Item 加一个方法:
_unSelect() {
    this.setState({
        isSelect: false
    })
}
我们还需要接收一个回调函数: onPress
const {itemHeight, itemWidth, dic, onPress} = this.props

 <TouchableOpacity
    style={{height: itemHeight, width: itemWidth, alignItems: 'center', justifyContent:'center',backgroundColor:'#EEEEEE'}}
    onPress={() => {
        onPress && onPress()
        this.setState({
            isSelect: true
        })
    }}
>
现在去 items.push 加入 onPress ,我们还需要一个状态 selectItem 来记录选中的标签:
// 初始状态
this.state = {
    itemHeight: 50,
    selectItem: null,
};
<Item
    ref={index}  //设置 ref 以供获取自己
    key={index}
    itemHeight={this.state.itemHeight}
    itemWidth={itemWidth}
    dic={dic}
    onPress={() => {
        this.state.selectItem && this.state.selectItem._unSelect() //让已经选中的标签变为未选中
        this.state.selectItem = this.refs[index]  //获取到点击的标签
    }}
/>
现在运行,就可以选中的时候取消上一个标签的选中状态了,但是我们需要默认选中第一个标签。
我们给 Item 加一个属性 isSelect :
<Item
    ref={index}  //设置 ref 以供获取自己
    key={index}
    isSelect={index == 0}
    itemHeight={this.state.itemHeight}
    itemWidth={itemWidth}
    dic={dic}
    onPress={() => {
        this.state.selectItem && this.state.selectItem._unSelect() //让已经选中的标签变为未选中
        this.state.selectItem = this.refs[index]  //获取到点击的标签
    }}
/>
修改 Item :
 constructor(props) {
    super(props);
    // 初始状态
    this.state = {
        isSelect: props.isSelect
    };
  }
现在运行发现第一项已经默认选中,但是点击别的标签,发现第一项并没有变成未选中,这是因为 this.state.selectItem 初始值为 null,那我们需要把第一项标签赋值给它。
由于只有在视图加载或更新完成才能通过 refs 获取到某个视图,所以我们需要一个定时器去触发选中方法。
去 Item 的 constructor() 加入定时器:
 constructor(props) {
    super(props);
    // 初始状态
    this.state = {
        isSelect: props.isSelect
    };

    this.timer = setTimeout(
	      () =>
	          props.isSelect && props.onPress && props.onPress() //100ms 后调用选中操作
	      ,
	      100
	    );
 }
搞定,最后我们还需要点击靠后的标签可以自动居中,我们需要操作 ScrollView 的偏移量,给 ScrollView 设置 ref='ScrollView'
<ScrollView
    ref="ScrollView"
    style={styles.scrollView}
    horizontal={true}
    showsHorizontalScrollIndicator={false}
>
然后去 items.push 加入偏移量的设置:
<Item
    ref={index}
    key={index}
    isSelect={index == 0}
    itemHeight={this.state.itemHeight}
    itemWidth={itemWidth}
    dic={dic}
    onPress={() => {
        this.state.selectItem && this.state.selectItem._unSelect()
        this.state.selectItem = this.refs[index]

        if (list.length > maxItem) {
            let meiosis = parseInt(maxItem / 2)
            this.refs.ScrollView.scrollTo({x: (index - meiosis < 0 ? 0 : index - meiosis > list.length - maxItem ? list.length - maxItem : index - meiosis ) * itemWidth, y: 0, animated: true})
        }
    }}
/>
现在的效果:

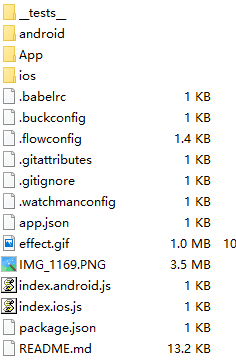
代码结构图
代码文件结构
React Native : 自定义视图
注:本文著作权归作者,由demo大师代发,拒绝转载,转载需要作者授权


【推荐】国内首个AI IDE,深度理解中文开发场景,立即下载体验Trae
【推荐】编程新体验,更懂你的AI,立即体验豆包MarsCode编程助手
【推荐】抖音旗下AI助手豆包,你的智能百科全书,全免费不限次数
【推荐】轻量又高性能的 SSH 工具 IShell:AI 加持,快人一步
· go语言实现终端里的倒计时
· 如何编写易于单元测试的代码
· 10年+ .NET Coder 心语,封装的思维:从隐藏、稳定开始理解其本质意义
· .NET Core 中如何实现缓存的预热?
· 从 HTTP 原因短语缺失研究 HTTP/2 和 HTTP/3 的设计差异
· 分享 3 个 .NET 开源的文件压缩处理库,助力快速实现文件压缩解压功能!
· Ollama——大语言模型本地部署的极速利器
· 使用C#创建一个MCP客户端
· 分享一个免费、快速、无限量使用的满血 DeepSeek R1 模型,支持深度思考和联网搜索!
· Windows编程----内核对象竟然如此简单?