iOS-仿智联字符图片验证码
概述
随机字符组成的图片验证码, 字符位数可改变, 字符可斜可正排列.
详细
项目中有时候会有这种需求: 获取这种 随机字符组成的图片验证码.
随机字符组成的图片验证码, 字符位数可改变, 字符可斜可正排列.
一、主要思路
-
1.初始化验证码的背景且设置随机色
-
2.获取验证图上的字符码并通过bolck带回验证码值
-
3.在背景上添加标签,获取字符随机产生赋值给标签(可斜可正排列)
-
4.添加干扰线于背景
-
5.初始化添加验证码视图 并添加手势点击刷新
-
6.判断验证码字符是否输入正确(区分大小写)
二、程序实现
首先 初始化创建验证码背景:ZLSecurityCodeImgView, 最后初始化添加验证码视图并添加手势点击刷新.

1、初始化验证码的背景且设置随机色
初始化背景:
1 2 3 4 5 6 | if (_bgView) { [_bgView removeFromSuperview]; } _bgView = [[UIView alloc]initWithFrame:self.bounds]; [self addSubview:_bgView]; [_bgView setBackgroundColor:[self getRandomBgColorWithAlpha:0.5]]; |
产生背景随机色:
1 2 3 4 5 6 7 8 9 | - (UIColor *)getRandomBgColorWithAlpha:(CGFloat)alpha { float red = arc4random() % 100 / 100.0; float green = arc4random() % 100 / 100.0; float blue = arc4random() % 100 / 100.0; UIColor *color = [UIColor colorWithRed:red green:green blue:blue alpha:alpha]; return color;} |
2、获取验证图上的字符码并通过bolck带回验证码值
1 2 3 4 5 6 7 8 9 10 11 12 13 14 15 | - (void)changeCodeStr { // 目前是数字字母 self.textArr = [[NSArray alloc] initWithObjects:@"0",@"1",@"2",@"3",@"4",@"5",@"6",@"7",@"8",@"9",@"A",@"B",@"C",@"D",@"E",@"F",@"G",@"H",@"I",@"J",@"K",@"L",@"M",@"N",@"O",@"P",@"Q",@"R",@"S",@"T",@"U",@"V",@"W",@"X",@"Y",@"Z",@"a",@"b",@"c",@"d",@"e",@"f",@"g",@"h",@"i",@"j",@"k",@"l",@"m",@"n",@"o",@"p",@"q",@"r",@"s",@"t",@"u",@"v",@"w",@"x",@"y",@"z",nil]; for(NSInteger i = 0; i < CodeCount; i++) { NSInteger index = arc4random() % ([self.textArr count] - 1); NSString *oneText = [self.textArr objectAtIndex:index]; self.imageCodeStr = (i==0) ? oneText : [self.imageCodeStr stringByAppendingString:oneText]; } // block 块带回验证码值 if (self.bolck) { self.bolck(self.imageCodeStr); }} |
其中这个字符CodeCount的个数可以按照自己需求了来修改.
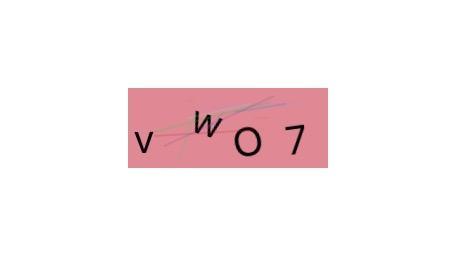
四位斜验证码:
5位斜字符验证码:
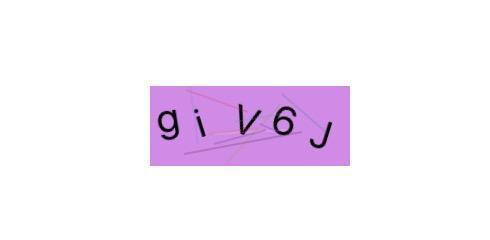
3、在背景上添加标签,获取字符随机产生赋值给标签(可斜可正排列)
1 2 3 4 5 6 7 8 9 10 11 12 13 14 15 16 17 18 19 20 | for (int i = 0; i<self.imageCodeStr.length; i++) { CGFloat px = arc4random()%randWidth + i*(self.frame.size.width-3)/self.imageCodeStr.length; CGFloat py = arc4random()%randHeight; UILabel * label = [[UILabel alloc] initWithFrame: CGRectMake(px+3, py, textSize.width, textSize.height)]; label.text = [NSString stringWithFormat:@"%C", [self.imageCodeStr characterAtIndex:i]]; label.font = [UIFont systemFontOfSize:20]; if (self.isRotation) { // 验证码字符是否需要斜着 double r = (double)arc4random() / ARC4RAND_MAX * 2 - 1.0f; // 随机-1到1 if (r > 0.3) { r = 0.3; }else if(r < -0.3){ r = -0.3; } label.transform = CGAffineTransformMakeRotation(r); } [_bgView addSubview:label]; } |
其中这个字符的正斜可以按照自己需求了来修改,这里看下正的:
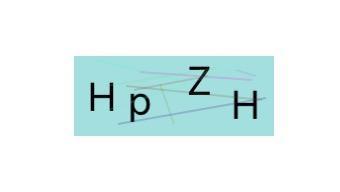
4、添加干扰线于背景
1 2 3 4 5 6 7 8 9 10 11 12 13 14 15 16 17 18 | for (int i = 0; i<10; i++) { UIBezierPath *path = [UIBezierPath bezierPath]; CGFloat pX = arc4random() % (int)CGRectGetWidth(self.frame); CGFloat pY = arc4random() % (int)CGRectGetHeight(self.frame); [path moveToPoint:CGPointMake(pX, pY)]; CGFloat ptX = arc4random() % (int)CGRectGetWidth(self.frame); CGFloat ptY = arc4random() % (int)CGRectGetHeight(self.frame); [path addLineToPoint:CGPointMake(ptX, ptY)]; CAShapeLayer *layer = [CAShapeLayer layer]; layer.strokeColor = [[self getRandomBgColorWithAlpha:0.2] CGColor]; // layer的边框色 layer.lineWidth = 1.0f; layer.strokeEnd = 1; layer.fillColor = [UIColor clearColor].CGColor; layer.path = path.CGPath; [_bgView.layer addSublayer:layer];} |
5、初始化添加验证码视图 并添加手势点击刷新
初始化添加验证码视图:
1 2 3 4 5 6 7 8 9 10 11 12 13 | - (void)setupSecurityCodeImgView { // 验证码背景宽高可根据需求自定义 _codeImgView = [[ZLSecurityCodeImgView alloc] initWithFrame:CGRectMake(150, 200, 100, 40)]; _codeImgView.bolck = ^(NSString *imageCodeStr){ // 根据需求是否使用验证码值 // 打印生成的验证码 NSLog(@"imageCodeStr = %@", imageCodeStr); }; // 验证码字符是否需要斜着 _codeImgView.isRotation = YES; [_codeImgView refreshSecurityCode]; [self.view addSubview: _codeImgView];} |
添加手势点击刷新:
1 2 | UITapGestureRecognizer *tap = [[UITapGestureRecognizer alloc] initWithTarget:self action:@selector(tapClick:)];[_codeImgView addGestureRecognizer:tap]; |
1 2 3 4 | - (void)tapClick:(UITapGestureRecognizer *)tap { [_codeImgView refreshSecurityCode];} |
斜验证码图刷新运行效果:

6、判断验证码字符是否输入正确(区分大小写)
1 2 3 4 5 6 7 8 9 10 11 12 13 14 15 16 17 18 19 20 21 22 23 24 25 | #pragma mark- UITextFieldDelegate- (BOOL)textFieldShouldReturn:(UITextField *)textField { if (textField == self.codeField) { [self.codeField resignFirstResponder]; // 判断验证码字符是否输入正确(区分大小写) if ([textField.text isEqualToString:self.imageCodeStr]) { UIAlertController *alert = [UIAlertController alertControllerWithTitle:@"测试" message:@"匹配成功" preferredStyle:UIAlertControllerStyleAlert]; UIAlertAction *okAction = [UIAlertAction actionWithTitle:@"确定" style:UIAlertActionStyleDefault handler:^(UIAlertAction * _Nonnull action) { }]; [alert addAction:okAction]; [self presentViewController:alert animated:YES completion:nil]; } else { UIAlertController *alert = [UIAlertController alertControllerWithTitle:@"测试" message:@"匹配失败" preferredStyle:UIAlertControllerStyleAlert]; UIAlertAction *okAction = [UIAlertAction actionWithTitle:@"确定" style:UIAlertActionStyleDefault handler:^(UIAlertAction * _Nonnull action) { }]; [alert addAction:okAction]; [self presentViewController:alert animated:YES completion:nil]; } } return YES;} |
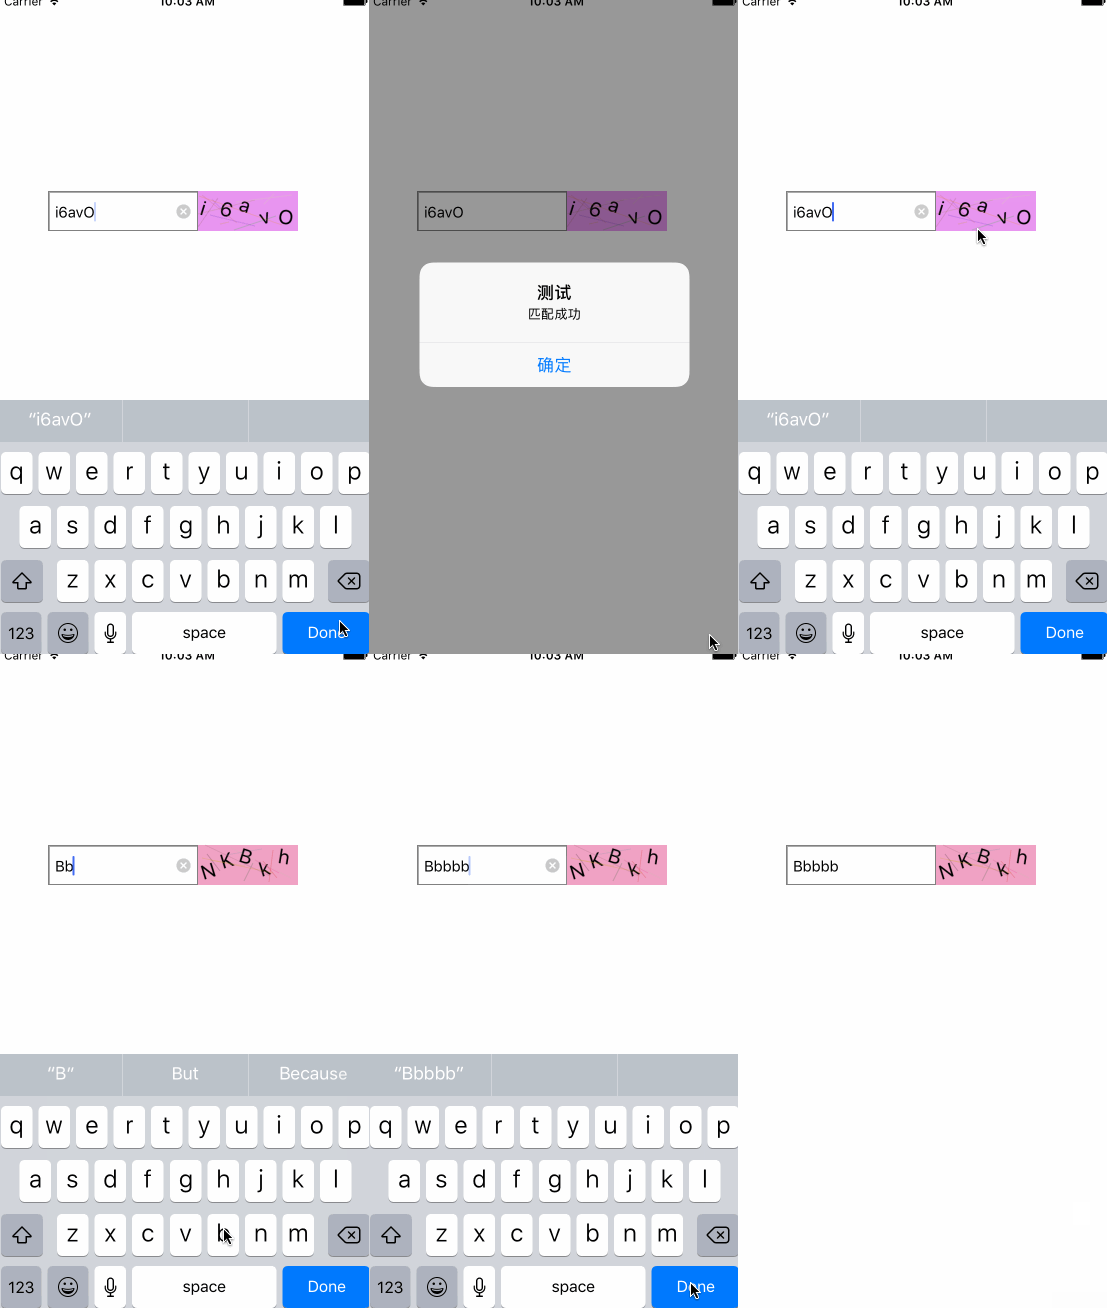
这时候整体测试一下效果 :
三、其他补充
1、压缩文件截图:
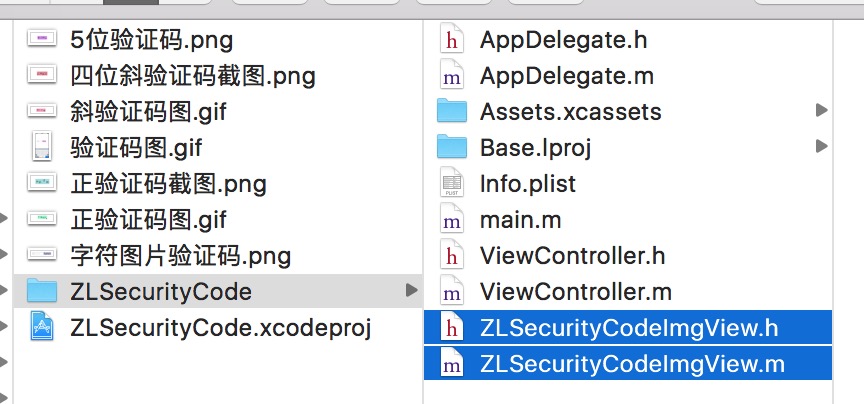
界面性问题可以根据自己项目需求调整即可, 具体可参考代码, 项目则能够直接运行!


【推荐】国内首个AI IDE,深度理解中文开发场景,立即下载体验Trae
【推荐】编程新体验,更懂你的AI,立即体验豆包MarsCode编程助手
【推荐】抖音旗下AI助手豆包,你的智能百科全书,全免费不限次数
【推荐】轻量又高性能的 SSH 工具 IShell:AI 加持,快人一步
· go语言实现终端里的倒计时
· 如何编写易于单元测试的代码
· 10年+ .NET Coder 心语,封装的思维:从隐藏、稳定开始理解其本质意义
· .NET Core 中如何实现缓存的预热?
· 从 HTTP 原因短语缺失研究 HTTP/2 和 HTTP/3 的设计差异
· 分享 3 个 .NET 开源的文件压缩处理库,助力快速实现文件压缩解压功能!
· Ollama——大语言模型本地部署的极速利器
· 使用C#创建一个MCP客户端
· 分享一个免费、快速、无限量使用的满血 DeepSeek R1 模型,支持深度思考和联网搜索!
· Windows编程----内核对象竟然如此简单?