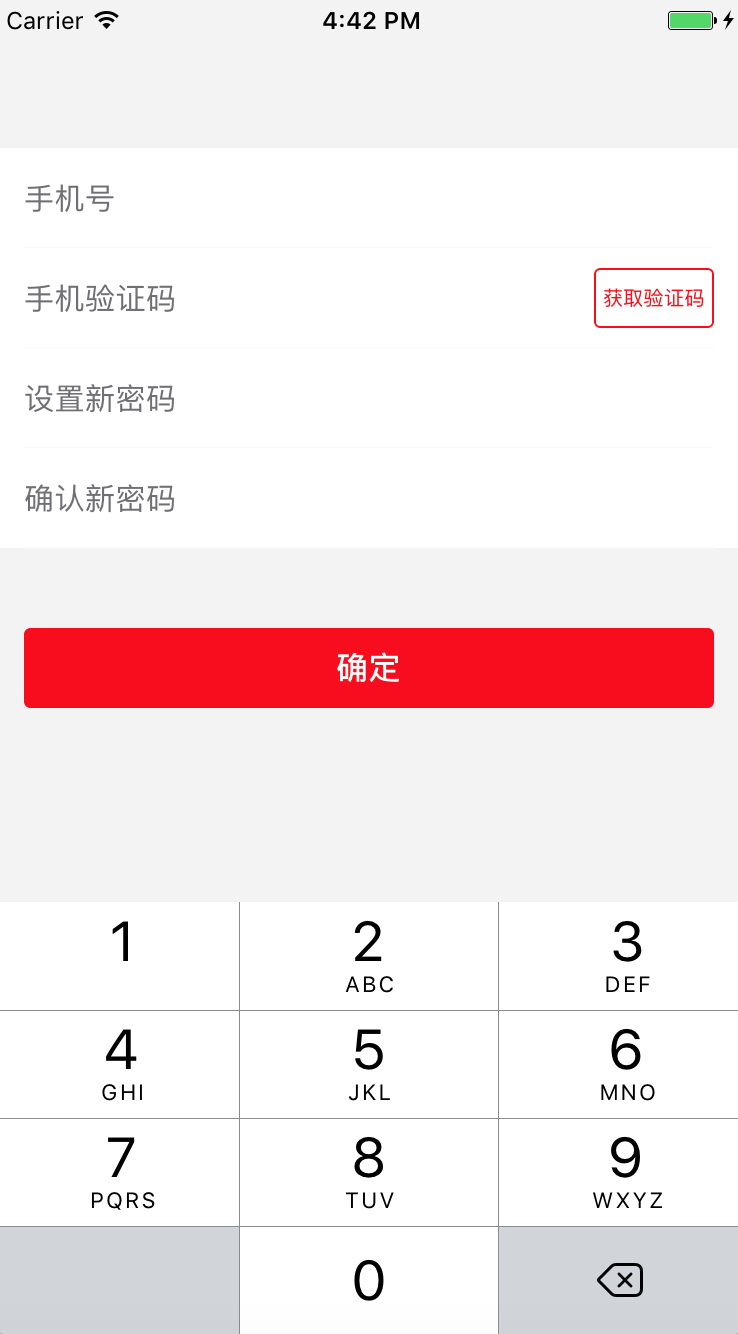
iOS点击获取短信验证码按钮
概述
iOS点击获取短信验证码按钮, 由于 Demo整体测试运行效果 , 整个修改密码界面都已展现, 并附送正则表达式及修改密码逻辑.
详细
在APP开发中,点击获取验证码的倒计时按钮 是在注册、修改密码、绑定手机号等场景中使用!在项目中,多次使用这个按钮,则自定义一个简单的获取短信验证码倒计时功能方便使用, 大大提高开发效率。

一、主要思路
1、自定义验证码按钮:ZLVerifyCodeButton
2、自定义文本输入框:ZLTextField
3、正则表达式:手机号及密码校验方法
4、修改密码界面里调用这个短信验证码, 调取后台接口,获取短信验证码处理相关其他逻辑.
二、程序实现
Step1. 首先自定义按钮:ZLVerifyCodeButton
只需要调用方法即可,可以在自定义里按照自己需求去更改按钮的UI。
@interface ZLVerifyCodeButton : UIButton
// 由于有些时间需求不同,特意露出方法,倒计时时间次数
- (void)timeFailBeginFrom:(NSInteger)timeCount;
@end
自定义按钮:
- (void)setup {

    [self setTitle:@" 获取验证码 " forState:UIControlStateNormal];
    self.titleLabel.font = [UIFont systemFontOfSize:10];
    self.backgroundColor = [UIColor whiteColor];
    self.layer.cornerRadius = 3.0;
    self.clipsToBounds = YES;
    [self setTitleColor:[UIColor redColor] forState:UIControlStateNormal];
    self.layer.borderColor = [UIColor redColor].CGColor;
    self.layer.borderWidth = 1.0;
}
倒计时方法:
- (void)timeFailBeginFrom:(NSInteger)timeCount {

    self.count = timeCount;
    self.enabled = NO;

    // 加1个计时器
    self.timer = [NSTimer scheduledTimerWithTimeInterval:1 target:self selector:@selector(timerFired) userInfo:nil repeats:YES];
}
计时器方法:
- (void)timerFired {
    if (self.count != 1) {
        self.count -= 1;
        self.enabled = NO;
        [self setTitle:[NSString stringWithFormat:@"剩余%ld秒", self.count] forState:UIControlStateNormal];
//       [self setTitle:[NSString stringWithFormat:@"剩余%ld秒", self.count] forState:UIControlStateDisabled];
    } else {

        self.enabled = YES;
        [self setTitle:@"获取验证码" forState:UIControlStateNormal];
//        self.count = 60;

        // 停掉定时器
        [self.timer invalidate];
        self.timer = nil;
    }
}
Step2. 自定义文本输入框:ZLTextField
- (void)setupUI {

    // 输入框
    self.borderStyle = UITextBorderStyleNone;
    [self setAutocapitalizationType:UITextAutocapitalizationTypeNone];
    self.backgroundColor = [UIColor whiteColor]; // ZLColor(0, 0, 0);
    self.contentVerticalAlignment = UIControlContentVerticalAlignmentCenter;
    self.returnKeyType = UIReturnKeyNext;
    self.font = [UIFont systemFontOfSize:15];
    self.textColor = ZLColor(113, 111, 118);
    // 设置光标颜色
    self.tintColor =  ZLColor(113, 111, 118);
    // 设置UITextField的占位文字颜色
    self.placeholder = @"设置了占位文字内容以后, 才能设置占位文字的颜色";
    [self setValue: ZLColor(113, 111, 118) forKeyPath:@"_placeholderLabel.textColor"];
    // 添加背景图片
//    self.background = [UIImage imageNamed:@"u58"];
    // 左间隔
    self.leftView = [[UIView alloc] init];
    self.leftView.width = 15;
    self.leftViewMode = UITextFieldViewModeAlways;
    // clearButton
    self.clearButtonMode = UITextFieldViewModeWhileEditing;

    CGFloat marginX = 15;
    // 间隔线
    UIView *line = [[UIView alloc] init];
    line.frame = CGRectMake(marginX, self.height - 0.7, UI_View_Width - marginX * 2, 1);
    line.backgroundColor = ZLColor(249, 249, 249);
    [self addSubview:line];

}
Step3. 正则表达式:手机号及密码校验方法
- (BOOL)match:(NSString *)pattern {
    // 1.创建正则表达式
    NSRegularExpression *regex = [[NSRegularExpression alloc] initWithPattern:pattern options:0 error:nil];
    // 2.测试字符串
    NSArray *results = [regex matchesInString:self options:0 range:NSMakeRange(0, self.length)];

    return results.count > 0;
}
Step4. 修改密码界面里调用这个短信验证码, 调取后台接口,获取短信验证码处理相关其他逻辑
在你所需要的控制器里调用这个短信验证码按钮即可:
4.1)初始化创建设置相关按钮属性
// 获取验证码按钮
@property (nonatomic, weak) ZLVerifyCodeButton *codeBtn;
    // 获取验证码按钮
    ZLVerifyCodeButton *codeBtn = [ZLVerifyCodeButton buttonWithType:UIButtonTypeCustom];
    codeBtn.frame = CGRectMake(codeField.width - codeBtnW - marginX, 10, codeBtnW, 30);
    [codeBtn addTarget:self action:@selector(codeBtnVerification) forControlEvents:UIControlEventTouchUpInside];
    [self.codeField addSubview:codeBtn];
    self.codeBtn = codeBtn;
4.2)调取后台接口,获取短信验证码处理相关其他逻辑
// 获取验证码点击事件
- (void)codeBtnVerification {

    NSLog(@"验证码:%@", self.mobileField.text);

    [self.codeBtn timeFailBeginFrom:60]; // 倒计时60s

    // 调用短信验证码接口
    // 用户输入的验证码数字传给server,判断请求结果作不同的逻辑处理,根据自己家的产品大大需求来即可....
//    if (请求成功且匹配成功验证码数字){
//        [self.codeBtn timeFailBeginFrom:60];  // 倒计时60s
//    } else {
//        [self.codeBtn timeFailBeginFrom:1]; // 处理请求成功但是匹配不成功的情况,并不需要执行倒计时功能
//    }
}
4.3)调取后台修改密码接口,处理相关逻辑
// 调用修改密码接口
- (void)sureBtnPress {

    if (![self.mobileField.text isPhoneNumber]) {

        [self setupAlertMessage:@"新手机号码输入不正确"];
    } else if (![self.codeField.text isEqualToString:self.codeStr]) {

        [self setupAlertMessage:@"验证码输入不正确"];
    } else if(![self.newpswField.text isPSW]) {

        [self setupAlertMessage:@"新密码不符合要求"];
    } else if ([self.mobileField.text isPhoneNumber] && [self.codeField.text isEqualToString:self.codeStr] && [self.newpswField.text isPSW]) {

        // 调用修改密码接口
        [self changePswForServer];
    }

}

// 弹框提示错误信息
- (void)setupAlertMessage:(NSString *)message {

    UIAlertController *alert = [UIAlertController alertControllerWithTitle:@"提示" message:message preferredStyle:UIAlertControllerStyleAlert];
    UIAlertAction *okAction = [UIAlertAction actionWithTitle:@"确定" style:UIAlertActionStyleDefault handler:^(UIAlertAction * _Nonnull action) {

    }];
    [alert addAction:okAction];
    [self presentViewController:alert animated:YES completion:nil];
}
三、压缩文件截图及运行效果
1、压缩文件截图

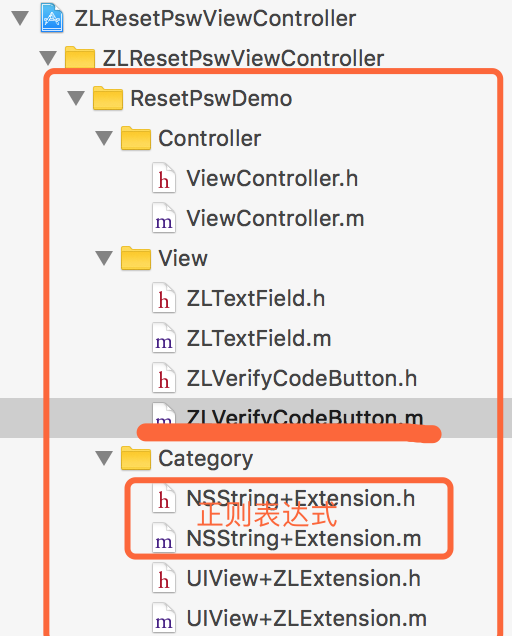
2、项目文件截图

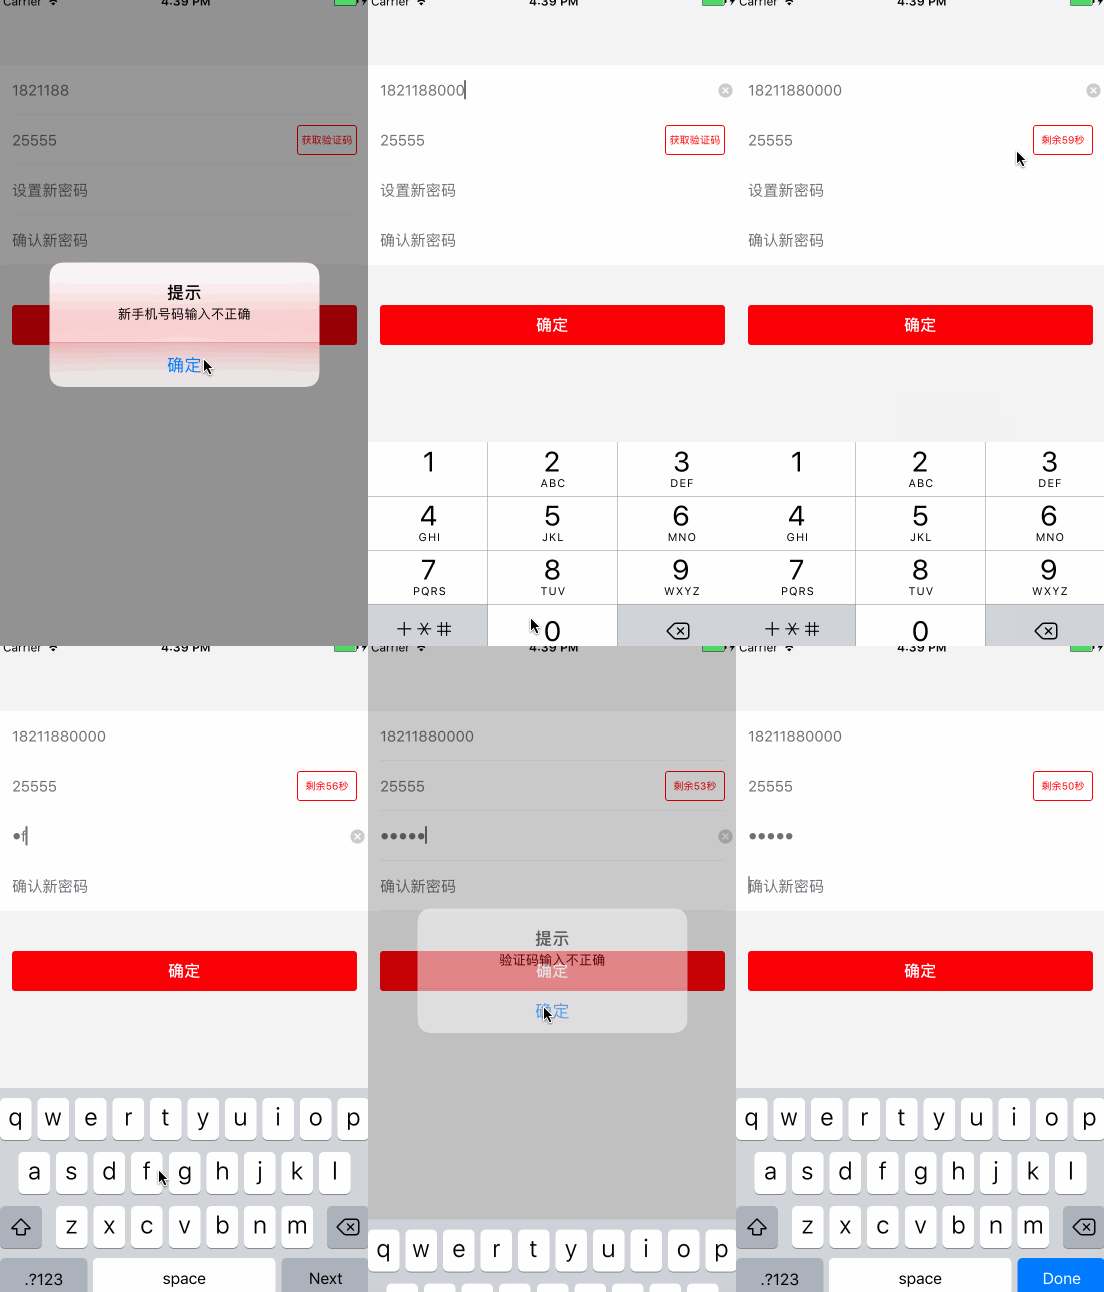
3、运行时的效果图

四、其他补充
界面性问题可以根据自己项目需求调整即可, 具体可参考代码, 项目能够直接运行!
由于 Demo整体测试运行效果 , 整个修改密码界面都已展现, 并附送正则表达式及修改密码逻辑.


