一:vuejs
1:token: 标志用户登录状态 , 存储用 vuex+cookie 实现, 即 vuex 里面设置变量 userToekn, 防止页面刷新 vuex中的变量恢复初始值。保存用户个人信息 ,用vuex 中变量userInfo (vuex+ localstorage), 原理跟token一致。
2:mouseover 父元素添加这个事件 子元素和孙子元素等后代元素都会触发这个事件, mouseenter仅作用于添加的元素上 不会传染给子元素。
3:vuejs 中修改数组或对象的值
1:修改数组对象中的值
perItems: [
{ src: require("img/index/pSetting/person01.png"), name: "" },
{ src: require("img/index/pSetting/order.png"), name: "我的订单" },
]
在 vuejs 中是无法检测到根据索引值修改的数据变动的, 所以:
方法一: this.perItems[0].name = “”张三“”;
this.perItems.__ob__.dep.notify();
方法二: this.$set(this.perItems[0], "name", "张三");
2:修改对象中的值:不管是修改原有属性 还是新增属性
perItems: { src: require("img/index/pSetting/person01.png"), name: "" };
方法一: this.perItems.name = “”张三“”;
this.perItems.__ob__.dep.notify();
方法二: this.$set(this.perItems, "name", "张三");
3:修改数组中的值
perItems: ["张三01", "张三02", "张三03"]
方法一: this.perItems[1] = "张三6"
this.perItems.__ob__.dep.notify();
方法二: this.$set(this.perItems, 1, "张三06"); // 修改数组中索引为1的 变量值
针对上面三种类型的变量,都用: this.$set()方法 或 .__ob__.dep.notify()
4:修改变量为:整个数组(分为 单纯数组或对象数组 ) 或 整个对象 中的值,直接 = 赋值即可,
1:若要props传递给子组件,传递的变量会改变,需要在子组件页面watch传递的变量变化
若传递的变量是数组或对象,要想在子组件监听到变量的变化,需要
方法一 变量添加 .__ob__.dep.notify()
方法二 若变量为对象,可以用Object.assign 方法( 原对象与要混合进去的对象par的 property 一起创建一个新的对象,再赋值给原对象) 如修改对象变量seledVal(par为一个对象): this.seledVal = Object.assign({}, this.seledVal, par)
2:在父页面不用添加.__ob__.dep.notify(),就可以直接watch到该变量的变化
单纯数组:
perItems: ["张三01", "张三02", "张三03"];
this.perItems = [6,8,9];
对象数组:
perItems:{
src: require("img/index/pSetting/person01.png"),
name: "hahhahaa"
},
{ src: require("img/index/pSetting/order.png"), name: "我的订单" }
]
let m = [
{
src: require("img/index/pSetting/logo.png"),
name: "hahhahaa"
},
{ src: require("img/index/pSetting/order.png"), name: "我的最爱" }
];
this.perItems = m;
this.perItems.__ob__.dep.notify();
4:点击空白处隐藏:
思路:外部div.outSection 添加点击事件foldDroplist() 设置.one隐藏, .two设置禁止冒泡事件:@click.stop, 即点击.two 不引发foldDroplist函数。
<div class="outSection" @click.stop="foldDroplist">
<div class='one' v-show='bl'>大宝</div>
<div class='two' @click.stop>
<p>我哈哈</p>
<input type='text' >
<div>
</div>
data(){
return {
bl:false
}
}
methods: {
foldDroplist(){
this.bl =false
}
}
二:element ui 框架使用注意事项
1:dropDown 下拉菜单: 点击el-dropdown-item 隐藏el-dropdown-menu (ui框架自带的功能),必须把点击事件写在 el-dropdown-item 上 ,应用场景:
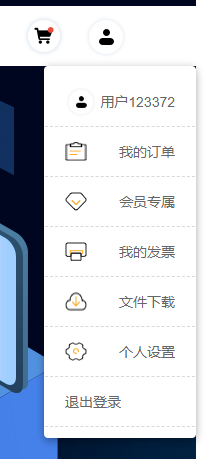
产品需求: 鼠标放上去, 个人中心下拉框展示出来, 点击 “退出登录” 执行 loginOut() 方法, 并且下拉框关闭, 代码如下:
<el-dropdown>
<div class="drop-top">
<img v-show="img01" src="~img/index/pSetting/person01.png" alt="" />
<img
v-show="!img01"
src="~img/index/pSetting/person02.png"
alt=""
/>
</div>
<el-dropdown-menu slot="dropdown" class="drop-down-con">
<el-dropdown-item class="flex" @click.native="loginOut">
<p class="pointer out">退出登录</p>
</el-dropdown-item>
</el-dropdown-menu>
</el-dropdown>
js:
methods: {
// 退出登录
loginOut() {
this.LOGIN_OUT();
}
}
2: el-form 组件 , el-form-item 这个标签上面不要添加 flex 布局 否则样式会乱,该标签内部元素可以添加flex布局
<el-form-item label="申请信息" class="info">
<div
class="flex firItemCon "
v-for="(item, key) in formNext.orderItems"
:key="key"
></div></el-form-item>
3:el-table 组件,一定要设置宽度
4:el-input框的@focus事件函数里面,不能用 alert confirm等弹框,否则会一直弹 弹框。解决方式,自己写一个弹框vue组件,控制组件的显示与隐藏.
5:el-dialog 弹框传值 用了 close 回调事件, 删除掉 :visible.sync 中的sync修饰符 点击 蒙层弹框中的x按钮, 弹框不会关闭 , 所以不能删除 .sync修饰符
<el-dialog
:center="true"
custom-class=" dialogDiv"
width="1000px"
top="0vh"
:visible.sync="dialogVisible"
></el-dialog>
6: el-from标签 1: hide-required-asterisk属性 表示 是否显示必填字段的标签旁边的红色星号, 取值为true 表示不显示 2:@submit.native.prevent, 禁止点击button按钮,form表单自动提交,以便执行自定义点击函数submitForm()
<el-form
:model="regForm"
:rules="rulesPh"
label-width="100px"
label-position="left"
:hide-required-asterisk="true"
ref="regForm"
@submit.native.prevent
>
<el-form-item>
<el-button class="pointer reg-btn" @click="submitForm('regForm')"
>提交</el-button
>
</el-form-item>
</el-from>
<script>
export default {
methods: {
//点击 提交 按钮
submitForm(formName) {
}
}
}
</script>
7: el-collapse 折叠面板 ,el-collapse-item 中的子元素添加点击事件,同时阻止折叠面板关闭,事件添加stop修饰符 阻止冒泡事件 相当于event.stopPropagation(), 阻止执行面板展开或折叠的操作
如:
<el-collapse>
<el-collapse-item>
<template slot="title">
<i class="el-icon-delete" @click.stop="clickDelICon(item, i)"></i>
</template>
</el-collapse-item>
</el-collapse>
父组件给子组件传值,并在子组件里面渲染该数据
用@Component({}) 方式(typescript的写法)引入子组件JobHeader,dom结构如下:
<!-- v-if="allImg.length > 0 " allImg 里面有数组了,再渲染子组件 JobHeader -->
<JobHeader ref="jobHeader" v-if=" allImg && allImg.length > 0 " :data="allImg"></JobHeader>
用 v-if + :data(data随便定义起名) 的方式传值并控制子组件显示
swiper插件的坑
DOM结构 :
 <div class="swiper-container" ref="mySwiper">
      <div class="swiper-wrapper">
        <div
          class="flex pointer swiper-slide"
          v-for="(item, i) in titArr"
          :key="i"
          :data_index="item"
          @click.stop="openRouter(item)"
        >
          <div class="flex itemDiv">
            <img class="img1" :src="item.url1" alt="" />
            <img class="img2" :src="item.url2" alt="" />
            <i class="el-icon-success"></i>
            <p class="nowrap">{{ item.name }}</p>
          </div>
        </div>
      </div>
    </div>
    <!-- 如果需要导航按钮 -->
    <div class="swiper-button-prev"></div>
    <div class="swiper-button-next"></div> (左右箭头放到.swiper-container容器的外面,更方便修改左右箭头的位置与样式)
<script>
import Swiper from 'swiper'
import 'swiper/dist/css/swiper.min.css'
(Swiper插件 特别是loop循环时,循环titArr数据时,此时会复制成很多slide,所以在slide上添加事件,后面复制的slide是无效的,可以在swiper里面 on属性 添加一些事件,比如点击事件,slide切换事件,在这些事件做一些js逻辑处理。
不要想着改变 titArr的值,或titArr内部某个属性值,会发生一些意想不到的bug。
ie11 不兼容 swiper4/5 只兼容 swiper3,具体不兼容表现是 ie11浏览器报错,报语法错误。swiper4/5 循环模式lopp下,指定切换到具体索引slide,可以用 slideToLoop()方法,切换到指定索引为2,即 slideToLoop(2)。
但swiper3 没有这个方法,只有slideTo(i)方法,指定切换到 索引为2的slide, 此时 i取值为 2+slidesPerView(一页显示的slide的个数) 的值,当前页面就是 2+5 = 7 ,即slideTo(7) )
export default {
data() {
return {
titArr: [
{
url1: require('img/selfAppl/tradeBusi/design/wheel/rejAppl.png'),
url2: require('img/selfAppl/tradeBusi/design/wheel/rejAppled.png'),
name: '商标驳回复审',
router: '/rejAppl/0'
},
{
url1: require('img/selfAppl/tradeBusi/design/wheel/change.png'),
url2: require('img/selfAppl/tradeBusi/design/wheel/changed.png'),
name: '商标变更',
router: '/rejAppl/1'
}
]
}
}
}
</script>
vue页面禁止蒙层底部滚动
方法一:(推荐)
<!-- 蒙层 -->
<div @click.stop="hide" @touchmove.prevent class="CustomPopup"></div>
使用 @touchmove.prevent 禁止穿透到底部
方法二:
函数名 popupVisible,我是把这个方法放到vuex里面, 滚动高度用变量top表示
state: {
    pageLoad: !0,
    top: 0, // 页面滚动的高度
  },
popupVisible(state, newValue) {
      if (newValue) {
        // 页面固定
        state.top = window.scrollY;
        console.log("true--state.top", state.top);
        document.body.style.position = "fixed";
        document.body.style.top = -state.top + "px";
      } else {
        // 页面滚动
        console.log("false--state.top", state.top);
        document.body.style.position = "";
        document.body.style.top = "";
        window.scrollTo(0, state.top);
      }
    },
actions 里面commit 该mutations方法:
hidePass({ commit }, params) { // commit对象
      commit('popupVisible', params);
    }
vue页面引用:
// 禁止蒙层底部滚动
this.$store.dispatch("hidePass", true);
// 允许
this.$store.dispatch("hidePass", false);
解决 css3 object-fit 不兼容IE浏览器,(从ie9都ie11,都不兼容)安装插件 object-fit-images
步骤一: npm install --save object-fit-images
步骤二:
main.js:
import objectFitImages from 'object-fit-images'
objectFitImages()   // 全局引入
步骤三:
在vue文件中:
<style>
.firstLi {
img {
width: 50px;
height: 50px;
border-radius: 50px;
align-items: flex-start;
margin: 0 10px 0 20px;
object-fit: cover;
font-family: 'object-fit: cover;';
}
}
</style>
也可以在main.less 全局定义图片:
main.less:
// 定义image图片的填充形式,图片不变形的情况下,使图片完全填充到 img图片定义的宽高中,即把容器铺满。
img {
  object-fit: cover;
  font-family: 'object-fit: cover;'; // 这行代码 是为了让ie浏览器识别
}
mixin(混入)的用法


