Python - 使用python3给企业微信发送消息
一、概述
本文将介绍如何使用python3给企业微信发送消息。我的环境是linux + python3.6.10。
二、python脚本

#!/root/.virtualenvs/wechat/bin/python
# usage: send message via wechat

import requests, sys, json
import urllib3
urllib3.disable_warnings()


###填写参数###

# Corpid是企业号的标识
Corpid = "ww34d7fed41a8d5dxx"

# Secret是管理组凭证密钥
Secret = "8QwzOi0xCvbp1ZnCbnQJ1d6uEIv-Lrbcjp93UrHFxxx"

# 应用ID
Agentid = "1000002"

# token_config文件放置路径
Token_config = r'/tmp/zabbix_wechat_config.json'

###下面的代码都不需要动###


def GetTokenFromServer(Corpid, Secret):
    """获取access_token"""
    Url = "https://qyapi.weixin.qq.com/cgi-bin/gettoken"
    Data = {
        "corpid": Corpid,
        "corpsecret": Secret
    }
    r = requests.get(url=Url, params=Data, verify=False)
    print(r.json())
    if r.json()['errcode'] != 0:
        return False
    else:
        Token = r.json()['access_token']
        file = open(Token_config, 'w')
        file.write(r.text)
        file.close()
        return Token


def SendMessage(Partyid, Subject, Content):
    """发送消息"""
    # 获取token信息
    try:
        file = open(Token_config, 'r')
        Token = json.load(file)['access_token']
        file.close()
    except:
        Token = GetTokenFromServer(Corpid, Secret)

    # 发送消息
    Url = "https://qyapi.weixin.qq.com/cgi-bin/message/send?access_token=%s" % Token
    Data = {
        "toparty": Partyid,
        "msgtype": "text",
        "agentid": Agentid,
        "text": {"content": Subject + '\n' + Content},
        "safe": "0"
    }
    r = requests.post(url=Url, data=json.dumps(Data), verify=False)

    # 如果发送失败,将重试三次
    n = 1
    while r.json()['errcode'] != 0 and n < 4:
        n = n + 1
        Token = GetTokenFromServer(Corpid, Secret)
        if Token:
            Url = "https://qyapi.weixin.qq.com/cgi-bin/message/send?access_token=%s" % Token
            r = requests.post(url=Url, data=json.dumps(Data), verify=False)
            print(r.json())

    return r.json()


if __name__ == '__main__':
    Partyid = str(sys.argv[1])
    Subject = str(sys.argv[2])
    Content = str(sys.argv[3])
    Status = SendMessage(Partyid, Subject, Content)
    print(Status)
需要修改的地方,其中Corpid,Secret,Agentid我会在后面的截图指出来要填的值。
下行是linux环境下python3的可执行路径,如果是windows,那么这行就不需要,只要将python的路径加入到path即可
#!/root/.virtualenvs/wechat/bin/python
# Corpid是企业ID
Corpid = "ww34d7fed41a8d5dxx"
# Secret是管理组凭证密钥
Secret = "8QwzOi0xCvbp1ZnCbnQJ1d6uEIv-Lrbcjp93UrHFxxx"
# Agentid是应用ID
Agentid = "1000002"
# Token_config里面存放token信息,这个自己随便填就行,只要自己有写的权限
Token_config = r'/tmp/zabbix_wechat_config.json'
三、企业微信设置
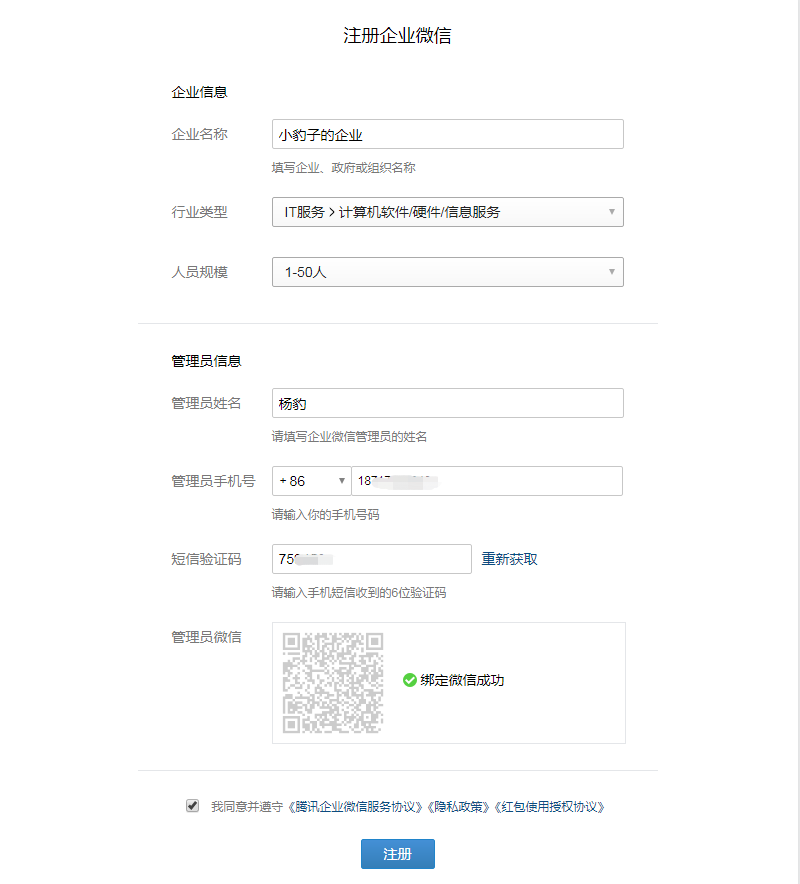
1. 注册企业微信
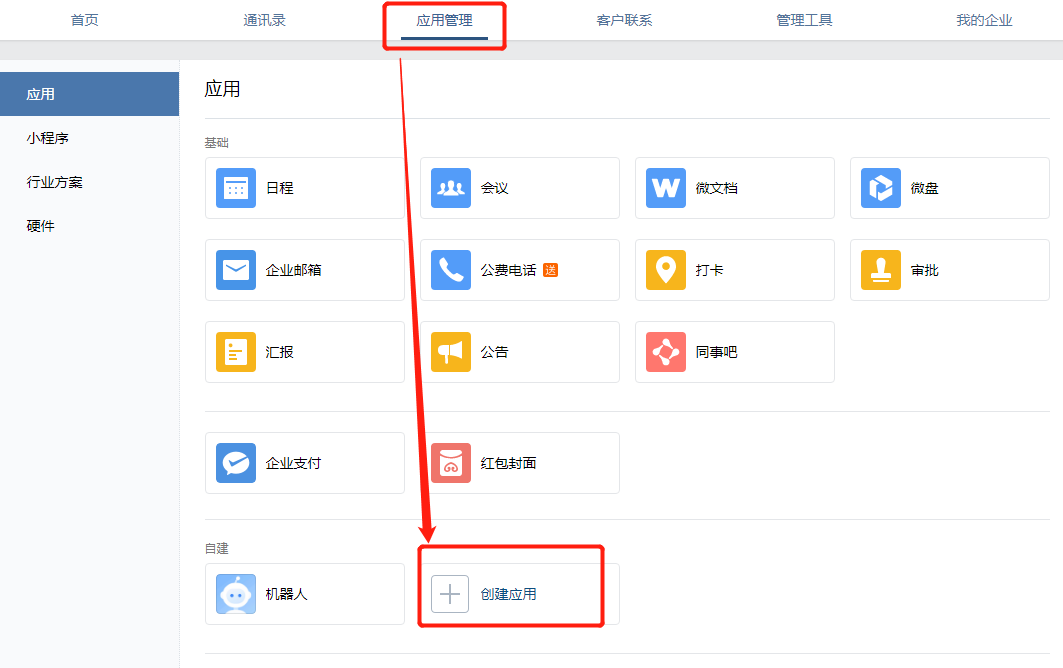
2. 点击进入管理后台
创建应用
3. 创建应用完成后
Agentid,Secret就出来了
4. 查看企业id
这个就是脚本中的Corpid
5. 查看部门id
我这个python脚本是通过部门id进行群体发送,所以这个部门id到后面会有用。
四、测试脚本

五、总结
脚本是在火星小刘的基础上改的,我是在linux环境下做的实验,windows下面跟这一样,其中微小的区别我在文章中已经标明。


【推荐】编程新体验,更懂你的AI,立即体验豆包MarsCode编程助手
【推荐】凌霞软件回馈社区,博客园 & 1Panel & Halo 联合会员上线
【推荐】抖音旗下AI助手豆包,你的智能百科全书,全免费不限次数
【推荐】博客园社区专享云产品让利特惠,阿里云新客6.5折上折
【推荐】轻量又高性能的 SSH 工具 IShell:AI 加持,快人一步
· [.NET]调用本地 Deepseek 模型
· 一个费力不讨好的项目,让我损失了近一半的绩效!
· .NET Core 托管堆内存泄露/CPU异常的常见思路
· PostgreSQL 和 SQL Server 在统计信息维护中的关键差异
· C++代码改造为UTF-8编码问题的总结
· 一个费力不讨好的项目,让我损失了近一半的绩效!
· 清华大学推出第四讲使用 DeepSeek + DeepResearch 让科研像聊天一样简单!
· 实操Deepseek接入个人知识库
· CSnakes vs Python.NET:高效嵌入与灵活互通的跨语言方案对比
· Plotly.NET 一个为 .NET 打造的强大开源交互式图表库