SSM(Spring+SpringMvc+Mybatis)整合笔记
1.使用开发工具
jdk1.8
eclipse
Tomcat7.0
MySql
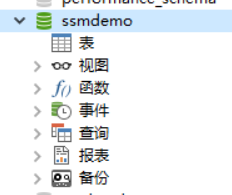
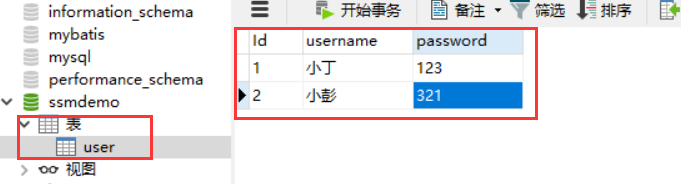
2.创建数据库和表,由于重点是整合,所以数据库就随意加几条数据。
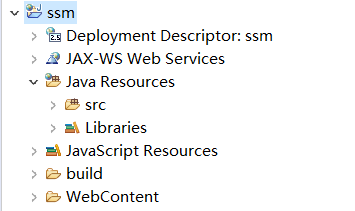
3.创建动态Web项目(推荐使用Maven可以用配置来导入jar包),导入jar包

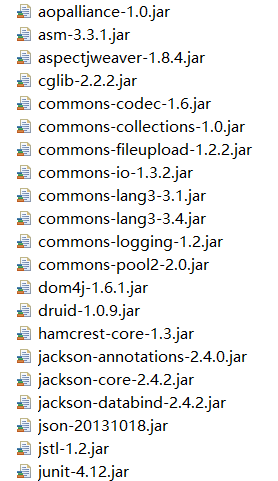
不管了 全家桶一次导入 👻 有兴趣的可以自己去筛选一下。
4.SSM整合
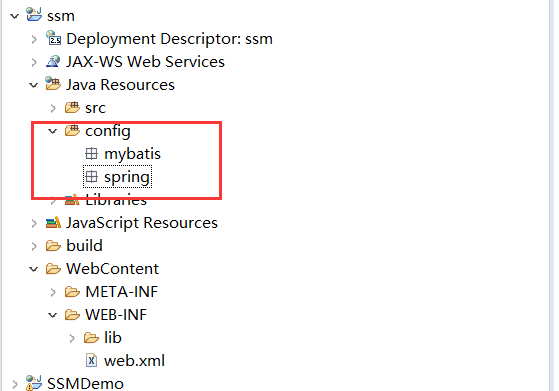
4.1 创建config文件夹 在config文件夹下创建mybatis和spring的文件夹用来分别放mybatis和spring的配置文件,这步就是为了让你下次改可以快速找到,你要是一箩筐放src中也是可以滴。
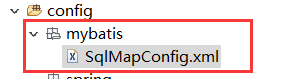
4.2加入SqlMapConfig.xml(Mybatis的用来创建工厂的“原材料” ,在没有spring的时候,数据库连接池是放在里面的 ,现在有了spirng,这个xml文件先为空就可以)
<?xml version="1.0" encoding="UTF-8" ?>
<!DOCTYPE configuration PUBLIC "-//mybatis.org//DTD Config 3.0//EN"
"http://mybatis.org/dtd/mybatis-3-config.dtd">
<configuration>

</configuration>
4.2加入spring需要的applicationContext.xml文件,spring就是根据你的这个xml文件去帮你动态创建相应的对象,由于分层的缘故嗷,配置文件我们也给他分个层。
applicationContext-dao.xml 表示dao层
<?xml version="1.0" encoding="UTF-8"?>
<beans xmlns="http://www.springframework.org/schema/beans"
    xmlns:context="http://www.springframework.org/schema/context"
    xmlns:p="http://www.springframework.org/schema/p"
    xmlns:aop="http://www.springframework.org/schema/aop"
    xmlns:tx="http://www.springframework.org/schema/tx"
    xmlns:xsi="http://www.w3.org/2001/XMLSchema-instance"
    xsi:schemaLocation="http://www.springframework.org/schema/beans http://www.springframework.org/schema/beans/spring-beans-4.0.xsd
    http://www.springframework.org/schema/context http://www.springframework.org/schema/context/spring-context-4.0.xsd
    http://www.springframework.org/schema/aop http://www.springframework.org/schema/aop/spring-aop-4.0.xsd http://www.springframework.org/schema/tx http://www.springframework.org/schema/tx/spring-tx-4.0.xsd
    http://www.springframework.org/schema/util http://www.springframework.org/schema/util/spring-util-4.0.xsd">

    <!-- 让这个配置文件知道从哪边去找 jdbc.properties并获得值 -->
    <context:property-placeholder
        location="classpath:jdbc.properties" />

    <!-- 配置数据连接池,这里为了解决硬编码,采用从jdbc.properties读数据的方法 -->
    <bean id="dataSource"
        class="com.alibaba.druid.pool.DruidDataSource">
        <property name="driverClassName" value="${jdbc.driver}" />
        <property name="url" value="${jdbc.url}" />
        <property name="username" value="${jdbc.username}" />
        <property name="password" value="${jdbc.password}" />
    </bean>

    <!-- 配置工厂,之前没有spring的时候,手动创建工厂需要核心配置文件, 核心配置文件中有数据连接池,但有了spring就把连接池写在了spring的配置文件中 -->
    <bean id="sqlFactory"
        class="org.mybatis.spring.SqlSessionFactoryBean">
        <property name="configLocation"
            value="classpath:mybatis/SqlMapConfig.xml" />
        <!-- 设置数据源  -->
        <property name="dataSource" ref="dataSource" />
    </bean>
</beans>
jdbc.properties

applicationContext-service.xml 由于现在还用不到,先配置个头的部分
<?xml version="1.0" encoding="UTF-8"?>
<beans xmlns="http://www.springframework.org/schema/beans"
    xmlns:context="http://www.springframework.org/schema/context" xmlns:p="http://www.springframework.org/schema/p"
    xmlns:aop="http://www.springframework.org/schema/aop" xmlns:tx="http://www.springframework.org/schema/tx"
    xmlns:xsi="http://www.w3.org/2001/XMLSchema-instance"
    xsi:schemaLocation="http://www.springframework.org/schema/beans http://www.springframework.org/schema/beans/spring-beans-4.0.xsd
    http://www.springframework.org/schema/context http://www.springframework.org/schema/context/spring-context-4.0.xsd
    http://www.springframework.org/schema/aop http://www.springframework.org/schema/aop/spring-aop-4.0.xsd http://www.springframework.org/schema/tx http://www.springframework.org/schema/tx/spring-tx-4.0.xsd
    http://www.springframework.org/schema/util http://www.springframework.org/schema/util/spring-util-4.0.xsd">

</beans>
4.3配置玩dao和service,就剩下ui层啦,也就是springmvc的配置 还是在spring文件下加springmvc.xml
<?xml version="1.0" encoding="UTF-8"?>
<beans xmlns="http://www.springframework.org/schema/beans"
    xmlns:xsi="http://www.w3.org/2001/XMLSchema-instance" xmlns:p="http://www.springframework.org/schema/p"
    xmlns:context="http://www.springframework.org/schema/context"
    xmlns:mvc="http://www.springframework.org/schema/mvc"
    xsi:schemaLocation="http://www.springframework.org/schema/beans http://www.springframework.org/schema/beans/spring-beans-4.0.xsd
        http://www.springframework.org/schema/mvc http://www.springframework.org/schema/mvc/spring-mvc-4.0.xsd
        http://www.springframework.org/schema/context http://www.springframework.org/schema/context/spring-context-4.0.xsd">

    <!-- 配置注解驱动  配置的原因是因为默认的过时了-->
    <mvc:annotation-driven />

    <!-- 配置视图解析器 这个可加可不加,就是返回jsp视图时少写点东西 -->
    <bean class="org.springframework.web.servlet.view.InternalResourceViewResolver">
        <!-- 前缀 -->
        <property name="prefix" value="/WEB-INF/jsp/" />
        <!-- 后缀 -->
        <property name="suffix" value=".jsp" />
    </bean>
</beans>
4.4配置web.xml , 前面加了这个多配置文件,web项目可没有那么聪明知道这个是dao,这个是service的,所以我们要在web.xml中配置
<?xml version="1.0" encoding="UTF-8"?>
<web-app xmlns:xsi="http://www.w3.org/2001/XMLSchema-instance"
    xmlns="http://java.sun.com/xml/ns/javaee"
    xsi:schemaLocation="http://java.sun.com/xml/ns/javaee http://java.sun.com/xml/ns/javaee/web-app_2_5.xsd"
    id="WebApp_ID" version="2.5">
    <display-name>ssm</display-name>
    <welcome-file-list>
        <welcome-file>index.html</welcome-file>
        <welcome-file>index.htm</welcome-file>
        <welcome-file>index.jsp</welcome-file>
        <welcome-file>default.html</welcome-file>
        <welcome-file>default.htm</welcome-file>
        <welcome-file>default.jsp</welcome-file>
    </welcome-file-list>

    <!-- 配置spring spring配置文件的路径 -->
    <context-param>
        <param-name>contextConfigLocation</param-name>
        <param-value>classpath:spring/applicationContext-*.xml</param-value>
    </context-param>

    <!-- 配置监听器加载spring -->
    <listener>
        <listener-class>org.springframework.web.context.ContextLoaderListener</listener-class>
    </listener>

    <!-- 上面这个是去找dao和service,下面这个就是去找springmvc的了 DispatcherServlet是springmvc架构的大脑 -->

    <servlet>
        <servlet-name>springmvc</servlet-name>
        <servlet-class>org.springframework.web.servlet.DispatcherServlet</servlet-class>
        <init-param>
            <param-name>contextConfigLocation</param-name>
            <param-value>classpath:spring/springmvc.xml</param-value>
        </init-param>
    </servlet>
    <servlet-mapping>
        <servlet-name>springmvc</servlet-name>
        <url-pattern>/</url-pattern>
    </servlet-mapping>

</web-app>
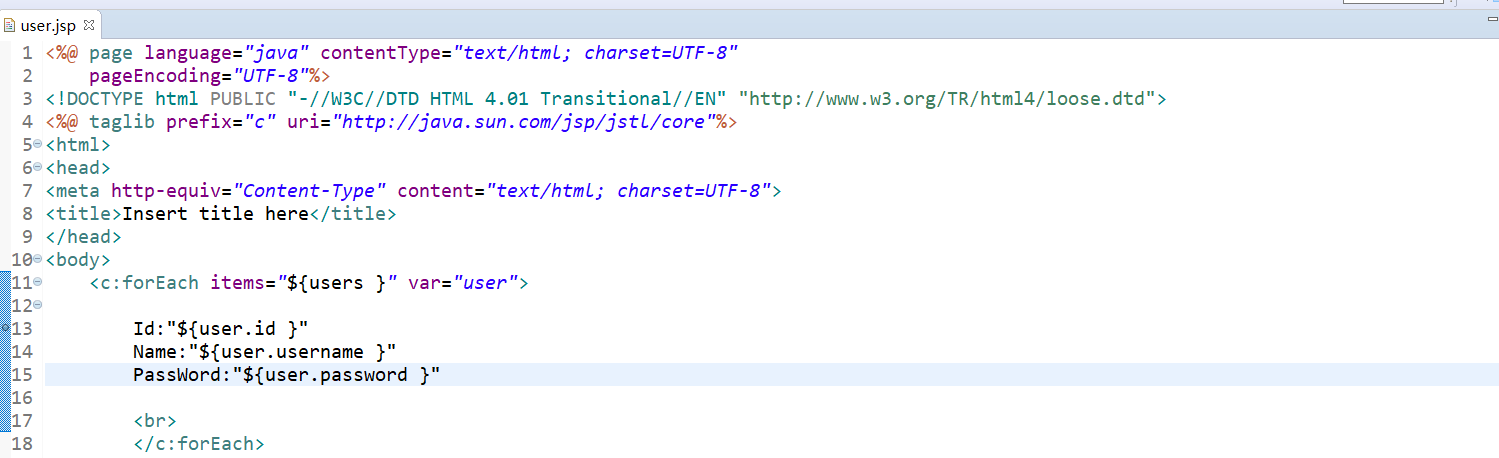
4.5 还记得我们数据库写了两个User吗,我们的目标就是要显示这两个User,所以先加个jsp页面,用来显示。
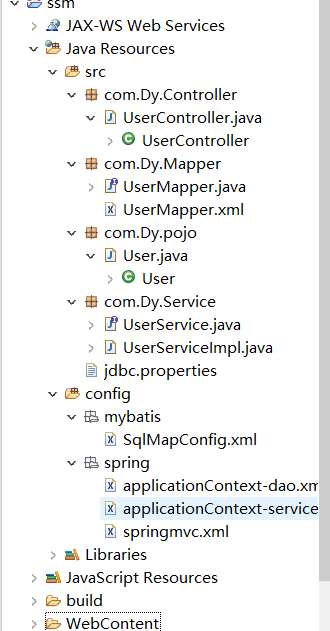
4.6.从数据库去找数据,从dao层开始,首先构建个pojo,pojo的字段名最好和数据库中的字段一样,这样mybatis可以自动映射
package com.Dy.pojo;

public class User {
    private String Id;
    private String username;
    private String password;
    public String getId() {
        return Id;
    }
    public void setId(String id) {
        Id = id;
    }
    public String getUsername() {
        return username;
    }
    public void setUsername(String username) {
        this.username = username;
    }
    public String getPassword() {
        return password;
    }
    public void setPassword(String password) {
        this.password = password;
    }

}
4.7.加入Mapper接口,从数据库找出这两条数据
package com.Dy.Mapper;

import java.util.List;

import com.Dy.pojo.User;

public interface UserMapper {
    public List<User> findAllUsers();
}
因为我们才用Mapper动态代理,所以加入UserMapper.xml 要和接口同名才行 这样不需要写接口的实现类,sping会帮我们创建一个具体的实现类
<?xml version="1.0" encoding="UTF-8" ?>
<!DOCTYPE mapper
PUBLIC "-//mybatis.org//DTD Mapper 3.0//EN"
"http://mybatis.org/dtd/mybatis-3-mapper.dtd">
<!-- 这里的namespace是为了去绑定那个接口,让xml文件知道对应的是哪个接口 -->
<mapper namespace="com.Dy.Mapper.UserMapper">

    <!-- id于接口的名字一样 -->
    <select id="findAllUsers" resultType="com.Dy.pojo.User">
        select * from user
    </select>

</mapper>
4.8. 配置动态扫描,动态扫描就是spring扫描你配置的包下,发现两个同名的,那么下次你用接口的时候,就自动帮你实例化一个对象,执行的代码就是xml的sql语句。在applicationContext-dao.xml中加上下面这句话

4.9.Service层开发,写一个接口,在实现这个接口。
package com.Dy.Service;

import java.util.List;

import com.Dy.pojo.User;

public interface UserService {
    public List<User> findAllUsers();
}
package com.Dy.Service;

import java.util.List;

import org.springframework.beans.factory.annotation.Autowired;
import org.springframework.stereotype.Service;

import com.Dy.Mapper.UserMapper;
import com.Dy.pojo.User;
@Service
public class UserServiceImpl implements UserService {

    @Autowired
    private UserMapper userMapper;

    @Override
    public List<User> findAllUsers() {
        return userMapper.findAllUsers();
    }

}
由于我们使用的是注解开发,所以在allicationConext-service.xml加上扫描

4.10 写Controller层
package com.Dy.Controller;

import java.util.List;

import org.springframework.beans.factory.annotation.Autowired;
import org.springframework.stereotype.Controller;
import org.springframework.ui.Model;
import org.springframework.web.bind.annotation.RequestMapping;

import com.Dy.Service.UserService;
import com.Dy.pojo.User;

@Controller
public class UserController {
    @Autowired
    private UserService userService;

    @RequestMapping("/Home")
    public String findAllUser(Model model) {
        List<User> users = userService.findAllUsers();
        model.addAttribute("users", users);
        return "user";
    }
}
因为Controller用了注解开发,所以在spingmvc.xml中加上

4.11启动项目


 浙公网安备 33010602011771号