第七节 SpringBoot自定义参数
一、使用yml配置文件
第一种方式就是把自定义参数配置在yml配置文件中。
例如,在application.yml中加入如下配置。
#自定义参数
define:
  userinfo:
    username: zhoutianyu
    age: 24
    position: java engineer
  department:
    name: 研发部门
(1)采用传统的@Value注解注入。注意写法 @Value( "$ { }" )
package com.zhoutianyu.learnspringboot.param;

import lombok.Data;
import org.springframework.beans.factory.annotation.Value;
import org.springframework.stereotype.Component;

@Component
@Data
public class Department {

    @Value("${define.department.name}")
    private String name;
}
(2)采用SpringBoot的@ConfigurationProperties注解注入。指明前缀即可。
package com.zhoutianyu.learnspringboot.param;

import lombok.Data;
import org.springframework.boot.context.properties.ConfigurationProperties;
import org.springframework.stereotype.Component;

@ConfigurationProperties(prefix = "define.userinfo")
@Component
@Data
public class UserInfo {

    private String username;

    private int age;

    private String position;
}
下面编写一个测试类来测试一下。
package com.zhoutianyu.learnspringboot.param;

import org.springframework.beans.factory.annotation.Autowired;
import org.springframework.web.bind.annotation.GetMapping;
import org.springframework.web.bind.annotation.RestController;

@RestController
public class UserInfoController {

    @Autowired
    private UserInfo userInfo;

    @Autowired
    private Department department;


    @GetMapping(value = "/param/test")
    public UserInfo userInfo() {
        return userInfo;
    }

    @GetMapping(value = "/param/test2")
    public String departmentName() {
        return department.getName();
    }
}
启动服务器,在浏览器上进行访问。
因为我的全局响应已经封装,返回结果可能与你们不一样。但是只要实体中有值证明就成功了。
可参考:第五节 统一全局响应
访问:http://localhost:8081/study/springboot/param/test,证明使用@ConfigruationProperties注入成功。

访问:http://localhost:8081/study/springboot/param/test2,证明使用@Value("${ }")注解注入成功。

二、使用Properties配置文件
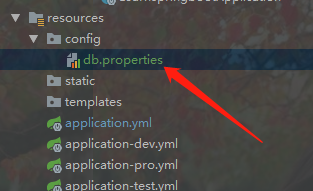
新建一个配置文件,db.properties文件。
在这个文件中加入如下配置。
database.name = MySQL
database.version = V5.7
如何把properties的属性注入到JAVA实体中呢?
SpringBoot十分贴心的提供了一个@PropertySource注解。只需要指明文件位置即可。
这也分两种注入方式,第一种就是使用@ConfigurationProperties,指明前缀就能省去使用@Value注解。
package com.zhoutianyu.learnspringboot.param;

import lombok.Data;
import org.springframework.boot.context.properties.ConfigurationProperties;
import org.springframework.context.annotation.PropertySource;
import org.springframework.stereotype.Component;

@PropertySource(value = "classpath:config/db.properties")
@ConfigurationProperties(prefix = "database")
@Component
@Data
public class Database {

    private String name;

    private String version;
}
第二种就是不用@ConfigurationProperties指明前缀,直接使用@Value注解,配上全名。例如下面:
package com.zhoutianyu.learnspringboot.param;

import lombok.Data;
import org.springframework.beans.factory.annotation.Value;
import org.springframework.context.annotation.PropertySource;
import org.springframework.stereotype.Component;

@PropertySource(value = "classpath:config/db.properties")
@Component
@Data
public class DatabaseCopy {

    @Value("${database.name}")
    private String name;

    @Value("${database.version}")
    private String version;
}
最后在Controller中编写测试方法。
package com.zhoutianyu.learnspringboot.param;

import org.springframework.beans.factory.annotation.Autowired;
import org.springframework.web.bind.annotation.GetMapping;
import org.springframework.web.bind.annotation.RestController;

@RestController
public class UserInfoController {

    @Autowired
    private Database database;

    @Autowired
    private DatabaseCopy databaseCopy;


    @GetMapping(value = "/param/test3")
    public Database dataBase() {
        return database;
    }

    @GetMapping(value = "/param/test4")
    public DatabaseCopy dataBaseCopy() {
        return databaseCopy;
    }
}
访问:http://localhost:8081/study/springboot/param/test3 ,使用@PropertySource + @ConfigurationProperties

访问:http://localhost:8081/study/springboot/param/test4,直接用@PropertySource + @Value 注解。效果相同。

三、源码下载
番外篇:手动实现@ConfigurationProperties,知己知彼,百战百胜。
本章节项目源码:点我下载源代码

 浙公网安备 33010602011771号