第十节 SpringBoot集成MyBatis与MybatisPlus
一、集成MyBatis
Mybatis现在应该在当前的市场上占据了大半壁江山,至少我任职过的公司都用mybatis。
最近项目组引入了MyBatis的增强版----MyBatisPlus。
(1)首先导入MyBatis的依赖。
<!-- mybatis依赖:2.1.0为稳定版本-->
<dependency>
<groupId>org.mybatis.spring.boot</groupId>
<artifactId>mybatis-spring-boot-starter</artifactId>
<version>2.1.0</version>
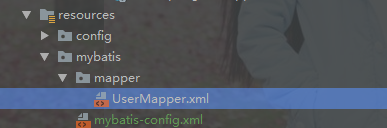
</dependency>(2)在application.yml中添加mybatis的配置,指明我们的mybatis的配置文件所在位置。
mybatis:
  mapperLocations: classpath:mybatis/mapper/*.xml
  configLocation: classpath:mybatis/mybatis-config.xml
mybatis-config.xml是mybatis总的配置,一般用于配置别名什么的。
<?xml version="1.0" encoding="UTF-8" ?>
<!DOCTYPE configuration PUBLIC "-//mybatis.org//DTD Config 3.0//EN"
        "http://mybatis.org/dtd/mybatis-3-config.dtd">
<configuration>
    <settings>
        <setting name="mapUnderscoreToCamelCase" value="true" />
    </settings>
</configuration>
mapper包下存放的就是实打实的用于写SQL的XML了,等会再说。
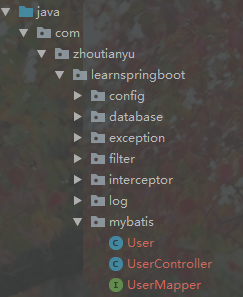
(3)好了,让我们来写一些Java。按照User UserMapper UserController 的思路编写。
@Data
public class User {
    private Long id;
    private String username;
    private Integer age;
}
@Mapper
public interface UserMapper {
User getUserById(Long id);
}@RestController
public class UserController {
private static final Logger LOGGER = LoggerFactory.getLogger(UserController.class);
@Autowired
private UserMapper mapper;
@GetMapping(value = "mybatis/getUserById")
public User function(Long id) {
LOGGER.info("the id is:{}", id);
return mapper.getUserById(id);
}
}
(4)编写最后的UserMapper.xml
<?xml version="1.0" encoding="UTF-8"?>
<!DOCTYPE mapper PUBLIC "-//mybatis.org//DTD Mapper 3.0//EN" "http://mybatis.org/dtd/mybatis-3-mapper.dtd">
<mapper namespace="com.zhoutianyu.learnspringboot.mybatis.UserMapper">
  <resultMap id="BaseResultMap" type="com.zhoutianyu.learnspringboot.mybatis.User">

    <id column="id" jdbcType="BIGINT" property="id" />
    <result column="username" jdbcType="VARCHAR" property="username" />
    <result column="age" jdbcType="INTEGER" property="age" />
  </resultMap>
  <sql id="Base_Column_List">
    id, username, age
  </sql>

  <select id="getUserById" parameterType="java.lang.Long" resultMap="BaseResultMap">
    select
    <include refid="Base_Column_List" />
    from t_user
    where id = #{id,jdbcType=BIGINT}
  </select>
</mapper>
测试
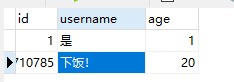
创建数据库表,并添加一些数据。
CREATE TABLE `t_user` (
  `id` bigint(11) NOT NULL AUTO_INCREMENT,
  `username` varchar(255) DEFAULT NULL,
  `age` int(255) DEFAULT NULL,
  PRIMARY KEY (`id`)
) ENGINE=InnoDB AUTO_INCREMENT=7 DEFAULT CHARSET=utf8;

启动项目,访问:http://localhost:8081/study/springboot/mybatis/getUserById?id=1
因为我自己的项目的全局响应已经封装,所以返回结果可能会有不同。可参考:第五节 统一全局响应

访问:http://localhost:8081/study/springboot/mybatis/getUserById?id=2

二、集成MyBaitsPlus
集成MyBatisPlus那是SoEasy。删除掉Mybatis得依赖,导入MyBatisPlus得依赖。
        <!-- mybatis plus -->
        <dependency>
            <groupId>com.baomidou</groupId>
            <artifactId>mybatis-plus-boot-starter</artifactId>
            <version>${mybatis-plus.version}</version>
        </dependency>
@Data
@TableName("user")
public class User {
private Long id;
private String username;
private Integer age;
}
@Mapper
@Repository
public interface UserMapper extends BaseMapper<User> {
}
@RestController
@RequiredArgsConstructor
public class UserController {
private final UserMapper mapper;
@GetMapping(value = "mybatis/getUserById")
public User function(Long id) {
LOGGER.info("the id is:{}", id);
return mapper.selectById(id);
}
@GetMapping(value = "mybatis/insert")
public Serializable function(String name) {
User user = new User();
user.setUsername(name);
user.setAge(20);
return mapper.insert(user);
}
}测试查询

测试插入

更多MyBatisPlus操作与语法请参考MyBatisPlus官网
三、源码下载
本章节项目源码:点我下载源代码

 浙公网安备 33010602011771号