使用C#开发CHIP-8虚拟机
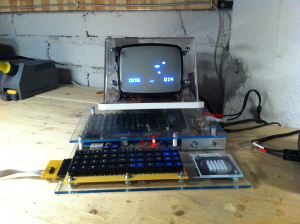
正在运行《太空拦截》游戏的Telmac 1800微型计算机
CHIP-8是上世纪70年代(1970)中期,由RCA Labs的工程师Joe Weisbecker开发的一套解释型编程语言,它被用于COSMAC VIP和Telmac 1800 8位微型计算机上。CHIP-8程序需要在CHIP-8虚拟机上运行,它简化了针对这些8位微型计算机的游戏开发。由于CHIP-8的简单性,加上它有着悠久的历史并且曾经一度风靡世界,使得至今仍有其爱好者自己DIY兼容CHIP-8的微型芯片,以及使用各种高级语言开发CHIP-8的虚拟机。例如,在这个网站上,还有自制CHIP-8处理器的教程。 有不少世界流行的经典游戏都是直接由CHIP-8开发,或者有CHIP-8的移植版,比如《Pong》、《太空入侵者》等。Pong是世界上最早的电子游戏之一,这些都是非常小非常简单的游戏,无论是视觉效果和操作体验上,都远远不及现在动辄几十上百GB的电脑游戏,但这并不能阻止这些游戏仍然在世界上存在至今。
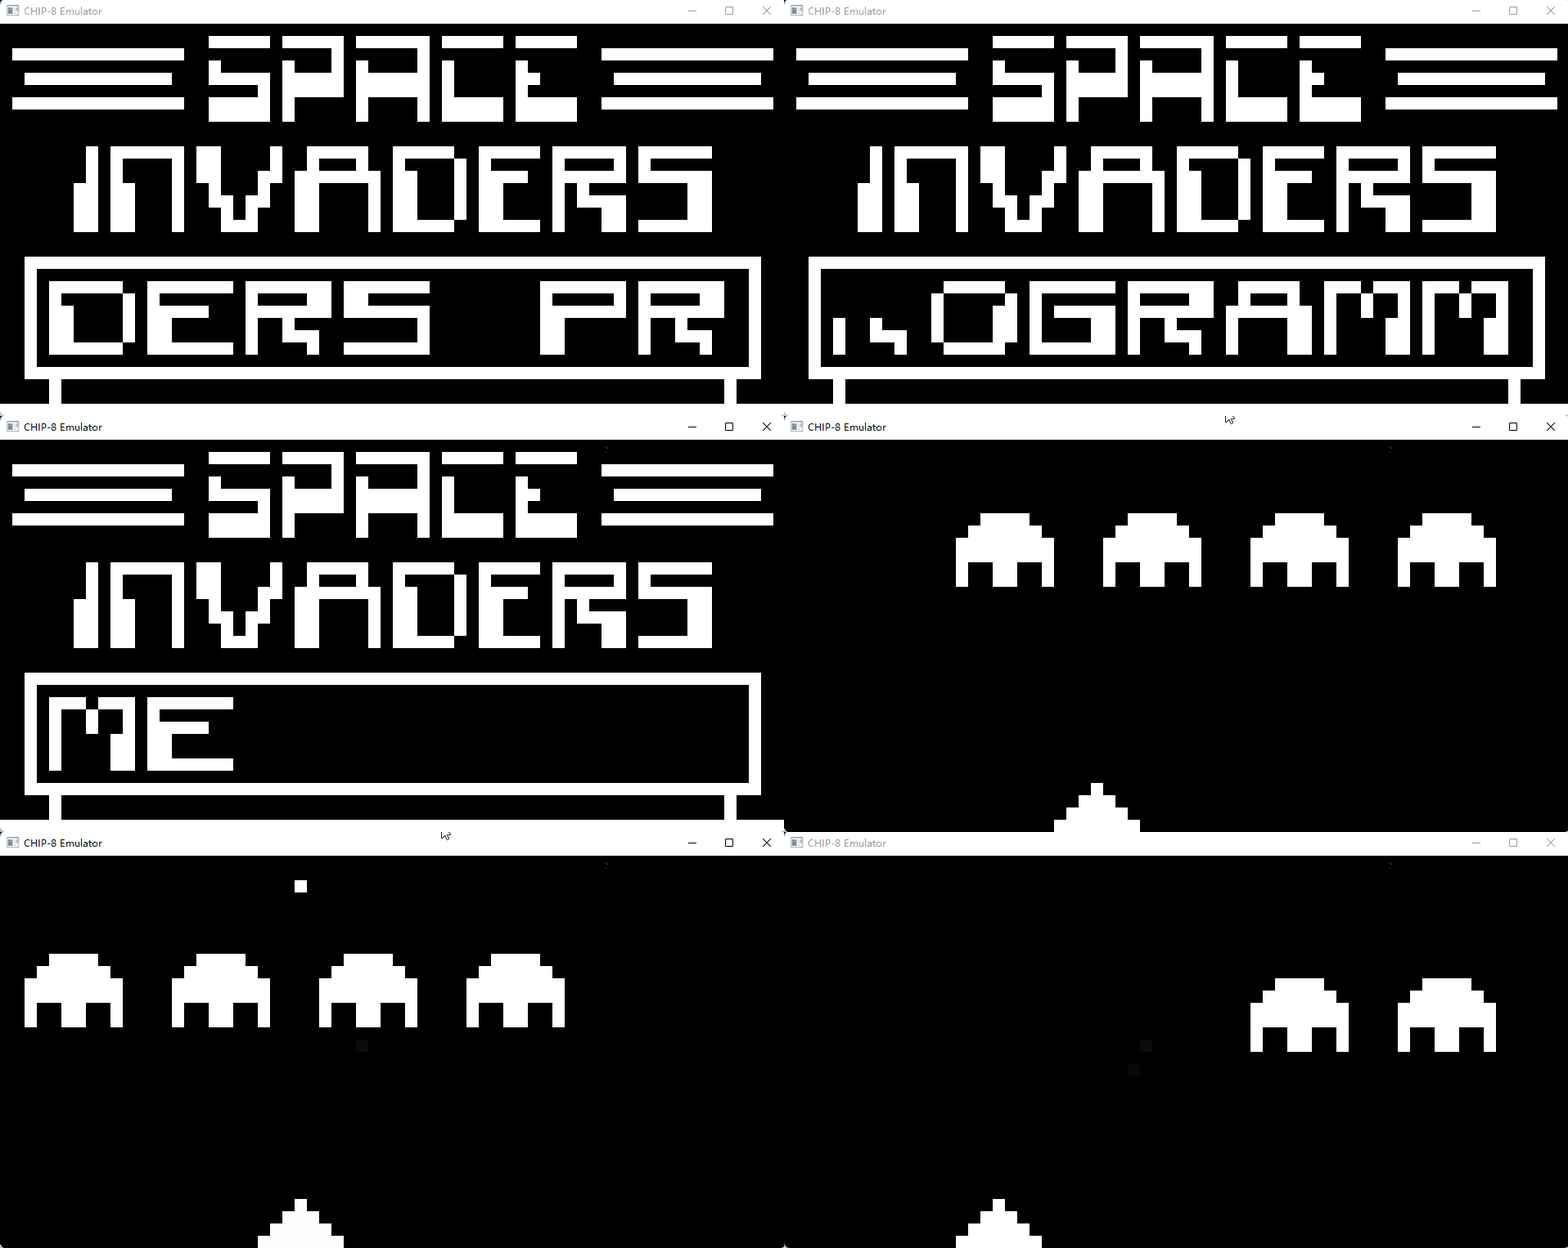
本文所介绍的用C#编写的CHIP-8模拟器,该模拟器正在运行著名的《太空入侵者》游戏
在使用C#开发一个CHIP-8的虚拟机(也就是俗称的模拟器)之前,先一起了解一下CHIP-8虚拟机的基本配置信息吧。
CHIP-8虚拟机的基本配置
CHIP-8拥有16位的内存寻址(其实是12位)以及16个(0x00~0x0f)8位寄存器,在一次FDE(Fetch, Decode, Execute)周期中处理两个字节的指令(一条指令由两个字节组成),所以我认为CHIP-8应该是16位的计算机。其基本配置如下:
- 内存:4KB,内存寻址指针是16位的(2个字节),但几乎所有的程序都只寻址12位,也就是2^12=4096(4KB)。因此,所有的可执行ROM大小都小于或等于4KB
- 显示:CHIP-8的显示支持64x32点点阵式显示(Super CHIP-8为128x64),双频单显,默认颜色为黑白
- 程序计数器(Program Counter,PC):16位,指向当前指令在内存中的地址
- 索引寄存器(I寄存器):16位,指向内存中的任意地址
- 16个8位寄存器,V0到VF
- 用于存储16位地址的栈结构,用来处理函数调用和函数返回
- 一个8位的延迟计时器,以60赫兹的频率递减,直到值为0
- 一个8位的声音计时器,与延迟计时器一样,会逐步递减,但如果值不为零,则会发出蜂窝音(beep)
CHIP-8的所有程序执行基本上就是依赖上面的这些硬件结构完成。此外,还有一些需要注意的地方:
内存
内存仅有4KB,虽然程序计数器和索引寄存器都是16位的,但是通常只会用到12位,也就是4096个字节的寻址能力。CHIP-8没有内存保护区域,所有程序都可以任意读写这4096字节的内存区域。通常情况下,程序会被读到内存偏移量为512(0x200)的地址上并开始执行。下面的C#代码从一个ROM文件读入程序,并将程序存储于偏移量为512的内存地址上:
public void LoadRom(string romFile)
{
    using var fileStream = File.OpenRead(romFile);
    fileStream.Read(_memory.Buffer, 0x200, (int)fileStream.Length);
}
字体
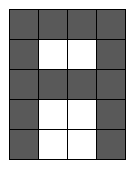
CHIP-8有内置的字体,分别定义了从0到F这16个十六进制字符的字体样式,每个字符是4个点宽,5个点高。因此,一个字符的字体由5个字节组成,每个字节的高4位代表当前行的点所表示的二进制数值(以16进制表示)。例如,对于字符A,在某种字体下,它的形态如下:
那么,如果对于有内容的格子,它的值为1,没有内容的格子值为0的话,第一行的值就是二进制1111,也就是0xF,由于每一行都是一个字节,字体的点是由该字节的高4位表达,因此,该字体对于A字符而言,第一行的值就是0xF0,第二行就是0x90,依此类推。再比如对于字符B,它的定义是这样的:
于是,它的字体定义就是:
0xE0, 0x90, 0xE0, 0x90, 0xE0字体是需要被装载到内存中以便让程序读取使用的,理论上你可以在初始化虚拟机的时候,将字体读入内存中前512字节的任意位置(因为从第513个字节开始,就是存放程序代码了),但人们习惯于将字体数据读入偏移量为0x50的内存地址(0x50~0x9F),所以在编写虚拟机的时候,不妨依照这个惯例来加载字体数据。
显示
CHIP-8的显示采用的是64x32的点阵,每个点的值为0或1(也就是1个位),也就是它有一块显存区域,大小是64x32字节。显示是以一定频率刷新的(通常是60Hz),为了提高性能,通常仅会在更新了显示内容的时候,才会刷新屏幕。 CPU指令代码0xDXYN用于操作屏幕显示,它的工作原理是这样的:
- 屏幕绘制基于“精灵(Sprite)”为单位,一个精灵的宽度是8个点,高度是0xDXYN指令中的N,也就是最高16个点
- 每一行的显示数据(8个点,一个字节)由索引寄存器I所指向的内存位置加上当前行的偏移量来决定,比如当前行为第1行,那么这一行的显示数据则为memory[I+1],在完成显示处理之后,I的值不会变
- 对于当前行显示数据中的每一位(bit):
- 如果显存中相同位置的bit的值与当前位的值同为1,则将寄存器VF的值设置为1
- 设置显存中的值为其当前值与当前行显示数据中当前位的值的逻辑异或值
- 0xDXYN指令中的X和Y分别表示保存x、y屏幕坐标所在的寄存器的索引号,比如x坐标保存在寄存器X中,y坐标则保存在寄存器Y中。如果绘制超出屏幕边界,则停止绘制
C#代码如下:
private void OpCode_D(int instruction)
{
    var rx = (instruction & 0x0f00) >> 8;
    var ry = (instruction & 0x00f0) >> 4;
    var height = instruction & 0x000f;
    byte pixel;

    _v[0xf] = 0;
    for (var row = 0; row < height; row++)
    {
        var y = (_v[ry] + row) % Graphics.HEIGHT;
        pixel = _machine.Memory.Buffer[_i + row];
        for (var col = 0; col < 8; col++)
        {
            var x = (_v[rx] + col) % Graphics.WIDTH;
            Bit bit = pixel & (0x80 >> col);
            var valXY = _machine.Graphics.GetXY(x, y);
            if (bit)
            {
                if (valXY)
                {
                    _v[0xf] = 1;
                }
            }
            _machine.Graphics.SetXY(x, y, valXY ^ bit);
        }
    }

    _machine.UpdateGraphics();
}
按键
CHIP-8有一个4x4按键键盘,布局如下:
1 2 3 C
4 5 6 D
7 8 9 E
A 0 B F
在模拟CHIP-8时,可以将实体键盘上的按键映射到这16个虚拟键上。比较普遍的做法是,将QWERT键盘的如下按键与上面的虚拟键盘一一对应:
1 2 3 4
Q W E R
A S D F
Z X C V
CPU指令EX9E、EXA1和FX0A都是与按键相关的操作。比如,指令FX0A是表示等待一个按键输入,如果有按键输入,则根据上面的实体键盘到虚拟键盘之间的映射关系,获得虚拟键盘的键值,然后将键值保存到VX寄存器。 举个例子,在CPU执行F10A指令时,等待用户键盘输入,当用户按下R这个键,根据上面的键盘映射,R对应十六进制数字D,则此时会把0xD这个值保存到V1寄存器。 基本的CHIP-8配置和输入输出设备就介绍这么一些。
CHIP-8 CPU指令集
CHIP-8 CPU指令集包含35条指令,这也是为什么很多计算机爱好者学习虚拟机编程都是从CHIP-8开始,因为简单。CHIP-8的指令会包含以下这些符号:
- NNN:表示地址,比如:0NNN表示从NNN处内存地址开始执行子程序
- NN:8位常量,比如:4XNN表示将寄存器VX中的值与常量NN进行比对
- N:4位常量,用法与NN类似
- X和Y:表示两个4位的寄存器标识,比如V0表示寄存器0,VF表示寄存器15(0xF)
- PC:程序计数器(Program Counter)
- I:16位的索引寄存器
下表列出了CHIP-8 CPU指令集中的所有指令,以及相关的说明。
| 操作符 | 类型 | C语言表述 | 说明 |
| 0NNN | Call | Calls machine code routine (RCA 1802 for COSMAC VIP) at address NNN. Not necessary for most ROMs. | |
| 00E0 | Display | disp_clear() | Clears the screen. |
| 00EE | Flow | return; | Returns from a subroutine. |
| 1NNN | Flow | goto NNN; | Jumps to address NNN. |
| 2NNN | Flow | *(0xNNN)() | Calls subroutine at NNN. |
| 3XNN | Cond | if (Vx == NN) | Skips the next instruction if VX equals NN (usually the next instruction is a jump to skip a code block). |
| 4XNN | Cond | if (Vx != NN) | Skips the next instruction if VX does not equal NN (usually the next instruction is a jump to skip a code block). |
| 5XY0 | Cond | if (Vx == Vy) | Skips the next instruction if VX equals VY (usually the next instruction is a jump to skip a code block). |
| 6XNN | Const | Vx = NN | Sets VX to NN. |
| 7XNN | Const | Vx += NN | Adds NN to VX (carry flag is not changed). |
| 8XY0 | Assig | Vx = Vy | Sets VX to the value of VY. |
| 8XY1 | BitOp | Vx |= Vy | Sets VX to VX or VY. (bitwise OR operation) |
| 8XY2 | BitOp | Vx &= Vy | Sets VX to VX and VY. (bitwise AND operation) |
| 8XY3 | BitOp | Vx ^= Vy | Sets VX to VX xor VY. |
| 8XY4 | Math | Vx += Vy | Adds VY to VX. VF is set to 1 when there's a carry, and to 0 when there is not. |
| 8XY5 | Math | Vx -= Vy | VY is subtracted from VX. VF is set to 0 when there's a borrow, and 1 when there is not. |
| 8XY6 | BitOp | Vx >>= 1 | Stores the least significant bit of VX in VF and then shifts VX to the right by 1.[b] |
| 8XY7 | Math | Vx = Vy - Vx | Sets VX to VY minus VX. VF is set to 0 when there's a borrow, and 1 when there is not. |
| 8XYE | BitOp | Vx <<= 1 | Stores the most significant bit of VX in VF and then shifts VX to the left by 1.[b] |
| 9XY0 | Cond | if (Vx != Vy) | Skips the next instruction if VX does not equal VY. (Usually the next instruction is a jump to skip a code block); |
| ANNN | MEM | I = NNN | Sets I to the address NNN. |
| BNNN | Flow | PC = V0 + NNN | Jumps to the address NNN plus V0. |
| CXNN | Rand | Vx = rand() & NN | Sets VX to the result of a bitwise and operation on a random number (Typically: 0 to 255) and NN. |
| DXYN | Display | draw(Vx, Vy, N) | Draws a sprite at coordinate (VX, VY) that has a width of 8 pixels and a height of N pixels. Each row of 8 pixels is read as bit-coded starting from memory location I; I value does not change after the execution of this instruction. As described above, VF is set to 1 if any screen pixels are flipped from set to unset when the sprite is drawn, and to 0 if that does not happen. |
| EX9E | KeyOp | if (key() == Vx) | Skips the next instruction if the key stored in VX is pressed (usually the next instruction is a jump to skip a code block). |
| EXA1 | KeyOp | if (key() != Vx) | Skips the next instruction if the key stored in VX is not pressed (usually the next instruction is a jump to skip a code block). |
| FX07 | Timer | Vx = get_delay() | Sets VX to the value of the delay timer. |
| FX0A | KeyOp | Vx = get_key() | A key press is awaited, and then stored in VX (blocking operation, all instruction halted until next key event). |
| FX15 | Timer | delay_timer(Vx) | Sets the delay timer to VX. |
| FX18 | Sound | sound_timer(Vx) | Sets the sound timer to VX. |
| FX1E | MEM | I += Vx | Adds VX to I. VF is not affected.[c] |
| FX29 | MEM | I = sprite_addr[Vx] | Sets I to the location of the sprite for the character in VX. Characters 0-F (in hexadecimal) are represented by a 4x5 font. |
| FX33 | BCD | set_BCD(Vx) | Stores the binary-coded decimal representation of VX, with the hundreds digit in memory at location in I, the tens digit at location I+1, and the ones digit at location I+2. |
| FX55 | MEM | reg_dump(Vx, &I) | Stores from V0 to VX (including VX) in memory, starting at address I. The offset from I is increased by 1 for each value written, but I itself is left unmodified.[d] |
| FX65 | MEM | reg_load(Vx, &I) | Fills from V0 to VX (including VX) with values from memory, starting at address I. The offset from I is increased by 1 for each value read, but I itself is left unmodified.[d] |
C#编程要点
简单介绍一下C#下实现CHIP-8虚拟机的编程要点。完整代码可以到https://github.com/daxnet/chip8下载。
CPU指令的处理
在所有35个CPU指令中,每个指令的最高4位决定了指令的具体作用,所以我们可以使用这4位的值来区分不同的操作,然后在每个具体操作中再对后面12位的数值进行不同的处理。由于这35个指令的最高4位值都是连续的(从0到0xf),所以只需要使用一个委托数组就可以了。 例如,首先解码当前指令instruction(2个字节),获取最高4位的值opcode = (instruction10 & 0xf000) >> 12,然后用这个opcode作为数组的索引,直接去数组中获得处理该opcode的委托,然后直接调用委托完成指令处理:
List<Action<int>> _opcodeExecCallbacks = new ()
{
    OpCode_0, OpCode_1, OpCode_2, OpCode_3, OpCode_4, OpCode_5, OpCode_6, OpCode_7, OpCode_8,
    OpCode_9, OpCode_A, OpCode_B, OpCode_C, OpCode_D, OpCode_E, OpCode_F,
};
var opcode = (instruction & 0xf000) >> 12;
_opcodeExecCallbacks[opcode](instruction);
// for example:
void OpCode_0(int instruction)
{
    switch (instruction)
    {
        case 0xe0:
            _machine.Graphics.Clear();
            _machine.UpdateGraphics();
            break;
        case 0xee:
            --_sp;
            _pc = _stack[_sp];
            break;
    }
}
实际上,在每个CPU周期(Machine Cycle)中,CPU都会完成获取(Fetch)、解码(Decode)和执行(Execute)的操作,类似过程如下:
public void Tick()
{
    // 从内存中的程序计数器(PC)处读入两个字节,拼接成一个字(Word)
    // 以此作为当前CPU指令
    var instruction = (_machine.Memory.Buffer[_pc] << 8) | (_machine.Memory.Buffer[_pc + 1]);
    // 获取指令最高4位,作为opcode
    var opcode = (instruction & 0xf000) >> 12;
    // 程序计数器自增2,移向下一条指令
    _pc += 2;
    // 从委托数组中获得处理opcode指令的委托
    var opcodeProc = _opcodeExecCallbacks[opcode];
    // 执行委托,完成指令处理
    opcodeProc(instruction);
}
显示输出的实现
显示部分使用了OpenTK开源库,使用OpenGL来渲染整个窗体的显示。每当CPU指令执行到需要更新显示的时候,就会使用下面的方法使用OpenGL来绘制窗体:
private void Machine_GraphicsUpdated(object? sender, GraphicsUpdatedEventArgs e)
{
    GL.Clear(ClearBufferMask.ColorBufferBit);

    for (var x = 0; x < 64; x++)
        for (var y = 0; y < 32; y++)
        {
            if (e.Data[x, y])
            {
                GL.Rect(x, y, x + 1, y + 1);
            }
        }

    SwapBuffers();
}详细代码可以参考这里:https://github.com/daxnet/chip8/blob/main/src/chip8/Chip8.Emulator/EmulatorWindow.cs
总结
本打算开发一款任天堂8位红白机游戏机的模拟器,但是刚开始入手觉得复杂,所以就先实现CHIP-8虚拟机,以了解开发模拟器的整个过程。其实这些硬件设备的基本结构都大同小异,可以考虑将公共部分抽取成框架以方便各种模拟器的开发,相信一定很有趣。


