自定义SpringBoot中的Starter(加强理解自动装配原理)
1、新建一个Maven项目:david-spring-boot-starter
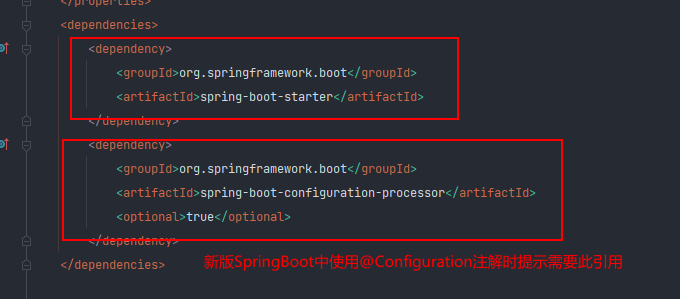
2、新建一个SpringBoot模块:david-spring-boot-starter-autoconfigure 。此模块中只需要保留一个starter就可以了
3、在SpringBoot模块中自定义一个Properties配置类 HelloProperties :
package com.david;


import org.springframework.boot.context.properties.ConfigurationProperties;

@ConfigurationProperties(prefix = "david.hello")
public class HelloProperties {
    private String prefix;
    private String suffix;

    public String getPrefix() {
        return prefix;
    }

    public void setPrefix(String prefix) {
        this.prefix = prefix;
    }

    public String getSuffix() {
        return suffix;
    }

    public void setSuffix(String suffix) {
        this.suffix = suffix;
    }
}
4、继续新建一个服务类:HelloService,处理业务
package com.david;

public class HelloService {
    HelloProperties helloProperties;

    public HelloProperties getHelloProperties(){
        return helloProperties;
    }
    public void setHelloProperties(HelloProperties helloProperties){
        this.helloProperties=helloProperties;
    }

    public String sayHello(String name){
        return helloProperties.getPrefix()+name+helloProperties.getSuffix();
    }

}
5、编写自动配置类并注入bean。-----------------------重点
package com.david;


import org.springframework.beans.factory.annotation.Autowired;
import org.springframework.boot.autoconfigure.condition.ConditionalOnWebApplication;
import org.springframework.boot.context.properties.EnableConfigurationProperties;
import org.springframework.context.annotation.Bean;
import org.springframework.context.annotation.Configuration;

@Configuration
@ConditionalOnWebApplication
@EnableConfigurationProperties(HelloProperties.class)
public class HelloServiceAutoConfiguration {

    @Autowired
    HelloProperties helloProperties;

    @Bean
    public HelloService helloService(){
        HelloService helloService=new HelloService();
        helloService.setHelloProperties(helloProperties);
        return helloService;
    }


}
6、在resources文件下添加自己的META-INF\spring.factories
# Auto Configure
org.springframework.boot.autoconfigure.EnableAutoConfiguration=\
com.kuang.HelloServiceAutoConfiguration
7、install:安装到本地Maven仓库。需要先安装 david-spring-boot-starter-autoconfigure 再安装starter。
8、启动测试
- 新建一个SpringBoot项目
- 导入我们自定义的starter
<dependency> <groupId>com.david</groupId> <artifactId>david-spring-boot-starter</artifactId> <version>2.0-SNAPSHOT</version> </dependency> - 编写一个 HelloController 进行测试我们自己的写的接口!
package com.david.demo;


import com.david.HelloService;
import org.springframework.beans.factory.annotation.Autowired;
import org.springframework.web.bind.annotation.RequestMapping;
import org.springframework.web.bind.annotation.RestController;

@RestController
public class HelloController {
    @Autowired
    HelloService helloService;

    @RequestMapping("/hello")
    public String hello(){
        return helloService.sayHello("哈撒给");
    }

}
- 编写配置文件 application.properties
kuang.hello.prefix="ppp" kuang.hello.suffix="sss" - 启动测试查看浏览器输出即可。
结论:
SpringBoot项目启动之前,会根据starter自动装配的项目,自动装配项目中会根据@Configuration注解的配置类去将对应的Bean注入容器之中,方便在使用服务类的时候能够拿到。
Properties配置类一个作用是为了在配置类中使用@EnableConfigurationProperties 注解获取到该对象,另一个作用在配置类中使用 @ConfigurationProperties 指定在yaml配置文
件中可以自定配置属性值。
SpringBoot是通过main方法下的SpringApplication.run方法启动的,启动的时候他会调用refreshContext方法,先刷新容器,然后根据解析注解或者解析配置文件的形式注册bean,而它是
通过启动类的SpringBootApplication注解进行开始解析的,他会根据EnableAutoConfiguration开启自动化配置,里面有个核心方法ImportSelect选择性的导入,方法loadFanctoryNames根据
classpash路径以MATA-INF/spring.factorces下面以XXXXEnableAutoConfiguration开头的key去加载里面所有对应的自动化配置,他并不是把这一百二十多个自动化配置全部导入,在他每
个自动化配置里面都有条件判断注解,先判断是否引入相互的jar包,再判断容器是否有bean再进行注入到bean容器

 浙公网安备 33010602011771号