[C/C++开发] Clion利用Docker开发和调试Linux C/C++程序
本文章以C++为例讲解Clion利用Docker开发和调试Linux C/C++程序。使用的Clion版本为2020.1
参考文章
Clion 如何使用 Docker 作为开发环境 (主要参考)
利用Docker和CLion在Mac优雅地开发和调试Linux C++程序
跨平台IDE集成开发环境Clion教程:将Docker与CLion结合使用
https://www.jetbrains.com/help/clion/remote-debug.html#remote-config
https://www.jetbrains.com/help/clion/cmake-profile.html
https://intellij-support.jetbrains.com/hc/en-us/community/posts/360004359599-Cmake-profile-not-found
构建docker镜像
dockerfile
# @description php image base on the alpine edge
#                       some information
# ------------------------------------------------------------------------------------
# @link https://hub.docker.com/_/alpine/      alpine image
# @link https://hub.docker.com/_/php/         php image
# @link https://github.com/docker-library/php php dockerfiles
# ------------------------------------------------------------------------------------
# @build-example docker build . -f Dockerfile -t mydev/ubuntu:1.0.0
#


FROM ubuntu:latest

RUN export DEBIAN_FRONTEND=noninteractive \
    && apt-get update \
    && apt-get install -y tzdata \
    && ln -fs /usr/share/zoneinfo/Asia/Shanghai /etc/localtime \
    && dpkg-reconfigure --frontend noninteractive tzdata
RUN apt-get update && apt-get install -y \
ssh \
build-essential \
gcc \
g++ \
gdb \
clang \
cmake \
rsync \
tar \
python \
vim \
automake \
openssh-client \
openssh-server \
pkg-config \
libxml2-dev \
libsqlite3-dev \
&& apt-get clean
RUN apt-get install sudo

RUN echo "#!/bin/bash\nadduser deploy << EOF\npassword\npassword\ndeploy\n\n\n\nY\nEOF" >> create_deploy.sh \
    && chmod 755 create_deploy.sh \
    && ./create_deploy.sh \
    && gpasswd -a deploy sudo \
    && rm create_deploy.sh \
    && chmod 644 /etc/sudoers \
    && echo "deploy ALL=(ALL) NOPASSWD: ALL" >> /etc/sudoers
    && passwd deploy
以上镜像,做了几个事情要提一下
1. 安装了ssh客户端
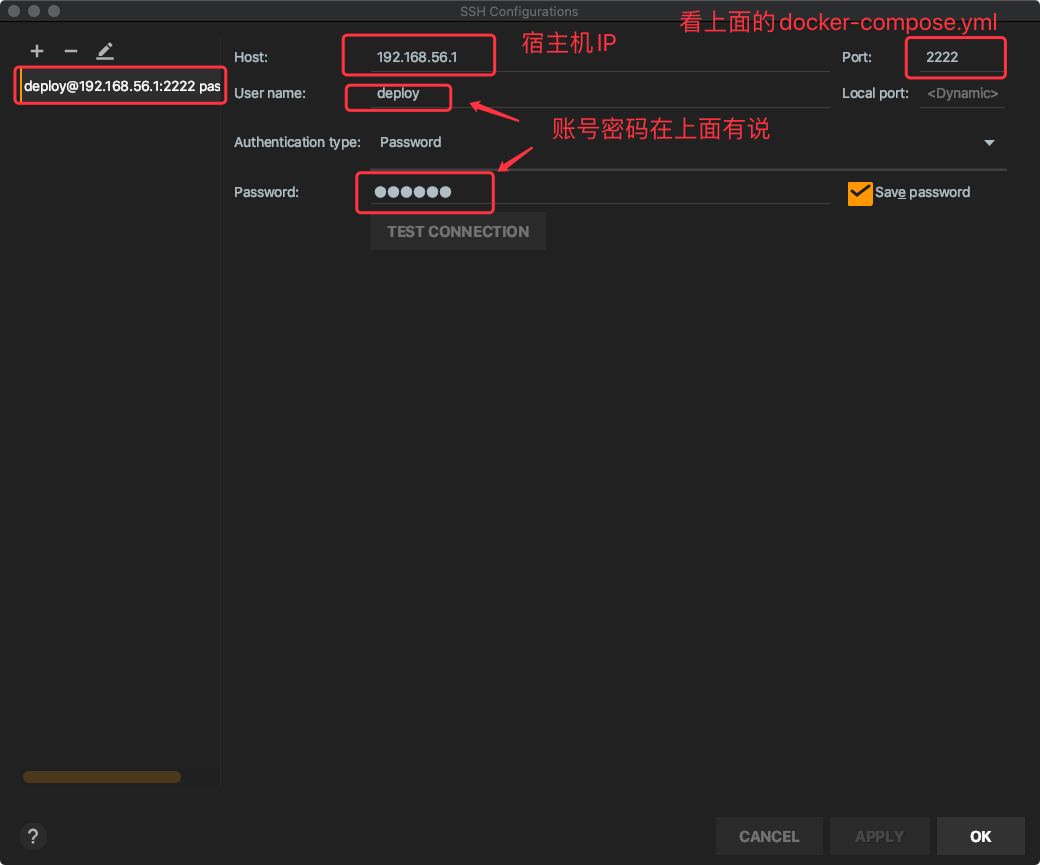
2. 建立了linux用户,账号: deploy,密码: deploy
构建
docker build . -f Dockerfile -t mydev/ubuntu:1.0.0
运行容器
docker-compose.yml
version: '3.4'

services:
  mydevubuntu:
    image: mydev/ubuntu:1.0.0
    container_name: mydevubuntu
    ports:
      - "2222:22"
      - "2223:2223"
    networks:
      # create the docker network first: docker network create local_default_network
      - local_default_network
      # create the docker network first: docker network create pp_service_network
      - pp_service_network
    volumes:
      - /System/Volumes/Data/Software/Project/pipi:/System/Volumes/Data/Software/Project/pipi
    stdin_open: true
    tty: true
    privileged: true
    security_opt:
      - seccomp:unconfined
    command:
      bash -c "/etc/init.d/ssh restart && tail -f /dev/null"

networks:
  local_default_network:
    external: true
  pp_service_network:
    external: true
运行容器
项目相关
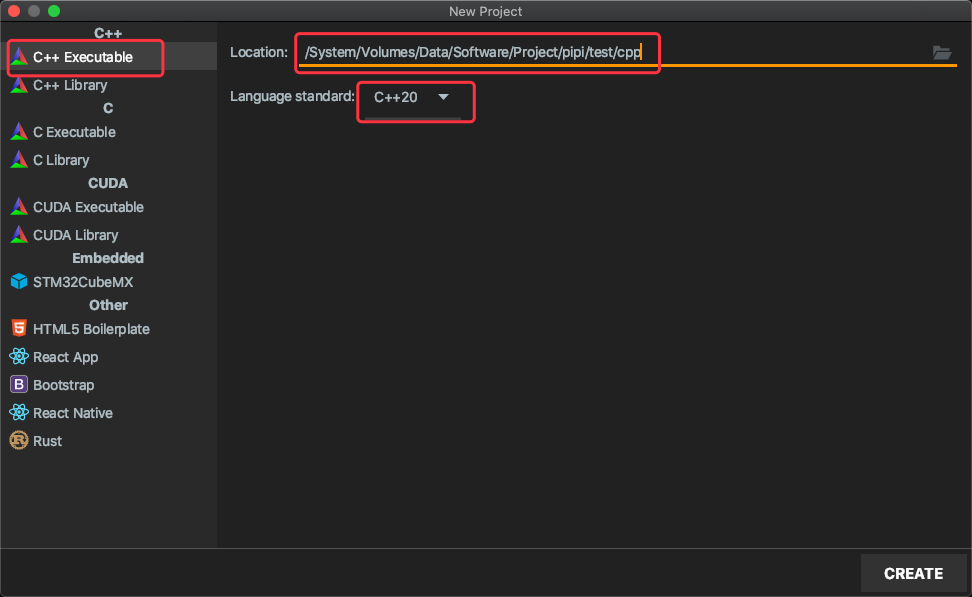
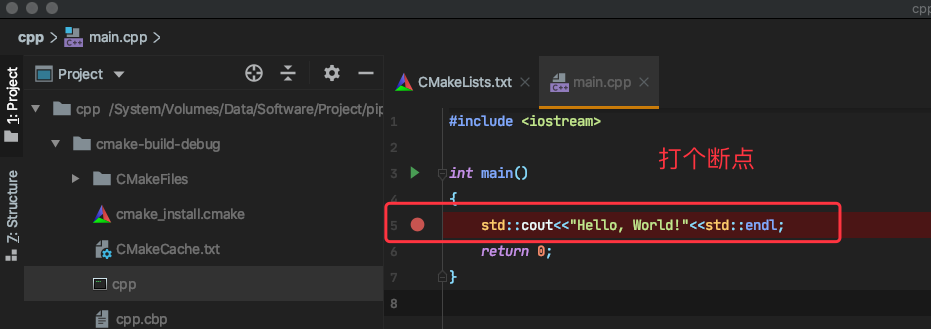
创建项目
Toolchains 设置
Settings-Build, Execution, Deployment-Toolchains

Settings-Build, Execution, Deployment-CMake

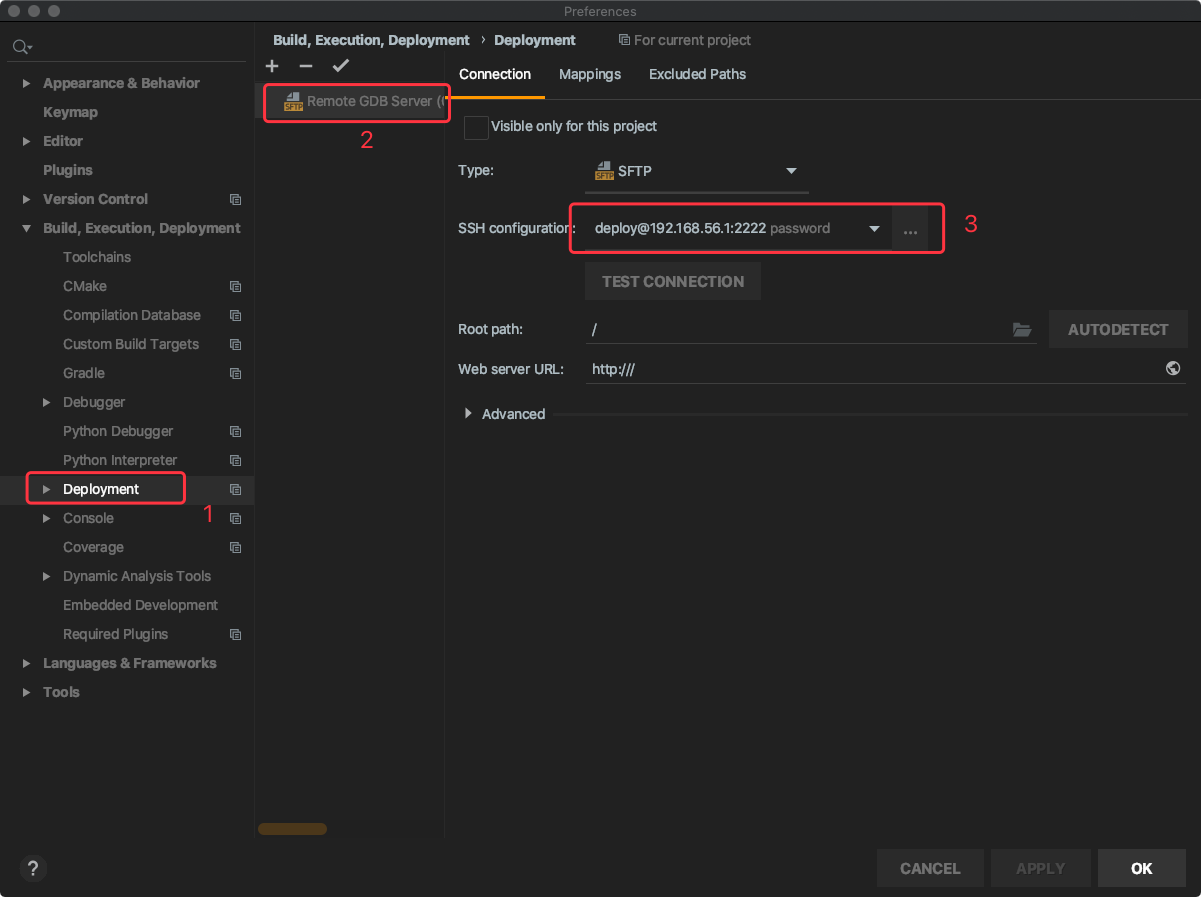
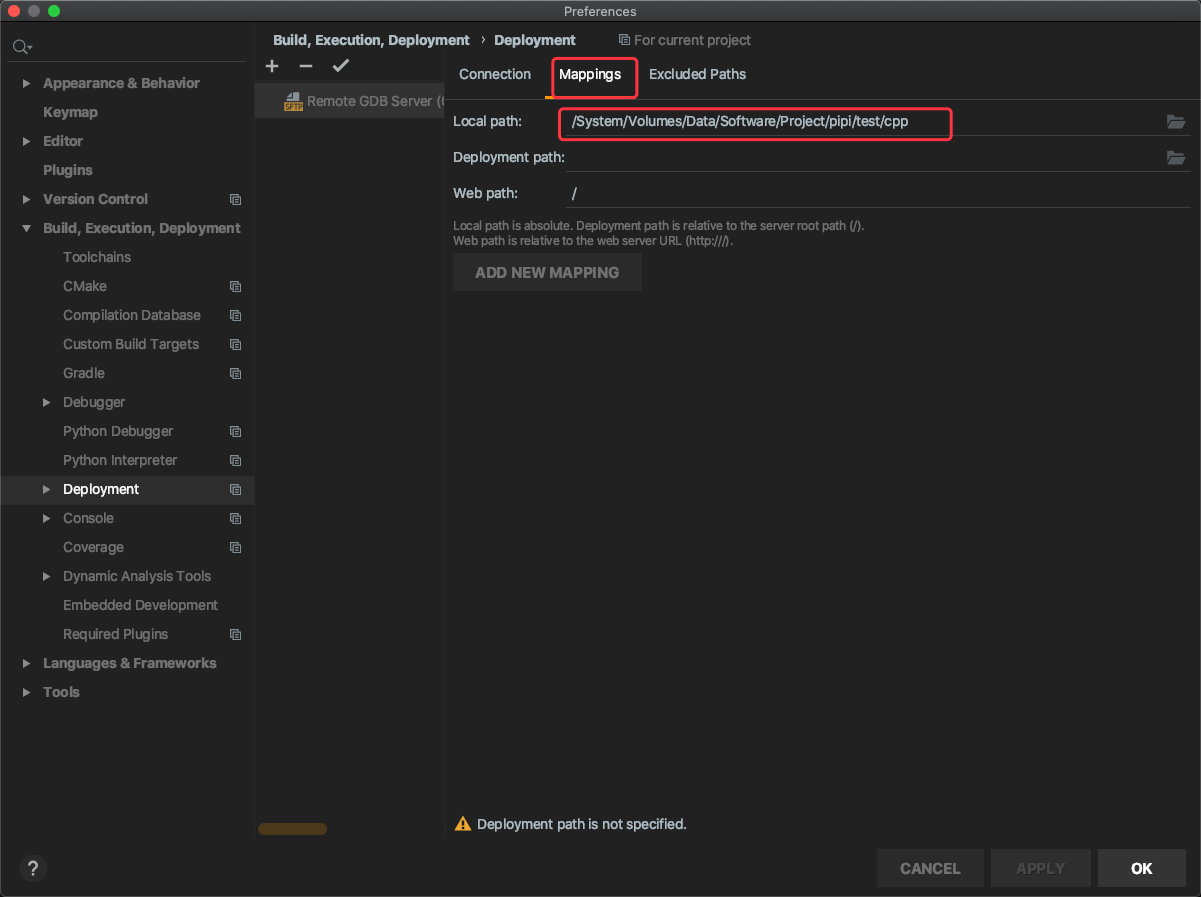
Settings-Build, Execution, Deployment-Deployment
远程debug配置
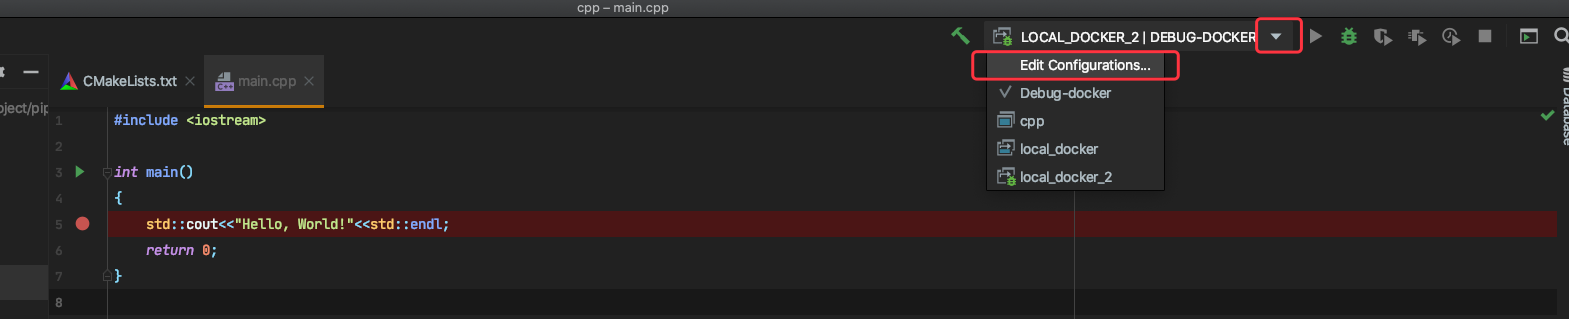


来了来了,他来了


 浙公网安备 33010602011771号