Selenide 简单实现自动化测试
Selenide 网址:http://selenide.org/
github 地址:https://github.com/codeborne/selenide
Selenide 早些年一直使用,中间有段时间没有更新,webdriver的版本支持不好。后来就没有怎么使用了。最近翻看代码时发现selenide在github上又更新了。所以又尝试着用一用。
Selenide 对selenium 进行了一些封装,是一个很好用的工具。搭建起来也比较容易。有兴趣的可以和我一起探索一下。
这次我们使用 Maven 进行搭建环境
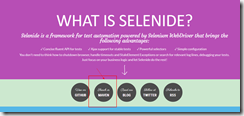
点击 官网 的 maven 如下图所示
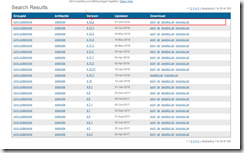
找到最新的版本点击版本号进入详情页面
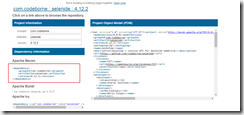
复制maven依赖,等待使用
我们使用IDEA 新建一个Maven项目 这里不详情讲
打开pom.xml 文件
<dependencies>
        <dependency>
            <groupId>com.codeborne</groupId>
            <artifactId>selenide</artifactId>
            <version>4.12.2</version>
        </dependency>
        <dependency>
            <groupId>junit</groupId>
            <artifactId>junit</artifactId>
            <version>4.12</version>
        </dependency>
    </dependencies>
导入包
import com.codeborne.selenide.Configuration;
import org.junit.jupiter.api.Test;
import static com.codeborne.selenide.Selenide.open;

public class testSelenideFirst {

    @Test
    public void test1(){
            Configuration.browser = "chrome";
            System.setProperty("webdriver.chrome.driver", "D:\\work\\com.test.selenium\\drivers\\chromedriver.exe");
            open("http://www.baidu.com");
    }
}
1、浏览器配置为chrome
2、chromedriver 地址标注
3、打开网页
到此已经配置好第一个selenide 自动化测试程序。
后续每天更新selenide 和selenium 应用场景和使用细节,请关注收藏!!
可以交流分享:


