AutoLayout性能
AutoLayout存在的问题
- 性能问题:
在iOS12以前,根据子控件的复杂程度对AutoLayout性能的影响是呈指数级上升的。也就是说,控件越复杂,AutoLayout性能越差。这也是为什么在AutoLayout推出后,这么多iOS开发者仍然是使用Frame来布局的一个原因,因为AutoLayout对视图布局关系经过计算后,还是转换成了Frame来实现布局,大多数iOS开发者认为,那么直接使用Frame来布局,没必要因为AutoLayout的计算步骤损耗性能。 - 用法问题:
相对于Frame的设置,苹果原生AutoLayout提供的写法是在是太复杂了,所以iOS不愿意去接触AutoLayout的写法。
AutoLayout是怎么实现布局的

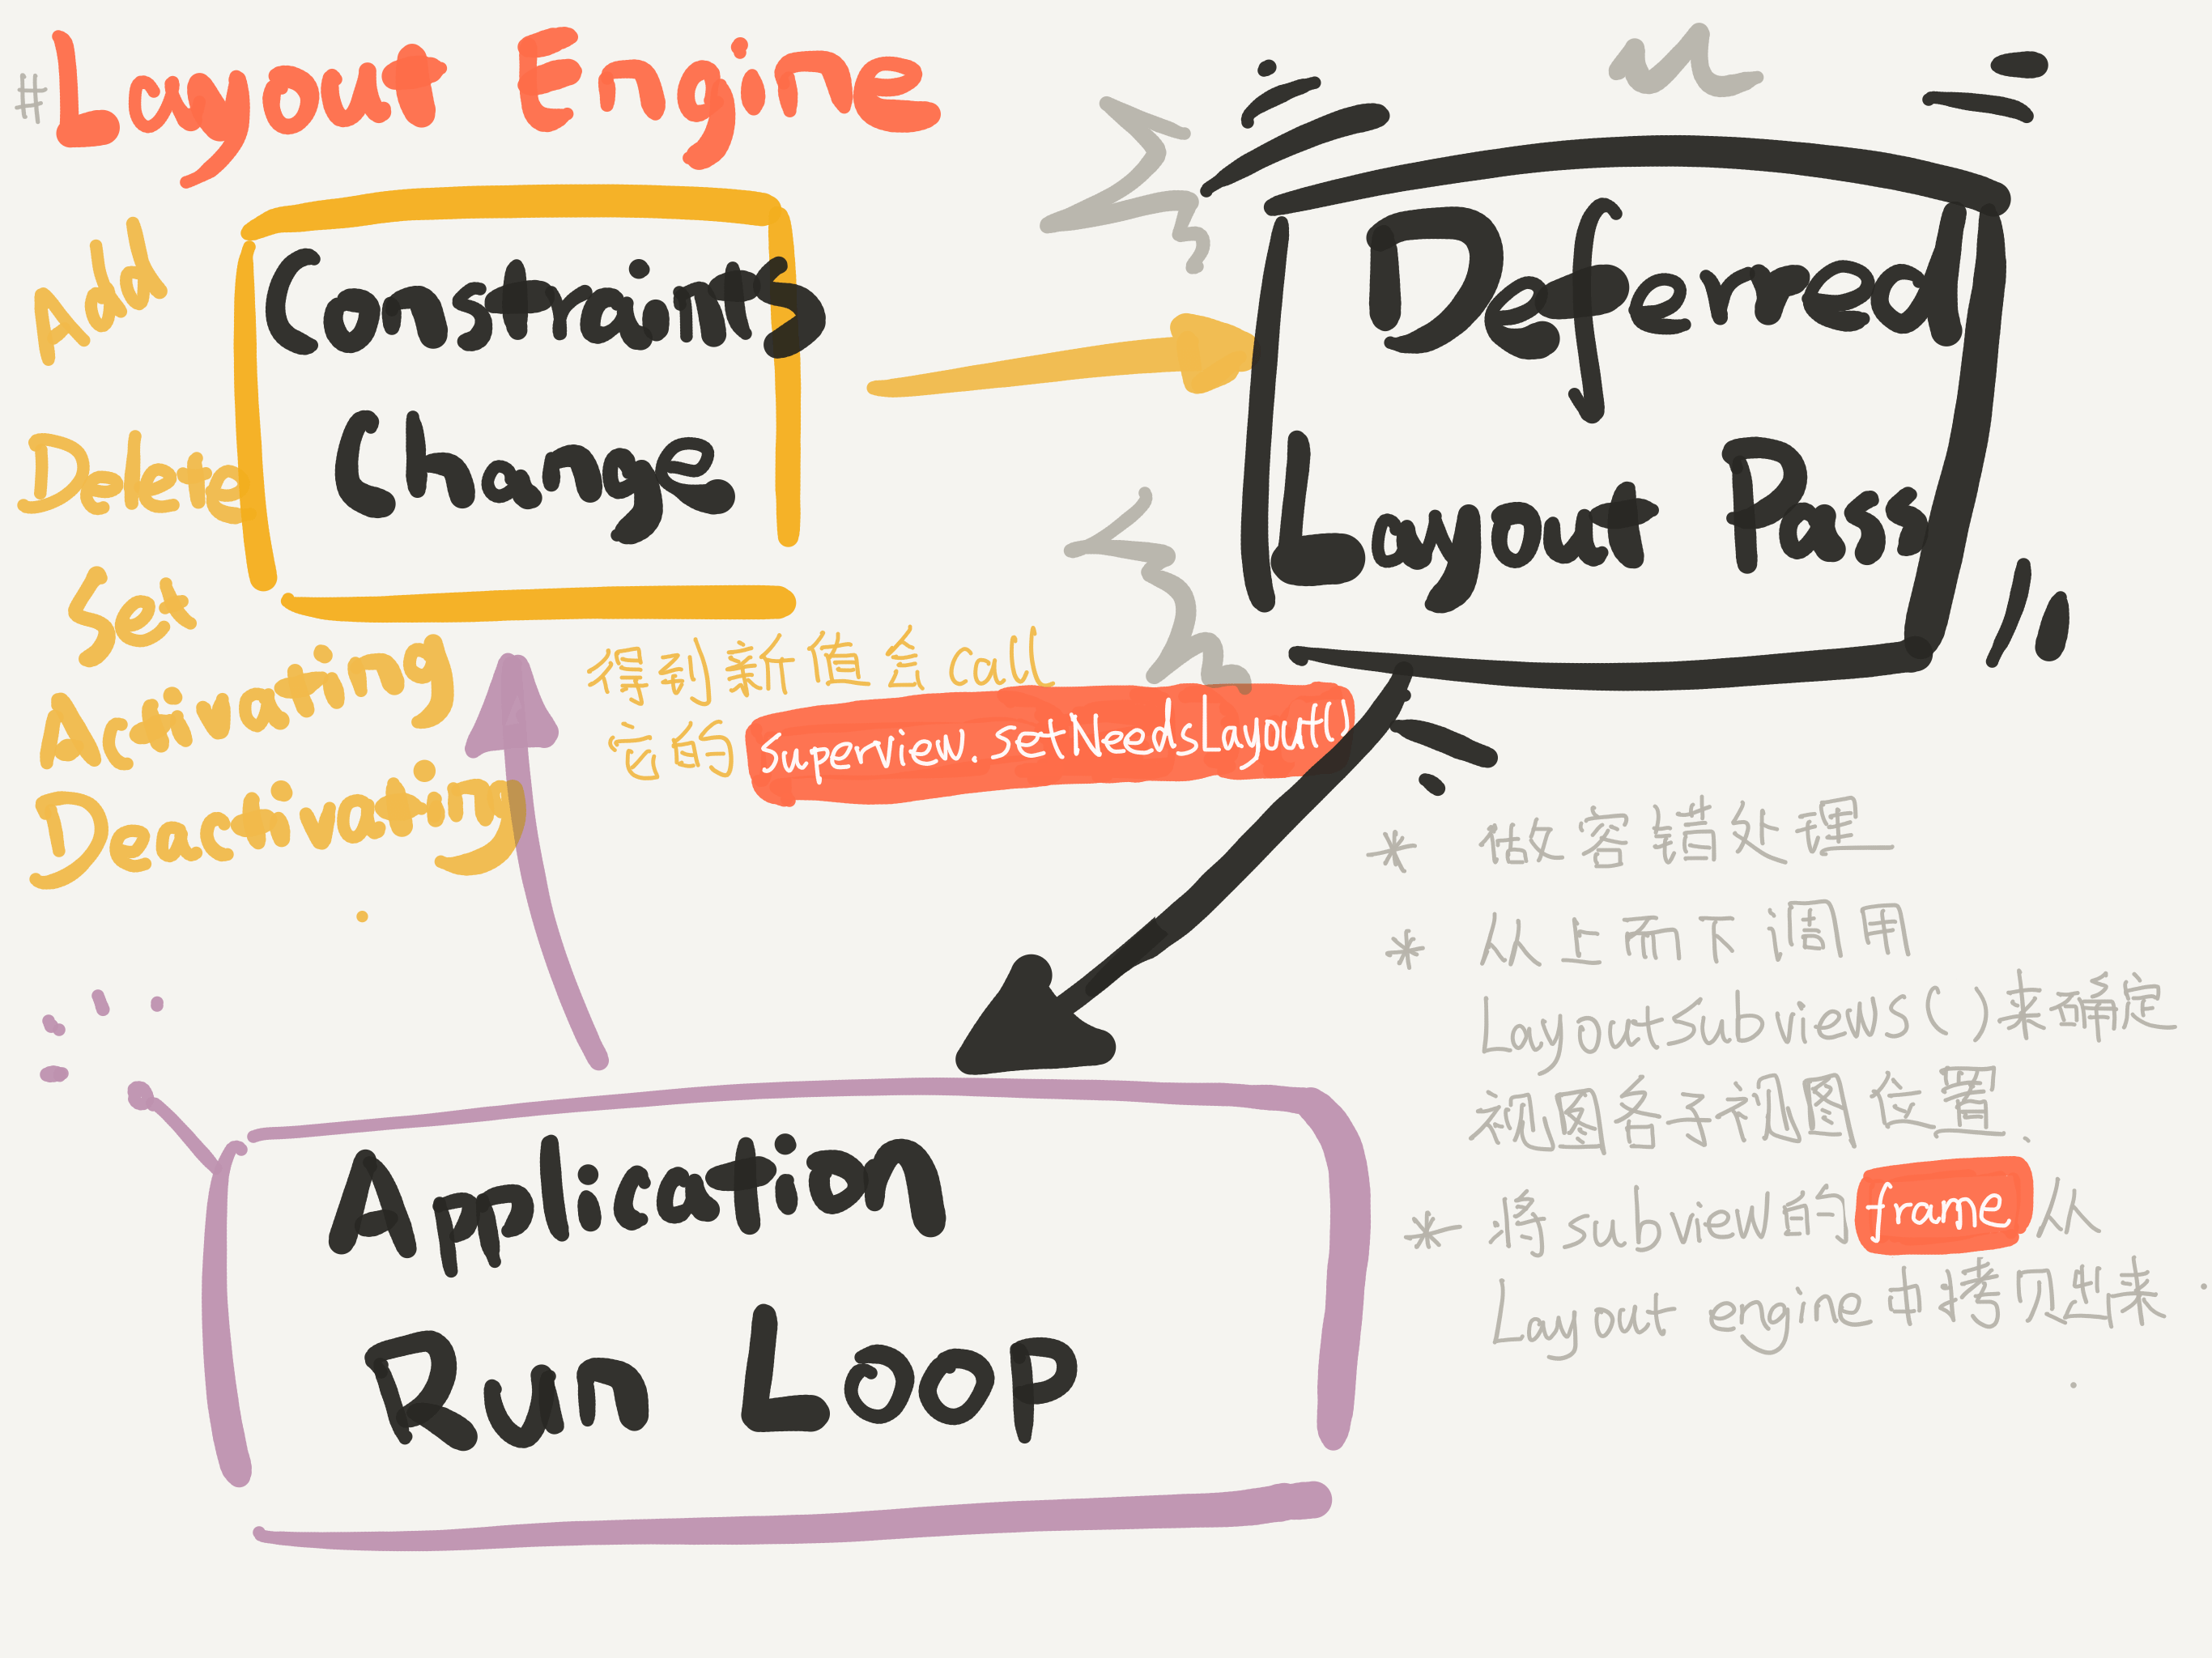
AutoLayout有两个关键的环节Constraints Change和Deffered Layout Pass
- Constraints Change
表示的是约束的变化。增删视图、改变优先级等都会触发约束改变。 - Deffered Layout Pass(延时布局传递)
做容错处理,更新约束,把frame从渲染引擎中拷贝出来,之后的处理就和手写Frame一模一样了。
AutoLayout的使用方式
1、直接在界面拖控件,设置约束,这个就不说用法了,只要就是注意相互之间的约束就好。
以下方法为手写约束,注意点:手写约束都需要把控件的translatesAutoresizingMaskIntoConstraints设置为false。
2、NSLayoutConstraint。直接写约束,初始化方法比较长,写出来的约束代码会比较多。
NSLayoutConstraint初始化方法参数说明:
item:当前主控件
attribute:对齐的位置
relatedBy:与目标控件的关系
toItem:目标控件
attribute:对齐的位置
multiplier:倍数
constant:偏移量
点击查看代码
let redView = UIView()
redView.backgroundColor = .red
redView.translatesAutoresizingMaskIntoConstraints = false//非常重要
view.addSubview(redView)
let left =
NSLayoutConstraint(item: redView, attribute: .left, relatedBy: .equal, toItem: view, attribute: .left, multiplier: 1, constant: 20)
let right = NSLayoutConstraint(item: redView, attribute: .right, relatedBy: .equal, toItem: view, attribute: .right, multiplier: 1, constant: -20)
let top = NSLayoutConstraint(item: redView, attribute: .top, relatedBy: .equal, toItem: view, attribute: .top, multiplier: 1, constant: 60)
let height = NSLayoutConstraint(item: redView, attribute: .height, relatedBy: .equal, toItem: nil, attribute: .height, multiplier: 1, constant: 60)
NSLayoutConstraint.activate([left,right,top,height])
3、VFL(Visual Format Language)。苹果推出的简化约束写法,让开发者跟直观的写布局。
VFL标记说明:
"H:"表示水平方向上的布局
"V:"表示垂直方向上的布局
"|"表示的是屏幕的边
"-"表示的是中间的间距
"[]"用方括号包起来表示一个控件
"()"用括号包起来表示的是这个控件的对应宽高(如果是在"H:"内就是宽,如果是在"V:"内就是高)
点击查看代码
let redView = UIView()
redView.backgroundColor = .red
redView.translatesAutoresizingMaskIntoConstraints = false
view.addSubview(redView)
let vflH = "H:|-20-[redView]-margin-|"
let views = ["redView": redView]
let metrics = ["margin": 50]

let vflV = "V:|-margin-[redView(40)]"
let conH = NSLayoutConstraint.constraints(withVisualFormat: vflH, options: .alignAllLeft, metrics: metrics, views: views)
let conV = NSLayoutConstraint.constraints(withVisualFormat: vflV, options: .alignAllBottom, metrics: metrics, views: views)
NSLayoutConstraint.activate(conH)
NSLayoutConstraint.activate(conV)
4、NSLayoutAnchor。是苹果在iOS9推出约束简化写法。但是需要注意每个Anchor都要手动激活才会生效
点击查看代码
let redView = UIView()
redView.backgroundColor = .red
redView.translatesAutoresizingMaskIntoConstraints = false
view.addSubview(redView)
//可以直接设置isActive激活
redView.topAnchor.constraint(equalTo: view.topAnchor, constant: 40).isActive = true
redView.leftAnchor.constraint(equalTo: view.leftAnchor, constant: 20).isActive = true
redView.rightAnchor.constraint(equalTo: view.rightAnchor, constant: -20).isActive = true
let heightAnchor = redView.heightAnchor.constraint(equalToConstant: 70)
//也可以调用activate方法统一激活
NSLayoutConstraint.activate([heightAnchor])


【推荐】国内首个AI IDE,深度理解中文开发场景,立即下载体验Trae
【推荐】编程新体验,更懂你的AI,立即体验豆包MarsCode编程助手
【推荐】抖音旗下AI助手豆包,你的智能百科全书,全免费不限次数
【推荐】轻量又高性能的 SSH 工具 IShell:AI 加持,快人一步
· 如何编写易于单元测试的代码
· 10年+ .NET Coder 心语,封装的思维:从隐藏、稳定开始理解其本质意义
· .NET Core 中如何实现缓存的预热?
· 从 HTTP 原因短语缺失研究 HTTP/2 和 HTTP/3 的设计差异
· AI与.NET技术实操系列:向量存储与相似性搜索在 .NET 中的实现
· 10年+ .NET Coder 心语 ── 封装的思维:从隐藏、稳定开始理解其本质意义
· 地球OL攻略 —— 某应届生求职总结
· 周边上新:园子的第一款马克杯温暖上架
· Open-Sora 2.0 重磅开源!
· 提示词工程——AI应用必不可少的技术