Jenkins+SonarQube 代码审查
安装 SonarQube
1、SonarQube 简介

SonarQube是一个用于管理代码质量的开放平台,可以快速的定位代码中潜在的或者明显的错误。目前 支持java,C#,C/C++,Python,PL/SQL,Cobol,JavaScrip,Groovy等二十几种编程语言的代码质量管理与检 测,底层使用elasticsearch作为代码检索工具。
环境要求:
|
软件 |
服务器 |
版本 |
|
JDK |
192.168.10.20 |
1.8 |
|
MySQL |
192.168.10.20 |
5.7 |
|
SonarQube |
192.168.10.20 |
6.7.4 |
一、安装 MySQL 数据库
msyql 安装包
boost_1_59_0.tar.gz包:
链接:https://pan.baidu.com/s/1meOHNzG5BXxv6IRMu_J5dg
提取码:drer
mysql-5.7.17.tar.gz包:
链接:https://pan.baidu.com/s/1enNeI1Yh_CTLG6q9odnKzg
提取码:38fj
--------------------------mysql5.7安装--------------------------------------
yum -y install gcc gcc-c++ ncurses ncurses-devel bison cmake

useradd -s /sbin/nologin mysql

tar zxvf mysql-5.7.17.tar.gz -C /opt/
tar zxvf boost_1_59_0.tar.gz -C /usr/local/
cd /usr/local/
mv boost_1_59_0 boost

cd /opt/mysql-5.7.17/

cmake \
-DCMAKE_INSTALL_PREFIX=/usr/local/mysql \
-DMYSQL_UNIX_ADDR=/usr/local/mysql/mysql.sock \
-DSYSCONFDIR=/etc \
-DSYSTEMD_PID_DIR=/usr/local/mysql \
-DDEFAULT_CHARSET=utf8  \
-DDEFAULT_COLLATION=utf8_general_ci \
-DWITH_INNOBASE_STORAGE_ENGINE=1 \
-DWITH_ARCHIVE_STORAGE_ENGINE=1 \
-DWITH_BLACKHOLE_STORAGE_ENGINE=1 \
-DWITH_PERFSCHEMA_STORAGE_ENGINE=1 \
-DMYSQL_DATADIR=/usr/local/mysql/data \
-DWITH_BOOST=/usr/local/boost \
-DWITH_SYSTEMD=1


------注意:如果在CMAKE的过程中有报错,当报错解决后,需要把源码目录中的CMakeCache.txt文件删除,然后再重新CMAKE,否则错误依旧------------


make -j6 && make install
###(-j6:六核编译,核数选择根据主机的cpu核数来)


chown -R mysql.mysql /usr/local/mysql/

vim /etc/my.cnf

[client]
port = 3306
default-character-set=utf8
socket = /usr/local/mysql/mysql.sock

[mysql]
port = 3306
default-character-set=utf8
socket = /usr/local/mysql/mysql.sock

[mysqld]
user = mysql
basedir = /usr/local/mysql
datadir = /usr/local/mysql/data
port = 3306
character_set_server=utf8
pid-file = /usr/local/mysql/mysqld.pid
socket = /usr/local/mysql/mysql.sock
server-id = 1

sql_mode=NO_ENGINE_SUBSTITUTION,STRICT_TRANS_TABLES,NO_AUTO_CREATE_USER,NO_AUTO_VALUE_ON_ZERO,NO_ZERO_IN_DATE,NO_ZERO_DATE,ERROR_FOR_DIVISION_BY_ZERO,PIPES_AS_CONCAT,ANSI_QUOTES


chown mysql:mysql /etc/my.cnf

echo 'PATH=/usr/local/mysql/bin:/usr/local/mysql/lib:$PATH' >> /etc/profile
echo 'export PATH' >> /etc/profile
source /etc/profile

cd /usr/local/mysql/

bin/mysqld \
--initialize-insecure \
--user=mysql \
--basedir=/usr/local/mysql \
--datadir=/usr/local/mysql/data

cp /usr/local/mysql/usr/lib/systemd/system/mysqld.service /usr/lib/systemd/system/
systemctl daemon-reload
systemctl start mysqld
netstat -anpt | grep 3306

systemctl enable mysqld

mysqladmin -u root -p password "abc123" //给root账号设置密码为abc123提示输入的是原始密码。

mysql -u root -p


------------------------授权远程登录-------------------------------------
grant all privileges on *.* to 'root'@'%' identified by 'abc123' with grant option;
二、安装 onarQube
1.安装 MySQL(已完成)
2.安装 SonarQube
sonarqube-6.7.4.zip包:
链接:https://pan.baidu.com/s/1XilDevcqyJmmvUB-l89Y8A
提取码:dqf1
(1)在 MySQL 创建 sonar 数据库
mysql -uroot -pabc123
show databases;
create database sonar;

show databases;
+--------------------+
| Database           |
+--------------------+
| information_schema |
| mysql              |
| performance_schema |
| sonar              |
| sys                |
+--------------------+
(2)解压sonar,并设置权限
yum install unzip  (已装)
unzip sonarqube-6.7.4.zip 解压
mkdir /opt/sonar 创建目录
mv sonarqube-6.7.4/* /opt/sonar 移动文件
useradd sonar 创建sonar用户,必须sonar用于启动,否则报错
chown -R sonar.  /opt/sonar  更改sonar目录及文件权限
3、修改 sonar 配置文件
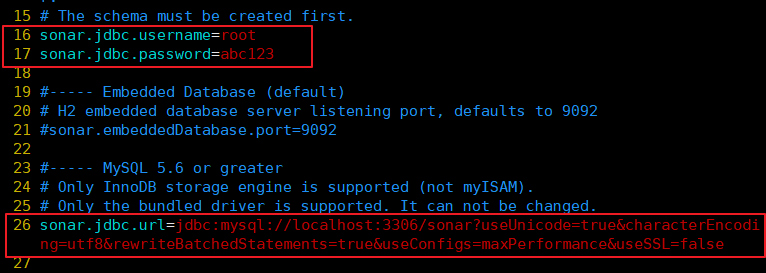
#jdbc 用于连接java和数据库的驱动,需要数据库的用户密码
--16行--
sonar.jdbc.username=root   #填写数据库授权用户
--17行--
sonar.jdbc.password=abc123  #填写数据库密码
--26行-- 取消注释
sonar.jdbc.url=jdbc:mysql://localhost:3306/sonar?useUnicode=true&characterEncoding=utf8&rewriteBatchedStatements=true&useConfigs=maxPerformance&useSS    L=false
注意:sonar默认监听9000端口,如果9000端口被占用,需要更改。
注:sonar.jdbc.url=jdbc:mysql://localhost:3306/sonar
此语句表示连接myslq数据库,使用本地的3306端口。连接的库名是sonar,所以,如果之前在mysql里创建的库名不叫sonar,要么修改mysql数据库里的库名为sonar,要么把这里的sonar 修改为和mysql数据库里创建的库名一致
4、启动sonar(注意:切换sonar用户)
cd /opt/sonar
su sonar ./bin/linux-x86-64/sonar.sh start     #启动
su sonar ./bin/linux-x86-64/sonar.sh status    #查看状态
su sonar ./bin/linux-x86-64/sonar.sh stop 停止
netstat -natp |grep 9000
tail -f logs/sonar.logs 查看日志

注: sonar 启动需要一段时间。如果一直没有启动,没有9000端口,再检查没有其他错误后,可以删除sonar的安装目录,然后重新解压安装
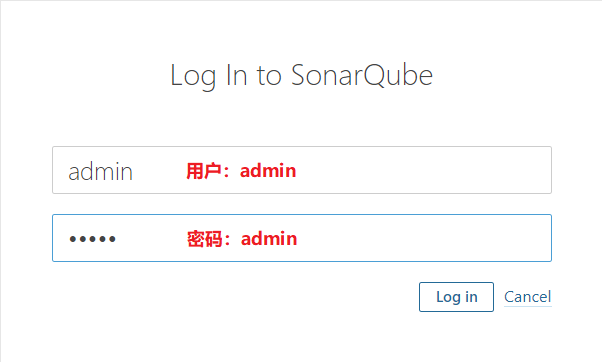
5、访问 sonar
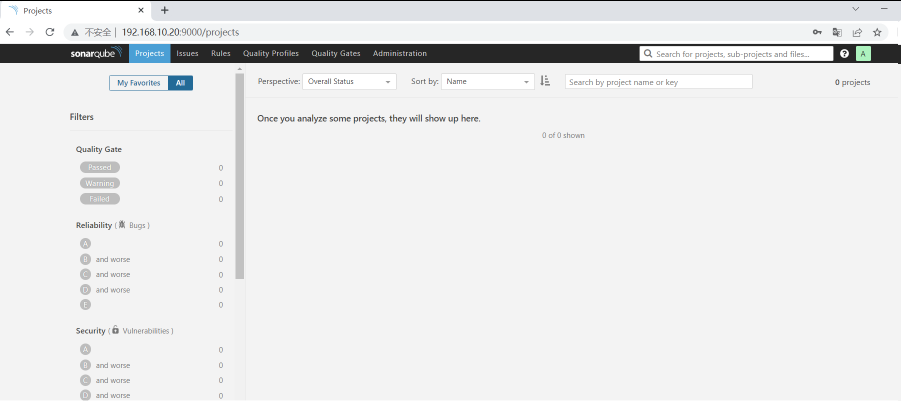
浏览器输入http://192.168.10.20:9000
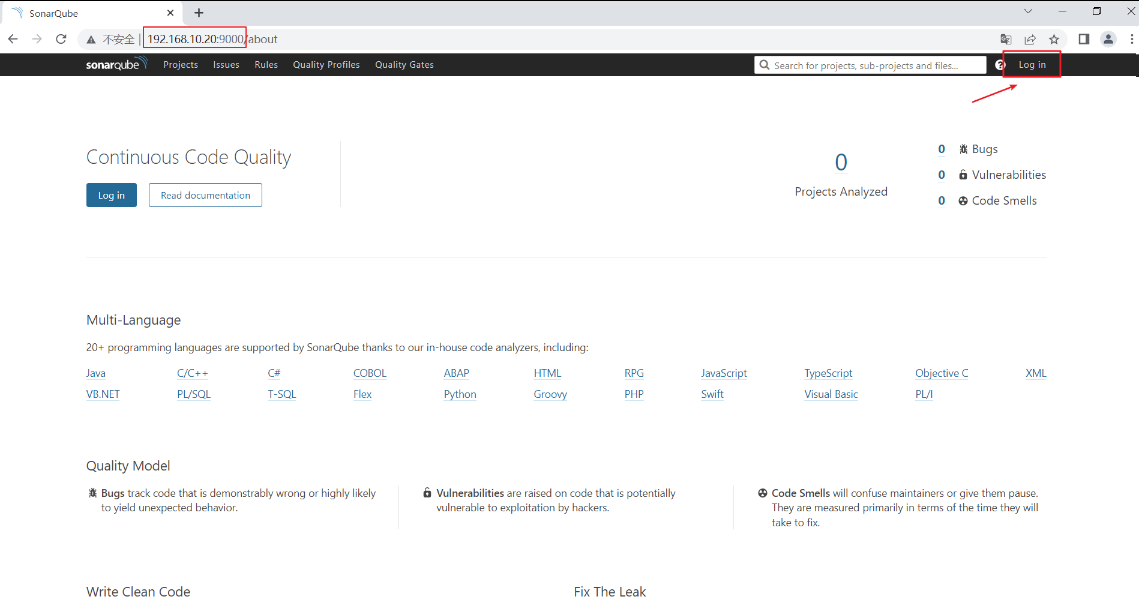
默认账户:admin/admin
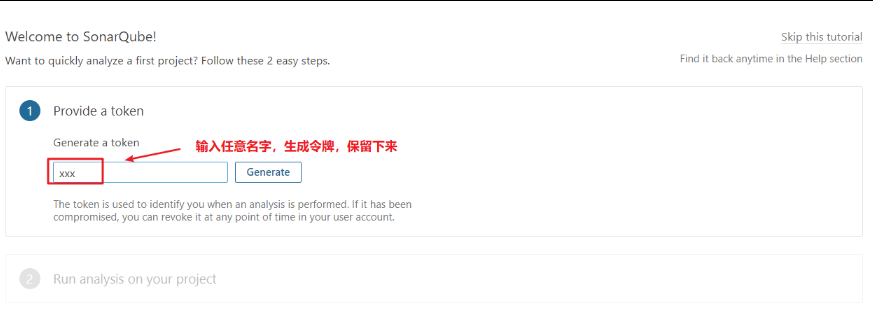
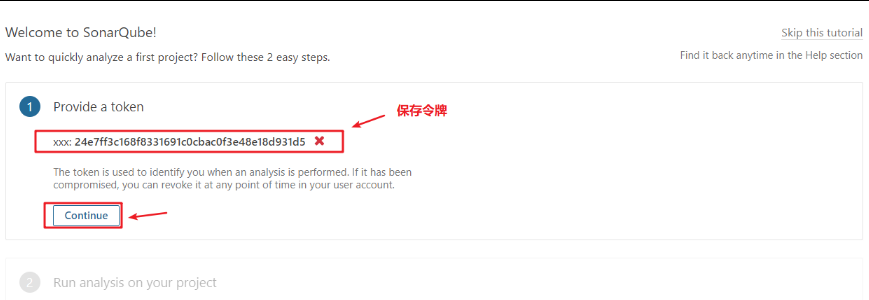
创建 token
xxx: 24e7ff3c168f8331691c0cbac0f3e48e18d931d5(和Jenkins整合会使用此密钥)
token 要记下来!!!
三、实现代码审查

1、安装 SonarQube Scanner 插件
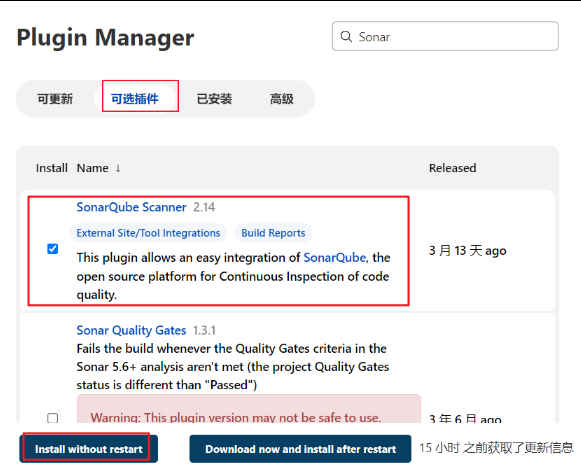
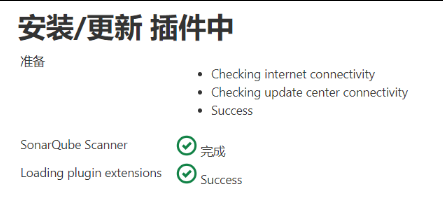
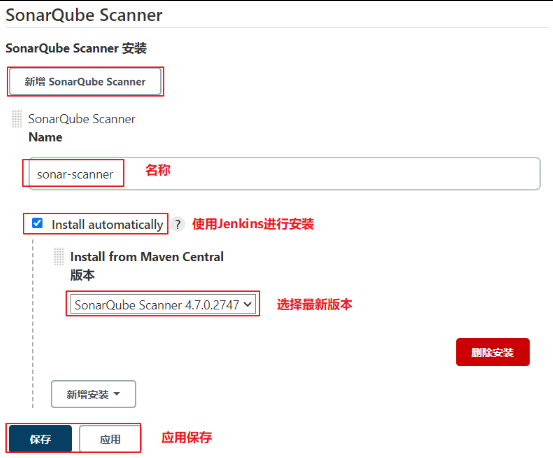
2、安装 SonarQube

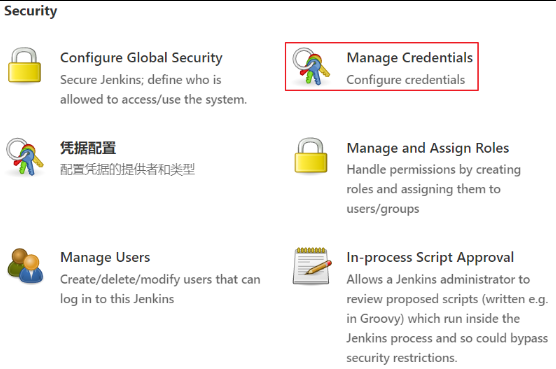
3、添加 SonarQube 凭证
Manager Jenkins → Manager Credentials
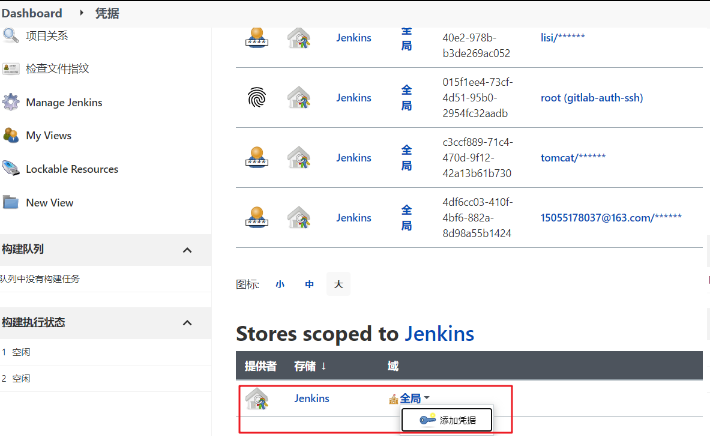
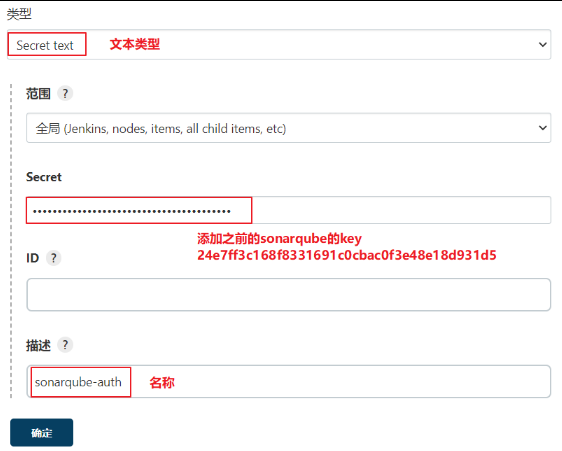
4、Jenkins 进行 SonarQube 配置
Manage Jenkins → Configure System → SonarQube servers

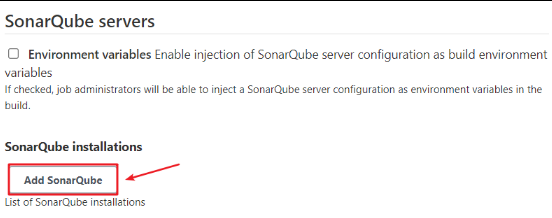
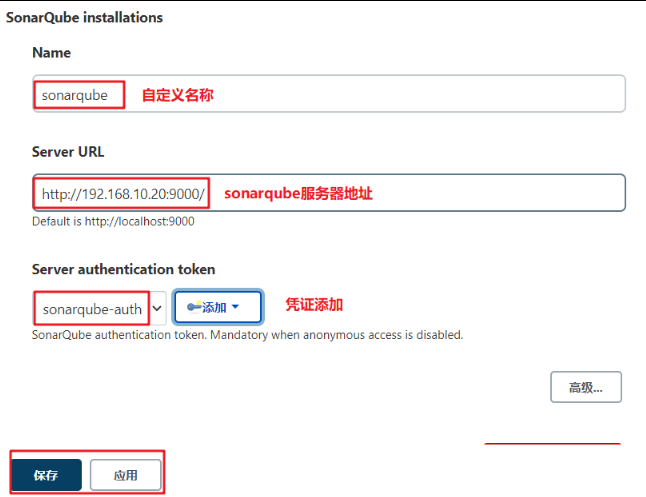
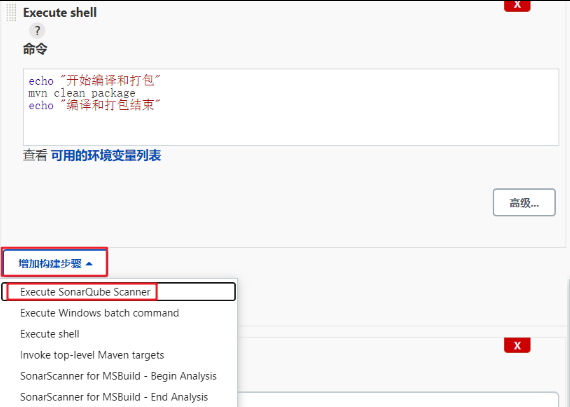
5、在项目添加SonaQube代码审查(非流水线项目)
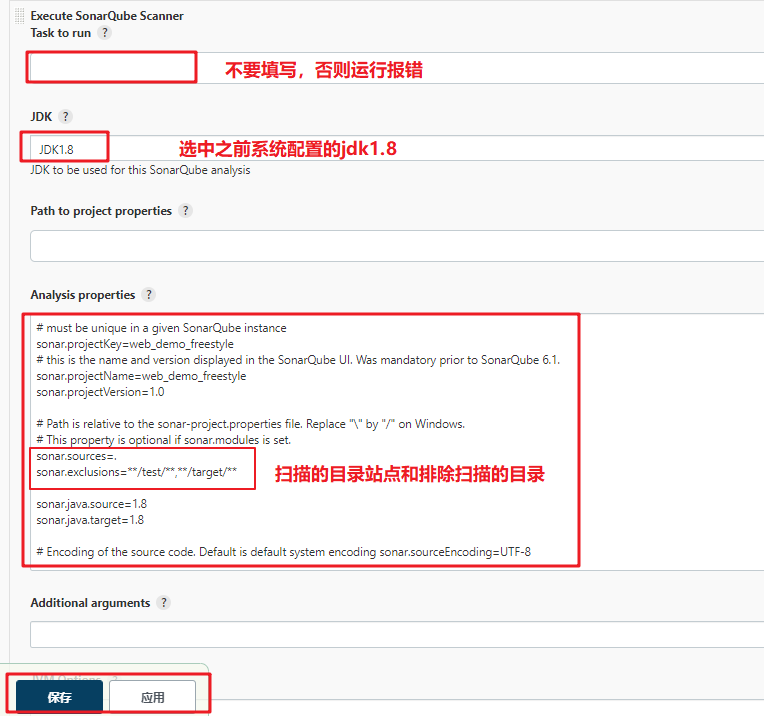
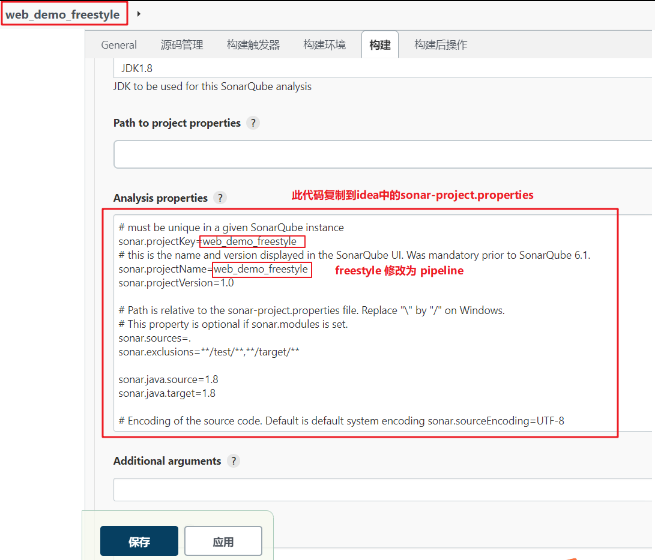
以自由风格为例:打开 web_demo_freestyle 配置
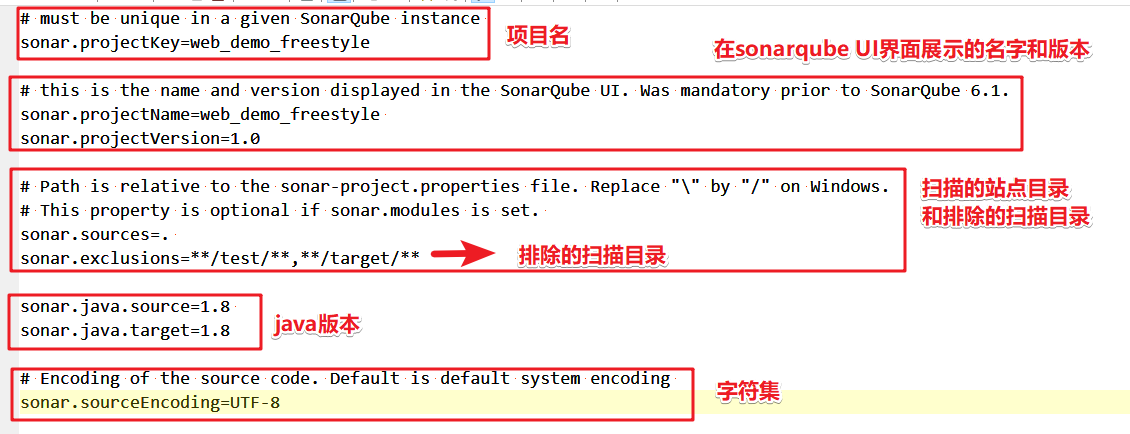
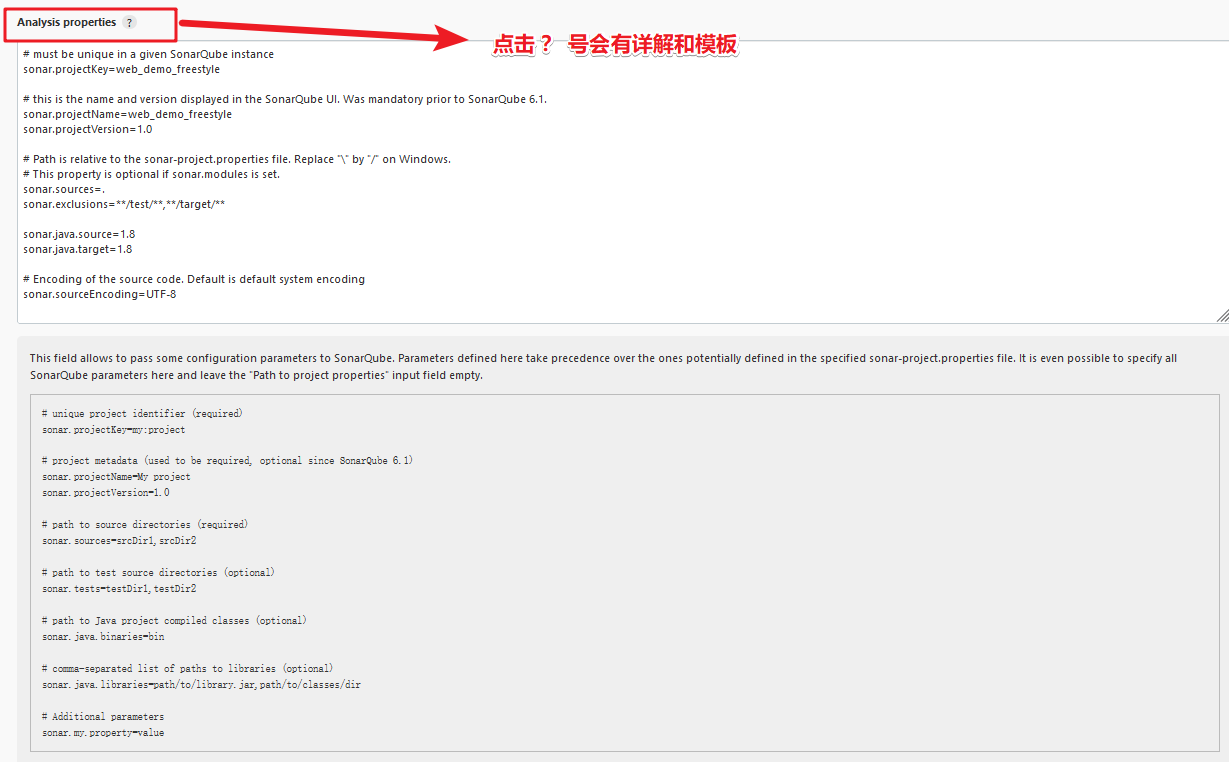
# must be unique in a given SonarQube instance
sonar.projectKey=web_demo_freestyle
# this is the name and version displayed in the SonarQube UI. Was mandatory prior to SonarQube 6.1.
sonar.projectName=web_demo_freestyle
sonar.projectVersion=1.0

# Path is relative to the sonar-project.properties file. Replace "\" by "/" on Windows.
# This property is optional if sonar.modules is set.
sonar.sources=.
sonar.exclusions=**/test/**,**/target/**

sonar.java.source=1.8
sonar.java.target=1.8

# Encoding of the source code. Default is default system encoding sonar.sourceEncoding=UTF-8
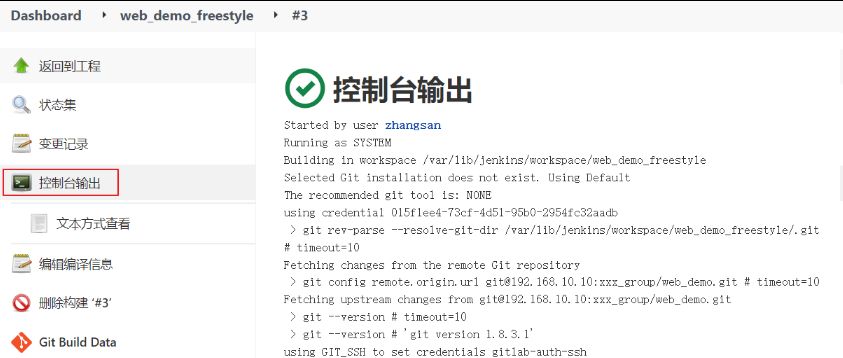
6、直接构建
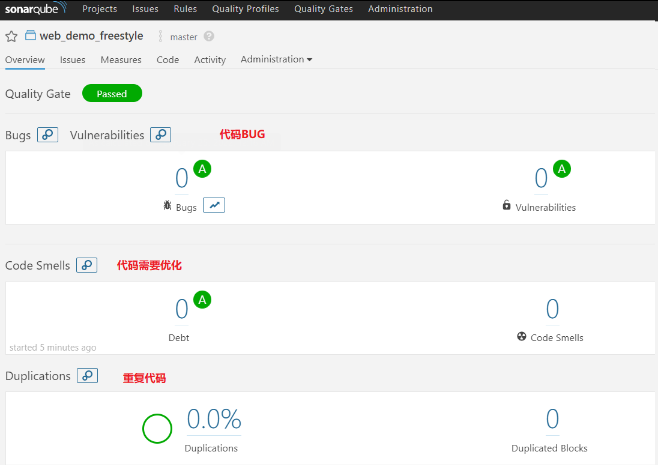
7、在sonarqube服务器上刷新,查看结果


8、测试错误代码,在idea上新建Java和resource目录
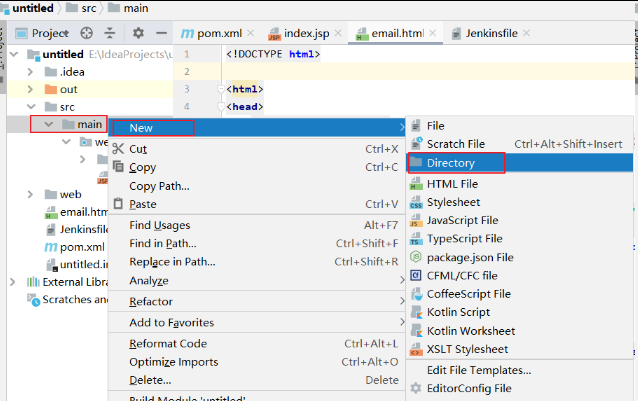
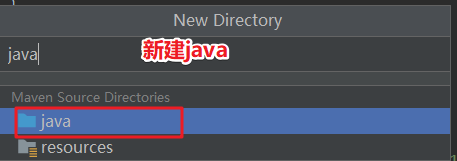
同样操作


9、配置 pom.xml 文件添加对 servlet 的依赖
pom.xml:maven的配置文件
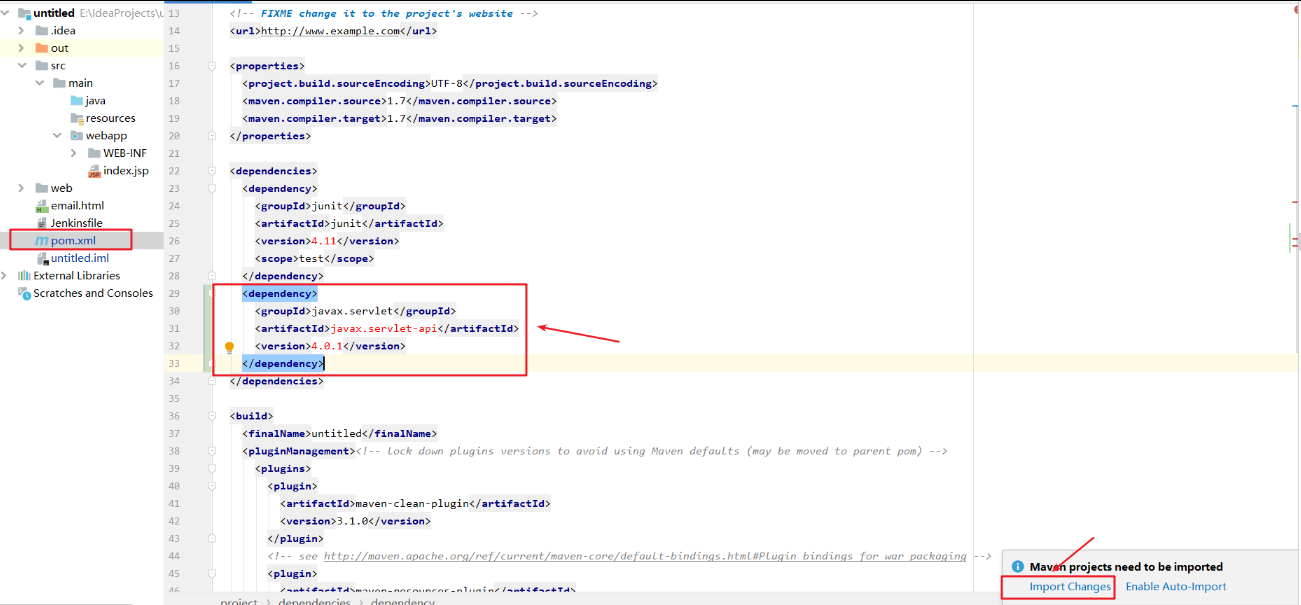
<dependency>
  <groupId>javax.servlet</groupId>
  <artifactId>javax.servlet-api</artifactId>
  <version>4.0.1</version>
</dependency>
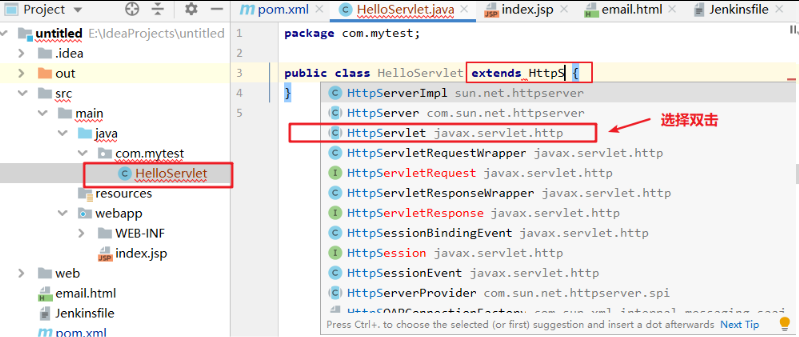
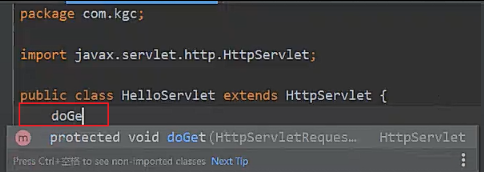
10、新建编写 Servlet 文件

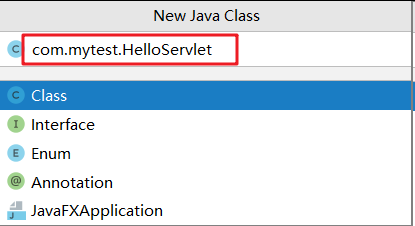
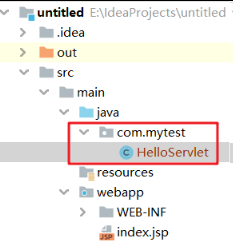
文件名:com.mytest.HelloServlet. 这样会在java目录下创建com.mytest目录,然后在该目录下创建HelloServlet.java文件

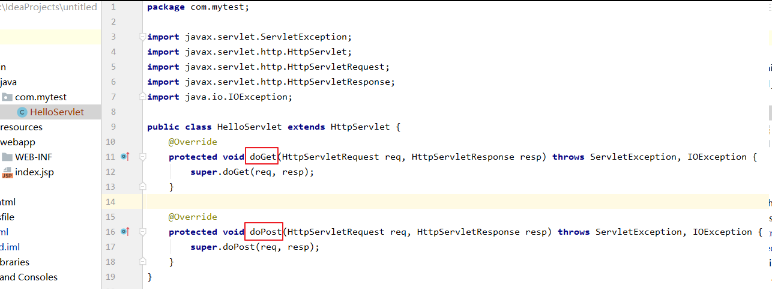
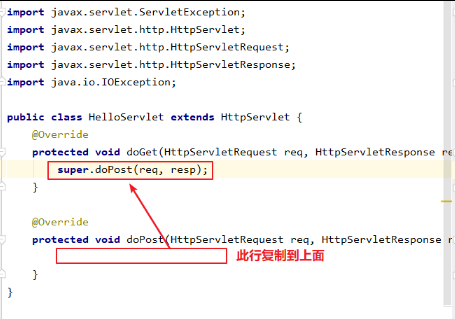
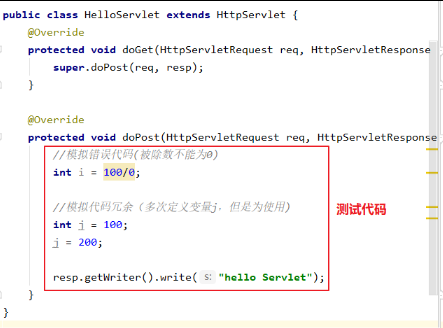
package com.mytest;

import javax.servlet.ServletException;
import javax.servlet.http.HttpServlet;
import javax.servlet.http.HttpServletRequest;
import javax.servlet.http.HttpServletResponse;
import java.io.IOException;

public class HelloServlet extends HttpServlet {
    @Override
    protected void doGet(HttpServletRequest req, HttpServletResponse resp) throws ServletException, IOException {
        super.doPost(req, resp);
    }

    @Override
    protected void doPost(HttpServletRequest req, HttpServletResponse resp) throws ServletException, IOException {
        //模拟错误代码(被除数不能为0)
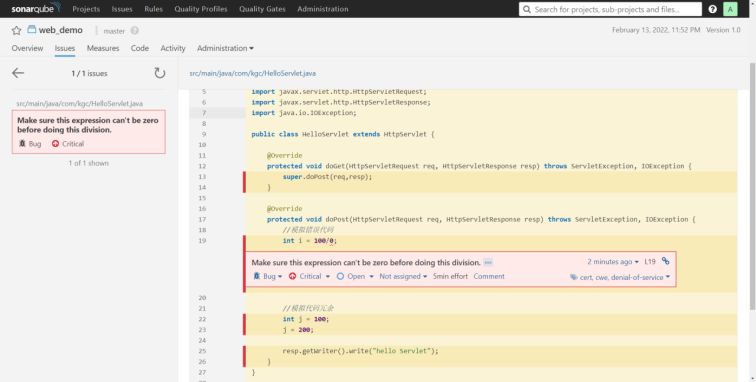
        int i = 100/0;

        //模拟代码冗余(多次定义变量j,但是为使用)
        int j = 100;
        j = 200;

        resp.getWriter().write("hello Servlet");
    }
}
11、提交 pom.xml和 HelloServlet 修改后的代码
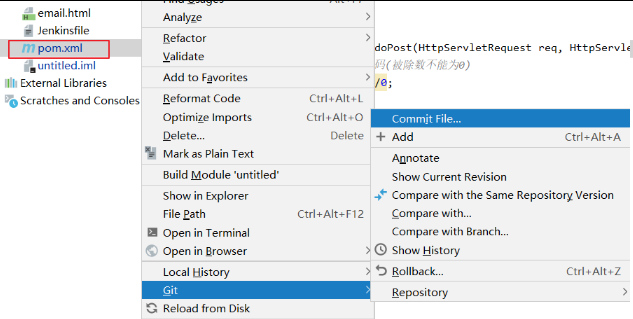
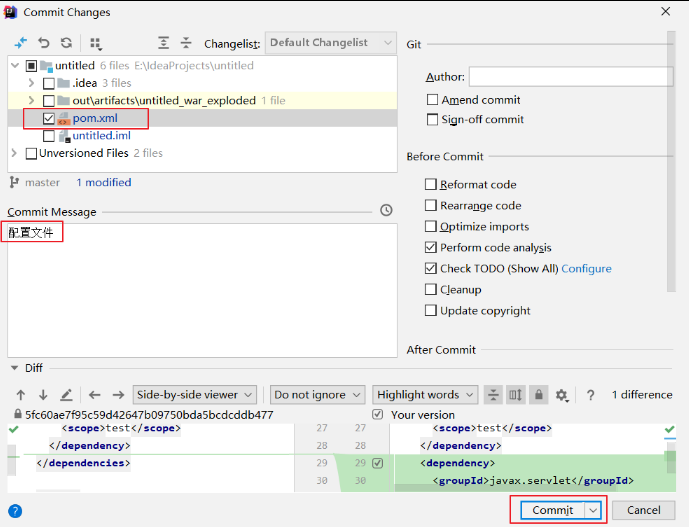
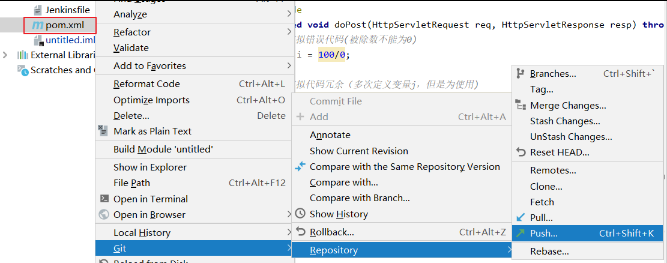
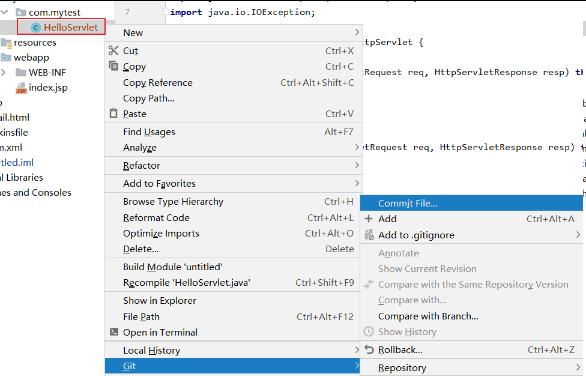
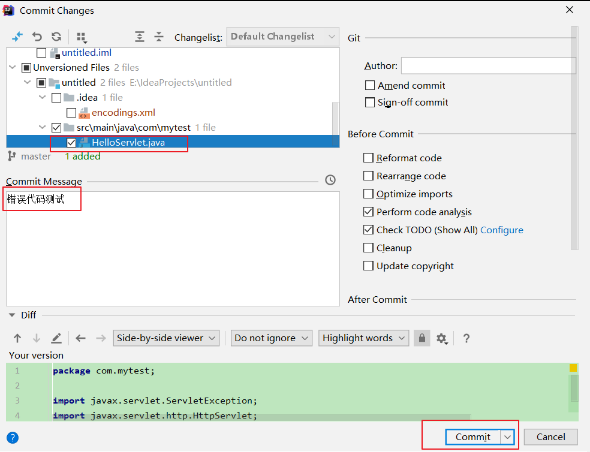
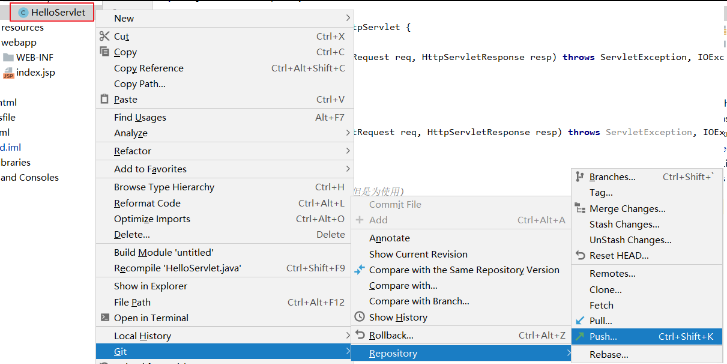
12、进行构建,测试结果
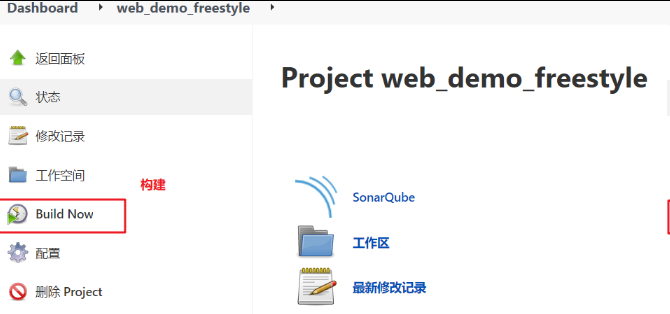
若发现构建结果报错

解决方法:
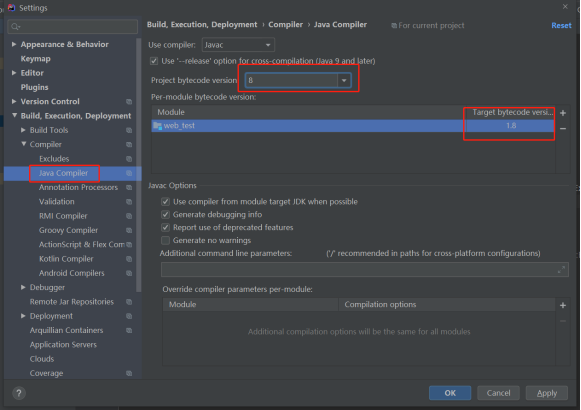
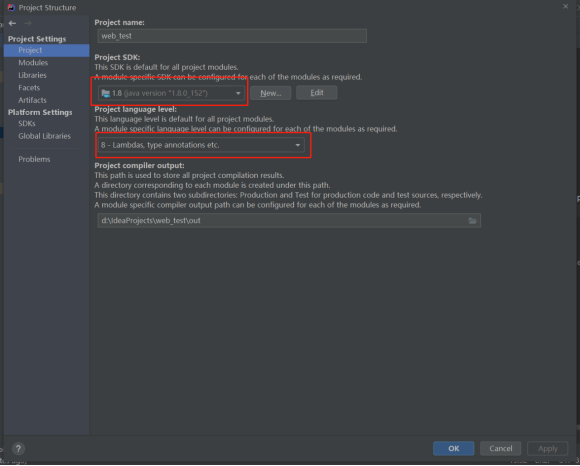
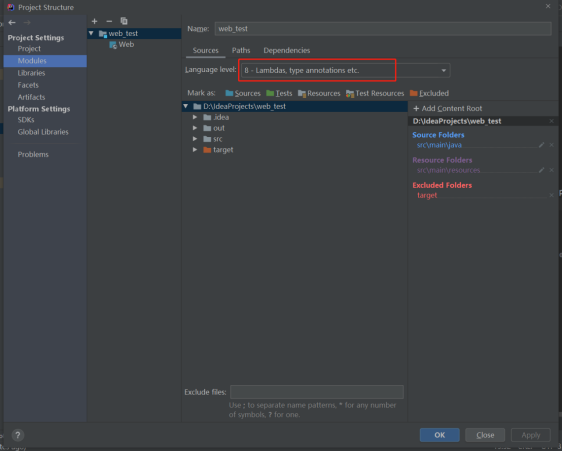
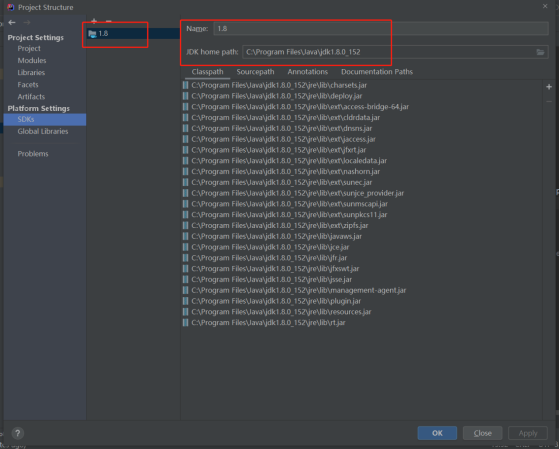
再次提交项目
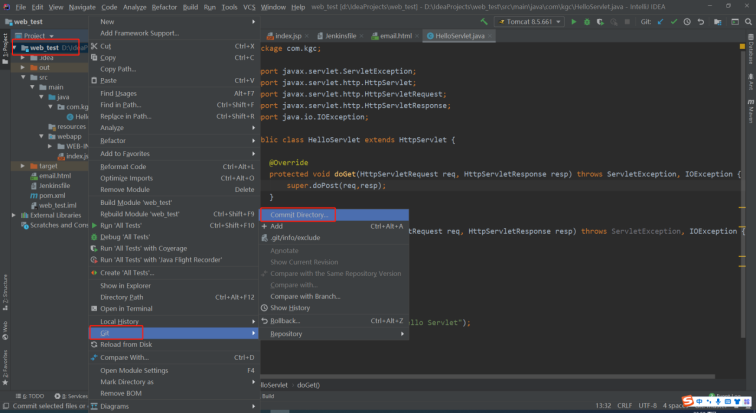
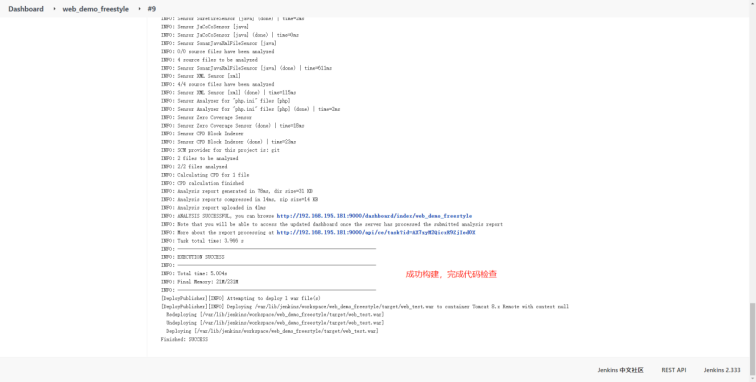
13、在sonarqube 服务器查看结果

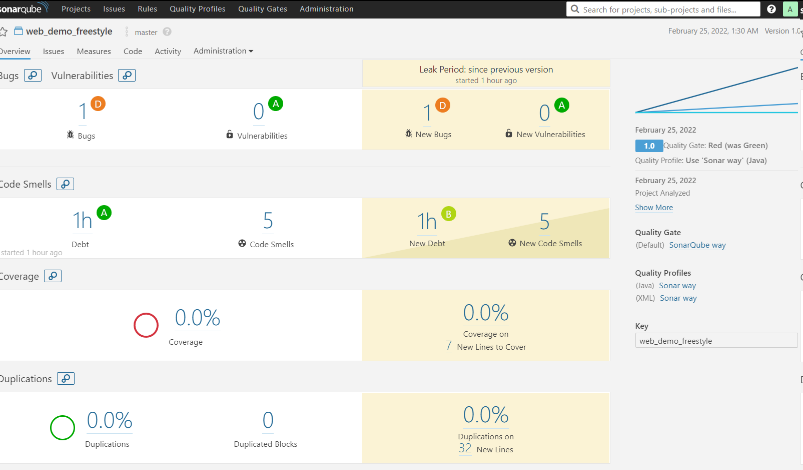
发现代码BUG和未使用变量等问题

在项目添加SonaQube代码审查(流水线项目)
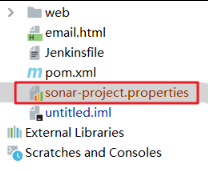
1、项目根目录下,创建sonar-project.properties文件

# must be unique in a given SonarQube instance
sonar.projectKey=web_demo_pipeline
# this is the name and version displayed in the SonarQube UI. Was mandatory prior to SonarQube 6.1.
sonar.projectName=web_demo_pipeline
sonar.projectVersion=1.0

# Path is relative to the sonar-project.properties file. Replace "\" by "/" on Windows.
# This property is optional if sonar.modules is set.
sonar.sources=.
sonar.exclusions=**/test/**,**/target/**

sonar.java.source=1.8
sonar.java.target=1.8

# Encoding of the source code. Default is default system encoding sonar.sourceEncoding=UTF-8
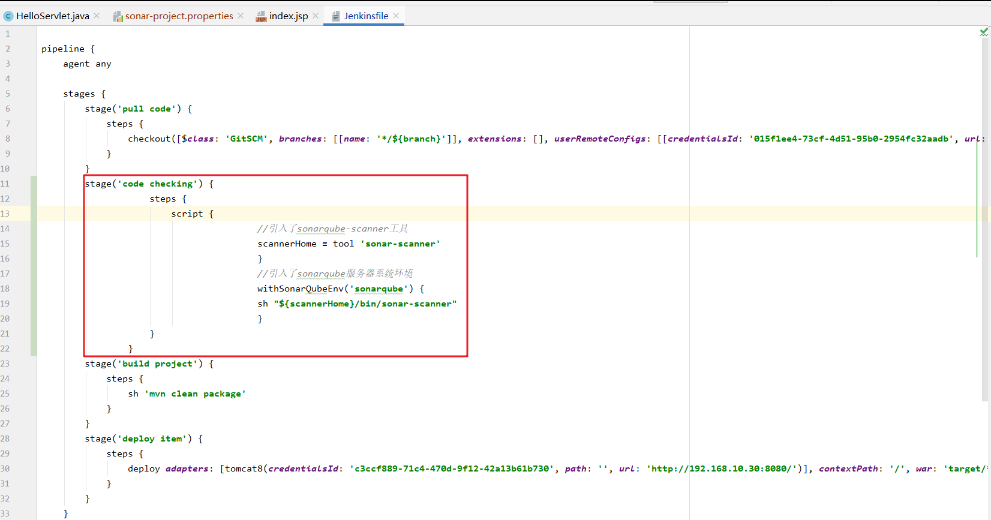
2、修改 Jenkinsfile,加入SonarQube代码审查阶段
pipeline {
    agent any

    stages {
        stage('pull code') {
            steps {
                checkout([$class: 'GitSCM', branches: [[name: '*/${branch}']], extensions: [], userRemoteConfigs: [[credentialsId: '015f1ee4-73cf-4d51-95b0-2954fc32aadb', url: 'git@192.168.10.10:xxx_group/web_demo.git']]])
            }
        }
        stage('code checking') {
                    steps {
                        script {
                                        //引入了sonarqube-scanner工具
                                        scannerHome = tool 'sonar-scanner'
                                        }
                                        //引入了sonarqube服务器系统环境
                                        withSonarQubeEnv('sonarqube') {
                                        sh "${scannerHome}/bin/sonar-scanner"
                                        }
                    }
                }
        stage('build project') {
            steps {
                sh 'mvn clean package'
            }
        }
        stage('deploy item') {
            steps {
                deploy adapters: [tomcat8(credentialsId: 'c3ccf889-71c4-470d-9f12-42a13b61b730', path: '', url: 'http://192.168.10.30:8080/')], contextPath: '/', war: 'target/*.war'
            }
        }
    }
    post {
                always {
                    emailext(
                    subject: '构建通知:${PROJECT_NAME} - Build # ${BUILD_NUMBER} - ${BUILD_STATUS}!',body: '${FILE,path="email.html"}', to: '1597116874@qq.com'
                    )
            }
        }
}
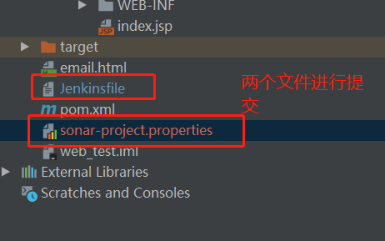
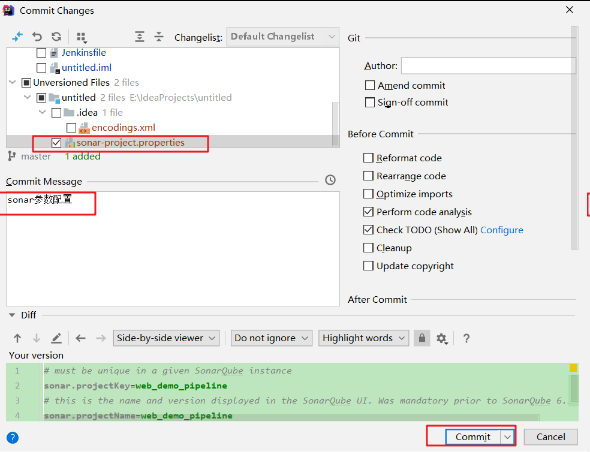
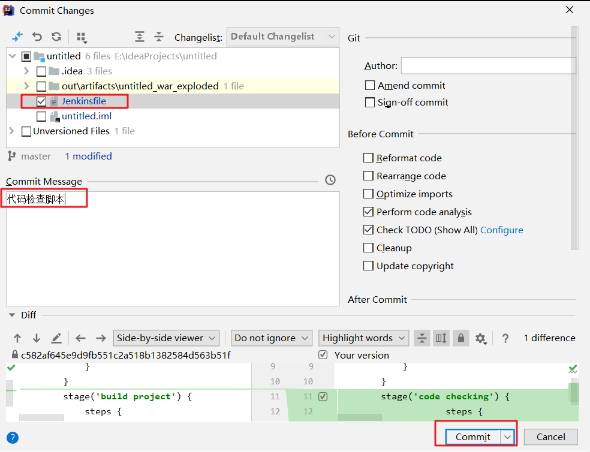
3、把更改后的sonar-project.properties和Jenkinsfile进行提交
4、开始构建 web_demo_pipeline
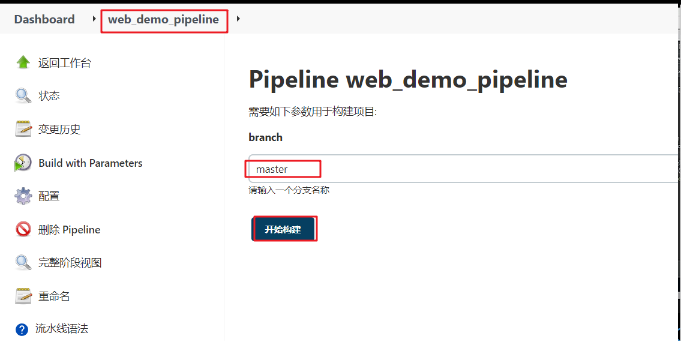
5、在 sonarqube 服务器查看检测结果,邮件通知也会收到

