Spring混合配置装配bean
书不记,熟读可记;义不精,细思可精;惟有志不立,直是无着力处。
——朱熹
前面学习了Spring通过自动化配置、Java代码装配bean,现在我们学习最后一种XML配置装配bean的方式。
XML配置
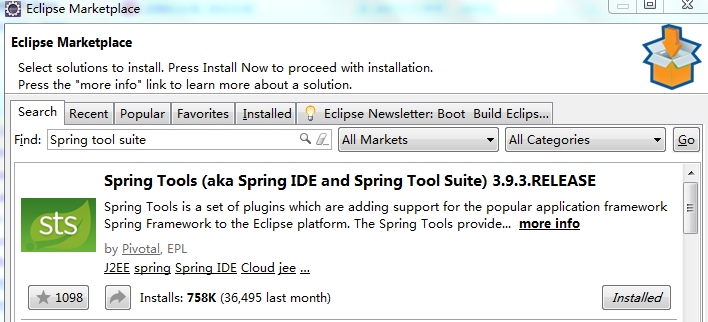
在创建XML配置文件时,需要在配置文件顶部声明多个XML模式(XSD)文件,这些文件定义了配置Spring的XML元素。创建和管理XML配置文件的一种简单方式是使用Spring Tool Suite插件。如图,可在Eclipse Marketplace中直接搜索并安装该插件。
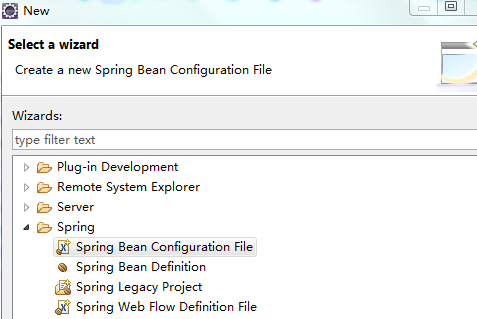
安装完毕并重启Eclipse之后,便可在方便快捷的创建XML配置。
借助构造器注入初始化bean
1) <constructor-arg>元素。
<?xml version="1.0" encoding="UTF-8"?>
<beans xmlns="http://www.springframework.org/schema/beans"
    xmlns:xsi="http://www.w3.org/2001/XMLSchema-instance"
    xmlns:aop="http://www.springframework.org/schema/aop"
    xmlns:c="http://www.springframework.org/schema/c"
    xmlns:util="http://www.springframework.org/schema/util"
    xsi:schemaLocation="http://www.springframework.org/schema/beans
     http://www.springframework.org/schema/beans/spring-beans.xsd
        http://www.springframework.org/schema/aop http://www.springframework.org/schema/aop/spring-aop.xsd
        http://www.springframework.org/schema/util http://www.springframework.org/schema/util/spring-util-4.3.xsd">
    <!-- 创建一个Computer实例computer-->
    <bean id="computer" class="chapter2.practice2.Computer"></bean>
    <!-- 创建一个LeagueOfLegends实例,通过构造器注入依赖对象computer -->
    <bean class="chapter2.practice2.LeagueOfLegends" >
        <constructor-arg ref="computer"></constructor-arg>
    </bean>
</beans>
2)使用Spring 3.0中引入的c-命名空间
(1) 直接饮用构造器参数的名称
<?xml version="1.0" encoding="UTF-8"?>
<beans xmlns="http://www.springframework.org/schema/beans"
    xmlns:xsi="http://www.w3.org/2001/XMLSchema-instance"
    xmlns:aop="http://www.springframework.org/schema/aop"
    xmlns:c="http://www.springframework.org/schema/c"
    xmlns:util="http://www.springframework.org/schema/util"
    xsi:schemaLocation="http://www.springframework.org/schema/beans
     http://www.springframework.org/schema/beans/spring-beans.xsd
        http://www.springframework.org/schema/aop http://www.springframework.org/schema/aop/spring-aop.xsd
        http://www.springframework.org/schema/util http://www.springframework.org/schema/util/spring-util-4.3.xsd">
    <!-- 创建一个Computer实例computer-->
    <bean id="computer" class="chapter2.practice2.Computer"></bean>
    <!-- 创建一个LeagueOfLegends实例,通过构造器注入依赖对象computer -->
    <bean class="chapter2.practice2.LeagueOfLegends" c:computer-ref="computer">
    </bean>
</beans>
(2)使用索引来识别构造器参数
<?xml version="1.0" encoding="UTF-8"?>
<beans xmlns="http://www.springframework.org/schema/beans"
    xmlns:xsi="http://www.w3.org/2001/XMLSchema-instance"
    xmlns:aop="http://www.springframework.org/schema/aop"
    xmlns:c="http://www.springframework.org/schema/c"
    xmlns:util="http://www.springframework.org/schema/util"
    xsi:schemaLocation="http://www.springframework.org/schema/beans
      http://www.springframework.org/schema/beans/spring-beans.xsd
        http://www.springframework.org/schema/aop http://www.springframework.org/schema/aop/spring-aop.xsd
        http://www.springframework.org/schema/util http://www.springframework.org/schema/util/spring-util-4.3.xsd">
    <!-- 创建一个Computer实例computer-->
    <bean id="computer" class="chapter2.practice2.Computer"></bean>
    <!-- 创建一个LeagueOfLegends实例,通过构造器注入依赖对象computer -->
    <bean class="chapter2.practice2.LeagueOfLegends" c:_0-ref="computer" >
    </bean>
</beans>
(3)若只有一个构造器参数,可以不用标示参数
<?xml version="1.0" encoding="UTF-8"?>
<beans xmlns="http://www.springframework.org/schema/beans"
    xmlns:xsi="http://www.w3.org/2001/XMLSchema-instance"
    xmlns:aop="http://www.springframework.org/schema/aop"
    xmlns:c="http://www.springframework.org/schema/c"
    xmlns:util="http://www.springframework.org/schema/util"
    xsi:schemaLocation="http://www.springframework.org/schema/beans
      http://www.springframework.org/schema/beans/spring-beans.xsd
        http://www.springframework.org/schema/aop http://www.springframework.org/schema/aop/spring-aop.xsd
        http://www.springframework.org/schema/util http://www.springframework.org/schema/util/spring-util-4.3.xsd">
    <!-- 创建一个Computer实例computer-->
    <bean id="computer" class="chapter2.practice2.Computer"></bean>
    <!-- 创建一个LeagueOfLegends实例,通过构造器注入依赖对象computer -->
    <bean class="chapter2.practice2.LeagueOfLegends" c:_-ref="computer" >
    </bean>
</beans>
借助构造器注入字面量值
在借助构造器装配bean和字面量值方面,两者的<constructor-arg>和c-命名空间的功能是相同的,只是装配bean使用的ref属性,而注入字面量值(如字符串)使用的是value属性。
<?xml version="1.0" encoding="UTF-8"?>
<beans xmlns="http://www.springframework.org/schema/beans"
    xmlns:xsi="http://www.w3.org/2001/XMLSchema-instance"
    xmlns:aop="http://www.springframework.org/schema/aop"
    xmlns:c="http://www.springframework.org/schema/c"
    xmlns:util="http://www.springframework.org/schema/util"
    xsi:schemaLocation="http://www.springframework.org/schema/beans
     http://www.springframework.org/schema/beans/spring-beans.xsd
        http://www.springframework.org/schema/aop http://www.springframework.org/schema/aop/spring-aop.xsd
        http://www.springframework.org/schema/util http://www.springframework.org/schema/util/spring-util-4.3.xsd">
    <!-- 创建一个LeagueOfLegends实例,通过构造器注入字符串 -->
    <bean class="chapter2.practice2.LeagueOfLegends" c:_-="LOL" >
    </bean>
</beans>
借助构造器注入集合
<constructor-arg>能够将集合装配到构造器参数中,而c-命名空间无法做到。<constructor-arg>的子元素<list>元素或<set>元素可以将一个包含bean引用(或是值)的列表传递到构造器中。
<?xml version="1.0" encoding="UTF-8"?>
<beans xmlns="http://www.springframework.org/schema/beans"
    xmlns:xsi="http://www.w3.org/2001/XMLSchema-instance"
    xmlns:aop="http://www.springframework.org/schema/aop"
    xmlns:c="http://www.springframework.org/schema/c"
    xmlns:util="http://www.springframework.org/schema/util"
    xsi:schemaLocation="http://www.springframework.org/schema/beans
      http://www.springframework.org/schema/beans/spring-beans.xsd
        http://www.springframework.org/schema/aop http://www.springframework.org/schema/aop/spring-aop.xsd
        http://www.springframework.org/schema/util http://www.springframework.org/schema/util/spring-util-4.3.xsd">
    <!-- 创建一个Computer实例computer-->
    <bean id="computer" class="chapter2.practice2.Computer"></bean>
    <!-- 创建一个LeagueOfLegends实例,通过构造器注入依赖对象computer -->
    <bean class="chapter2.practice2.LeagueOfLegends">
        <constructor-arg>
            <list>
                <!-- 传递bean引用集合列表 -->
                <ref bean="computer"/>
                <!-- 传递值集合列表 -->
                <value>LOL</value>
            </list>
        </constructor-arg>
    </bean>
</beans>
<set>和<list>元素的区别不大,其中最重要的不同在于当Spring创建要装配的集合时,所创建的是java.util.Set还是java.util.List。如果是Set那么集合中的元素是无序且不重复的。
通过属性(set方法)注入bean
1)使用<bean>元素的子元素<property>
<?xml version="1.0" encoding="UTF-8"?>
<beans xmlns="http://www.springframework.org/schema/beans"
    xmlns:xsi="http://www.w3.org/2001/XMLSchema-instance"
    xmlns:aop="http://www.springframework.org/schema/aop"
    xmlns:c="http://www.springframework.org/schema/c"
    xmlns:util="http://www.springframework.org/schema/util"
    xsi:schemaLocation="http://www.springframework.org/schema/beans
       http://www.springframework.org/schema/beans/spring-beans.xsd
        http://www.springframework.org/schema/aop http://www.springframework.org/schema/aop/spring-aop.xsd
        http://www.springframework.org/schema/util http://www.springframework.org/schema/util/spring-util-4.3.xsd">
    <!-- 创建一个Computer实例computer-->
    <bean id="computer" class="chapter2.practice2.Computer"></bean>
    <!-- 创建一个LeagueOfLegends实例,通过构造器注入依赖对象computer -->
    <bean class="chapter2.practice2.LeagueOfLegends">
        <property name="computer" ref="computer"></property>
    </bean>
</beans>
2)使用p-命名空间
<?xml version="1.0" encoding="UTF-8"?>
<beans xmlns="http://www.springframework.org/schema/beans"
    xmlns:xsi="http://www.w3.org/2001/XMLSchema-instance"
    xmlns:aop="http://www.springframework.org/schema/aop"
    xmlns:c="http://www.springframework.org/schema/c"
    xmlns:util="http://www.springframework.org/schema/util"
    xmlns:p="http://www.springframework.org/schema/p"
    xsi:schemaLocation="http://www.springframework.org/schema/beans
     http://www.springframework.org/schema/beans/spring-beans.xsd
        http://www.springframework.org/schema/aop http://www.springframework.org/schema/aop/spring-aop.xsd
        http://www.springframework.org/schema/util http://www.springframework.org/schema/util/spring-util-4.3.xsd">
    <!-- 创建一个Computer实例computer-->
    <bean id="computer" class="chapter2.practice2.Computer"></bean>
    <!-- 创建一个LeagueOfLegends实例,通过构造器注入依赖对象computer -->
    <bean class="chapter2.practice2.LeagueOfLegends" p:computer-ref="computer">
    </bean>
</beans>
借助util命名空间,将集合单独声明为bean
<?xml version="1.0" encoding="UTF-8"?>
<beans xmlns="http://www.springframework.org/schema/beans"
    xmlns:xsi="http://www.w3.org/2001/XMLSchema-instance"
    xmlns:aop="http://www.springframework.org/schema/aop"
    xmlns:c="http://www.springframework.org/schema/c"
    xmlns:util="http://www.springframework.org/schema/util"
    xmlns:p="http://www.springframework.org/schema/p"
    xsi:schemaLocation="http://www.springframework.org/schema/beans
     http://www.springframework.org/schema/beans/spring-beans.xsd
        http://www.springframework.org/schema/aop http://www.springframework.org/schema/aop/spring-aop.xsd
        http://www.springframework.org/schema/util http://www.springframework.org/schema/util/spring-util-4.3.xsd">
    <!-- 创建一个Computer实例computer-->
    <bean id="computer" class="chapter2.practice2.Computer"></bean>
    <!-- 创建一个LeagueOfLegends实例,通过构造器注入依赖对象computer -->
    <bean class="chapter2.practice2.LeagueOfLegends" p:computer-ref="computerList">
    </bean>

    <util:list id="computerList">
        <ref bean="computer"/>
    </util:list>
</beans>
在Java代码配置中引入XML配置
package chapter2.practice2;

import org.springframework.context.annotation.ComponentScan;
import org.springframework.context.annotation.Configuration;
import org.springframework.context.annotation.Import;
import org.springframework.context.annotation.ImportResource;

/**
 * 创建一个Java根配置类
 * @ToDo 将两个或更多的Java配置类或XML配置文件组合起来,并启用组件扫描
 *
 */
@Configuration
@ComponentScan
@Import(GamerConfig.class)
@ImportResource("classpath:lol-config.xml")
public class GameSystemConfig {
}
在XML配置中引用Java代码配置
<?xml version="1.0" encoding="UTF-8"?>
<beans xmlns="http://www.springframework.org/schema/beans"
    xmlns:xsi="http://www.w3.org/2001/XMLSchema-instance"
    xmlns:aop="http://www.springframework.org/schema/aop"
    xmlns:c="http://www.springframework.org/schema/c"
    xmlns:util="http://www.springframework.org/schema/util"
    xmlns:p="http://www.springframework.org/schema/p"
    xsi:schemaLocation="http://www.springframework.org/schema/beans
      http://www.springframework.org/schema/beans/spring-beans.xsd
        http://www.springframework.org/schema/aop http://www.springframework.org/schema/aop/spring-aop.xsd
        http://www.springframework.org/schema/util http://www.springframework.org/schema/util/spring-util-4.3.xsd">
    <!-- 创建一个XML根配置文件,将两个或多个装配Java类或XML配置文件组合起来 -->

    <!-- 引入Java配置类 -->
    <bean class="chapter2.practice2.GamerConfig"></bean>

    <!-- 引入其他XMP配置文件 -->
    <import resource="lol-config.xml"/>
</beans>

 浙公网安备 33010602011771号