SpringSecurity整合Oauth2
父模块:
  <parent>
        <groupId>org.springframework.boot</groupId>
        <artifactId>spring-boot-starter-parent</artifactId>
        <version>2.1.3.RELEASE</version>
        <relativePath/>
    </parent>

    <properties>
        <spring-cloud.version>Greenwich.RELEASE</spring-cloud.version>
    </properties>

    <dependencyManagement>
        <dependencies>
            <dependency>
                <groupId>org.springframework.cloud</groupId>
                <artifactId>spring-cloud-dependencies</artifactId>
                <version>${spring-cloud.version}</version>
                <type>pom</type>
                <scope>import</scope>
            </dependency>
        </dependencies>
    </dependencyManagement>

    <repositories>
        <repository>
            <id>spring-snapshots</id>
            <name>Spring Snapshots</name>
            <url>https://repo.spring.io/snapshot</url>
            <snapshots>
                <enabled>true</enabled>
            </snapshots>
        </repository>
        <repository>
            <id>spring-milestones</id>
            <name>Spring Milestones</name>
            <url>https://repo.spring.io/milestone</url>
            <snapshots>
                <enabled>false</enabled>
            </snapshots>
        </repository>
    </repositories>
创建资源模块
创建工程并导入jar包
<dependencies>
        <dependency>
            <groupId>org.springframework.boot</groupId>
            <artifactId>spring-boot-starter-web</artifactId>
        </dependency>
        <dependency>
            <groupId>org.springframework.boot</groupId>
            <artifactId>spring-boot-starter-security</artifactId>
        </dependency>
        <dependency>
            <groupId>org.springframework.cloud</groupId>
            <artifactId>spring-cloud-starter-oauth2</artifactId>
            <version>2.1.0.RELEASE</version>
        </dependency>
        <dependency>
            <groupId>mysql</groupId>
            <artifactId>mysql-connector-java</artifactId>
            <version>5.1.47</version>
        </dependency>
        <dependency>
            <groupId>org.mybatis.spring.boot</groupId>
            <artifactId>mybatis-spring-boot-starter</artifactId>
            <version>2.1.0</version>
        </dependency>
    </dependencies>
提供配置文件
server:
  port: 9002
spring:
  datasource:
    driver-class-name: com.mysql.jdbc.Driver
    url: jdbc:mysql:///security_authority
    username: root
    password: 123456
  main:
    allow-bean-definition-overriding: true #允许我们自己覆盖spring放入到IOC容器的对象
mybatis:
  type-aliases-package: com.topcheer.domain
  configuration:
    map-underscore-to-camel-case: true
logging:
  level:
    com.topcheer: debug
编写资源管理配置类
@Configuration
@EnableResourceServer
public class OauthSourceConfig extends ResourceServerConfigurerAdapter {

    @Autowired
    private DataSource dataSource;

    /**
     * 指定token的持久化策略
     * InMemoryTokenStore表示将token存储在内存
     * Redis表示将token存储在redis中
     * JdbcTokenStore存储在数据库中
     * @return
     */
    @Bean
    public TokenStore jdbcTokenStore(){
        return new JdbcTokenStore(dataSource);
    }

    /**
     * 指定当前资源的id和存储方案
     * @param resources
     * @throws Exception
     */
    @Override
    public void configure(ResourceServerSecurityConfigurer resources) throws Exception {
        resources.resourceId("product_api").tokenStore(jdbcTokenStore());
    }

    @Override
    public void configure(HttpSecurity http) throws Exception{
        http.authorizeRequests()
                //指定不同请求方式访问资源所需要的权限,一般查询是read,其余是write。
                .antMatchers(HttpMethod.GET, "/**").access("#oauth2.hasScope('read')")
                .antMatchers(HttpMethod.POST, "/**").access("#oauth2.hasScope('write')")
                .antMatchers(HttpMethod.PATCH, "/**").access("#oauth2.hasScope('write')")
                .antMatchers(HttpMethod.PUT, "/**").access("#oauth2.hasScope('write')")
                .antMatchers(HttpMethod.DELETE, "/**").access("#oauth2.hasScope('write')")
                .and()
                .headers().addHeaderWriter((request, response) -> {
            response.addHeader("Access-Control-Allow-Origin", "*");//允许跨域
            if (request.getMethod().equals("OPTIONS")) {//如果是跨域的预检请求,则原封不动向下传达请求头信息
                response.setHeader("Access-Control-Allow-Methods", request.getHeader("Access-Control-Request-Method"));
                response.setHeader("Access-Control-Allow-Headers", request.getHeader("Access-Control-Request-Headers"));
            }
        });
    }


}
创建授权模块
创建工程并导入jar包
   <dependencies>
        <dependency>
            <groupId>org.springframework.boot</groupId>
            <artifactId>spring-boot-starter-web</artifactId>
        </dependency>
        <dependency>
            <groupId>org.springframework.boot</groupId>
            <artifactId>spring-boot-starter-security</artifactId>
        </dependency>
        <dependency>
            <groupId>org.springframework.cloud</groupId>
            <artifactId>spring-cloud-starter-oauth2</artifactId>
            <version>2.1.0.RELEASE</version>
        </dependency>
        <dependency>
            <groupId>mysql</groupId>
            <artifactId>mysql-connector-java</artifactId>
            <version>5.1.47</version>
        </dependency>
        <dependency>
            <groupId>org.mybatis.spring.boot</groupId>
            <artifactId>mybatis-spring-boot-starter</artifactId>
            <version>2.1.0</version>
        </dependency>
    </dependencies>
配置类
server:
  port: 9001
spring:
  datasource:
    driver-class-name: com.mysql.jdbc.Driver
    url: jdbc:mysql:///security_authority
    username: root
    password: 123456
  main:
    allow-bean-definition-overriding: true
mybatis:
  type-aliases-package: com.topcheer.domain
  configuration:
    map-underscore-to-camel-case: true
logging:
  level:
    com.topcheer: debug
提供 SpringSecurity配置类
@Configuration
@EnableWebSecurity
public class WebSecurityConfig extends WebSecurityConfigurerAdapter {

    @Autowired
    private UserService userService;

    @Bean
    public BCryptPasswordEncoder passwordEncoder(){
        return new BCryptPasswordEncoder();
    }

    @Override
    public void configure(AuthenticationManagerBuilder auth) throws Exception {
        auth.userDetailsService(userService).passwordEncoder(passwordEncoder());
    }

    @Override
    protected void configure(HttpSecurity http) throws Exception {

        http.authorizeRequests()
                .anyRequest().authenticated()
                .and()
                .formLogin()
                .loginProcessingUrl("/login")
                .permitAll()
                .and()
                .csrf()
                .disable();
    }

    //AuthenticationManager对象在OAuth2认证服务中要使用,提前放入IOC容器中
    @Override
    @Bean
    public AuthenticationManager authenticationManagerBean() throws Exception {
        return super.authenticationManagerBean();
    }

}
提供OAuth2授权配置类
@Configuration
@EnableAuthorizationServer
public class OauthServerConfig extends AuthorizationServerConfigurerAdapter {

    //数据库连接池对象
    @Autowired
    private DataSource dataSource;

    //认证业务对象
    @Autowired
    private UserService userService;

    //授权模式专用对象
    @Autowired
    private AuthenticationManager authenticationManager;

    //客户端信息来源
    @Bean
    public JdbcClientDetailsService jdbcClientDetailsService(){
        return new JdbcClientDetailsService(dataSource);
    }

    //token保存策略
    @Bean
    public TokenStore tokenStore(){
        return new JdbcTokenStore(dataSource);
    }

    //授权信息保存策略
    @Bean
    public ApprovalStore approvalStore(){
        return new JdbcApprovalStore(dataSource);
    }

    //授权码模式数据来源
    @Bean
    public AuthorizationCodeServices authorizationCodeServices(){
        return new JdbcAuthorizationCodeServices(dataSource);
    }

    //指定客户端信息的数据库来源
    @Override
    public void configure(ClientDetailsServiceConfigurer clients) throws Exception {
        clients.withClientDetails(jdbcClientDetailsService());
    }

    //检查token的策略
    @Override
    public void configure(AuthorizationServerSecurityConfigurer security) throws Exception {

        security.allowFormAuthenticationForClients();
    }

    //OAuth2的主配置信息
    @Override
    public void configure(AuthorizationServerEndpointsConfigurer endpoints) throws Exception {
        endpoints
                .approvalStore(approvalStore())
                .authenticationManager(authenticationManager)
                .authorizationCodeServices(authorizationCodeServices())
                .tokenStore(tokenStore());
    }

}
测试
在数据库中手动添加客户端信息
所有要使用当前项目资源的项目,都是我们的客户端。比如我们之前举的例子,A服务打印照片,B服务存储照
片。A服务要使用B服务的资源,那么A服务就是B服务的客户端。
这里要区分用户的信息和客户端信息,用户信息是用户在B服务上注册的用户信息,在sys_user表中。客户端信息
是A服务在B服务中注册的账号,在OAuth2的oauth_client_details表中。
测试数据sql语句如下:

授权码模式测试
在地址栏访问地址
http://localhost:9001/oauth/authorize?response_type=code&client_id=topcheer_one
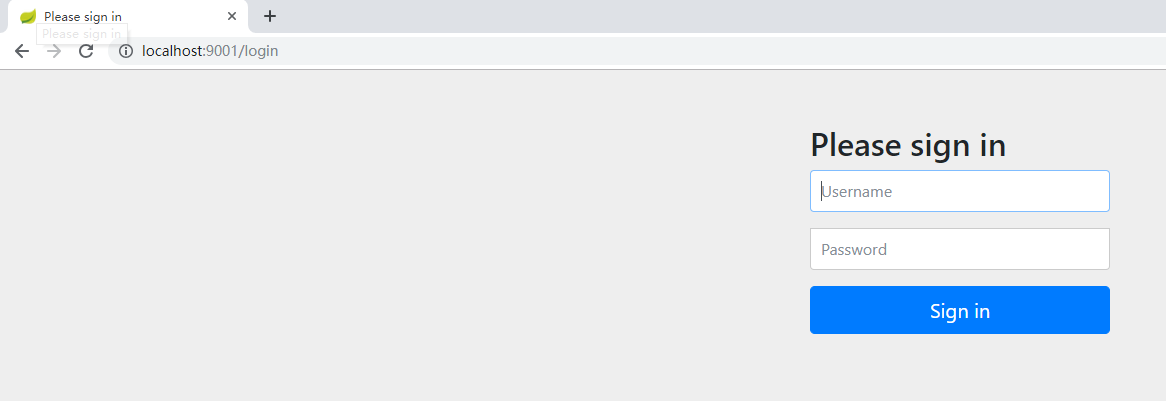
跳转到SpringSecurity默认认证页面,提示用户登录个人账户【这里是sys_user表中的数据】
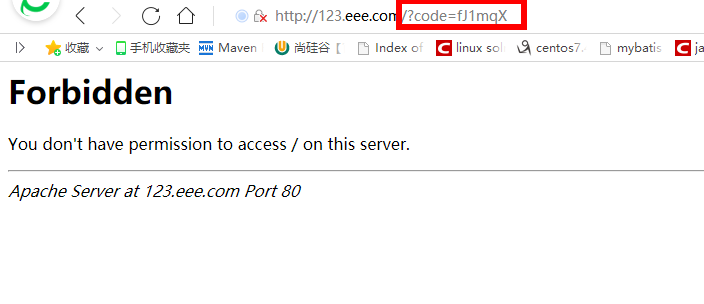
点击 Authorize后跳转到回调地址并获取授权码
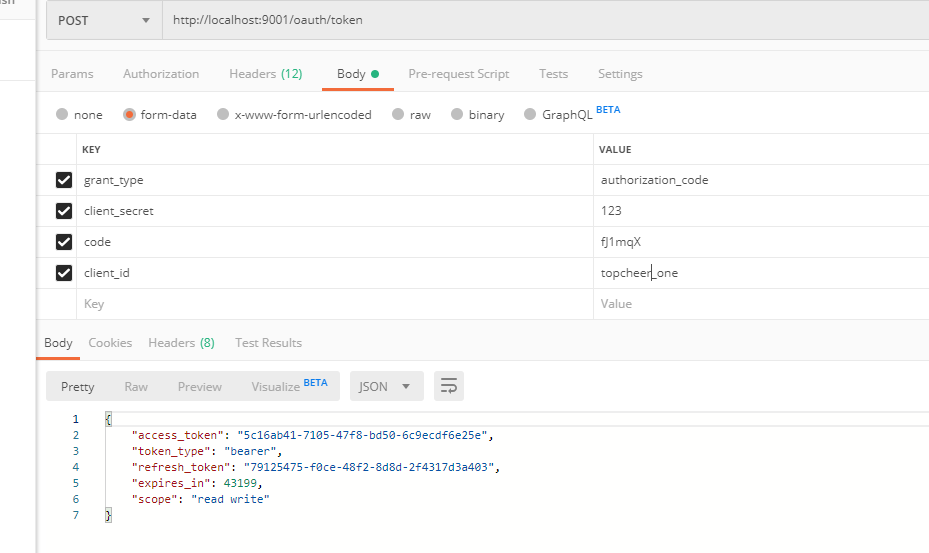
使用授权码到服务器申请通行令牌 token
重启资源服务器,然后携带通行令牌再次去访问资源服务器,大功告成!
简化模式测试
在地址栏访问地址
http://localhost:9001/oauth/authorize?response_type=token&client_id=topcheer_one
由于上面用户已经登录过了,所以无需再次登录,其实和上面是有登录步骤的,这时,浏览器直接返回了token

密码模式
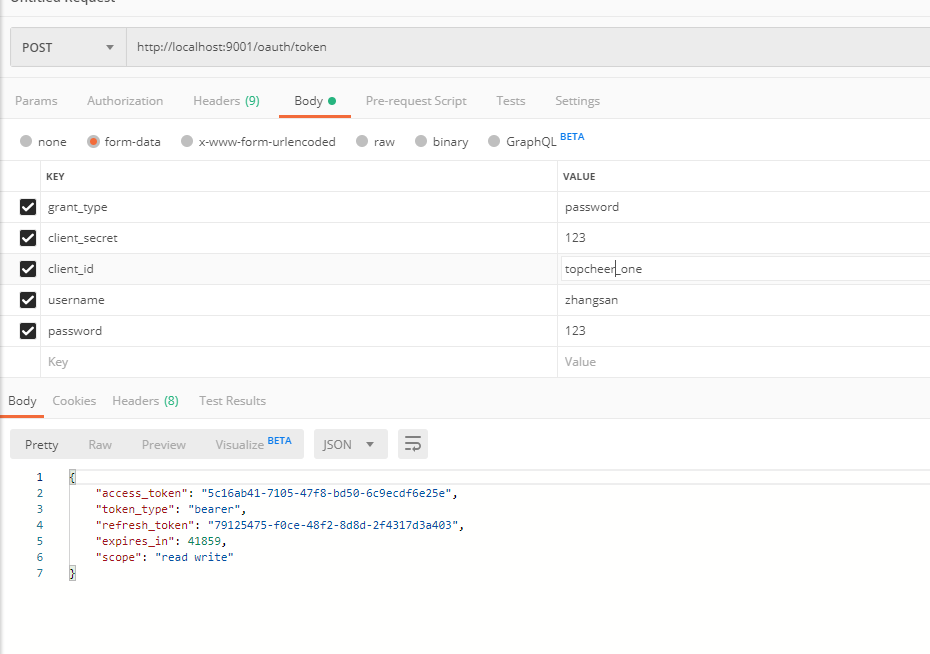
客户端模式测试
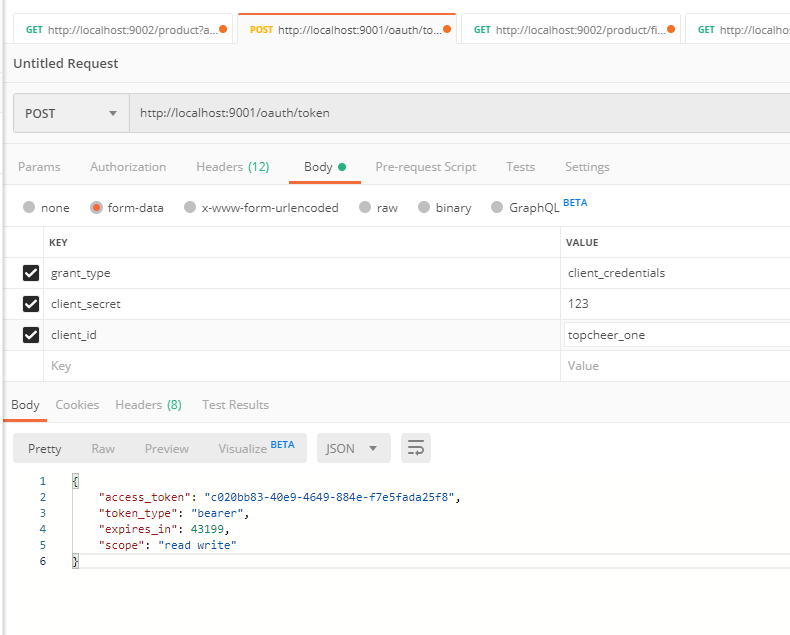
申请token
