
一、Weave Scope
1. weave scope 容器地图
创建 Kubernetes 集群并部署容器化应用只是第一步。一旦集群运行起来,我们需要确保一起正常,所有必要组件就位并各司其职,有足够的资源满足应用的需求。Kubernetes 是一个复杂系统,运维团队需要有一套工具帮助他们获知集群的实时状态,并为故障排查提供及时和准确的数据支持。
Weave Scope 是 Docker 和 Kubernetes 可视化监控工具。Scope 提供了至上而下的集群基础设施和应用的完整视图,用户可以轻松对分布式的容器化应用进行实时监控和问题诊断。
Weave Scope 的最大特点是会自动生成一张 Docker 容器地图,让我们能够直观地理解、监控和控制容器。千言万语不及一张图,先感受一下。

2.weave scope部署


[root@cicd kubernetes]# cat scope.yaml
apiVersion: v1
kind: List
items:
  - apiVersion: v1
    kind: Namespace
    metadata:
      name: weave
      annotations:
        cloud.weave.works/version: unknown
  - apiVersion: v1
    kind: ServiceAccount
    metadata:
      name: weave-scope
      annotations:
        cloud.weave.works/launcher-info: |-
          {
            "original-request": {
              "url": "/k8s/v1.8/scope.yaml",
              "date": "Tue Nov 06 2018 11:58:40 GMT+0000 (UTC)"
            },
            "email-address": "support@weave.works"
          }
      labels:
        name: weave-scope
      namespace: weave
  - apiVersion: rbac.authorization.k8s.io/v1beta1
    kind: ClusterRole
    metadata:
      name: weave-scope
      annotations:
        cloud.weave.works/launcher-info: |-
          {
            "original-request": {
              "url": "/k8s/v1.8/scope.yaml",
              "date": "Tue Nov 06 2018 11:58:40 GMT+0000 (UTC)"
            },
            "email-address": "support@weave.works"
          }
      labels:
        name: weave-scope
    rules:
      - apiGroups:
          - ''
        resources:
          - pods
        verbs:
          - get
          - list
          - watch
          - delete
      - apiGroups:
          - ''
        resources:
          - pods/log
          - services
          - nodes
          - namespaces
          - persistentvolumes
          - persistentvolumeclaims
        verbs:
          - get
          - list
          - watch
      - apiGroups:
          - apps
        resources:
          - statefulsets
        verbs:
          - get
          - list
          - watch
      - apiGroups:
          - batch
        resources:
          - cronjobs
          - jobs
        verbs:
          - get
          - list
          - watch
      - apiGroups:
          - extensions
        resources:
          - deployments
          - daemonsets
        verbs:
          - get
          - list
          - watch
      - apiGroups:
          - extensions
        resources:
          - deployments/scale
        verbs:
          - get
          - update
      - apiGroups:
          - storage.k8s.io
        resources:
          - storageclasses
        verbs:
          - get
          - list
          - watch
  - apiVersion: rbac.authorization.k8s.io/v1beta1
    kind: ClusterRoleBinding
    metadata:
      name: weave-scope
      annotations:
        cloud.weave.works/launcher-info: |-
          {
            "original-request": {
              "url": "/k8s/v1.8/scope.yaml",
              "date": "Tue Nov 06 2018 11:58:40 GMT+0000 (UTC)"
            },
            "email-address": "support@weave.works"
          }
      labels:
        name: weave-scope
    roleRef:
      kind: ClusterRole
      name: weave-scope
      apiGroup: rbac.authorization.k8s.io
    subjects:
      - kind: ServiceAccount
        name: weave-scope
        namespace: weave
  - apiVersion: apps/v1beta1
    kind: Deployment
    metadata:
      name: weave-scope-app
      annotations:
        cloud.weave.works/launcher-info: |-
          {
            "original-request": {
              "url": "/k8s/v1.8/scope.yaml",
              "date": "Tue Nov 06 2018 11:58:40 GMT+0000 (UTC)"
            },
            "email-address": "support@weave.works"
          }
      labels:
        name: weave-scope-app
        app: weave-scope
        weave-cloud-component: scope
        weave-scope-component: app
      namespace: weave
    spec:
      replicas: 1
      revisionHistoryLimit: 2
      template:
        metadata:
          labels:
            name: weave-scope-app
            app: weave-scope
            weave-cloud-component: scope
            weave-scope-component: app
        spec:
          containers:
            - name: app
              args:
                - '--mode=app'
              command:
                - /home/weave/scope
              env: []
              image: 'reg.yunwei.edu/learn/weavscope:1.9.1'
              imagePullPolicy: IfNotPresent
              ports:
                - containerPort: 4040
                  protocol: TCP
  - apiVersion: v1
    kind: Service
    metadata:
      name: weave-scope-app
      annotations:
        cloud.weave.works/launcher-info: |-
          {
            "original-request": {
              "url": "/k8s/v1.8/scope.yaml",
              "date": "Tue Nov 06 2018 11:58:40 GMT+0000 (UTC)"
            },
            "email-address": "support@weave.works"
          }
      labels:
        name: weave-scope-app
        app: weave-scope
        weave-cloud-component: scope
        weave-scope-component: app
      namespace: weave
    spec:
      type: NodePort
      ports:
        - name: app
          port: 80
          protocol: TCP
          targetPort: 4040
      selector:
        name: weave-scope-app
        app: weave-scope
        weave-cloud-component: scope
        weave-scope-component: app
  - apiVersion: extensions/v1beta1
    kind: DaemonSet
    metadata:
      name: weave-scope-agent
      annotations:
        cloud.weave.works/launcher-info: |-
          {
            "original-request": {
              "url": "/k8s/v1.8/scope.yaml",
              "date": "Tue Nov 06 2018 11:58:40 GMT+0000 (UTC)"
            },
            "email-address": "support@weave.works"
          }
      labels:
        name: weave-scope-agent
        app: weave-scope
        weave-cloud-component: scope
        weave-scope-component: agent
      namespace: weave
    spec:
      minReadySeconds: 5
      template:
        metadata:
          labels:
            name: weave-scope-agent
            app: weave-scope
            weave-cloud-component: scope
            weave-scope-component: agent
        spec:
          containers:
            - name: scope-agent
              args:
                - '--mode=probe'
                - '--probe-only'
                - '--probe.kubernetes=true'
                - '--probe.docker.bridge=docker0'
                - '--probe.docker=true'
                - 'weave-scope-app.weave.svc.cluster.local:80'
              command:
                - /home/weave/scope
              env:
                - name: KUBERNETES_NODENAME
                  valueFrom:
                    fieldRef:
                      apiVersion: v1
                      fieldPath: spec.nodeName
              image: 'reg.yunwei.edu/learn/weavscope:1.9.1'
              imagePullPolicy: IfNotPresent
              securityContext:
                privileged: true
              volumeMounts:
                - name: scope-plugins
                  mountPath: /var/run/scope/plugins
                - name: sys-kernel-debug
                  mountPath: /sys/kernel/debug
                - name: docker-socket
                  mountPath: /var/run/docker.sock
          dnsPolicy: ClusterFirstWithHostNet
          hostNetwork: true
          hostPID: true
          serviceAccountName: weave-scope
          tolerations:
            - effect: NoSchedule
              operator: Exists
          volumes:
            - name: scope-plugins
              hostPath:
                path: /var/run/scope/plugins
            - name: sys-kernel-debug
              hostPath:
                path: /sys/kernel/debug
            - name: docker-socket
              hostPath:
                path: /var/run/docker.sock
      updateStrategy:
        type: RollingUpdate
安装 Scope 的方法很简单,执行如下命令:
#kubectl apply -f scope.yaml

部署成功后,有如下相关组件:

-
DaemonSet weave-scope-agent,集群每个节点上都会运行的 scope agent 程序,负责收集数据。
-
Deployment weave-scope-app,scope 应用,从 agent 获取数据,通过 Web UI 展示并与用户交互。
-
Service weave-scope-app,默认是 ClusterIP 类型,为了方便已通过 kubectl edit 修改为 NodePort。
3.使用 weave scope
(1)登陆weavescope

(2)拓扑结构
Scope 会自动构建应用和集群的逻辑拓扑。比如点击顶部 PODS,会显示所有 Pod 以及 Pod 之间的依赖关系。

点击 HOSTS,会显示各个节点之间的关系。

(3)实时资源监控
可以在 Scope 中查看资源的 CPU 和内存使用情况。

支持图,表,柱状图显示


(4)在线操作
Scope 还提供了便捷的在线操作功能,比如选中某个 Host,点击 >_ 按钮可以直接在浏览器中打开节点的命令行终端:

点击 Deployment 的 + 可以执行 Scale Up 操作:

可以 attach、restart、stop 容器,以及直接在 Scope 中排查问题:

详细信息包括这么几部分:
Status:CPU、内存的实时使用情况以及历史曲线。
INFO:容器 image、启动命令、状态、网络等信息。
以下几项需拉动滚动条查看。

PROCESSES:容器中运行的进程。
ENVIRONMENT VARIABLES:环境变量。
DOCKER LABELS:容器启动命令。
IMAGE:镜像详细信息。
(5)在容器信息的上面还有一排操作按钮。

attach 到容器启动进程,相当于执行 docker container attach
打开shell,相当于执行docker container exec
重启容器,相当于执行 docker container restart
暂停容器,相当于执行 docker container pause
关闭容器,相当于执行 docker container stop
(6)强大的搜索功能
Scope 支持关键字搜索和定位资源。

还可以进行条件搜索,比如查找和定位 cpu > 1% 的 Containers 。

Weave Scope 界面极其友好,操作简洁流畅,更多功能留给大家去探索。

二、用 Heapster 监控集群:
1.heapster介绍
Heapster 是 Kubernetes 原生的集群监控方案。Heapster 以 Pod 的形式运行,它会自动发现集群节点、从节点上的 Kubelet 获取监控数据。Kubelet 则是从节点上的 cAdvisor 收集数据。
Heapster 将数据按照 Pod 进行分组,将它们存储到预先配置的 backend 并进行可视化展示。Heapster 当前支持的 backend 有 InfluxDB(通过 Grafana 展示),Google Cloud Monitoring 等。Heapster 的整体架构如下图所示:

Heapster 本身是一个 Kubernetes 应用,部署方法很简单,之前章节中我们实践了由 Heapster、InfluxDB 和 Grafana 组成的监控方案。Kubelet 和 cAdvisor 是 Kubernetes 的自带组件,无需额外部署。
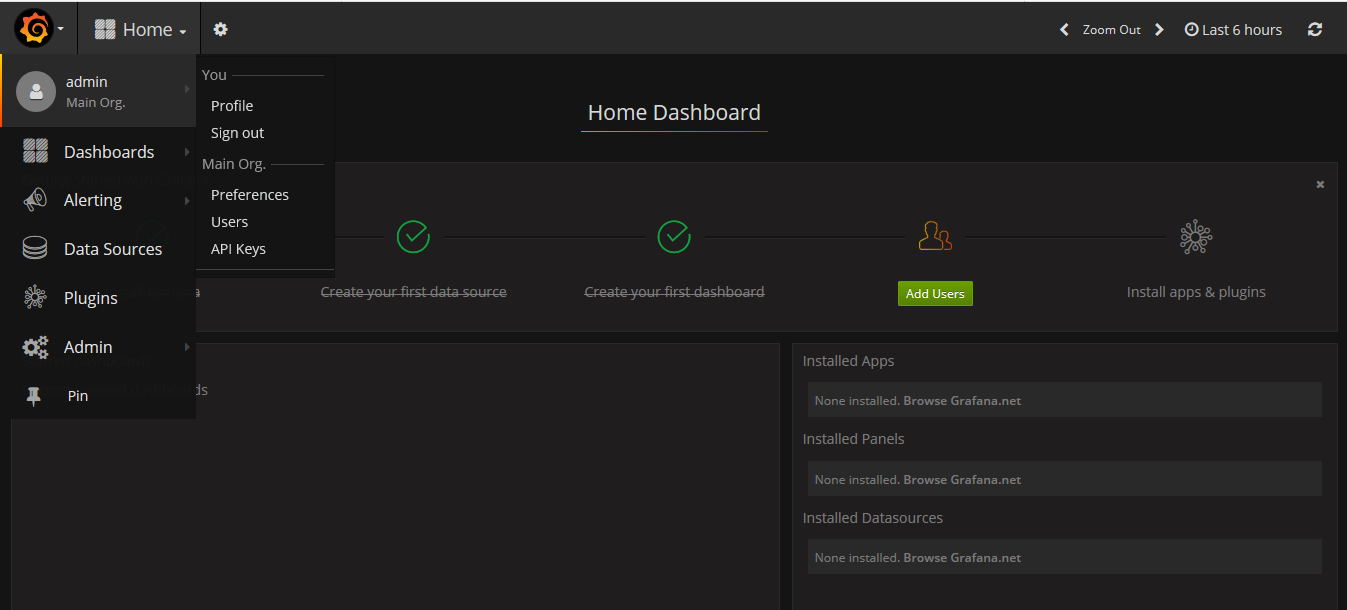
2.grafana部署
[root@cicd kubernetes]# docker ps -a
0918862b8730        1acb4fd5df5b                           "/bin/sh"                4 days ago          Up 2 hours                                                                                    xenodochial_liskov
[root@cicd kubernetes]# docker exec -it 0918862b8730 /bin/sh
/ #
/ # cd /etc/ansible/
/etc/ansible # ls
01.prepare.yml      05.kube-node.yml    example
02.etcd.retry       06.network.yml      hosts
02.etcd.yml         99.clean.yml        manifests
03.docker.yml       ansible.cfg         roles
04.kube-master.yml  bin                 tools
/etc/ansible # cd manifests/
/etc/ansible/manifests # ls
coredns    dashboard  efk        heapster   ingress    kubedns
/etc/ansible/manifests # cd heapster/
/etc/ansible/manifests/heapster # ls
grafana.yaml      influxdb-v1.1.1   influxdb.yaml
heapster.yaml     influxdb-with-pv
/etc/ansible/manifests/heapster # kubectl apply -f .
deployment "monitoring-grafana" unchanged
service "monitoring-grafana" unchanged
serviceaccount "heapster" unchanged
clusterrolebinding "heapster" configured
deployment "heapster" unchanged
service "heapster" unchanged
deployment "monitoring-influxdb" unchanged
service "monitoring-influxdb" unchanged

/etc/ansible/manifests/heapster # kubectl cluster-info
Kubernetes master is running at https://192.168.42.121:6443
CoreDNS is running at https://192.168.42.121:6443/api/v1/namespaces/kube-system/services/coredns:dns/proxy
kubernetes-dashboard is running at https://192.168.42.121:6443/api/v1/namespaces/kube-system/services/https:kubernetes-dashboard:/proxy
monitoring-grafana is running at https://192.168.42.121:6443/api/v1/namespaces/kube-system/services/monitoring-grafana/proxy

To further debug and diagnose cluster problems, use 'kubectl cluster-info dump'.

用户名和密码都是admi
3.界面展示

 浙公网安备 33010602011771号