本文参考https://blog.csdn.net/u013113678/article/details/112727681实施验证后记录
Windows编译OpenResty并加入正向代理
1、准备相关资源文件
下载OpenResty最新源码包
https://openresty.org/download/openresty-1.19.3.1.tar.gz
下载正向代理源码包,注意如果openresty是最新版本,则正向代理也下载最新版本
https://github.com/chobits/ngx_http_proxy_connect_module/releases
下载msys2
下载依赖库
打开文件:OpenResty源码包/util/build-win32.sh
这里面列出了当前OpenResty版本所需的依赖库,需要手动下载:
# wget https://www.openssl.org/source/openssl-1.1.1g.tar.gz # wget http://zlib.net/zlib-1.2.11.tar.gz # wget https://ftp.pcre.org/pub/pcre/pcre-8.44.tar.gz 注意版本一定要对应正确,否则无法编译
下载其他依赖工具strawberryperl
所有文件下载完后如下:

2、搭建编译环境
2.1、安装msys2
自行安装
2.2、设置包管理国内镜像
这一步不是必须的,不设置镜像只是后续操作下载速度会很慢。
找到msys2的安装目录,继续转到etc\pacman.d目录下,用记事本打开下列文件:
①编辑mirrorlist.mingw32文件
首行添加:Server = https://mirrors.tuna.tsinghua.edu.cn/msys2/mingw/i686/
②编辑mirrorlist.mingw64文件
首行添加:Server = https://mirrors.tuna.tsinghua.edu.cn/msys2/mingw/x86_64/
③编辑mirrorlist.msys文件
首行添加:Server = https://mirrors.tuna.tsinghua.edu.cn/msys2/msys/$arch/
回到msys2的安装目录打开msys2.exe执行 pacman -Sy 刷新软件包数据。
2.3、安装mingw
在msys2的安装目录打开msys2.exe执行如下命令:
①:编译64位安装 pacman -S mingw-w64-x86_64-toolchain ②编译32位安装 pacman -S mingw-w64-i686-toolchain 一路回车或按y完成安装
2.4、安装必要的工具
在msys2的安装目录打开msys2.exe执行如下语句:
①pacman -S make ②pacman -S patch
3、开始编译
3.1、放置源码
①将openresty源码解压放至msys2的安装目录下。
②将openssl-1.1.1g.tar.gz、zlib-1.2.13.tar.gz、pcre/pcre-8.44.tar.gz放至msys2的安装目录下。
③将ngx_http_proxy_connect_module-master.zip源码解压放至msys2的安装目录下,文件夹名称为ngx_http_proxy_connect_module。
3.2、configure加入正向代理模块语句
使用记事本打开openresty源码目录下的util的build-win32.sh文件,在该位置加入自定义的模块,并且加入正向代理所需的补丁包,修改后./configure命令内容如下:
./configure \ --with-cc=gcc \ --with-ipv6 \ --prefix= \ --with-cc-opt='-DFD_SETSIZE=1024' \ --sbin-path=nginx.exe \ --with-pcre-jit \ --without-http_rds_json_module \ --without-http_rds_csv_module \ --without-lua_rds_parser \ --with-ipv6 \ --with-stream \ --with-stream_ssl_module \ --with-stream_ssl_preread_module \ --with-http_v2_module \ --without-mail_pop3_module \ --without-mail_imap_module \ --without-mail_smtp_module \ --with-http_stub_status_module \ --with-http_realip_module \ --with-http_addition_module \ --with-http_auth_request_module \ --with-http_secure_link_module \ --with-http_random_index_module \ --with-http_gzip_static_module \ --with-http_sub_module \ --with-http_dav_module \ --with-http_flv_module \ --with-http_mp4_module \ --with-http_gunzip_module \ --with-select_module \ --with-luajit-xcflags="-DLUAJIT_NUMMODE=2 -DLUAJIT_ENABLE_LUA52COMPAT" \ --with-pcre=objs/lib/$PCRE \ --with-zlib=objs/lib/$ZLIB \ --with-openssl=objs/lib/$OPENSSL \ --add-module=../ngx_http_proxy_connect_module patch -d build/nginx-1.19.3/ -p 1 < ../ngx_http_proxy_connect_module/patch/proxy_connect_rewrte_101504.patch make && make install

3.3、使用mingw编译
①在msys2的安装目录打开mingw64.exe或mingw32exe(需要编译64位打开前者,32位打开后者),cd到openresty源码目录,执行:util/build-win32.sh
注意在该执行命令窗口中,[/]的路径代表当前msys2安装的的路径
②等待执行成功
报错案例:
第一个:

说明有包包不存在,这里是openssl包(其他包出现问题是一样的道理),则检查是否正确完成3.1步骤,然后检查openresty源码/util/build-win32.sh文件中这几个名称是否和我们下载包的名称一致:

如果不正确则人工修正即可。
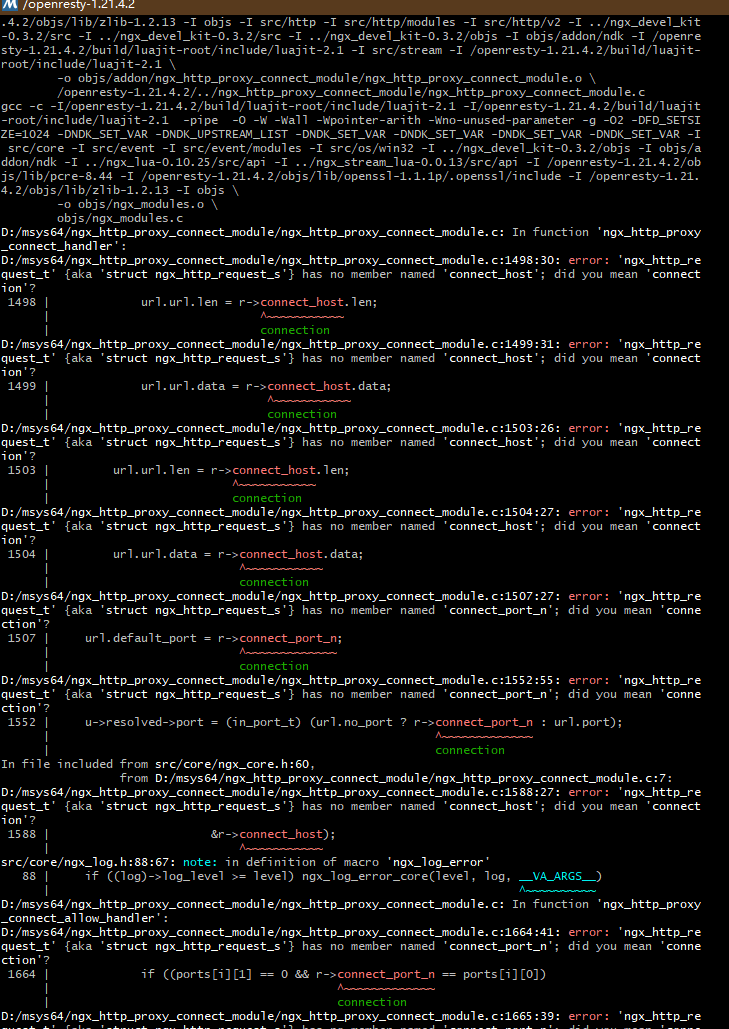
第二个:

说明正向代理包有问题,切换正向代理包版本后再尝试
4、验证
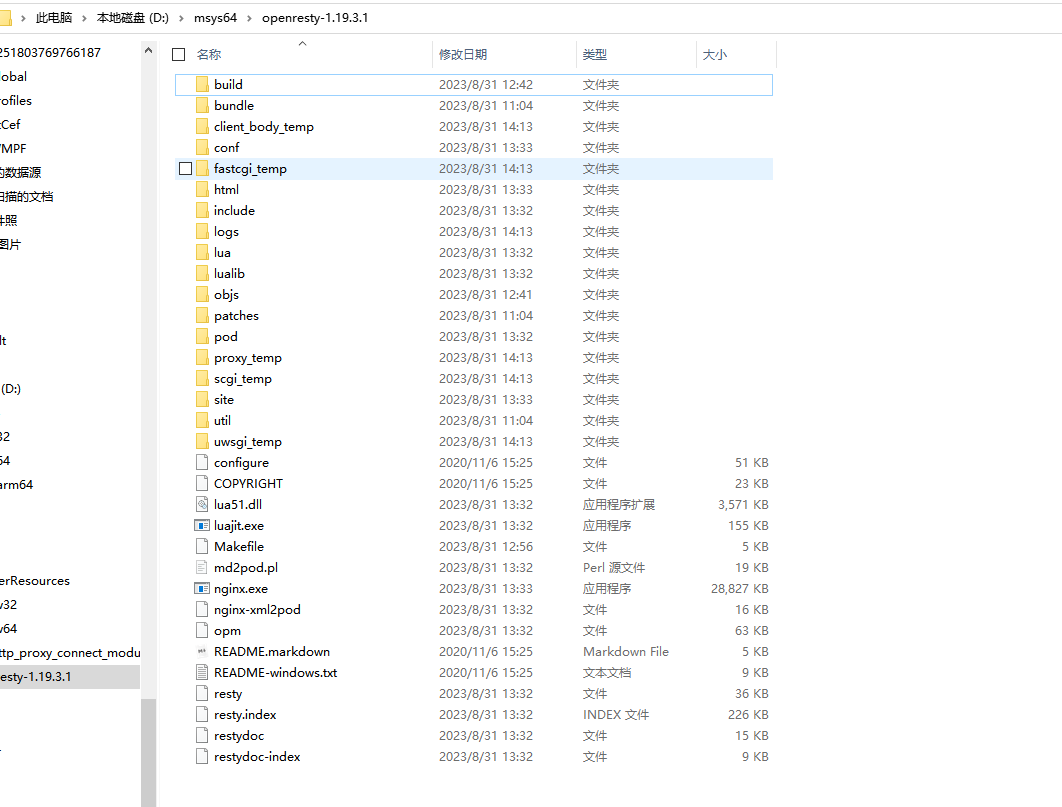
前面打包完成后,在msys的openresty目录中就会得到打包好的内容。如下:

然后即可开始验证nginx各项功能是否正常,此步骤自行验证即可。
附带:编译好的windows包:
链接:https://pan.baidu.com/s/1sDzv7aoQZwovNefRGPK09A
提取码:dl6j
编译所需全部资源:
链接:https://pan.baidu.com/s/1PltaRqbJEeru57wU7thTow
提取码:dwli


【推荐】国内首个AI IDE,深度理解中文开发场景,立即下载体验Trae
【推荐】编程新体验,更懂你的AI,立即体验豆包MarsCode编程助手
【推荐】抖音旗下AI助手豆包,你的智能百科全书,全免费不限次数
【推荐】轻量又高性能的 SSH 工具 IShell:AI 加持,快人一步
· TypeScript + Deepseek 打造卜卦网站:技术与玄学的结合
· Manus的开源复刻OpenManus初探
· AI 智能体引爆开源社区「GitHub 热点速览」
· 三行代码完成国际化适配,妙~啊~
· .NET Core 中如何实现缓存的预热?