
vagrant & centos & phpstorm & xdebug 调试
vagrant & centos & phpstorm & xdebug 调试
f!!!! 温馨提醒 PHP版本一点要和xdebug版本对应
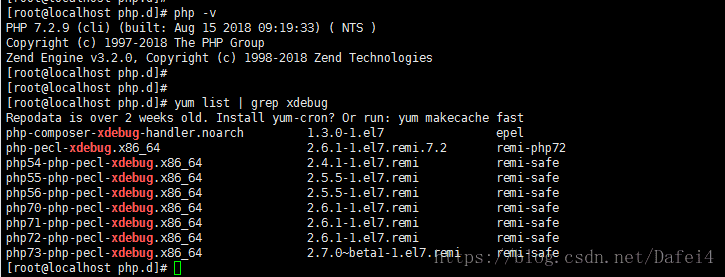
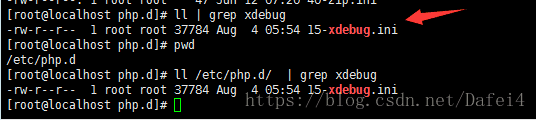
###查看安装的xdebug  01
[root@localhost php.d]# yum list | grep xdebug

Repodata is over 2 weeks old. Install yum-cron? Or run: yum makecache fast
php-composer-xdebug-handler.noarch         1.3.0-1.el7                epel
php-pecl-xdebug.x86_64                     2.6.1-1.el7.remi.7.2       remi-php72
php54-php-pecl-xdebug.x86_64               2.4.1-1.el7.remi           remi-safe
php55-php-pecl-xdebug.x86_64               2.5.5-1.el7.remi           remi-safe
php56-php-pecl-xdebug.x86_64               2.5.5-1.el7.remi           remi-safe
php70-php-pecl-xdebug.x86_64               2.6.1-1.el7.remi           remi-safe
php71-php-pecl-xdebug.x86_64               2.6.1-1.el7.remi           remi-safe
php72-php-pecl-xdebug.x86_64               2.6.1-1.el7.remi           remi-safe
php73-php-pecl-xdebug.x86_64               2.7.0~beta1-1.el7.remi     remi-safe

[root@localhost php.d]# yum install php-pecl-xdebug

###查看安装的xdebug  02
[root@localhost php.d]# ll /etc/php.d/  | grep xdebug
-rw-r--r--  1 root root 37784 Aug  4 05:54 15-xdebug.ini
[root@localhost php.d]# vim 15-xdebug.ini
    zend_extension=xdebug.so
    xdebug.idekey = "PHPSTORM"
    xdebug.default_enable = 1
    xdebug.remote_connect_back = 1
    xdebug.remote_port = 9001
    xdebug.remote_enable = 1
    xdebug.remote_autostart = 1
    xdebug.remote_handler="dbgp"


###查看安装的xdebug 03
[root@localhost php.d]# php -v
PHP 7.2.9 (cli) (built: Aug 15 2018 09:19:33) ( NTS )
Copyright (c) 1997-2018 The PHP Group
Zend Engine v3.2.0, Copyright (c) 1998-2018 Zend Technologies
    with Xdebug v2.6.1, Copyright (c) 2002-2018, by Derick Rethans

###这里的配置不要写错了,remote_connect_back这项很重要
[root@localhost php.d]#  vim 15-xdebug.ini
        zend_extension=xdebug.so
        xdebug.idekey = "PHPSTORM"
        xdebug.default_enable = 1
        xdebug.remote_connect_back = 1
        xdebug.remote_port = 9001
        xdebug.remote_enable = 1
        xdebug.remote_autostart = 1
        xdebug.remote_handler="dbgp"

        或者
        zend_extension=xdebug.so
        xdebug.idekey="PHPSTORM"
        xdebug.remote_connect_back = 1   //这项不要丢了
        xdebug.remote_handler = "dbgp"
        xdebug.remote_mode = "req"
        xdebug.remote_host=127.0.0.1
        xdebug.remote_enable=on
        xdebug.remote_port = 9001
        xdebug.remote_autostart = no

---------------虚拟机配置完毕------------------
windows中配置
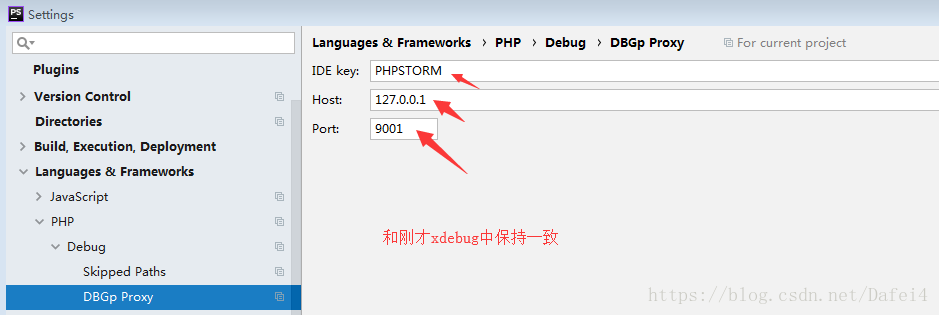
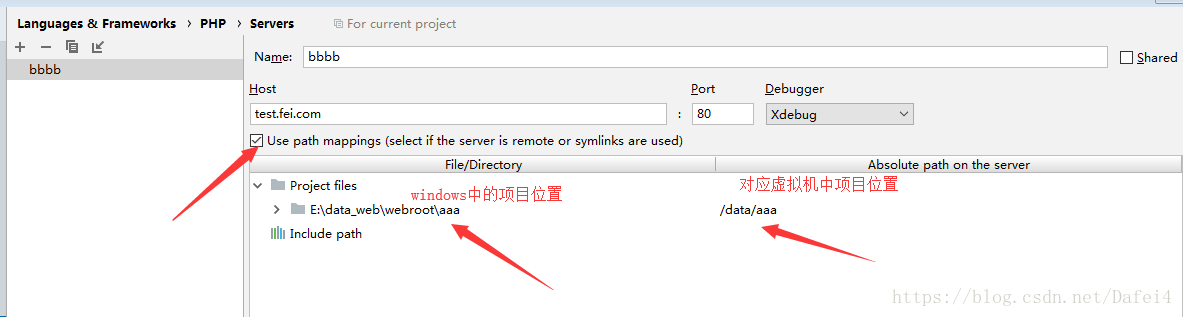
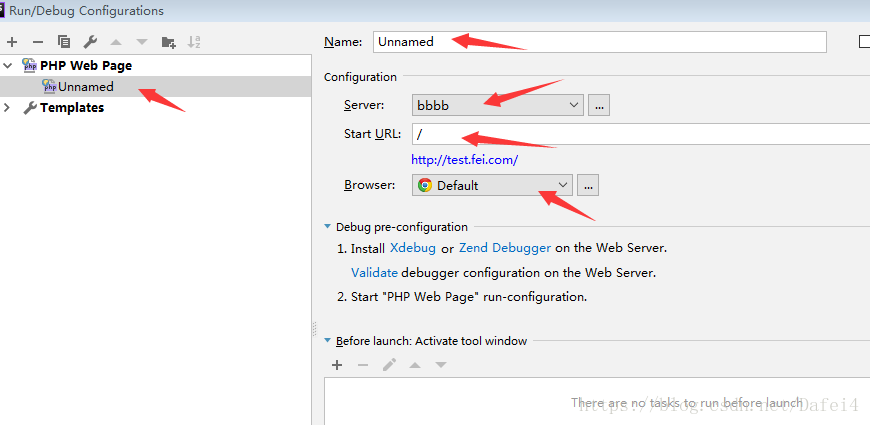
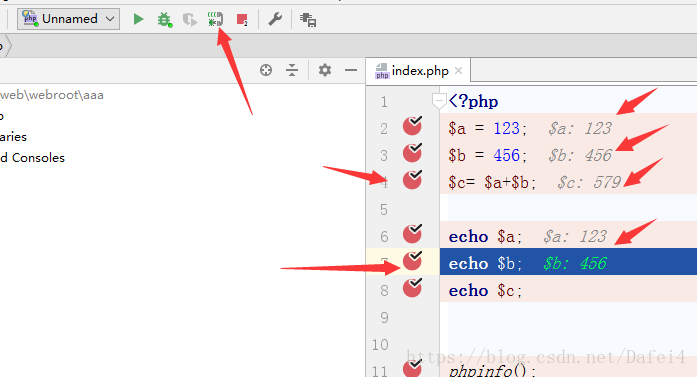
04  Tools-->Vagrant
05  Languages & Frameworks -->PHP--> Debug
06  Languages & Frameworks -->PHP--> Debug --> DBGp Proxy
07  Languages & Frameworks -->PHP--> Servers

08 Run --> Edit Configurations  添加PHP Web Page
09接下来接可以断点调试了
配图说明:


 浙公网安备 33010602011771号