


fastapi项目 04-JWT-Token
前言
对于 flask ,有 flask-jwt-extended 插件快速实现生成登录token。fastapi-jwt-auth .它的灵感来自于flask-jwt-extended。
官网教程地址https://indominusbyte.github.io/fastapi-jwt-auth/usage/basic/。
1. fastapi-jwt-auth演示
首先需要通过fastapi库生成登录token:pip install fastapi-jwt-auth。打开上面这个库的官方文档,我们将官方给的例子,拷贝下来。
from fastapi import FastAPI, HTTPException, Depends, Request
from fastapi.responses import JSONResponse
from fastapi_jwt_auth import AuthJWT
from fastapi_jwt_auth.exceptions import AuthJWTException
from pydantic import BaseModel
import uvicorn

app = FastAPI()


class User(BaseModel):
    username: str
    password: str


# in production you can use Settings management
# from pydantic to get secret key from .env
class Settings(BaseModel):
    authjwt_secret_key: str = "secret"


# callback to get your configuration
@AuthJWT.load_config
def get_config():
    return Settings()


# exception handler for authjwt
# in production, you can tweak performance using orjson response
@app.exception_handler(AuthJWTException)
def authjwt_exception_handler(request: Request, exc: AuthJWTException):
    return JSONResponse(
        status_code=exc.status_code,
        content={"detail": exc.message}
    )


# provide a method to create access tokens. The create_access_token()
# function is used to actually generate the token to use authorization
# later in endpoint protected
@app.post('/login')
def login(user: User, Authorize: AuthJWT = Depends()):
    if user.username != "test" or user.password != "test":
        raise HTTPException(status_code=401, detail="Bad username or password")

        # subject identifier for who this token is for example id or username from database
    access_token = Authorize.create_access_token(subject=user.username)
    return {"access_token": access_token}


# protect endpoint with function jwt_required(), which requires
# a valid access token in the request headers to access.
@app.get('/user')
def user(Authorize: AuthJWT = Depends()):
    Authorize.jwt_required()

    current_user = Authorize.get_jwt_subject()
    return {"user": current_user}

if __name__ == '__main__':
    uvicorn.run(app='basic:app', host='0.0.0.0', port=8081)
# 这是官方文档给出的test示例,作为参考。

$ curl http://localhost:8000/user

{"detail":"Missing Authorization Header"}

$ curl -H "Content-Type: application/json" -X POST \
  -d '{"username":"test","password":"test"}' http://localhost:8000/login

{"access_token":"eyJ0eXAiOiJKV1QiLCJhbGciOiJIUzI1NiJ9.eyJzdWIiOiJ0ZXN0IiwiaWF0IjoxNjAzNjkyMjYxLCJuYmYiOjE2MDM2OTIyNjEsImp0aSI6IjZiMjZkZTkwLThhMDYtNDEzMy04MzZiLWI5ODJkZmI3ZjNmZSIsImV4cCI6MTYwMzY5MzE2MSwidHlwZSI6ImFjY2VzcyIsImZyZXNoIjpmYWxzZX0.ro5JMHEVuGOq2YsENkZigSpqMf5cmmgPP8odZfxrzJA"}

$ export TOKEN=eyJ0eXAiOiJKV1QiLCJhbGciOiJIUzI1NiJ9.eyJzdWIiOiJ0ZXN0IiwiaWF0IjoxNjAzNjkyMjYxLCJuYmYiOjE2MDM2OTIyNjEsImp0aSI6IjZiMjZkZTkwLThhMDYtNDEzMy04MzZiLWI5ODJkZmI3ZjNmZSIsImV4cCI6MTYwMzY5MzE2MSwidHlwZSI6ImFjY2VzcyIsImZyZXNoIjpmYWxzZX0.ro5JMHEVuGOq2YsENkZigSpqMf5cmmgPP8odZfxrzJA

$ curl -H "Authorization: Bearer $TOKEN" http://localhost:8000/user

{"user":"test"}
我们重新运行它的例子,看看是否如其所说。


2. 生成登录token
根据官方文档所给的示例,我们在工厂函数中增加获取JWT配置以及校验。
# apps/__init__.py

def create_app():
    """工厂函数"""
    app = FastAPI()

    @AuthJWT.load_config
    def get_config():
        return Settings()

    # exception handler for authjwt
    # in production, you can tweak performance using orjson response
    @app.exception_handler(AuthJWTException)
    def authjwt_exception_handler(request: Request, exc: AuthJWTException):
        return JSONResponse(
            status_code=exc.status_code,
            content={"detail": exc.message}
        )

  # 注册view路由
  app.include_router(view_jwt.router, prefix="/api/v1", tags=["登录token"])
增加view_jwt函数。
from fastapi import APIRouter, Depends, HTTPException
from apps.model.schemas import UserIn
from fastapi_jwt_auth import AuthJWT

router = APIRouter()

@router.post("/login/jwt")
async def login_jwt_token(user: UserIn, Authorize: AuthJWT = Depends()):
    if user.username != "test":
        raise HTTPException(status_code=401, detail="Bad username or password")

        # subject identifier for who this token is for example id or username from database
    access_token = Authorize.create_access_token(subject=user.username)
    return {
        "code": "0000",
        "message": "Login Successful",
        "body": {"access_token": access_token}
    }
运行启动,并且测试。


3. 数据库校验
创建完登录的token后,我们需要连接数据库,来校验我们登录的账号和密码是否正确。
# 创建数据库密码校验crud
# apps/model/crud.py

from apps.model.models import User
from fastapi import HTTPException
from sqlalchemy.orm import Session

def check_user_password(db: Session, user):
    db_user = db.query(User).filter_by(username=user.username).first()
    return db_user.verify_password(user.password)
# 优化登录接口,连接数据库进行校验密码是否正确

from apps.model import crud
from sqlalchemy.orm import Session
from apps.dependency import get_db

@router.post("/login/jwt")
async def login_jwt_token(user: UserIn, db: Session = Depends(get_db), Authorize: AuthJWT = Depends()):
    # 1. 先校验用户名是否存在
    if not crud.is_user_exist(db, user):
        raise HTTPException(status_code=404, detail="用户名或者密码错误")
    if not crud.check_user_password(db, user):
        raise HTTPException(status_code=404, detail="用户名或者密码错误")
    # 2.生成token
    access_token = Authorize.create_access_token(subject=user.username)
    return {
        "code": "0000",
        "message": "Login Successful",
        "body": {"access_token": access_token}
    }
通过postman进行验证接口是否校验数据库密码成功。


4. 后面接口传token
登录完后,需要操作其他的接口,一般都是需要带上登录接口返回的token的,并且一般都是以:Authorization:Bearer access_token的形式传入到请求头部的。只需要下一个接口中增加Authorize.jwt_required(),即可实现。
@router.get("/userinfo/jwt")
async def get_user_info(Authorize: AuthJWT = Depends()):
    Authorize.jwt_required()  # 该接口请求,需要传token header
    # 该token的用户
    current_user = Authorize.get_jwt_subject()
    return {"current_user": current_user}
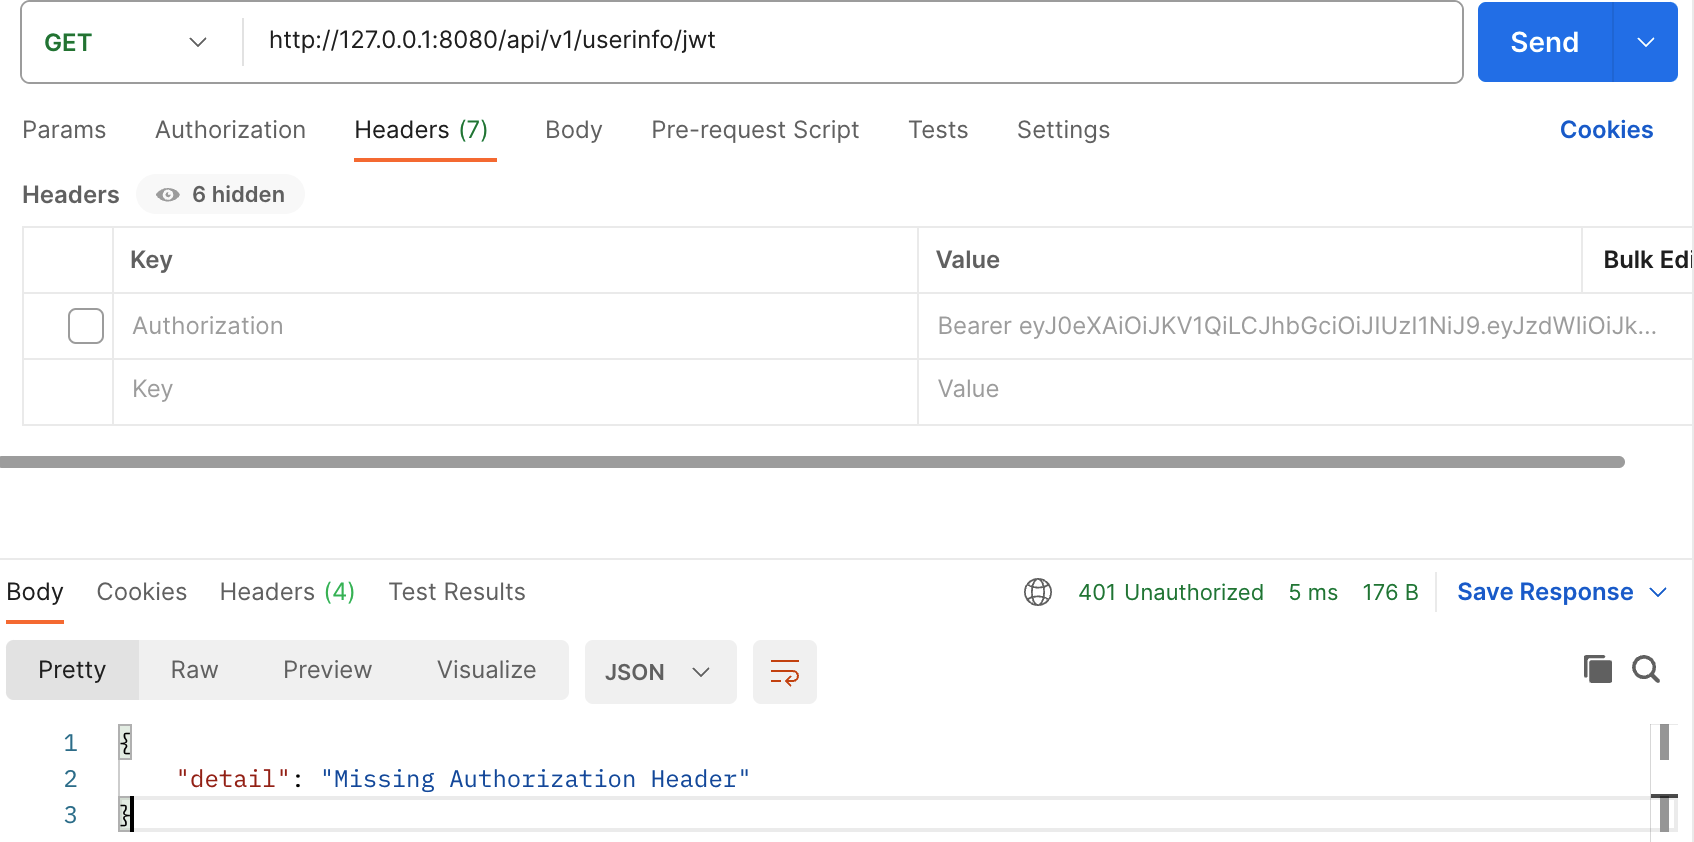
我们增加token后,postman查看返回是否正确。

4.1 额外增加接口返回的数据
获取用户信息接口,一般都需要从数据库中,返回用户的全部信息,所以需要额外通过获取数据库中用户的信息,再将其返回。
# 修改crud.py文件,修改如下,返回用户的数据信息

def is_user_exist(db: Session, user):
    q_user = db.query(User).filter_by(username=user.username)
    if q_user.count() > 0:
        return q_user.first()
    else:
        return False
# 修改登录接口,并添加user_claims参数即可

@router.post("/login/jwt")
async def login_jwt_token(user: UserIn, db: Session = Depends(get_db), Authorize: AuthJWT = Depends()):
    # 1. 先校验用户名是否存在
    get_user_info = crud.is_user_exist(db, user)
    if not get_user_info:
        raise HTTPException(status_code=404, detail="用户名或者密码错误")
    if not crud.check_user_password(db, user):
        raise HTTPException(status_code=404, detail="用户名或者密码错误")
    # 2.生成token
    # access_token = Authorize.create_access_token(subject=user.username)

    # 获取其他额外的内容
    # 2.1 获取登录用户的id
    user_id = get_user_info.id
    username = get_user_info.username
    is_active = get_user_info.is_active
    another_claims = {"id": user_id, "username": username, "is_active": is_active}
    access_token = Authorize.create_access_token(subject=get_user_info.username, user_claims=another_claims)

@router.get("/userinfo/jwt")
async def get_user_info(Authorize: AuthJWT = Depends()):
    Authorize.jwt_required()  # 该接口请求,需要传token header
    # 该token的用户
    # current_user = Authorize.get_jwt_subject()
    another_claims = Authorize.get_raw_jwt()  # 通过Authorize.get_raw_jwt()获取到用户的数据库信息
    return {"body": another_claims}

4.2 添加cookies
如果访问的客户端是浏览器,则还需要添加cookies。只需要在登录的时候,添加cookies就行,另外还需要添加cookies的配置。
access_token = Authorize.create_access_token(subject=get_user_info.username, user_claims=another_claims)
    # 若是浏览器访问则需要添加cookies
    Authorize.set_access_cookies(access_token)
# apps/__init__.py
class Settings(BaseModel):
    authjwt_secret_key: str = "secret"
    # Configure application to store and get JWT from cookies
    authjwt_token_location: set = {"cookies"}
    # 设置cookie有效期30天,如果不设置默认关闭浏览器cookie失效
    authjwt_cookie_max_age: int = 60 * 60 * 24 * 30
    # 使用Cookie时启用 / 禁用CSRF保护。默认为True
    authjwt_cookie_csrf_protect = False
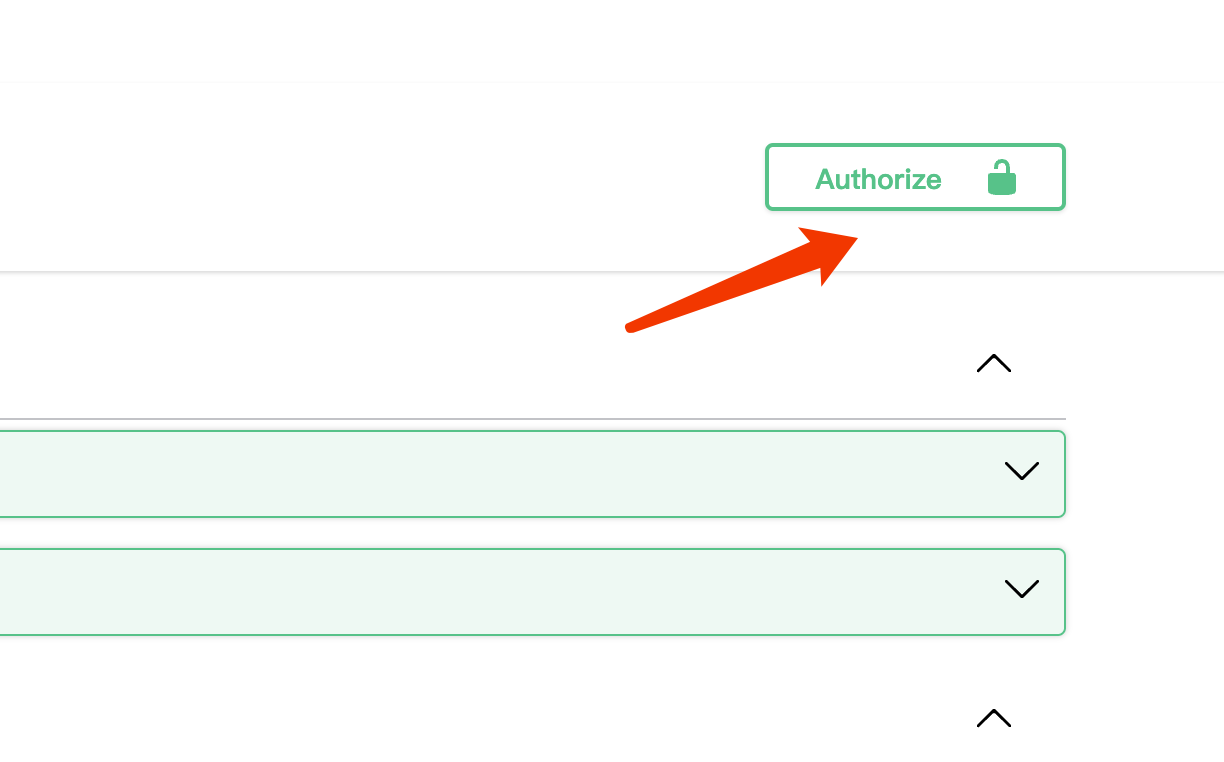
5. swagger 生成Authorize按钮
将下面的代码复制到,工厂函数中即可。
import re
import inspect
from fastapi.routing import APIRoute
from fastapi.openapi.utils import get_openapi

    def custom_openapi():
        if app.openapi_schema:
            return app.openapi_schema

        openapi_schema = get_openapi(
            title="My Auth API",
            version="1.0",
            description="An API with an Authorize Button",
            routes=app.routes,
        )

        openapi_schema["components"]["securitySchemes"] = {
            "Bearer Auth": {
                "type": "apiKey",
                "in": "header",
                "name": "Authorization",
                "description": "Enter: **'Bearer <JWT>'**, where JWT is the access token"
            }
        }

        # Get all routes where jwt_optional() or jwt_required
        api_router = [route for route in app.routes if isinstance(route, APIRoute)]

        for route in api_router:
            path = getattr(route, "path")
            endpoint = getattr(route, "endpoint")
            methods = [method.lower() for method in getattr(route, "methods")]

            for method in methods:
                # access_token
                if (
                        re.search("jwt_required", inspect.getsource(endpoint)) or
                        re.search("fresh_jwt_required", inspect.getsource(endpoint)) or
                        re.search("jwt_optional", inspect.getsource(endpoint))
                ):
                    openapi_schema["paths"][path][method]["security"] = [
                        {
                            "Bearer Auth": []
                        }
                    ]

        app.openapi_schema = openapi_schema
        return app.openapi_schema

    app.openapi = custom_openapi

6 退出登录
退出登录接口,先校验用户是否登录Authorize.jwt_required() ,再删除cookies Authorize.unset_jwt_cookies()。
@router.delete('/logout')
async def logout(Authorize: AuthJWT = Depends()):
    """
       因为JWT现在存储在httponly cookie中,
    我们不能通过简单地删除前端的cookie来注销用户。
    我们需要后台向我们发送删除cookie的响应。
    """
    Authorize.jwt_required()
    # 删除cookies
    Authorize.unset_jwt_cookies()
    return {"msg": "Successfully logout"}


【推荐】国内首个AI IDE,深度理解中文开发场景,立即下载体验Trae
【推荐】编程新体验,更懂你的AI,立即体验豆包MarsCode编程助手
【推荐】抖音旗下AI助手豆包,你的智能百科全书,全免费不限次数
【推荐】轻量又高性能的 SSH 工具 IShell:AI 加持,快人一步
· 分享一个免费、快速、无限量使用的满血 DeepSeek R1 模型,支持深度思考和联网搜索!
· 基于 Docker 搭建 FRP 内网穿透开源项目(很简单哒)
· ollama系列01:轻松3步本地部署deepseek,普通电脑可用
· 25岁的心里话
· 按钮权限的设计及实现