监控项目指标-SpringBoot Actuator
一、初识
引入环境
  <!-- 引入监控功能-->
        <dependency>
            <groupId>org.springframework.boot</groupId>
            <artifactId>spring-boot-starter-actuator</artifactId>
        </dependency>
访问监控
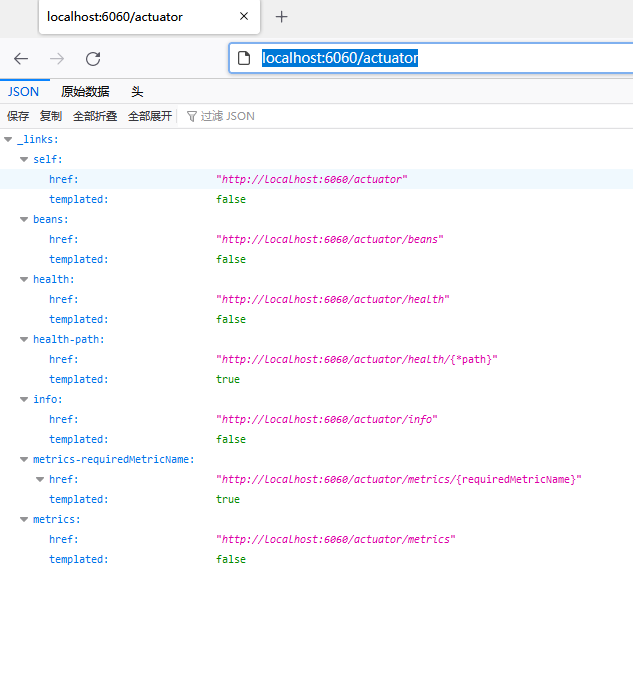
http://localhost:6060/actuator

访问后一下只有health一个端口,其余需要手动开启,往下看
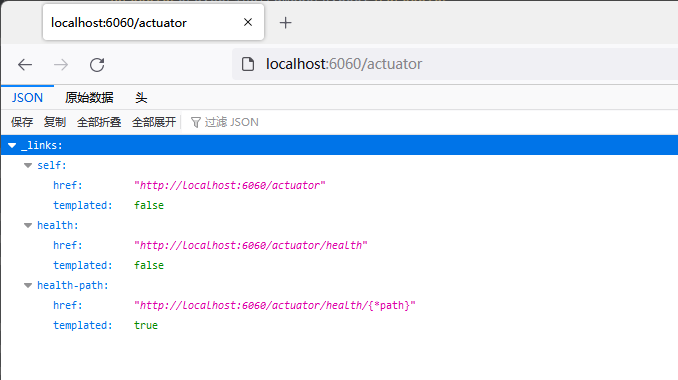
其中 下面是获取当前项目健康状态
http://localhost:6060/actuator/health
UNKNOWN -- 未知
UP -- 正常
DOWN -- 下架
OUT_OF_SERVICE -- 终止服务
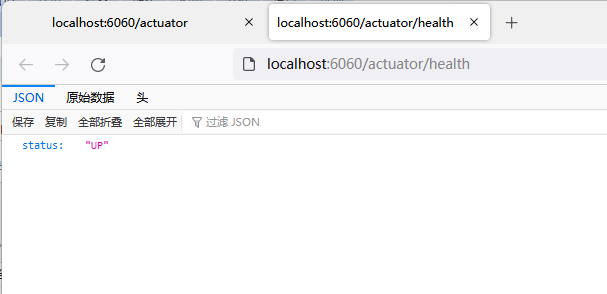
//查看业务模块是否正常运行
http://localhost:6060/actuator/health/{*path}
二、了解信息
使用的端点
|
ID |
描述 |
|
|
暴露当前应用程序的审核事件信息。需要一个 |
|
|
显示应用程序中所有Spring Bean的完整列表。 |
|
|
暴露可用的缓存。 |
|
|
显示自动配置的所有条件信息,包括匹配或不匹配的原因。 |
|
|
显示所有 |
|
|
暴露Spring的属性 |
|
|
显示已应用的所有Flyway数据库迁移。 |
|
|
显示应用程序运行状况信息。 |
|
|
显示HTTP跟踪信息(默认情况下,最近100个HTTP请求-响应)。需要一个 |
|
|
显示应用程序信息。 |
|
|
显示Spring |
|
|
显示和修改应用程序中日志的配置。 |
|
|
显示已应用的所有Liquibase数据库迁移。需要一个或多个 |
|
|
显示当前应用程序的“指标”信息。 |
|
|
显示所有 |
|
|
显示应用程序中的计划任务。 |
|
|
允许从Spring Session支持的会话存储中检索和删除用户会话。需要使用Spring Session的基于Servlet的Web应用程序。 |
|
|
使应用程序正常关闭。默认禁用。 |
|
|
显示由 |
|
|
执行线程转储。 |
如果您的应用程序是Web应用程序(Spring MVC,Spring WebFlux或Jersey),则可以使用以下附加端点:
|
ID |
描述 |
|
|
返回 |
|
|
通过HTTP暴露JMX bean(需要引入Jolokia,不适用于WebFlux)。需要引入依赖 |
|
|
返回日志文件的内容(如果已设置 |
|
|
以Prometheus服务器可以抓取的格式公开指标。需要依赖 |
配置文件配置
1).配置所有
# management 是所有actuator的配置
management:
  endpoints:
    enabled-by-default: true  #默认开启所有端点
    web:
      exposure:
        include: '*'  # 以web方式暴漏所有端点
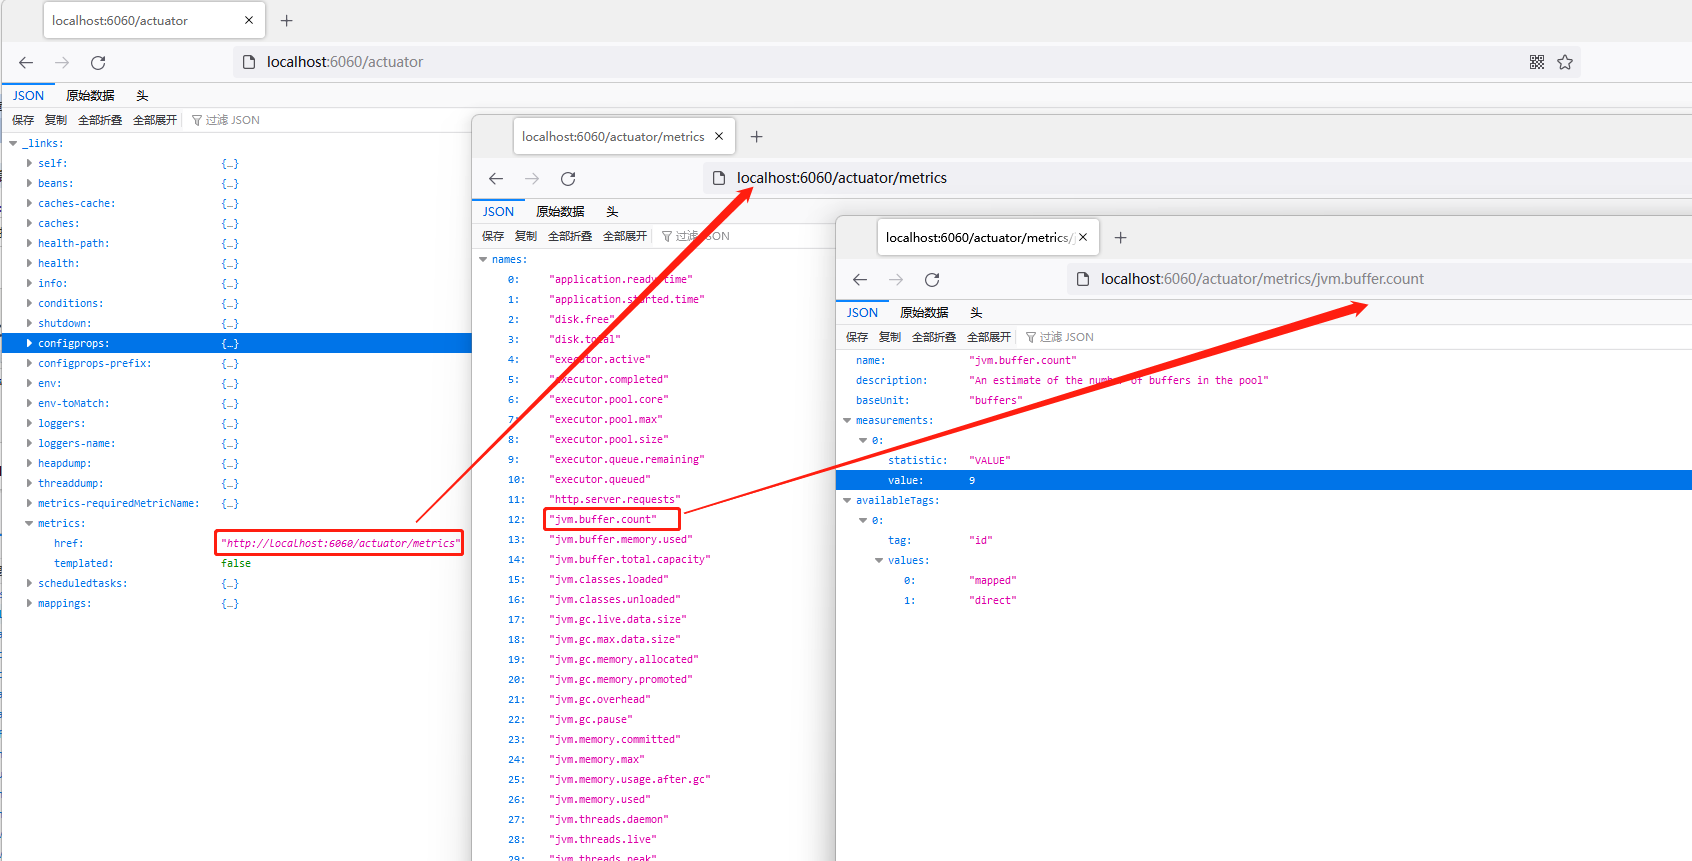
http://localhost:6060/actuator
http://localhost:6060/actuator/metrics
http://localhost:6060/actuator/metrics/jvm.buffer.count
......
一级一级看到指标
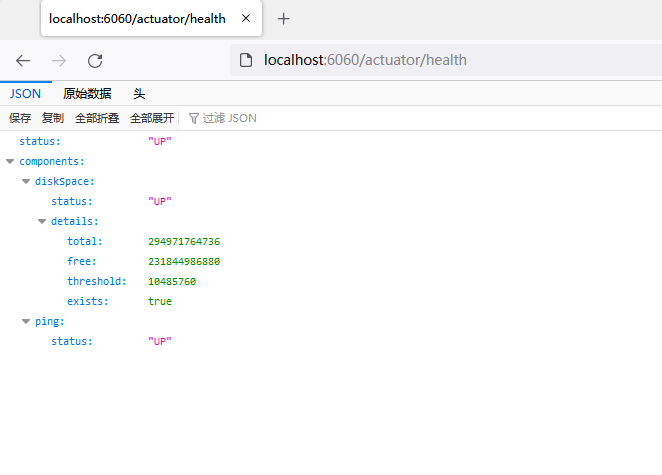
2).配置详细
management:
  endpoint:
    health:
      show-details: always #显示详细信息 默认是never 不显示详细信息
3).开启单个端口
management:
  endpoints:
    enabled-by-default: false
    web:
      exposure:
        include: '*'
  endpoint:
    health:
      show-details: always #显示详细信息 默认是never 不显示详细信息
      enabled: true # 健康状态开启
    info:
      enabled: true # 开启info
    beans:
      enabled: true # 开启beans
    metrics:
      enabled: true
三、深入
自定义Health
配置
server:
  port: 6060


management:
  endpoints:
    enabled-by-default: false
    web:
      exposure:
        include: '*'
  endpoint:
    health:
      show-details: always #显示详细信息 默认是never 不显示详细信息
      enabled: true # 健康状态开启
@Component
public class MyDefinitionHealthIndicator extends AbstractHealthIndicator {

    /**
     * title 自定义检查
     *
     * @param builder
     * @throws Exception
     */
    @Override
    protected void doHealthCheck(Health.Builder builder) throws Exception {
        // 封装其他信息集合
        Map<String,Object> map = new HashMap<>();
        // 测试是否正常
        if( 1 == 1 ){
            // 正常
            //builder.up();
            // 另一种写法
            builder.status(Status.UP);
            map.put("message","正常连接");
            map.put("code","2000");
        }else{
            // 不正常
            //builder.down();
            // 另一种写法
            builder.status(Status.DOWN);
            map.put("message","死机");
            map.put("code","3000");
        }
        // 可以单个添加,也可以添加集合
        builder.withDetail("name","mongo连接")
                .withDetails(map);
    }
}
访问
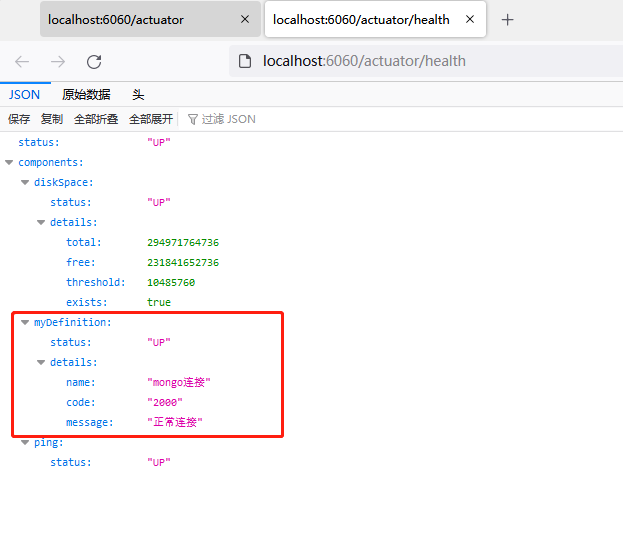
其中名称就是类名把后面的HealthIndicator截取掉后的名字
自定义info
第一种配置
yaml
management:
  endpoints:
    enabled-by-default: false
    web:
      exposure:
        include: '*'
  endpoint:
    info:
      enabled: true # 开启info
  info:
    env:
      enabled: true #启用配置里的info开头的变量

info:
  appName: StudyWork1_yaml
  version: 1.0.1.0
  mavenProjectName: @project.artifactId@  #使用@@可以获取maven的pom文件值
  mavenProjectVersion: @project.version@
pom
<build>
        <plugins>
            <!--支持yaml读取pom的参数-->
            <plugin>
                <groupId>org.apache.maven.plugins</groupId>
                <artifactId>maven-resources-plugin</artifactId>
                <version>3.2.0</version>
                <configuration>
                    <encoding>UTF-8</encoding>
                    <delimiters>
                        <delimiter>@</delimiter>
                    </delimiters>
                    <useDefaultDelimiters>false</useDefaultDelimiters>
                </configuration>
            </plugin>
        </plugins>
    </build>
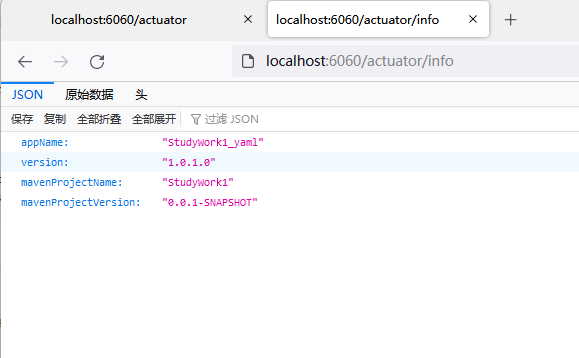
访问
第二种配置
配置
management:
  endpoints:
    enabled-by-default: false
    web:
      exposure:
        include: '*'
  endpoint:
    info:
      enabled: true # 开启info
@Component
public class MyInfoiInfoContributor implements InfoContributor {

    /**
     * title 自定义构建info
     *
     * @param builder
     */
    @Override
    public void contribute(Info.Builder builder) {
        // 其他参数集合
        Map<String,Object> map = new HashMap<>();
        map.put("wordCode","2000");
        map.put("wordMessage","成功");
     // 当个存放
        builder.withDetail("message","消息")
                .withDetail("code","状态码")
                .withDetails(map);
    }
}
访问
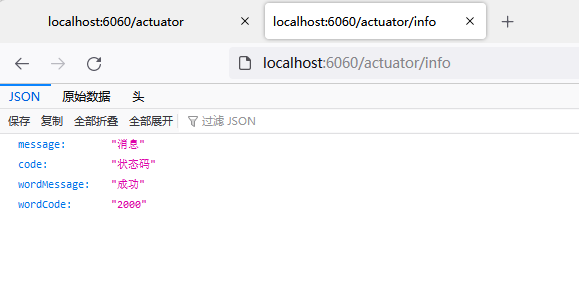
第一种和第二种可以一起使用,结果是两种的集合,Java代码内容优先级高
自定义Metrics
配置
management:
  endpoints:
    enabled-by-default: false
    web:
      exposure:
        include: '*'
  endpoint:
    metrics:
      enabled: true
@Controller
public class MyController {

    @Autowired
    private User user;

    Counter counter;

    public MyController(MeterRegistry meterRegistry){
        counter = meterRegistry.counter("MyController.getUser.count");
    }

    @ResponseBody
    @GetMapping("/getUser")
    public User getUser(){
        // 计数
        counter.increment();
        return user;
    }
}
访问
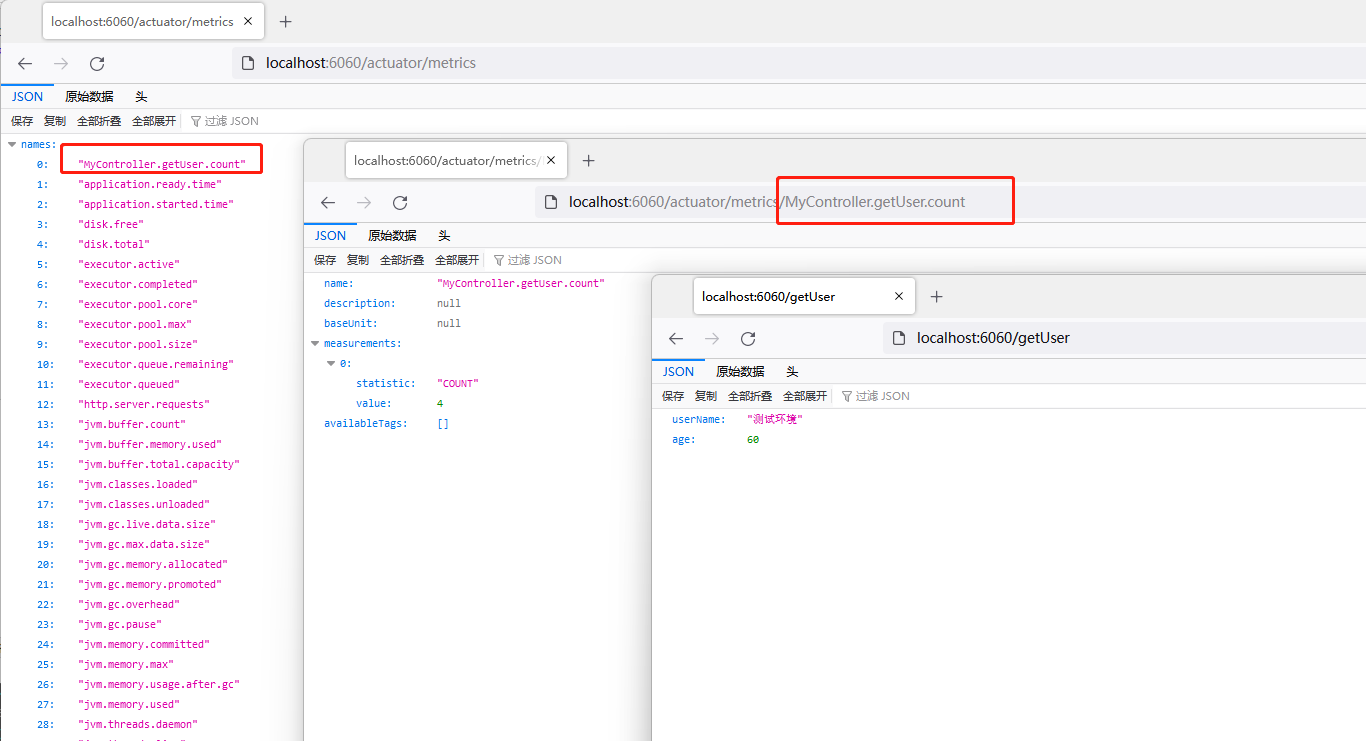
自定义端点Endpoint
@Component
@Endpoint( id= "myService")
public class MyServiceEndpoint {
    /**
     * title 端点的读操作
     */
    @ReadOperation
    public Map getOracleInfo(){
        Map<String,Object> map = new HashMap<>();
        map.put("name","oracle");
        map.put("id","127.0.0.1");
        return map;
    }


    /**
     * title 端点的写操作
     */
    @WriteOperation
    public void stopOracle(){
        System.out.println("Oracle 停止!");
    }
}
访问
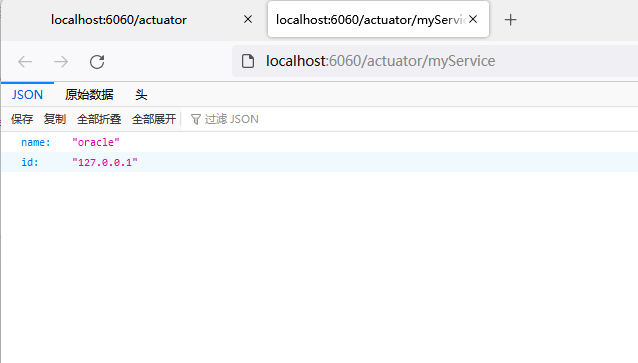
四、可视化adminserver
官网地址 https://github.com/codecentric/spring-boot-admin
1.新建一个项目
2.pom
<dependencies>
            <dependency>
            <groupId>org.springframework.boot</groupId>
            <artifactId>spring-boot-starter-web</artifactId>
        </dependency>
        <dependency>
            <groupId>de.codecentric</groupId>
            <artifactId>spring-boot-admin-starter-server</artifactId>
            <version>2.5.1</version>
        </dependency>
3.主控制类(启动类)中添加注解
@EnableAdminServer
4.properties设置端口
server.port=9000
5.启动项目
6.在需要监控的项目中配置
1).
<!-- 引入监控功能-->
        <dependency>
            <groupId>org.springframework.boot</groupId>
            <artifactId>spring-boot-starter-actuator</artifactId>
        </dependency>
        <!--    adminServer客户端    -->
        <dependency>
            <groupId>de.codecentric</groupId>
            <artifactId>spring-boot-admin-starter-client</artifactId>
            <version>2.5.1</version>
        </dependency>
2).yaml
management:
  endpoints:
    enabled-by-default: true #开放所有端口
    web:
      exposure:
        include: '*' # web形式都可以访问所有端口
  endpoint:
    health:
      show-details: always
spring:
  boot:
    admin:
      client:
        url: http://localhost:9000/  # 注册到adminServer服务
        instance:
          prefer-ip: true  # 使用ip注册 默认是计算机名称
  application:
    name: StudyWork1 # 注册项目的名称 默认名称是spring-boot-application(InstanceProperties类)
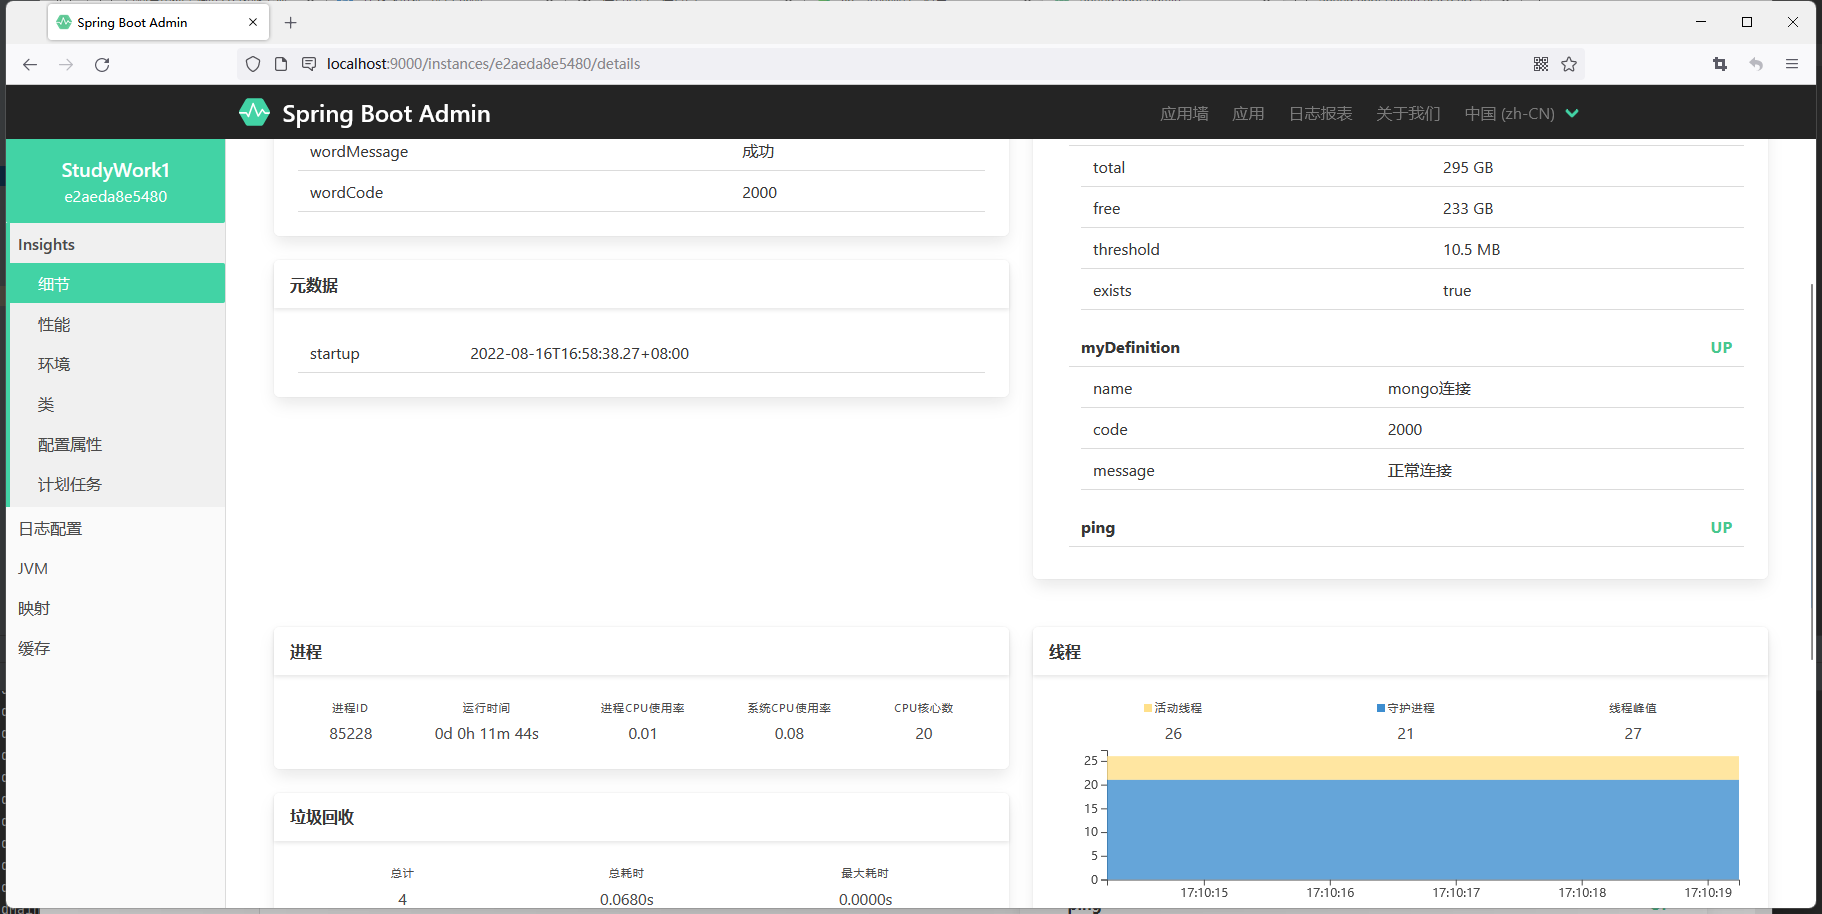
7.访问控制界面
http://localhost:9000/


【推荐】国内首个AI IDE,深度理解中文开发场景,立即下载体验Trae
【推荐】编程新体验,更懂你的AI,立即体验豆包MarsCode编程助手
【推荐】抖音旗下AI助手豆包,你的智能百科全书,全免费不限次数
【推荐】轻量又高性能的 SSH 工具 IShell:AI 加持,快人一步
· DeepSeek 开源周回顾「GitHub 热点速览」
· 物流快递公司核心技术能力-地址解析分单基础技术分享
· .NET 10首个预览版发布:重大改进与新特性概览!
· AI与.NET技术实操系列(二):开始使用ML.NET
· 单线程的Redis速度为什么快?