

OpenCV Java Tutorials- Camera Calibration
2020-10-10原文地址:https://opencv-java-tutorials.readthedocs.io/en/latest/09-camera-calibration.html#id1
Note
We assume that by now you have already read the previous tutorials. If not, please check previous tutorials at http://opencv-java-tutorials.readthedocs.org/en/latest/index.html. You can also find the source code and resources at https://github.com/opencv-java/
注意
我们假设您现在已经阅读了以前的教程,否则请访问http://opencv-java-tutorials.readthedocs.org/en/latest/index.html查看以前的教程和资源在https://github.com/opencv-java/
Warning
This tutorial is not updated to OpenCV 3.0.
警告
本教程未更新为OpenCV 3.0。
Goal
The goal of this tutorial is to learn how to calibrate a camera given a set of chessboard images.
目标
本教程的目的是学习在给定一组棋盘图像的情况下如何校准相机。
What is the camera calibration?
什么是相机校准?
The camera calibration is the process with which we can obtain the camera parameters such as intrinsic and extrinsic parameters, distortions and so on. The calibration of the camera is often necessary when the alignment between the lens and the optic sensors chip is not correct; the effect produced by this wrong alignment is usually more visible in low quality cameras.
相机校准是获取相机参数的过程,例如内部和外部参数,失真等;当镜头与光学传感器芯片之间的对准不正确时,通常需要对相机进行校准; 这种错误对准产生的效果通常在低画质相机中更为明显。
Calibration Pattern
校准图案
As we said earlier we are going to need some sort of pattern that the program can recognize in order to make the calibration work. The pattern that we are going to use is a chessboard image.
如前所述,为了使校准工作,我们将需要某种程序可以识别的模式,我们将使用的模式是棋盘图像。
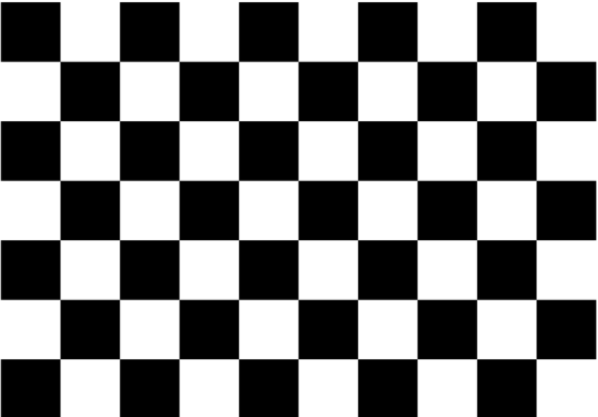
The reason why we use this image is because there are some OpenCV functions that can recognize this pattern and draw a scheme which highlights the intersections between each block. To make the calibration work you need to print the chessboard image and show it to the cam; it is important to maintain the sheet still, better if stick to a surface. In order to make a good calibration, we need to have about 20 samples of the pattern taken from different angles and distances.
我们使用此图像的原因是因为有一些OpenCV函数可以识别此模式并绘制一个突出显示每个图块之间交叉点的方案,要进行校准,您需要打印棋盘图像并将其显示在凸轮上; 重要的是要保持片材静止不动,更好地粘附在表面上,为了进行良好的校准,我们需要从不同的角度和距离获取大约20个图案样本。
What we will do in this tutorial
我们将在本教程中做什么
In this guide, we will:
- Create some TextEdit field to give some inputs to our program
- Recognize the pattern using some OpenCV functions
- Calibrate and show the video stream.
在本指南中,我们将:
- 创建一些TextEdit字段以为我们的程序提供一些输入
- 使用一些OpenCV功能识别模式
- 校准并显示视频流。
Getting Started
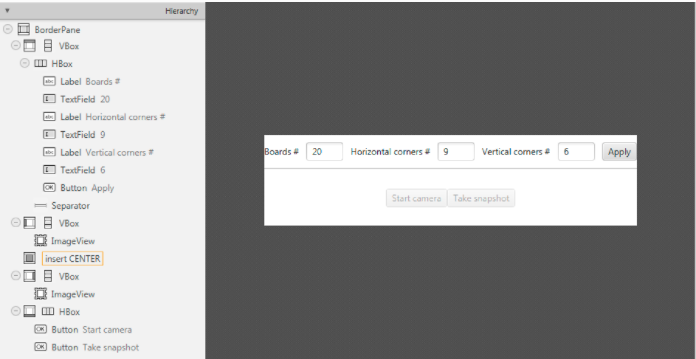
Create a new JavaFX project (e.g. “CameraCalibration”) with the usual OpenCV user library. Open Scene Builder and add a Border Pane with:
使用常规的OpenCV用户库创建一个新的JavaFX项目(例如“ CameraCalibration”),打开Scene Builder并添加带有以下内容的边框窗格:
- on TOP we need to have the possibility to set the number of samples for the calibration, the number of horizontal corners we have in the test image, the number of vertical corners we have in the test image and a button to update this data. To make things cleaner let’s put all these elements inside a HBox.
- 在TOP上,我们需要设置校准样本的数量,测试图像中水平角的数量,测试图像中垂直角的数量以及用于更新此数据的按钮。 让事情变得更整洁,让我们将所有这些元素放在HBox中。
<HBox alignment="CENTER" spacing="10">
Let’s also add some labels before each text fields. Each text field is going to need an id, and let’s put a standard value for them already.
我们还要在每个文本字段之前添加一些标签。每个文本字段都需要一个ID,并且已经为其输入了标准值。
<Label text="Boards #" />
<TextField fx:id="numBoards" text="20" maxWidth="50" />
<Label text="Horizontal corners #" />
<TextField fx:id="numHorCorners" text="9" maxWidth="50" />
<Label text="Vertical corners #" />
<TextField fx:id="numVertCorners" text="6" maxWidth="50" />
For the button instead, set the id and a method for the onAction field:
为按钮设置id和onAction字段的方法:
<Button fx:id="applyButton" alignment="center" text="Apply" onAction="#updateSettings" />
- on the LEFT add an ImageView inside a VBox for the normal cam stream; set an id for it.
- 在左侧,为普通凸轮流在VBox内添加ImageView;为其设置ID。
<ImageView fx:id="originalFrame" />
- on the RIGHT add an ImageView inside a VBox for the calibrated cam stream; set an id for it.
- 在右侧,在VBox内为已校准的凸轮流添加ImageView;为其设置ID。
<ImageView fx:id="originalFrame" />
- in the BOTTOM add a start/stop cam stream button and a snapshot button inside a HBox; set an id and a action method for each one.
- 在底部,在HBox内添加开始/停止凸轮流按钮和快照按钮;分别为每个按钮设置ID和操作方法。
<Button fx:id="cameraButton" alignment="center" text="Start camera" onAction="#startCamera" disable="true" />
<Button fx:id="snapshotButton" alignment="center" text="Take snapshot" onAction="#takeSnapshot" disable="true" />
Your GUI will look something like this:
您的GUI将如下所示:
Pattern Recognition
模式识别
The calibration process consists on showing to the cam the chessboard pattern from different angles, depth and points of view. For each recognized pattern we need to track:
校准过程包括从不同角度,深度和视角向凸轮显示棋盘图案,对于每种识别的图案,我们都需要跟踪:
some reference system’s 3D point where the chessboard is located (let’s assume that the Z axe is always 0):
棋盘所在参考系统的3D点(假设Z轴始终为0):
for (int j= 0; j < numSquares; j++){
        obj.push_back(new MatOfPoint3f(new Point3(j / this.numCornersHor, j % this.numCornersVer, 0.0f)));
    }
the image’s 2D points (operation made by OpenCV with findChessboardCorners):
图片的2D点(由OpenCV与findChessboardCorners进行的操作):
boolean found = Calib3d.findChessboardCorners(grayImage, boardSize, imageCorners, Calib3d.CALIB_CB_ADAPTIVE_THRESH + Calib3d.CALIB_CB_NORMALIZE_IMAGE + Calib3d.CALIB_CB_FAST_CHECK);
The findChessboardCorners function attempts to determine whether the input image is a view of the chessboard pattern and locate the internal chessboard corners. Its parameters are:
findChessboardCorners函数尝试确定输入图像是否为棋盘图案的视图并找到棋盘内部角,其参数为:
- image Source chessboard view. It must be an 8-bit grayscale or color image.
- patternSize Number of inner corners per a chessboard row and column
- corners Output array of detected corners.
- flags Various operation flags that can be zero or a combination of the following values:
-
CV_CALIB_CB_ADAPTIVE_THRESHUse adaptive thresholding to convert the image to black and white, rather than a fixed threshold level (computed from the average image brightness).CV_CALIB_CB_NORMALIZE_IMAGENormalize the image gamma with “equalizeHist” before applying fixed or adaptive thresholding.CV_CALIB_CB_FILTER_QUADSUse additional criteria (like contour area, perimeter, square-like shape) to filter out false quads extracted at the contour retrieval stage.CALIB_CB_FAST_CHECKRun a fast check on the image that looks for chessboard corners, and shortcut the call if none is found. This can drastically speed up the call in the degenerate condition when no chessboard is observed.
- image源棋盘视图,必须是8位灰度或彩色图像。
- patternSize 每个棋盘行和列的内角数
- corners 输出检测到的角点的数组。.
- flags 各种操作标志,可以为零或以下值的组合::
-
CV_CALIB_CB_ADAPTIVE_THRESH使用自适应阈值处理将图像转换为黑白图像,而不是固定的阈值水平(根据平均图像亮度计算)。CV_CALIB_CB_NORMALIZE_IMAGE在应用固定或自适应阈值处理之前,请使用“ equalizeHist”对图像伽玛进行归一化。CV_CALIB_CB_FILTER_QUADS使用其他条件(例如轮廓区域,周长,正方形形状)过滤掉在轮廓检索阶段提取的假四边形。CALIB_CB_FAST_CHECK对查找棋盘角的图像进行快速检查,如果未找到棋盘角,则将呼叫快捷化,这在退化状态下(未观察到棋盘时)可以大大加快呼叫速度。
Warning
Before doing the findChessboardCorners convert the image to grayscale and save the board size into a Size variable:
警告
在执行findChessboardCorners之前,将图像转换为灰度并将板尺寸保存到Size变量中:
Imgproc.cvtColor(frame, grayImage, Imgproc.COLOR_BGR2GRAY);
Size boardSize = new Size(this.numCornersHor, this.numCornersVer);
If the recognition went well found should be true.
如果认可顺利,found应该是true。
For square images the positions of the corners are only approximate. We may improve this by calling the cornerSubPix function. It will produce better calibration result.
对于正方形图像,拐角位置仅是近似值,我们可以通过调用cornerSubPix函数来改善此效果,从而产生更好的校准结果。
TermCriteria term = new TermCriteria(TermCriteria.EPS | TermCriteria.MAX_ITER, 30, 0.1);
Imgproc.cornerSubPix(grayImage, imageCorners, new Size(11, 11), new Size(-1, -1), term);
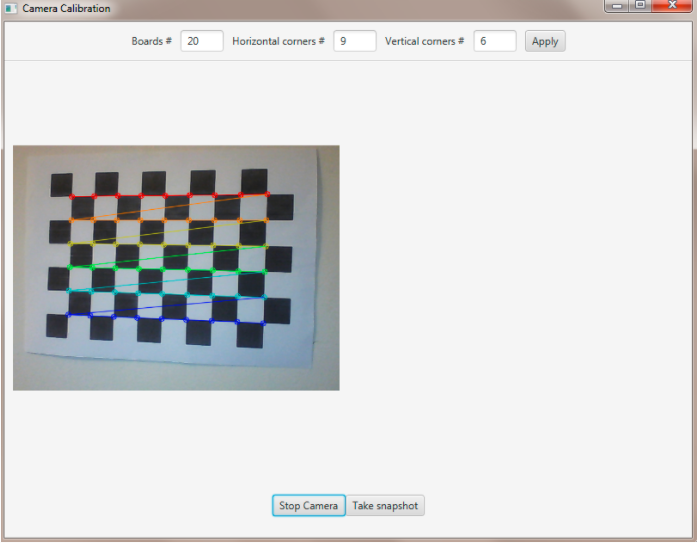
We can now highlight the found points on stream:
现在,我们可以突出显示流中找到的点:
Calib3d.drawChessboardCorners(frame, boardSize, imageCorners, found);
The function draws individual chessboard corners detected either as red circles if the board was not found, or as colored corners connected with lines if the board was found.
该功能绘制检测到的单个棋盘角,如果找不到该棋盘,则将其绘制为红色圆圈,如果找到该棋盘,则将其绘制为与线相连的彩色角。
Its parameters are:
- image Destination image. It must be an 8-bit color image.
- patternSize Number of inner corners per a chessboard row and column.
- corners Array of detected corners, the output of findChessboardCorners.
- patternWasFound Parameter indicating whether the complete board was found or not. The return value of
findChessboardCornersshould be passed here.
它的参数是:
- image 目标图像,必须是8位彩色图像。
- patternSize 每个棋盘行和列的内角数。
- corners 检测到的角点数组,findChessboardCorners的输出。
- patternWasFound 指示是否找到完整板的参数,应该在此处传递findChessboardCorners的返回值。
Now we can activate the Snapshot button to save the data.
现在,我们可以激活“快照”按钮以保存数据。
this.snapshotButton.setDisable(false);
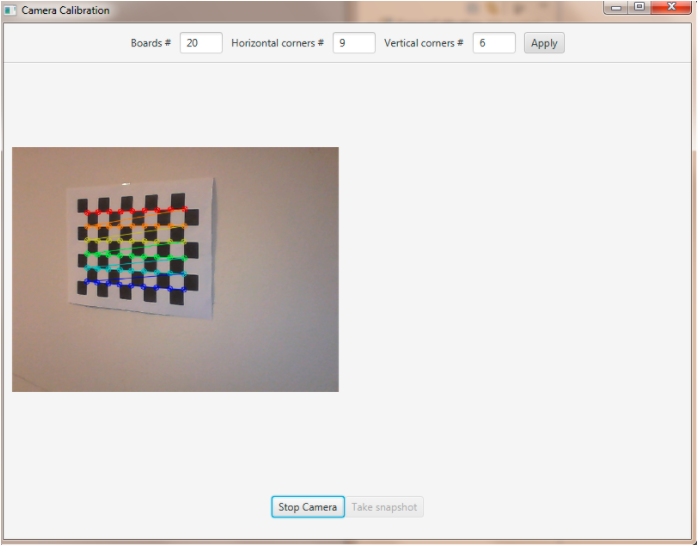
We should take the set number of “snapshots” from different angles and depth, in order to make the calibration.
为了进行校准,我们应从不同角度和深度获取设定数量的“快照”。
Note
We don’t actually save the image but just the data we need.
注意
我们实际上并不保存图像,而只是保存我们需要的数据。
Saving Data
By clicking on the snapshot button we call the takeSnapshot method. Here we need to save the data (2D and 3D points) if we did not make enough sample:
通过单击快照按钮,我们调用takeSnapshot方法,如果样本不足,则需要保存数据(2D和3D点):
this.imagePoints.add(imageCorners);
this.objectPoints.add(obj);
this.successes++;
Otherwise we can calibrate the camera.
否则我们可以校准相机。
Camera Calibration
For the camera calibration we should create initiate some needed variable and then call the actual calibration function:
对于相机校准,我们应该创建一些需要初始化的变量,然后调用实际的校准函数:
List<Mat> rvecs = new ArrayList<>();
List<Mat> tvecs = new ArrayList<>();
intrinsic.put(0, 0, 1);
intrinsic.put(1, 1, 1);

Calib3d.calibrateCamera(objectPoints, imagePoints, savedImage.size(), intrinsic, distCoeffs, rvecs, tvecs);
The calibrateCamera function estimates the intrinsic camera parameters and extrinsic parameters for each of the views. The algorithm is based on [Zhang2000] and [BouguetMCT]. The coordinates of 3D object points and their corresponding 2D projections in each view must be specified. Its parameters are:
该算法基于[Zhang2000]和[BouguetMCT],必须指定每个视图中3D对象点的坐标及其对应的2D投影。 他们的参数是:
- objectPoints In the new interface it is a vector of vectors of calibration pattern points in the calibration pattern coordinate space. The outer vector contains as many elements as the number of the pattern views. The points are 3D, but since they are in a pattern coordinate system, then, if the rig is planar, it may make sense to put the model to a XY coordinate plane so that Z-coordinate of each input object point is 0.
- imagePoints It is a vector of vectors of the projections of calibration pattern points.
- imageSize Size of the image used only to initialize the intrinsic camera matrix.
- cameraMatrix Output 3x3 floating-point camera matrix A = |fx 0 cx| |0 fy cy| |0 0 1|. If
CV_CALIB_USE_INTRINSIC_GUESSand/orCV_CALIB_FIX_ASPECT_RATIOare specified, some or all of fx, fy, cx, cy must be initialized before calling the function. - distCoeffs Output vector of distortion coefficients of 4, 5, or 8 elements.
- rvecs Output vector of rotation vectors estimated for each pattern view. That is, each k-th rotation vector together with the corresponding k-th translation vector.
- tvecs Output vector of translation vectors estimated for each pattern view.
- objectPoints 在新界面中,它是校准图案坐标空间中校准图案点的向量的向量,外部向量包含与图案视图数量一样多的元素,这些点是3D的,但由于它们在图案坐标系中 ,然后,如果装备是平面的,则可以将模型放置在XY坐标平面上,以便每个输入对象点的Z坐标为0。
- imagePoints 它是校准图案点的投影的向量的向量。
- imageSize 仅用于初始化内部相机矩阵的图像大小。
- cameraMatrix 输出3x3浮点相机矩阵A = | fx 0 cx | | 0 fy cy | | 0 0 1 |。如果指定了CV_CALIB_USE_INTRINSIC_GUESS和/或CV_CALIB_FIX_ASPECT_RATIO,则必须在调用前初始化fx,fy,cx,cy的部分或全部 功能。
- distCoeffs 4、5或8个元素的失真系数的输出向量。
- rvecs 为每个模式视图估计的旋转向量的输出向量,即每个第k个旋转向量以及相应的第k个平移向量。
- tvecs 为每个模式视图估计的翻译向量的输出向量。
We ran calibration and got camera’s matrix with the distortion coefficients we may want to correct the image using undistort function:
我们进行了校准,并获得了带有失真系数的相机矩阵,我们可能想使用undistort函数校正图像:
if (this.isCalibrated)
{
    // prepare the undistored image
    Mat undistored = new Mat();
    Imgproc.undistort(frame, undistored, intrinsic, distCoeffs);
    undistoredImage = mat2Image(undistored);
}
The undistort function transforms an image to compensate radial and tangential lens distortion.
The source code of the entire tutorial is available on GitHub.
取消畸变功能可变换图像以补偿径向和切向透镜畸变。
整个教程的源代码可在GitHub上找到。
