Debug in Umbraco site
Supported by Nova Outsourcing
When the asp.net webform developers become Umbraco developers, they often ask questions on how to debug the Umbraco extensions. I will explain it in detail here. I will appreciate if you could share any of your ideas on it.
- Install Umbraco site in Visual Studio 2010
- Create your project for Umbraco extension
Install Umbraco site in Visual Studio 2010
You can download the Umbraco installation package from umbraco.codeplex.com/releases. Let’s say, we unzip the package to f:\XXX_Project\Umbraco_Site\.
Run Visual Studio 2010. Select File->Open->Web Site. Select the folder f:\XXX_Project\Umbraco_Site\.
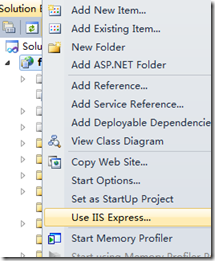
Right click the project and then select “Use IIS Express”.
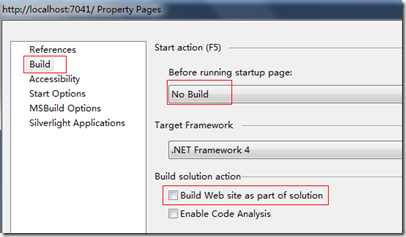
Right click the project and then select “Property Pages”. Select the “Build” tab and then select “No Build” in Before running startup pages dropdownlist, uncheck “Build Web site as part of solution”.
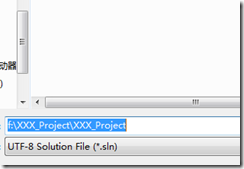
Click “Save All” button in the Visual Studio to name and save the solution file. It is recommended to save it at f:\XXX_Project\ folder and name the solution file “XXX_Project”.
Now you can press F5 to run the site to start the installation.
Note: In your development practice, it is recommended to replace XXX with your business name.
Create your project for Umbraco extension
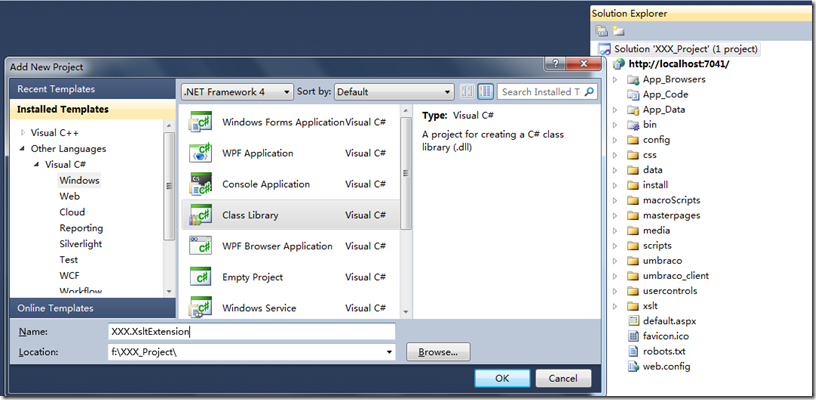
Let’s say, we will create a project, XXX.XsltExtension to contain Umbraco Xslt extensions for complex business.
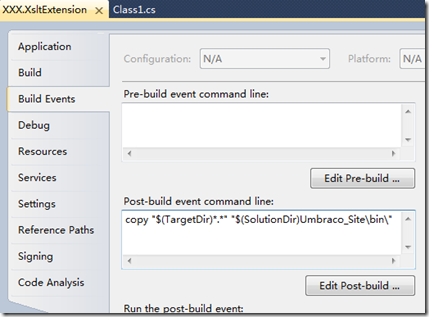
After the project is created, right click the XXX.XsltExtension project and select “Properties” to add the copy command as following.
The command is as following to copy the dll and pdb (symbol files for debug) to the bin folder of Umbraco site for debug purpose.
copy "$(TargetDir)*.*" "$(SolutionDir)Umbraco_Site\bin\"
Then whenever you build XXX.XsltExtension project, the dll and pdb files will be copied to the bin folder under the Umbraco site. Now you can debug your xslt extension functions as long as you get the xslt extension configured in f:\XXX_Project\Umbraco_Site\config\xsltExtensions.config.
Supported by Nova Outsourcing


