
实验5:开源控制器实践——POX
实验5:开源控制器实践——POX
一、实验目的
- 能够理解 POX 控制器的工作原理;
- 通过验证POX的forwarding.hub和forwarding.l2_learning模块,初步掌握POX控制器的使用方法;
- 能够运用 POX控制器编写自定义网络应用程序,进一步熟悉POX控制器流表下发的方法。
二、实验环境
Ubuntu 20.04 Desktop amd64
三、实验要求
(一)基本要求
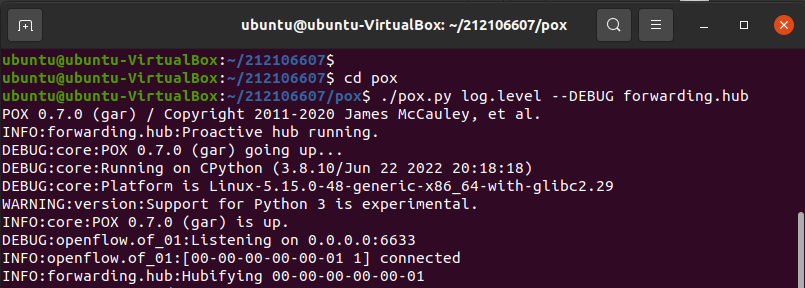
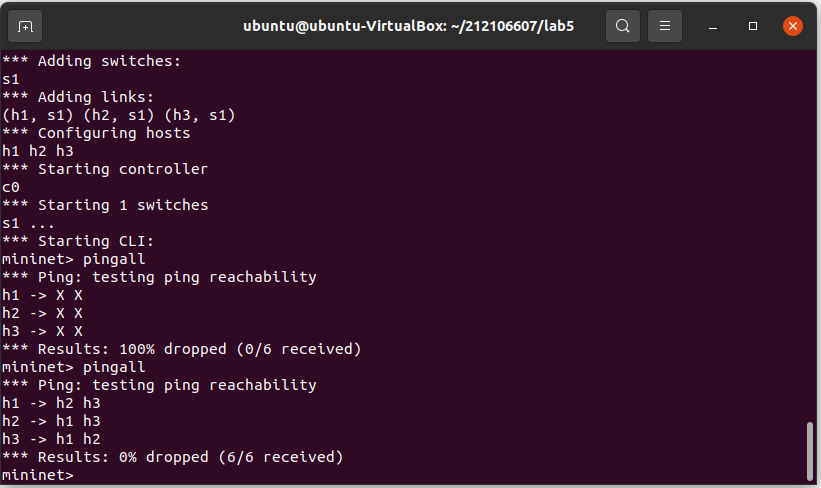
- 搭建下图所示SDN拓扑,协议使用Open Flow 1.0,控制器使用部署于本地的POX(默认监听6633端口)

- 阅读Hub模块代码,使用 tcpdump 验证Hub模块;

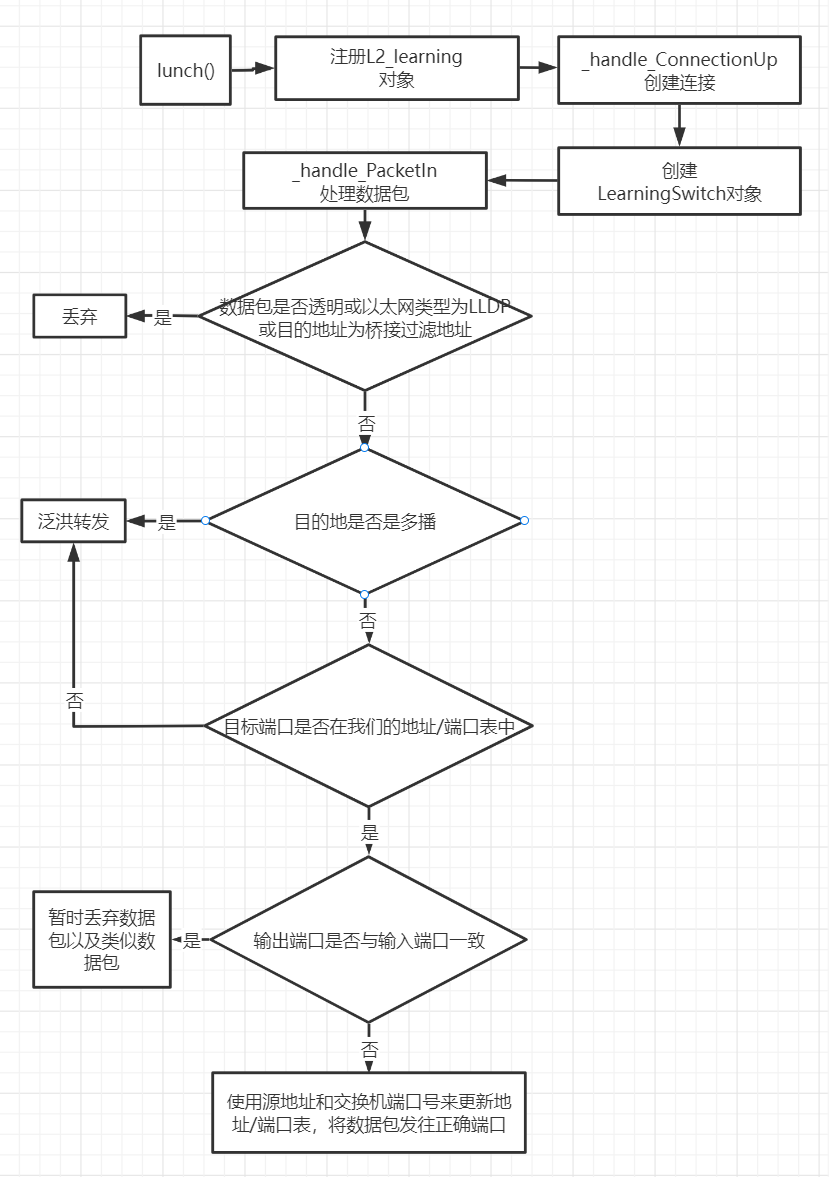
- 阅读L2_learning模块代码,画出程序流程图,使用 tcpdump 验证Switch模块

(二)进阶要求
- 重新搭建(一)的拓扑,此时交换机内无流表规则,拓扑内主机互不相通;编写Python程序自定义一个POX模块SendFlowInSingle3,并且将拓扑连接至SendFlowInSingle3(默认端口6633),实现向s1发送流表规则使得所有主机两两互通。

 123456789101112131415161718192021222324252627282930
frompox.core import coreimport pox.openflow.libopenflow_01asofclassSendFlowInSingle3(object):def __init__(self):core.openflow.addListeners(self)def _handle_ConnectionUp(self,event):msg = of.ofp_flow_mod() # 使用ofp_flow_mod()方法向交换机下发流表msg.priority = 1msg.match.in_port = 1 # 使数据包进入端口1msg.actions.append(of.ofp_action_output(port=2)) # 从端口2转发出去msg.actions.append(of.ofp_action_output(port=3)) # 从端口3转发出去event.connection.send(msg)msg = of.ofp_flow_mod() # 使用ofp_flow_mod()方法向交换机下发流表msg.priority = 1msg.match.in_port = 2 # 使数据包进入端口2msg.actions.append(of.ofp_action_output(port=1)) # 从端口1转发出去msg.actions.append(of.ofp_action_output(port=3)) # 从端口3转发出去event.connection.send(msg)msg = of.ofp_flow_mod() # 使用ofp_flow_mod()方法向交换机下发流表msg.priority = 1msg.match.in_port = 3 # 使数据包进入端口3msg.actions.append(of.ofp_action_output(port=1)) # 从端口1转发出去msg.actions.append(of.ofp_action_output(port=2)) # 从端口2转发出去event.connection.send(msg)def launch():core.registerNew(SendFlowInSingle3) - 基于进阶1的代码,完成ODL实验的硬超时功能。
 123456789101112131415161718192021222324252627282930
frompox.core import coreimport pox.openflow.libopenflow_01asofclassSendFlowInSingle3(object):def __init__(self):core.openflow.addListeners(self)def _handle_ConnectionUp(self,event):msg = of.ofp_flow_mod() # 使用ofp_flow_mod()方法向交换机下发流表msg.priority = 1msg.match.in_port = 1 # 使数据包进入端口1msg.actions.append(of.ofp_action_output(port=2)) # 从端口2转发出去# msg.actions.append(of.ofp_action_output(port=3)) # 从端口3转发出去event.connection.send(msg)msg = of.ofp_flow_mod() # 使用ofp_flow_mod()方法向交换机下发流表msg.priority = 1msg.match.in_port = 2 # 使数据包进入端口2msg.actions.append(of.ofp_action_output(port=1)) # 从端口1转发出去msg.actions.append(of.ofp_action_output(port=3)) # 从端口3转发出去event.connection.send(msg)msg = of.ofp_flow_mod() # 使用ofp_flow_mod()方法向交换机下发流表msg.priority = 1msg.match.in_port = 3 # 使数据包进入端口3# msg.actions.append(of.ofp_action_output(port=1)) # 从端口1转发出去msg.actions.append(of.ofp_action_output(port=2)) # 从端口2转发出去event.connection.send(msg)def launch():core.registerNew(SendFlowInSingle3)
(三)个人总结
这次的实验极其抽象,对于流表py的编写有很大难度,Hub模块和Switch模块的理解较为透彻,但L2_learning模块的代码解析和流程图非常吃力。
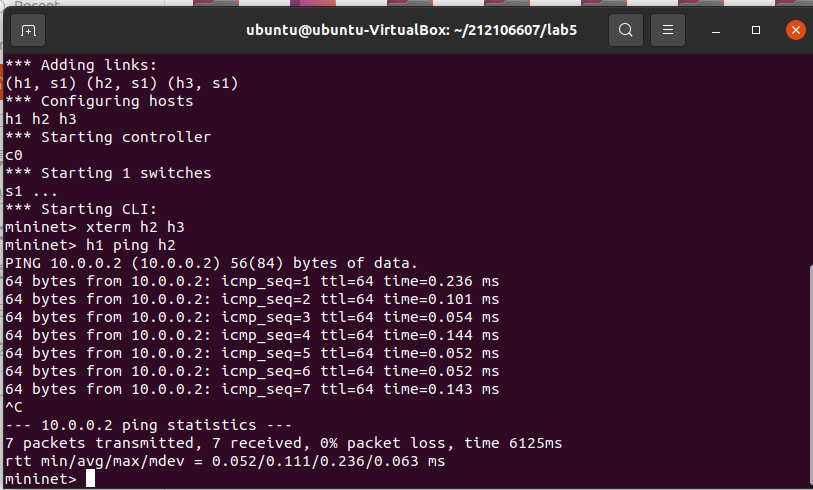
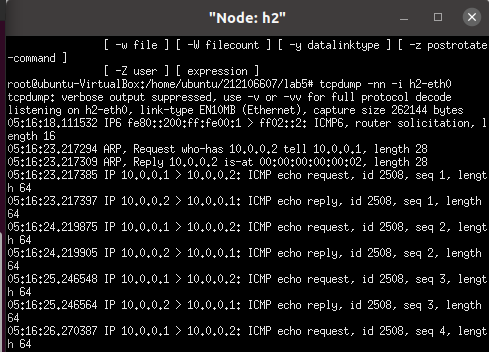
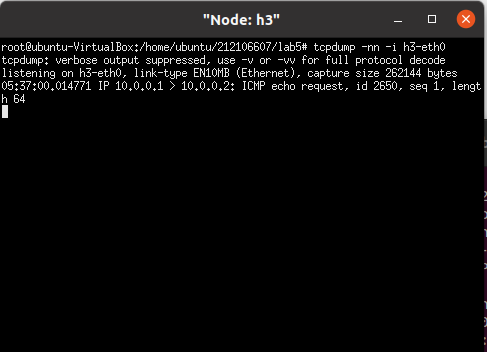
Hub模块:在h1 ping h2时 h2 和 h3 都能收到ICMP报文 说明Hub模块在每个交换机上安装泛洪通配符规则,将数据包广播转发,此时交换机等效于集线器或广播交换机
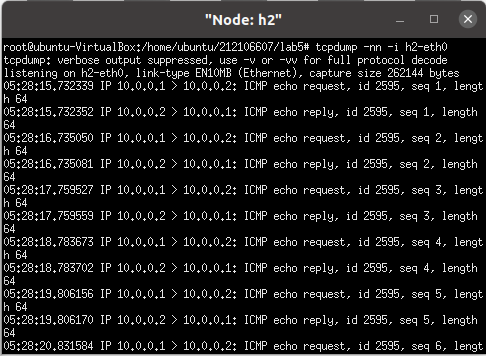
Switch模块:在h1 ping h2时,只有h2能收到ICMP报文,说明switch模块让Openflow交换机实现L2自学习,交换机对数据包进行了学习,实现从相应的端口发出,只有目的主机可以抓取到报文
提高部分的所有文件要创建在 pox文件下 与 pox.py文件同级
ping的过程中实现断开功能 采用交替流表数据的形式 先发送SendFlowInSingle3流表然后中止,再发送SendPoxHardTimeOut流表然后中止(实现断开),最后再次发送SendFlowInSingle3流表即可
实验问题可能出现在 pox 文件夹带锁 需要用 chmod +777 pox 解锁
分类:
SDN作业报告


【推荐】国内首个AI IDE,深度理解中文开发场景,立即下载体验Trae
【推荐】编程新体验,更懂你的AI,立即体验豆包MarsCode编程助手
【推荐】抖音旗下AI助手豆包,你的智能百科全书,全免费不限次数
【推荐】轻量又高性能的 SSH 工具 IShell:AI 加持,快人一步
· 分享一个免费、快速、无限量使用的满血 DeepSeek R1 模型,支持深度思考和联网搜索!
· 使用C#创建一个MCP客户端
· 基于 Docker 搭建 FRP 内网穿透开源项目(很简单哒)
· ollama系列1:轻松3步本地部署deepseek,普通电脑可用
· 按钮权限的设计及实现