Web 开发基础之CSS
CSS
在标签属性上设置style样式
#id 选择器
写在head标签里面,style标签中写样式,如下:
<!DOCTYPE html>
<html lang="en">
<head>
    <meta charset="UTF-8">
    <title>Title</title>
    <style>
        #i1 {
            background-color: chartreuse;
            height: 80px;
        }
    </style>

</head>
<body>
    <div id="i1">
        <p>aa</p>
        <p>bb</p>
        <p>cc</p>
    </div>
</body>
</html>
.class选择器
同样是写在head标签里,style标签中写样式,但是这次不通过id调用,而是通过class调用(这种方式是用的多最多的,也是推荐的),如下
<!DOCTYPE html>
<html lang="en">
<head>
    <meta charset="UTF-8">
    <title>Title</title>
    <style>
        .c1 {
            background-color: chartreuse;
            height: 80px;
        }
    </style>

</head>
<body>
    <div class="c1">
        <p>aa</p>
        <p>bb</p>
        <p>cc</p>
    </div>
</body>
</html>

标签选择器
<!DOCTYPE html>
<html lang="en">
<head>
<meta charset="UTF-8">
<title>Title</title>
<style>
div {
background-color: black;
color:white;
}
</style>
</head>
<body>
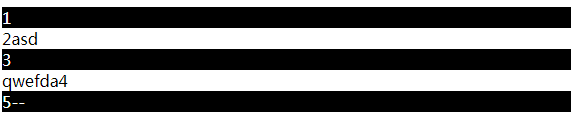
<div>1</div>
<span>2asd
<div>3</div>
qwefda4</span>
<div>5--</div>
</body>
</html>
这样的效果就是所有的div标签都会应用上面的这个样式
层级选择器
通过空格分隔,如下:
<style>
    span div{
        background-color:black;
        color:white;
    }
</style>
也可以
<!DOCTYPE html>
<html lang="en">
<head>
    <meta charset="UTF-8">
    <title>Title</title>
    <style>
        .c1 div{
            background-color:black;
            color:white;
        }
    </style>

</head>
<body>
    <div>1</div>
    <span class="c1">2asd
        <div>3</div>
        asqwe4</span>
    <div>5</div>
</body>
</html>
这样span(或.class="c1")标签下的div标签就会应用上面的这个样式

组合选择器
通过逗号分隔,如下
<!DOCTYPE html>
<html lang="en">
<head>
    <meta charset="UTF-8">
    <title>Title</title>
    <style>
        #i1,#i2,#i3,.c1{
            -color:black;
            color:white;
        }
    </style>

</head>
<body>
    <div id="i1">1</div>
    <div id="i2">2</div>
    <div class="c1">3</div>
    <div id="i3">4</div>
</body>
</html>
这样id=i1,i2,i3以及class=c1的都会应用上面的样式

属性选择器
对选择到的标签,再通过属性进行一次筛选,如下
<!DOCTYPE html>
<html lang="en">
<head>
    <meta charset="UTF-8">
    <title>Title</title>
    <style>
        input[type="text"]{
            width:100px;
            height:200px;
        }
    </style>

</head>
<body>
    <input type="text">
    <input type="password">
</body>
</html>
这样就会找到input标签并且type=“text”的应用上面的样式

也可以在style标签中自定义一个属性,如n="tom":
<!DOCTYPE html>
<html lang="en">
<head>
    <meta charset="UTF-8">
    <title>Title</title>
    <style>
        .c1[n="tom"]{
            width:100px;
            height:200px;
        }
    </style>

</head>
<body>
    <input class="c1" type="text" n="tom">
    <input type="password">
</body>
</html>
css优先级
优先级:标签上style优先,编写顺序,就近原则
从上到下,下面的优先级最高
<!DOCTYPE html>
<html lang="en">
<head>
    <meta charset="UTF-8">
    <title>Title</title>
    <style>
        .c1{
            background-color: green;
            color: white;
        }
        .c2{
            background-color: red;
            font-size: 58px;
            color: black;
        }
    </style>

</head>
<body>
    <div class="c1 c2" style="color: pink">asdasd</div>
</body>
</html>

我们可以将css文件写入到一个文件,然后让其他都能用
调用的方式:在head里写如下代码:
<link rel="stylesheet" href="comm.css">
设置边框
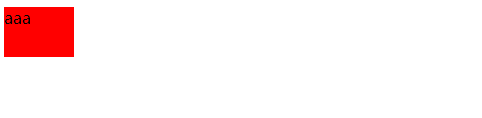
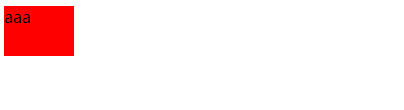
<div style="border: 1px solid red;">aaa</div>
<div style="border-left:4px dotted red;">bbb</div>

设置宽度的百分比
<div style="height: 100px;width: 80%;border: 1px solid red;">aaaa</div>
font-size:16px 表示字体大小
text-align: center; 用于设置水平居中
line-height: 100px:用于设置垂直居中,根据标签高度
font-weight:bold; 字体加粗
float标签
<div style="background-color: red;width: 20%;float: left">aaa</div>
<div style="background-color: blue;width: 80%;float: left">bbb</div>
这样就可以实现让块级标签在一行显示

<div style="clear: both;"></div>
display
none:让标签消失
把块级标签变成行内标签
<div style="background-color: red;display: inline;">aaa</div>

把行内标签变成块级标签
<span style="background-color: red;display: block;">bbb</span>

行内标签:无法设置高度,宽度,margin-top,margin-bottom
<span style="background-color: red;height: 50px;width: 70px;">aaa</span>

块级标签:可以设置高度,宽度、padding,margin
<div style="background-color: red;height: 50px;width: 70px;">aaa</div>
inline-block:具有inline特性,默认自己有多少占多少,也具有block特性,可以设置高度,宽度,padding,margin
<span style="background-color: red;display: inline-block;height: 50px;width: 70px;">aaa</span>
设置边距
margin:外边距
<body>
    <div style="border: 1px solid red;height: 70px">
        <div style="background-color: green;height: 50px;
        margin-top: 20px;">aaa</div>
    </div>

</body>

padding:内边距
<body>
    <div style="border: 1px solid red;height: 70px">
        <div style="background-color: green;height: 50px;
        padding-top: 20px;">aaa</div>
    </div>

</body>

position
fixed:可以将标签固定在页面的某个位置
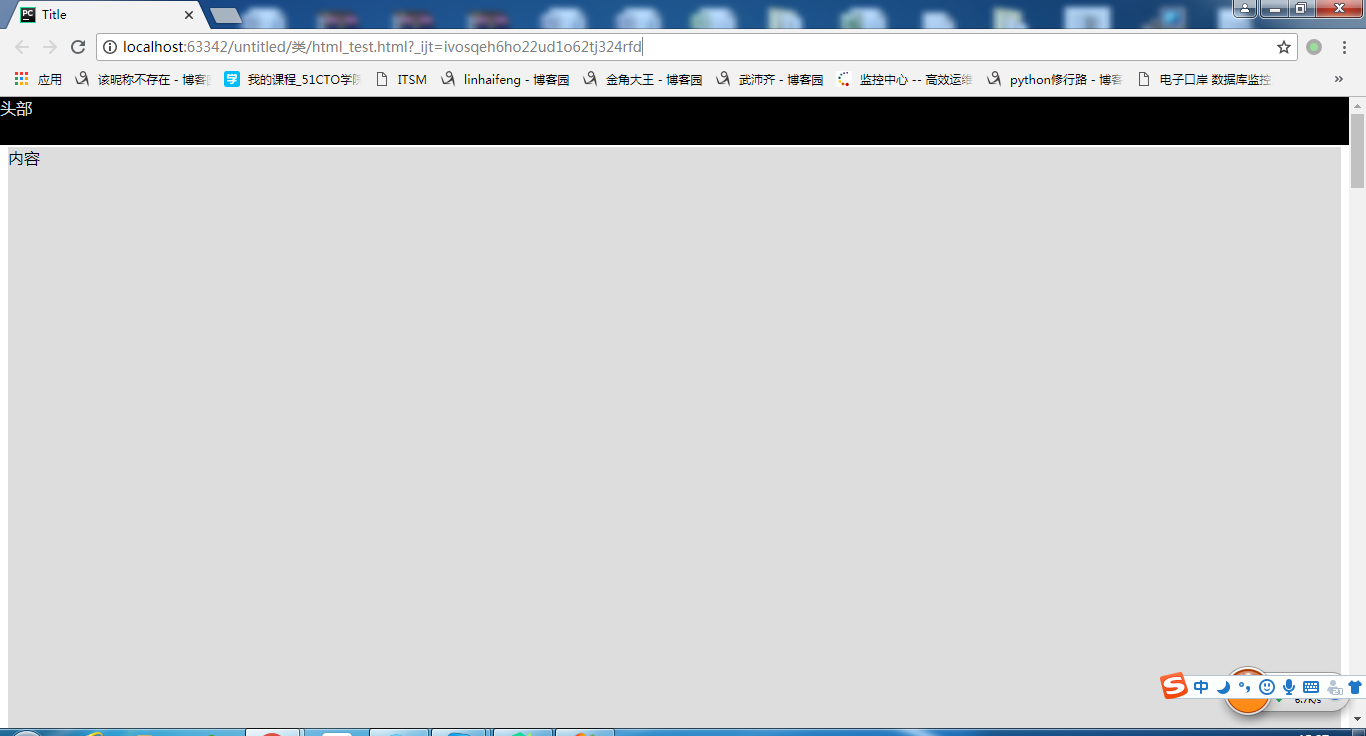
absolute+relative:通过两者的结合可以让标签在一个相对的位置,如下
<!DOCTYPE html>
<html lang="en">
<head>
    <meta charset="UTF-8">
    <title>Title</title>
    <style>
        .pg-header{
            height: 48px;
            background-color: black;
            color: #dddddd;
            position: fixed;
            top: 0;
            right: 0;
            left: 0;
        }
        .pg-body{
            background-color: #dddddd;
            height: 5000px;
            margin-top: 50px;
        }
    </style>

</head>
<body>
    <div class="pg-header">头部</div>
    <div class="pg-body">内容</div>
</body>
</html>
这样实现的效果:当拖动右边的滚动条的时候,头部的内容会一直显示在顶部
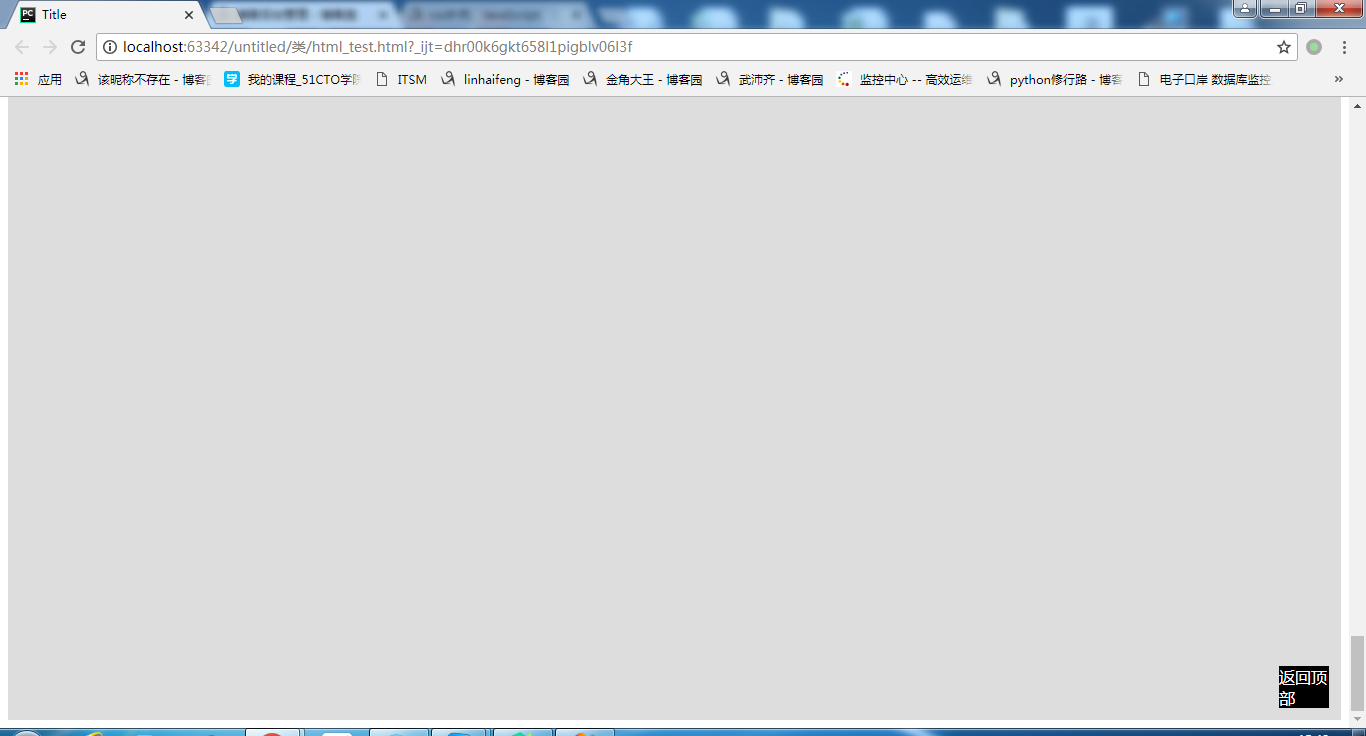
很多网站在网站的右下角有一个图标,当点击的时候会返回到网站的顶部,实现方法如下
<body>
    <div onclick="GoTOP();" style="width: 50px;background-color: black;color: white;position: fixed;bottom: 20px;right: 20px;">返回顶部</div>
    <div style="height: 5000px;background-color: #dddddd">aaaaaaaa</div>
    <script>function GoTop() {
        document.body.scrollTop=0;
    }</script>
</body>
效果如下:当点击返回顶部的时候,网页会返回到整个页面的顶部
代码例子:(通过relative+absolute结合使用,将标签固定在一个相对位置)
<body>
    <div style="position: relative;width: 500px;height: 200px;border: 1px solid red;margin: 0 auto">
        <div style="position: absolute;left: 0;bottom: 0;width: 20px;height: 20px;background-color: black">
        </div>
    </div>

    <div style="position: relative;width: 500px;height: 200px;border: 1px solid red;margin: 0 auto">
        <div style="position: absolute;right: 0;bottom: 0;width: 20px;height: 20px;background-color: black">
        </div>
    </div>

    <div style="position: relative;width: 500px;height: 200px;border: 1px solid red;margin: 0 auto">
        <div style="position: absolute;right: 0;top: 0;width: 20px;height: 20px;background-color: black">
        </div>
    </div>
</body>

opacity:0.0-1.0 设置透明度
z-index:设置层级的,值越大,越优先
<body>
    <div style="display:none;z-index: 10;position: fixed;top: 50%;left: 50%;margin-left: -250px;margin-top: -200px;background-color: white;height: 400px;width: 500px">
        <input type="text">
        <input type="text">
    </div>
    <div style="display:none;z-index: 9;position: fixed;background-color: black;
    top: 0;
    bottom: 0;
    right: 0;
    left: 0;
    opacity: 0.5"></div>
    <div style="height: 5000px;background-color: green">
        sdfsdfsdf
    </div>
</body>
这样就实现了三层叠加的效果但是通过display:none参数将其中的两层隐藏起来
overflow
hidden,auto设置图片的显示,如下:
<body>
    <div style="height: 200px;width: 300px;overflow: auto">
        <img src="p1.jpg">
    </div>
    <div style="height: 200px;width: 300px;overflow: hidden">
        <img src="p1.jpg">
    </div>
    <div style="height: 200px;width: 300px;">
        <img src="p1.jpg" style="height: 200px;width: 300px">
    </div>
</body>
实现的效果如下:可以看出hiden的时候图片超过父级标签的部分就就不会显示出来,如果设置auto的时候,这个图片还会显示,但是需要拖动滚动条才可以显示出来,只要当图片也设置大小的时候这样就能完整的显示。

hover
模拟抽屉网站的头部效果,如下:

当鼠标放在相应内容的时候显示不同的背景色,实现代码如下
<head>
    <meta charset="UTF-8">
    <title>Title</title>
    <style>
        .pg-header{
            position: fixed;
            right: 0;
            left: 0;
            top: 0;
            background-color: #2459a2;
            height: 48px;
            line-height: 48px;
        }
        .pg-body{
            margin-top: 50px;
            background-color: red;
        }
        .w{
            width: 980px;
            margin: 0 auto;
        }
        .pg-header .menu{
            display: inline-block;
            padding: 0 20px;
            color: white;
        }

        .pg-header .menu:hover{
            background-color: blue;
        }
    </style>

</head>
<body>
    <div class="pg-header">
        <div class="w">
            <a>LOGO</a>
            <a class="menu">全部</a>
            <a class="menu">42区</a>
            <a class="menu">段子</a>
            <a class="menu">图片</a>
            <a class="menu">小说</a>
            <a class="menu">展示</a>
        </div>
    </div>
    <div class="pg-body">
        <div class="w">
            www
        </div>
    </div>
</body>
</html>

background-image:url(图片路径)
background-image: url('image/4.gif') #默认div大的话图片就会重复放
如果为了不重复的话可以通过:
background-repeat:no-repeat
同时也可以设置只有水平方向重复或者只有垂直方向重复
background-position-x、 background-position-y可以通过移动图片从而显示不同图片内容
对上面所有知识点的一个综合应用,如下
<body>
    <div style="height: 35px;width: 400px;position: relative">
        <input type="text" style="height: 35px;width: 370px;padding-right: 30px" />
        <span style="background-image: url(p1.jpg);height: 16px;width: 16px;display: inline-block;position: absolute;right: 0;top: 10px;"></span>
    </div>
    <p></p>
    <div style="height: 35px;width: 400px;position: relative">
        <input type="text" style="height: 35px;width: 370px;padding-right: 30px" />
        <span style="background-image: url(p1.jpg);height: 16px;width: 16px;display: inline-block;position: absolute;right: 0;top: 10px"></span>
    </div>
</body>


 浙公网安备 33010602011771号