

centos7安装gitlab
yum 安装
-
安装openssh
sudo yum install -y curl policycoreutils-python openssh-server perl sudo systemctl enable sshd sudo systemctl start sshd -
安装gitLab
#配置镜像源 curl -fsSL https://packages.gitlab.cn/repository/raw/scripts/setup.sh | /bin/bash #yum安装gitLab,需要下载一个多G的文件,这下面的之间可能比较长 yum -y install gitlab-jh #可以直接 指定 EXTERNAL_URL 这样就省去了第三步 EXTERNAL_URL="http://192.168.100.66" yum -y install gitlab-jh -
配置主机
默认配置文件位置/etc/gitlab/gitlab.rb#vim /etc/gitlab/gitlab.rb 修改,192.168.1.66 是服务器IP,也可以是域名 #这个地址就gitlab代码界面,点击code 然后生成对应检查代码命令里面的 地址 external_url 'http://192.168.100.66' #配置的时间也比较长,修改配置以后重启是无效的,需要从配置,最好从配置以后再重启 gitlab-ctl reconfigure #重启 gitlab-ctl restart -
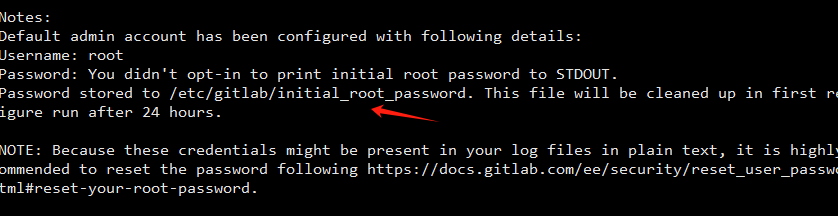
查看初始化密码
初始用户:root
初始密码位置:/etc/gitlab/initial_root_password 里面
gitlab-ctl reconfigure 以后日志末尾截图
-
gitlab命令
gitlab-ctl restart #启动 gitlab-ctl stop #启动 gitlab-ctl restart #重启 gitlab-ctl status #显示当前状态 gitlab-ctl reconfigure #配置 gitlib ,修改/etc/gitlab/gitlab.rb 后用 gitlab-ctl show-config #检查配置文件 gitlab-ctl tail <service name> #查看日志 systemctl enable gitlab-runsvdir.service #开机启动 systemctl disable gitlab-runsvdir.service #禁止开机自启动 -
查看gitlab 的状态
gitlab运行了很多服务比如nginx,prometheus,postgresql,redis等等,需要的内层挺多的,内存少了跑不起来建议内存4G+,个人测试环境不用时建议关闭[root@localhost ~]# gitlab-ctl status run: alertmanager: (pid 3750) 271s; run: log: (pid 3444) 603s run: gitaly: (pid 3758) 270s; run: log: (pid 2700) 704s run: gitlab-exporter: (pid 3773) 269s; run: log: (pid 3263) 621s run: gitlab-kas: (pid 3784) 258s; run: log: (pid 2959) 694s run: gitlab-workhorse: (pid 3795) 257s; run: log: (pid 3118) 641s run: logrotate: (pid 3806) 257s; run: log: (pid 2599) 716s run: nginx: (pid 3812) 256s; run: log: (pid 3175) 635s run: node-exporter: (pid 3818) 256s; run: log: (pid 3230) 627s run: postgres-exporter: (pid 3823) 256s; run: log: (pid 3474) 597s run: postgresql: (pid 3831) 255s; run: log: (pid 2852) 699s run: prometheus: (pid 3840) 255s; run: log: (pid 3331) 611s run: puma: (pid 3850) 254s; run: log: (pid 3050) 651s run: redis: (pid 3855) 254s; run: log: (pid 2666) 711s run: redis-exporter: (pid 3862) 254s; run: log: (pid 3292) 615s run: sidekiq: (pid 3868) 252s; run: log: (pid 3079) 645s -
使用前面的 用户名密码修改,登录后最好去用户设置里面修改密码
gitlab启动很慢如果页面502,多等一会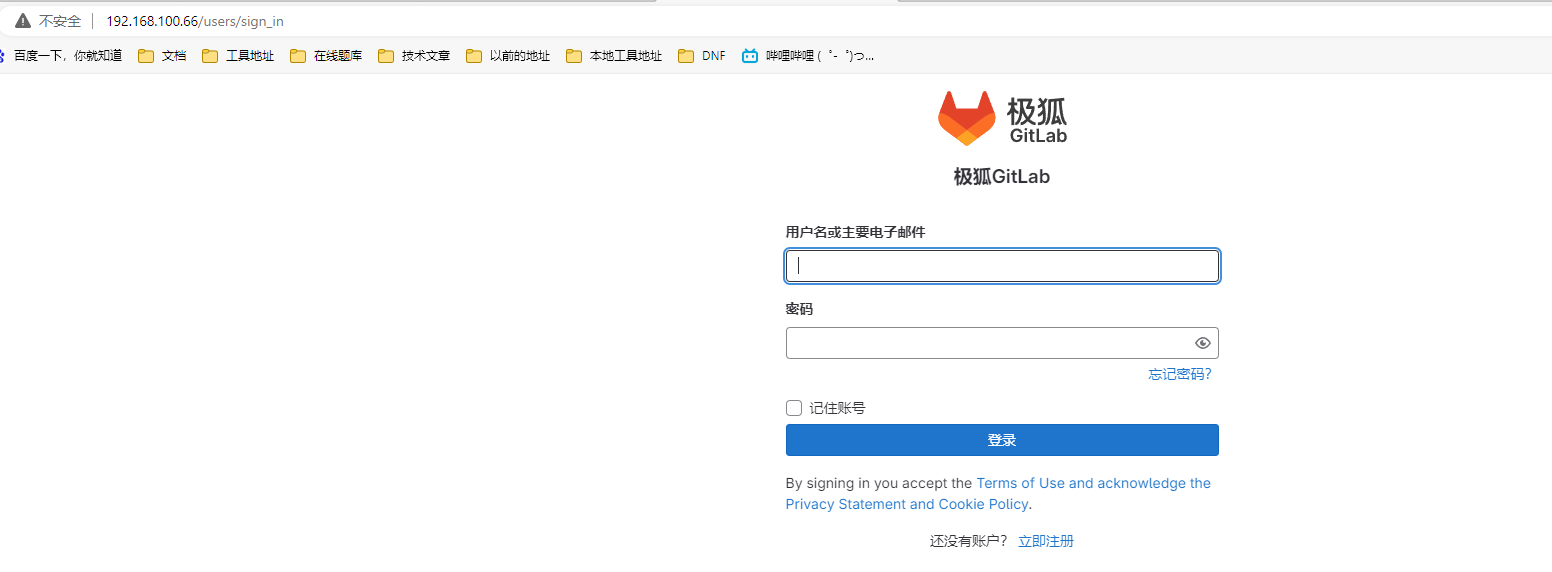
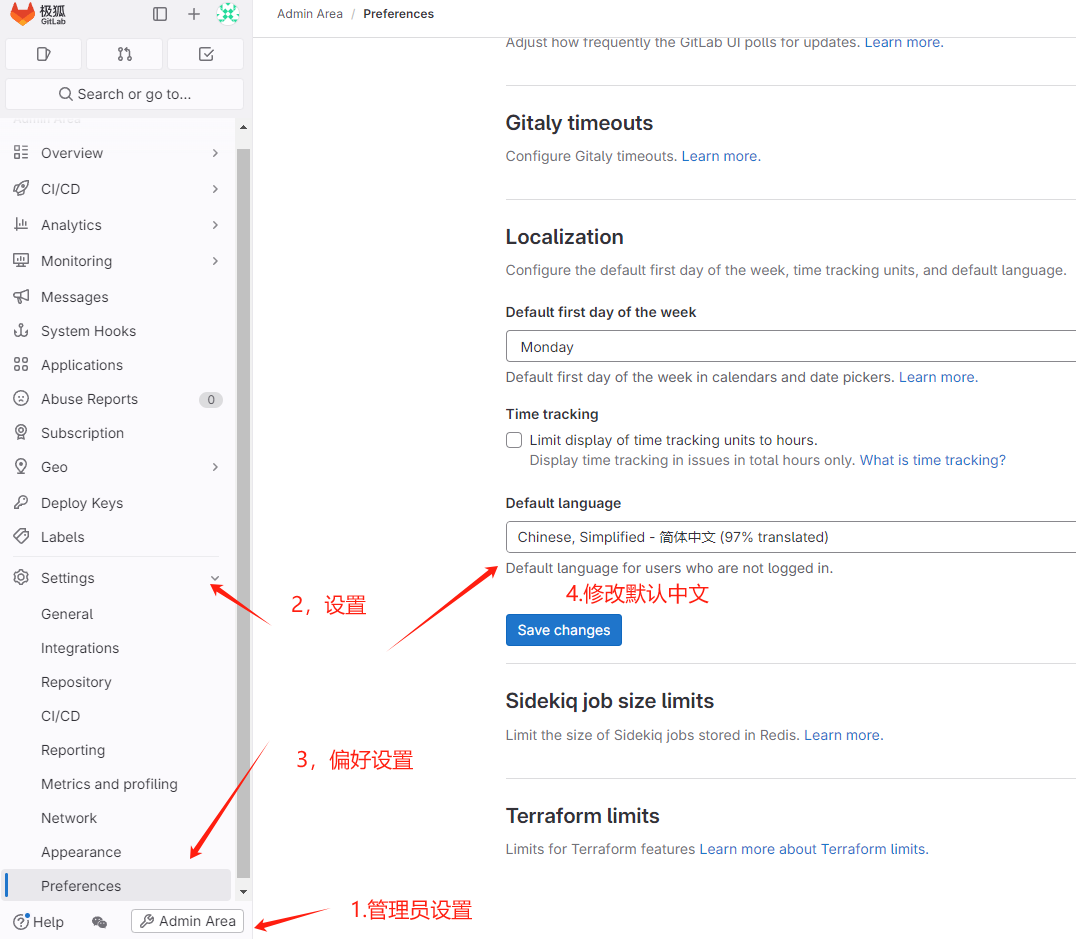
下面是修改默认语言(已经登录的用户不影响)
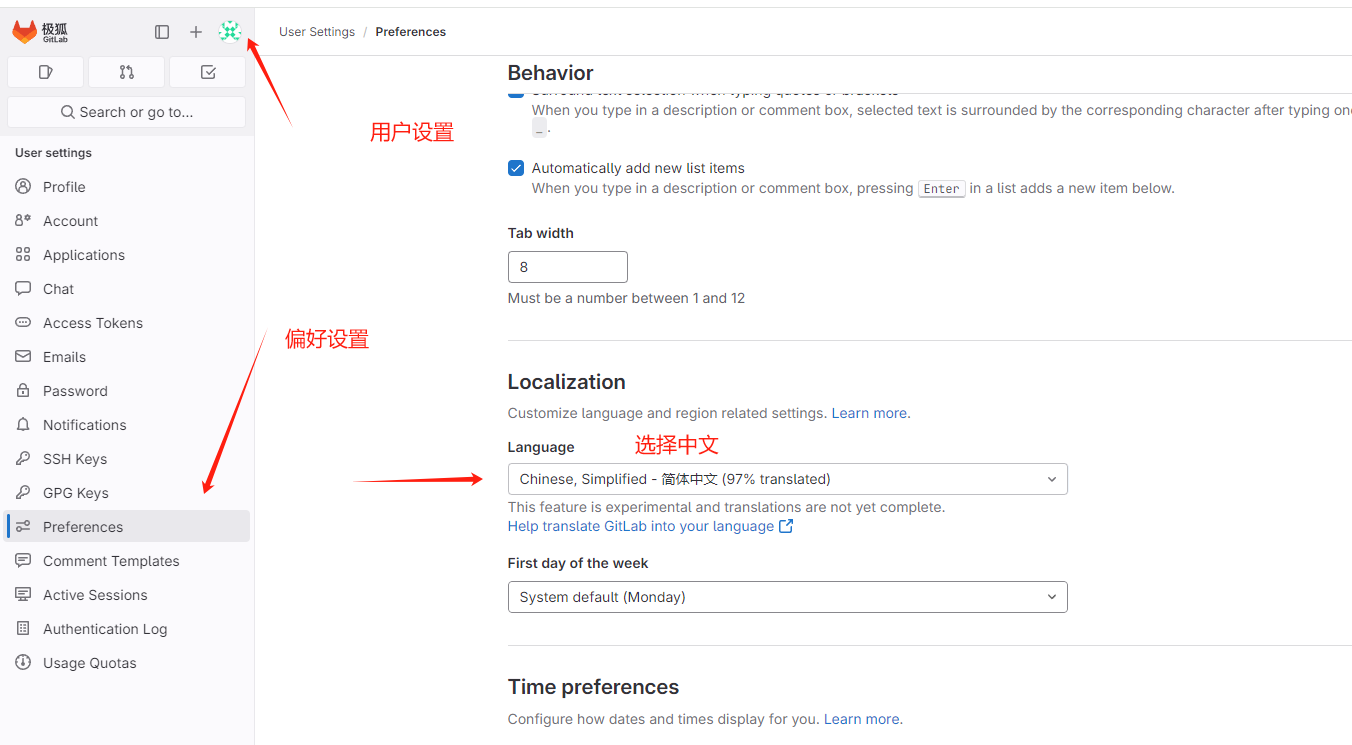
当前用户为中文
docker 安装
需要下载一个多G的包,第一次启动需要很久
docker run --detach \
  --hostname 192.168.100.66 \
  --restart always
  --publish 1443:443 --publish 180:80 --publish 122:22 \
  --name gitlab \
  --volume /opt/gitlab/config:/etc/gitlab:Z \
  --volume /opt/gitlab/logs:/var/log/gitlab:Z \
  --volume /opt/gitlab/data:/var/opt/gitlab:Z \
  --shm-size 256m \
  --privileged=true \
  gitlab/gitlab-ce:latest
--shm-size 设置共享内存的大小,默认64m
--hostname 效果等价于 配置文件里面 指定 EXTERNAL_URL里面的的主机名字
默认密码在 /opt/gitlab/config(上面指定的) 下的 initial_root_password文件里面
能耍的时候就一定要耍,不能耍的时候一定要学。
--天道酬勤,贵在坚持
posted on 2024-01-28 18:05 zhangyukun 阅读(46) 评论(0) 编辑 收藏 举报


【推荐】国内首个AI IDE,深度理解中文开发场景,立即下载体验Trae
【推荐】编程新体验,更懂你的AI,立即体验豆包MarsCode编程助手
【推荐】抖音旗下AI助手豆包,你的智能百科全书,全免费不限次数
【推荐】轻量又高性能的 SSH 工具 IShell:AI 加持,快人一步
· 阿里最新开源QwQ-32B,效果媲美deepseek-r1满血版,部署成本又又又降低了!
· AI编程工具终极对决:字节Trae VS Cursor,谁才是开发者新宠?
· 开源Multi-agent AI智能体框架aevatar.ai,欢迎大家贡献代码
· Manus重磅发布:全球首款通用AI代理技术深度解析与实战指南
· 被坑几百块钱后,我竟然真的恢复了删除的微信聊天记录!