SpringBoot web开发以及配置SpringMVC
SpringBoot web开发
处理静态资源
查询源码在ResourceProperties可知

在这四个路径下可以加载静态资源
MVC自动装配原理
我们先来查看一下SpringBoot对SpringMVC自动装配的官方文档
Spring MVC Auto-configuration
// Spring Boot为Spring MVC提供了自动配置,它可以很好地与大多数应用程序一起工作。
Spring Boot provides auto-configuration for Spring MVC that works well with most applications.
// 自动配置在Spring默认设置的基础上添加了以下功能:
The auto-configuration adds the following features on top of Spring’s defaults:
// 包含视图解析器
Inclusion of ContentNegotiatingViewResolver and BeanNameViewResolver beans.
// 支持静态资源文件夹的路径,以及webjars
Support for serving static resources, including support for WebJars
// 自动注册了Converter:
// 转换器,这就是我们网页提交数据到后台自动封装成为对象的东西,比如把"1"字符串自动转换为int类型
// Formatter:【格式化器,比如页面给我们了一个2019-8-10,它会给我们自动格式化为Date对象】
Automatic registration of Converter, GenericConverter, and Formatter beans.
// HttpMessageConverters
// SpringMVC用来转换Http请求和响应的的,比如我们要把一个User对象转换为JSON字符串,可以去看官网文档解释;
Support for HttpMessageConverters (covered later in this document).
// 定义错误代码生成规则的
Automatic registration of MessageCodesResolver (covered later in this document).
// 首页定制
Static index.html support.
// 图标定制
Custom Favicon support (covered later in this document).
// 初始化数据绑定器:帮我们把请求数据绑定到JavaBean中!
Automatic use of a ConfigurableWebBindingInitializer bean (covered later in this document).

/*
如果您希望保留Spring Boot MVC功能,并且希望添加其他MVC配置(拦截器、格式化程序、视图控制器和其他功能),则可以添加自己
的@configuration类,类型为webmvcconfiguer,但不添加@EnableWebMvc。如果希望提供
RequestMappingHandlerMapping、RequestMappingHandlerAdapter或ExceptionHandlerExceptionResolver的自定义
实例,则可以声明WebMVCregistrationAdapter实例来提供此类组件。
*/
If you want to keep Spring Boot MVC features and you want to add additional MVC configuration
(interceptors, formatters, view controllers, and other features), you can add your own
@Configuration class of type WebMvcConfigurer but without @EnableWebMvc. If you wish to provide
custom instances of RequestMappingHandlerMapping, RequestMappingHandlerAdapter, or
ExceptionHandlerExceptionResolver, you can declare a WebMvcRegistrationsAdapter instance to provide such components.

// 如果您想完全控制Spring MVC,可以添加自己的@Configuration,并用@EnableWebMvc进行注释。
If you want to take complete control of Spring MVC, you can add your own @Configuration annotated with @EnableWebMvc.
修改SpringBoot的默认配置
官方文档有明确的指示:
If you want to keep Spring Boot MVC features and you want to add additional MVC configuration (interceptors, formatters, view controllers, and other features), you can add your own @Configuration class of type WebMvcConfigurer but without @EnableWebMvc. If you wish to provide custom instances of RequestMappingHandlerMapping, RequestMappingHandlerAdapter, or ExceptionHandlerExceptionResolver, you can declare a WebMvcRegistrationsAdapter instance to provide such components.
我们要做的就是编写一个@Configuration注解类,并且类型要为WebMvcConfigurer,还不能标注@EnableWebMvc注解;我们去自己写一个;我们新建一个包叫config,写一个类MyMvcConfig;
//应为类型要求为WebMvcConfigurer,所以我们实现其接口
//可以使用自定义类扩展MVC的功能
@Configuration
public class MyMvcConfig implements WebMvcConfigurer {

    @Override
    public void addViewControllers(ViewControllerRegistry registry) {
        // 浏览器发送/test , 就会跳转到test页面;
        registry.addViewController("/test").setViewName("test");
    }
}
接下来看一个很有意思的注解
官方说明:
If you want to take complete control of Spring MVC
you can add your own @Configuration annotated with @EnableWebMvc.
思考问题?为什么加了一个注解,自动配置就失效了!我们看下源码:
1、这里发现它是导入了一个类,我们可以继续进去看
@Import({DelegatingWebMvcConfiguration.class})
public @interface EnableWebMvc {
}
2、它继承了一个父类 WebMvcConfigurationSupport
public class DelegatingWebMvcConfiguration extends WebMvcConfigurationSupport {
  // ......
}
3、我们来回顾一下Webmvc自动配置类
@Configuration(proxyBeanMethods = false)
@ConditionalOnWebApplication(type = Type.SERVLET)
@ConditionalOnClass({ Servlet.class, DispatcherServlet.class, WebMvcConfigurer.class })
// 这个注解的意思就是:容器中没有这个组件的时候,这个自动配置类才生效
@ConditionalOnMissingBean(WebMvcConfigurationSupport.class)
@AutoConfigureOrder(Ordered.HIGHEST_PRECEDENCE + 10)
@AutoConfigureAfter({ DispatcherServletAutoConfiguration.class, TaskExecutionAutoConfiguration.class,
    ValidationAutoConfiguration.class })
public class WebMvcAutoConfiguration {

}
可以看到很有意思的是,webmvc自动配置类有一个注解的意思:当是容器中没有WebMvcConfigurer.class这个组件的时候,自动配置类才生效,而@EnableWebMvc恰好导入了这个组件。
这就能解释为什么官方让我们不要添加@EnableWebMvc这个注解了。当使用@EnableWebMvc注解时,意味着Boot的webmvc自动装配全部失效,完全由我们来接管。而官方更推荐我们这么去使用,既保SpringBoot留所有的自动配置,也能用我们扩展的配置
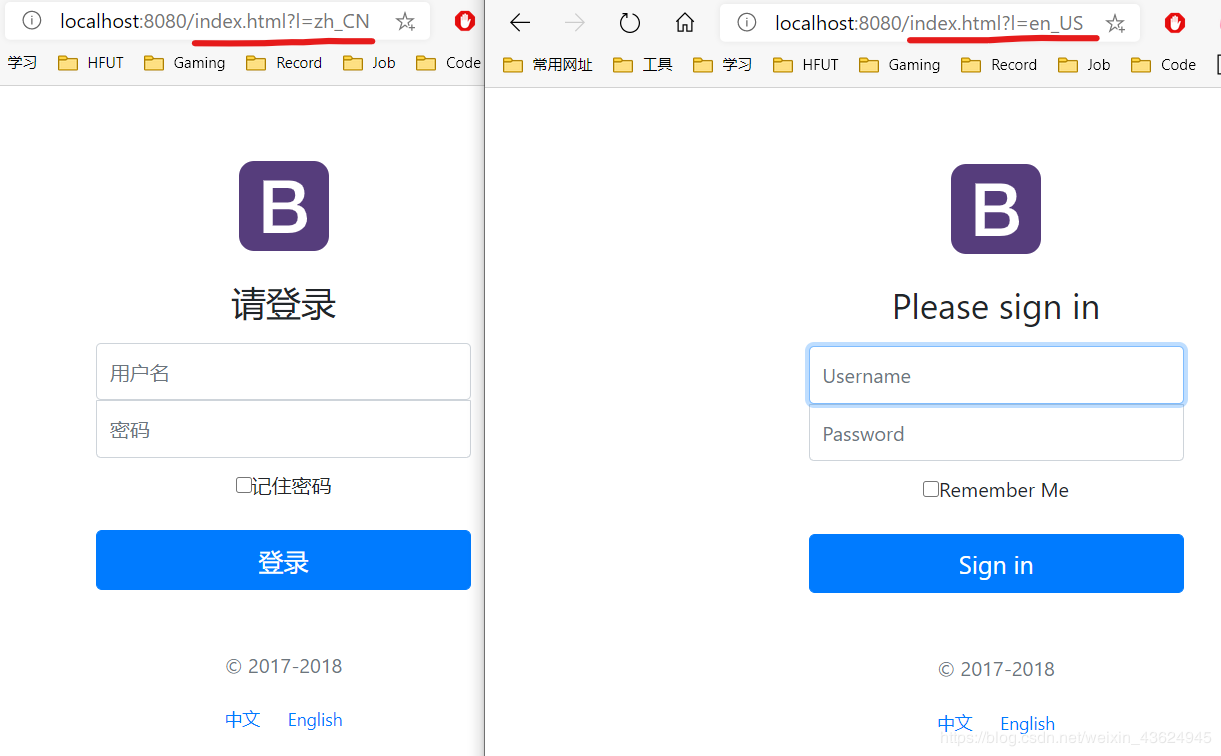
国际化
首先,确定编码格式为utf-8。
所谓国际化就是可以切换多语言(中英切换)。
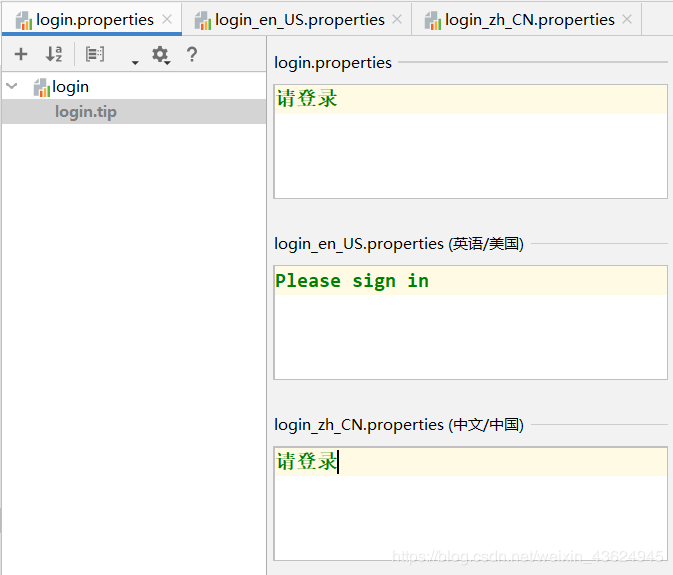
编写配置文件
新建如下所示三个配置文件,系统会把它们自动合并,然后可以使用IDEA提供的方便的Resource Bundle功能,同时编辑这三个文件:
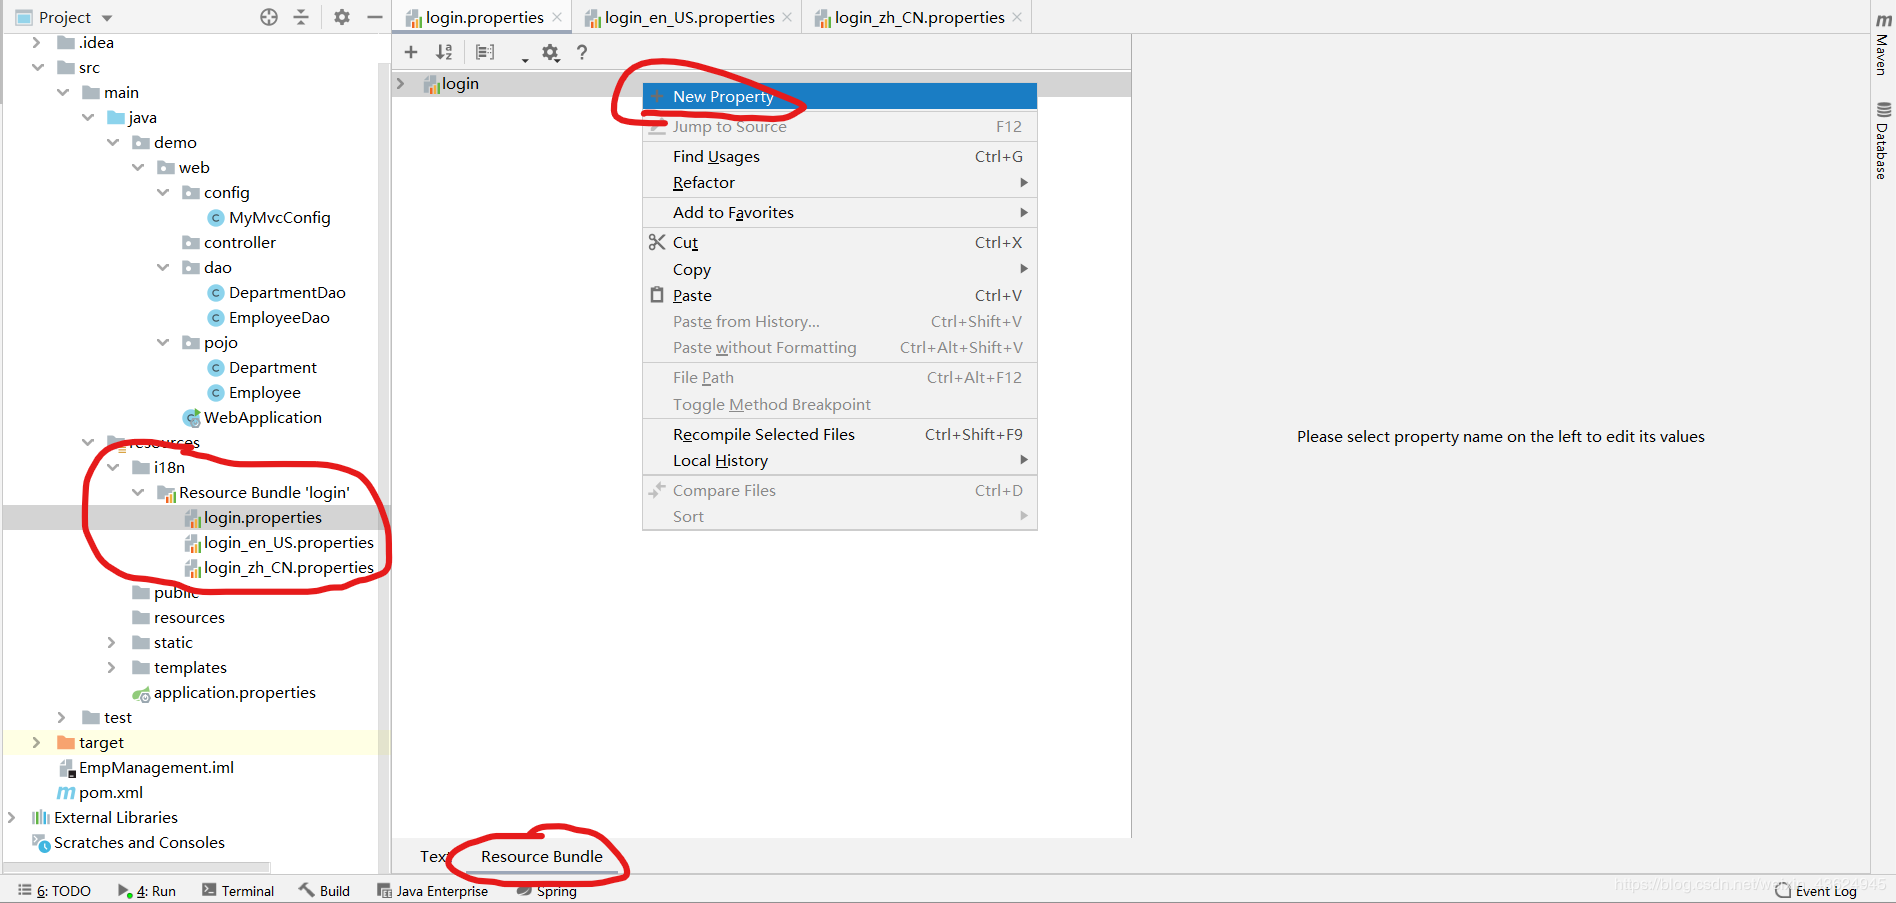
在application.properties文件中添加:spring.messages.basename=i18n.login,绑定配置文件的位置。
编辑index.html文件
<body class="text-center">
	<form class="form-signin" action="dashboard.html">
		<img class="mb-4" th:src="@{/img/bootstrap-solid.svg}" alt="" width="72" height="72">

		<h1 class="h3 mb-3 font-weight-normal" th:text="#{login.tip}"></h1>

		<label class="sr-only" th:text="#{login.username}"></label>
		<input type="text" class="form-control" th:placeholder="#{login.username}" required="" autofocus="">

		<label class="sr-only" th:text="#{login.password}"></label>
		<input type="password" class="form-control" th:placeholder="#{login.password}" required="">

		<div class="checkbox mb-3">
			<label>
				<input type="checkbox" value="remember-me" th:text="#{login.remember}">
			</label>
		</div>
		<button class="btn btn-lg btn-primary btn-block" type="submit" th:text="#{login.enter}"></button>
		<p class="mt-5 mb-3 text-muted">© 2017-2018</p>
		<a class="btn btn-sm">中文</a>
		<a class="btn btn-sm">English</a>
	</form>

</body>
加入链接
			<a class="btn btn-sm" th:href="@{/index.html(l='zh_CN')}">中文</a>
			<a class="btn btn-sm" th:href="@{/index.html(l='en_US')}">English</a>
编写demo.web.config.MyLocaleResolver
public class MyLocaleResolver implements LocaleResolver {

    // 解析请求
    @Override
    public Locale resolveLocale(HttpServletRequest httpServletRequest) {

        // 获取请求中的语言参数
        String language = httpServletRequest.getParameter("l") ;

        // 如果没有就使用默认
        Locale locale = Locale.getDefault() ;

        // 如果请求的链接携带了国际化参数
        if (!StringUtils.isEmpty(language)) {
            //  zh_CN
            String[] split = language.split("_");
            // 国家,地区
            locale = new Locale(split[0], split[1]) ;
        }
        return locale;
    }

    @Override
    public void setLocale(HttpServletRequest httpServletRequest, HttpServletResponse httpServletResponse, Locale locale) {

    }
}
把国际化组件MyLocaleResolver放到Bean里面:
@Configuration
public class MyMvcConfig implements WebMvcConfigurer {

	······

    // 这样自定义的国际化组件就生效了
    @Bean
    public LocaleResolver localeResolver(){
        return new MyLocaleResolver();
    }

}