xavier NX编译caffe错误记录
原博客搬移到:https://blog.csdn.net/u013171226/article/details/107680343
在xavier NX上编译caffe时遇到一些错误,简单记录一下,
一:首先是缺少各种库,对于这种错误直接用下面这篇博客的笔记安装相应的依赖库即可。
下面这篇博客里面记录了boost glog gflag lmdb hdf5 leveldb openmpi等依赖库的安装。
https://www.cnblogs.com/cumtchw/p/13064158.html
二:无法读取cudnn版本

在cmake/Cuda.cmake里面有检测cudnn版本的代码,就是通过检测use/include里面的cudnn.h里面的内容去检测,你这个错误的原因是你usr/cudnn里面的cudnn.h文件不对,另一个路径下是对的,把另一个路径下面的cudnn.h拷贝过来然后放到usr/include里面即可。,拷贝之前记得把原来的cudnn.h备份,这样如果拷贝过来错误还没解决,可以恢复到之前的状态。
cp /data/trt_test/aiot/prot2trt_v2/include/cudnn.h /usr/include/
三:找不到opencv

这个就是下载opencv源码,然后重新编译就好了,
mkdir build # 创建编译的文件目录
cd build
cmake -D CMAKE_BUILD_TYPE=Release -D CMAKE_INSTALL_PREFIX=/usr/local ..
make -j8  #编译
sudo make install
cmake的时候注意把路径安装到/usr/local下面,这样就会自动找到opencv。
四:CUDA_cublas_device_LIBRARY (ADVANCED) linked by target "caffe" in directory /data/software/caffe_gcs/src/caffe

网上查上面这个错误,说是可能是因为cmake版本不对,cmake版本至少需要3.12,而我的cmake版本是3.10.2,于是首先卸载cmake,然后重新安装,但是发现重新安装的cmake版本是3.5.1,并不是3.12,不过自己还是cmake ..试了下,发现cmake通过了。
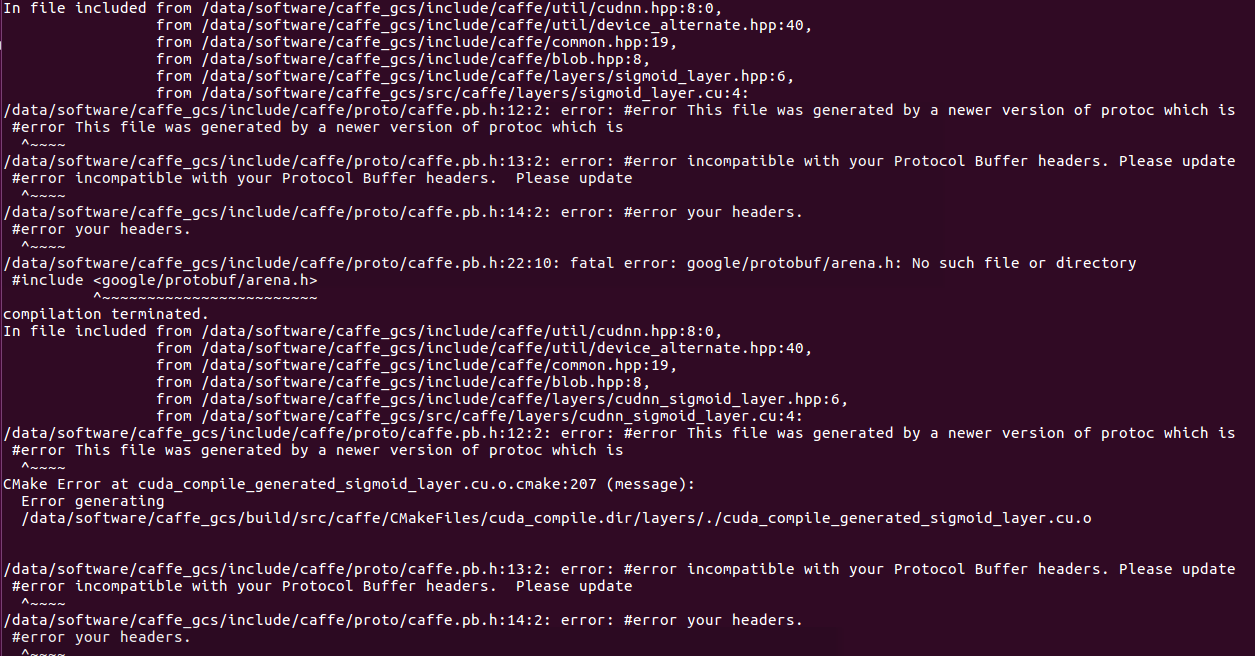
五: protoc版本不对
/data/software/caffe_gcs/include/caffe/proto/caffe.pb.h:12:2: error: #error This file was generated by a newer version of protoc which is
 #error This file was generated by a newer version of protoc which is
  ^~~~~
/data/software/caffe_gcs/include/caffe/proto/caffe.pb.h:13:2: error: #error incompatible with your Protocol Buffer headers. Please update
 #error incompatible with your Protocol Buffer headers.  Please update
  ^~~~~
/data/software/caffe_gcs/include/caffe/proto/caffe.pb.h:14:2: error: #error your headers.
 #error your headers.
  ^~~~~
/data/software/caffe_gcs/include/caffe/proto/caffe.pb.h:22:10: fatal error: google/protobuf/arena.h: No such file or directory
 #include <google/protobuf/arena.h>
          ^~~~~~~~~~~~~~~~~~~~~~~~~

出现上述错误之后,在网上查,都是说要安装protoc 的3.6.1版本,但是我的xavier里面现在的就是3.6.1版本的,
然后自己看错误提示是说自己现在安装的版本太久了,要安装个新版本的,于是首先卸载掉之前的旧版本,使用如下命令卸载
sudo apt-get remove libprotobuf-dev protobuf-compiler
然后下载安装新版本的protobuf
wget https://github.com/protocolbuffers/protobuf/archive/v3.8.0.tar.gz
tar -xzvf  v3.8.0.tar.gz
cd protobuf-3.8.0
./autogen.sh
./configure
make
sudo make install
sudo ldconfig
export PATH=$PATH:/usr/local/protobuf/bin
export LD_LIBRARY_PATH=$LD_LIBRARY_PATH:/usr/local/protobuf/lib
然后再次编译,发现
/data/software/caffe_gcs/include/caffe/proto/caffe.pb.h:17:2: error: #error This file was generated by an older version of protoc which is
 #error This file was generated by an older version of protoc which is
  ^~~~~
/data/software/caffe_gcs/include/caffe/proto/caffe.pb.h:18:2: error: #error incompatible with your Protocol Buffer headers. Please
 #error incompatible with your Protocol Buffer headers.  Please

这次的错误和之前相反了,这次是版本又太新了。。。。。无语。
于是要重新安装,我看了另一块xavier板子上的protobuf是3.0.0版本的,另外也在网上曾经搜到过这样的回答
This error usually happens when the protocol compiler (protoc) and the library header (/usr/include/google/protobuf) are inconsistent.
When you are using the protoc installed with apt-get, it should be installed in /usr/bin.

% which protoc
/usr/bin/protoc
% /usr/bin/protoc --version
libprotoc 3.0.0
% grep GOOGLE_PROTOBUF_VERSION /usr/include/google/protobuf/stubs/common.h
#define GOOGLE_PROTOBUF_VERSION 300000
于是装一个3.0.0试试看,但是要首先把源码安装的3.8.0卸载掉,在刚才的编译目录下执行,
make uninstall
然后用下面的方法安装proto3.0.0,
https://github.com/google/protobuf/archive/v3.0.0.zip
解压后,在v3.0.0版本中的autogen.sh中,需要下载gmock的1.7.0版本。因为有时候网速的问题,在这里我们先把他给下好,然后在autogen.sh中把下载这段代码给注释掉。
git clone https://github.com/paulsapps/gmock-1.7.0
然后改名为:
mv gmock-1.7.0 gmock
并且复制到protobuf目录下。
打开sutogen.sh,然后将下面的内容注释掉。
if test ! -e gmock; then
  echo "Google Mock not present.  Fetching gmock-1.7.0 from the web..."
  curl $curlopts -O https://googlemock.googlecode.com/files/gmock-1.7.0.zip
  unzip -q gmock-1.7.0.zip
  rm gmock-1.7.0.zip
  mv gmock-1.7.0 gmock
fi
然后执行如下操作
./autogen.sh
./configure
make
make check #执行这个命令可能会有错误,不影响,可以继续make install,或者这行命令就直接不执行了,直接执行下面的make install
make install
1、创建文件 /etc/ld.so.conf.d/libprotobuf.conf 包含内容:
    /usr/local/lib
2、sudo ldconfig
    这时,再运行protoc --version 就可以正常看到版本号了
作者:cumtchw
出处:http://www.cnblogs.com/cumtchw/
我的博客就是我的学习笔记,学习过程中看到好的博客也会转载过来,若有侵权,与我联系,我会及时删除。

