php怎么安装xdebug扩展
php安装xdebug扩展的方法:1、进入xdebug官网;2、在用户下载引导页面粘贴当前phpinfo信息;3、下载插件,并将插件放于指定目录;4、加入xdebug设置;5、查看插件是否安装成功;6、配置phpstorm即可。


本文操作环境:windows7系统、phpstorm 2020版,DELL G3电脑
php安装xdebug扩展,PHPStorm+XDebug单步调试
场景
在使用phpstorm等IDE编辑器编写php代码时,为了更方便的调试,我们需要安装一款php的扩展插件 xdebug。本实例当前运行环境为phpstudy集成环境。
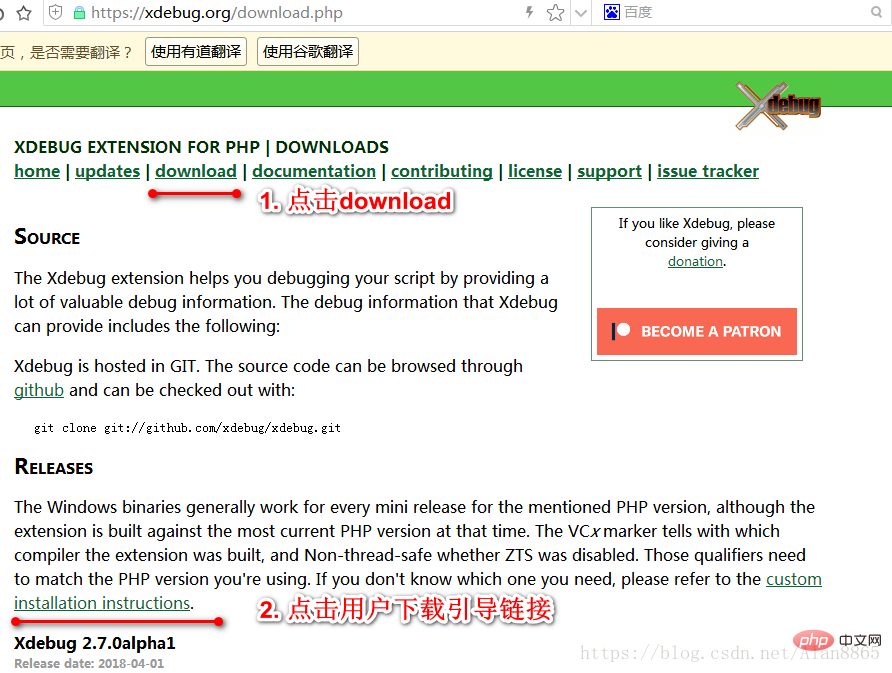
step1 进入xdebug官网,进入用户下载引导页
-
游览器输入网址:https://xdebug.org或者直接搜索xdebug进入网站。
-
点击下方download进入下载页面。点击 custom installation instructions链接。
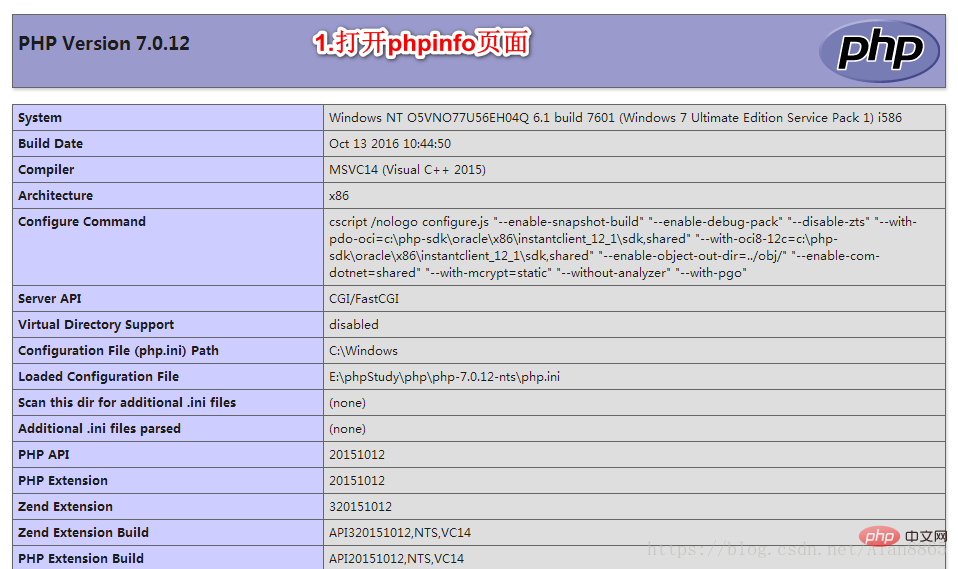
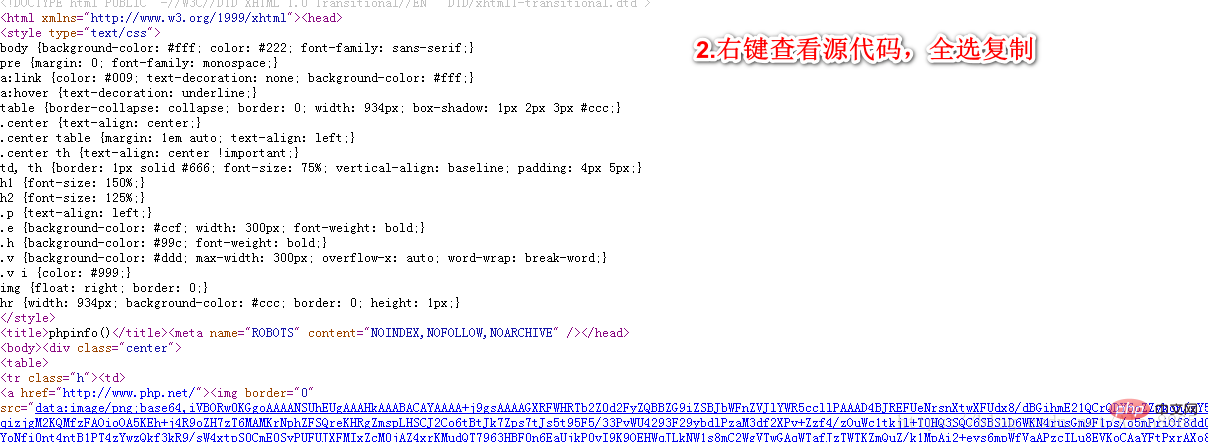
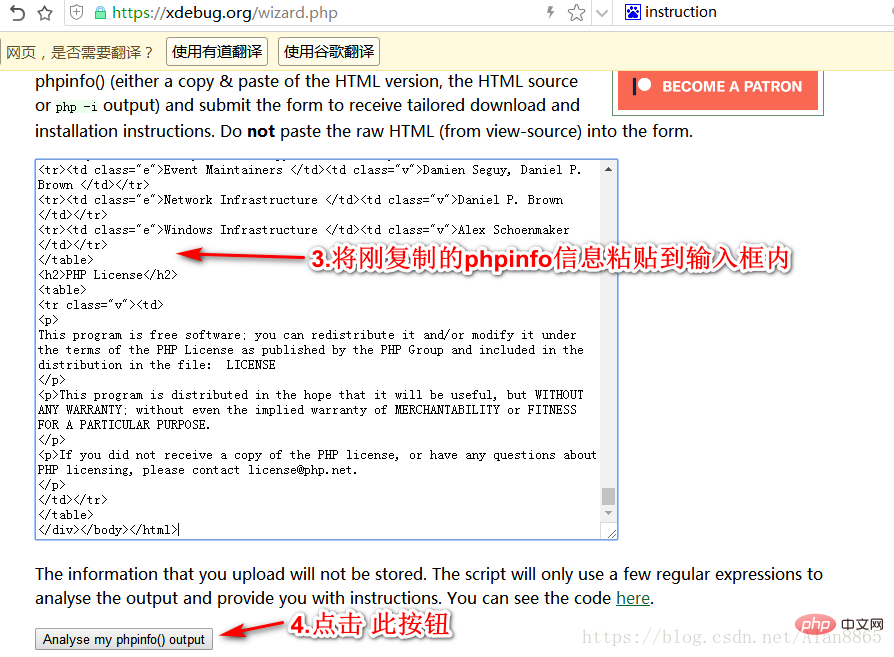
step2 在用户下载引导页面粘贴当前phpinfo信息
- 打开phpinfo页面
- 右键查看源代码,全选复制
- 切换到用户下载引导页,将刚复制的phpinfo信息粘贴到输入框内
- 点击 下方 analyse my phpinfo() output 按钮,系统将会推荐适合当前php版本信息的xdebug插件
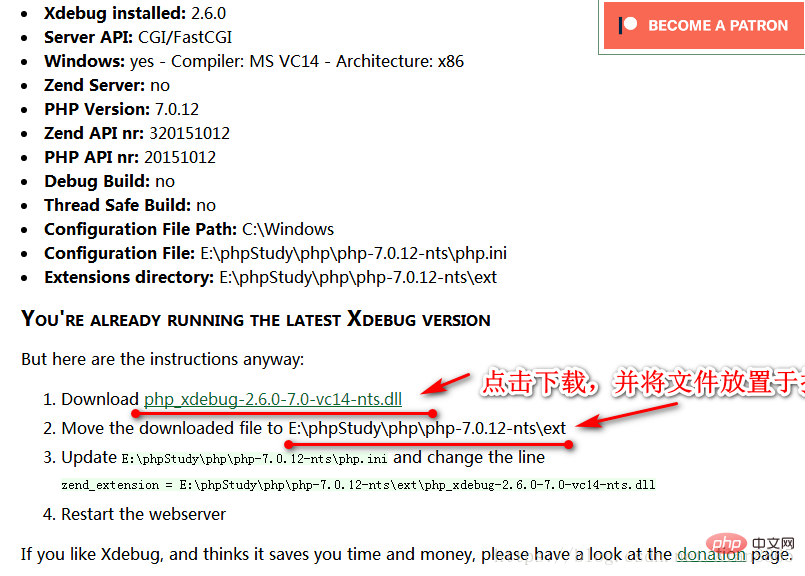
step3.下载插件,并将插件放于指定目录
step4.打开php.ini,在文件中加入xdebug设置
- 打开php.ini文件
- 在文件末尾加入以下几行信息
|
1 2 3 4 |
|
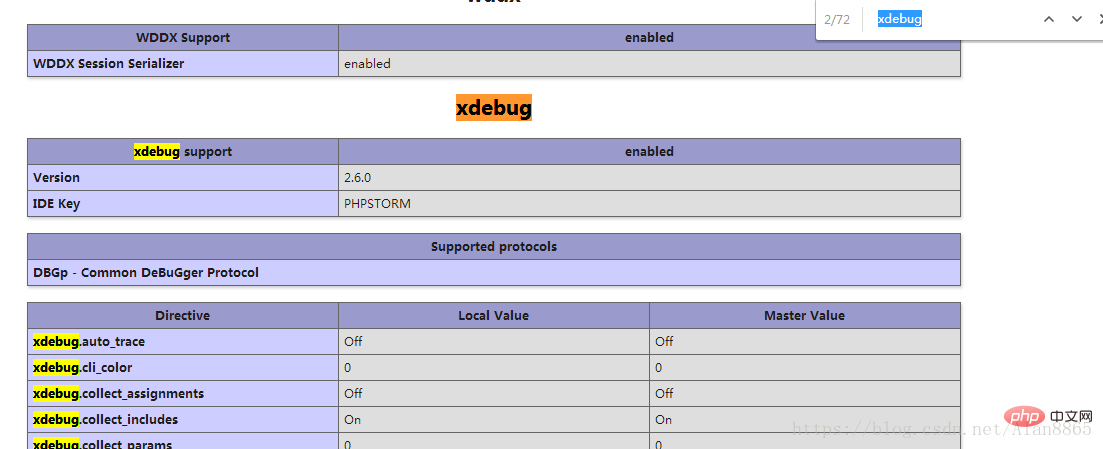
step5 重启phpstudy,查看xdebug插件是否安装成功
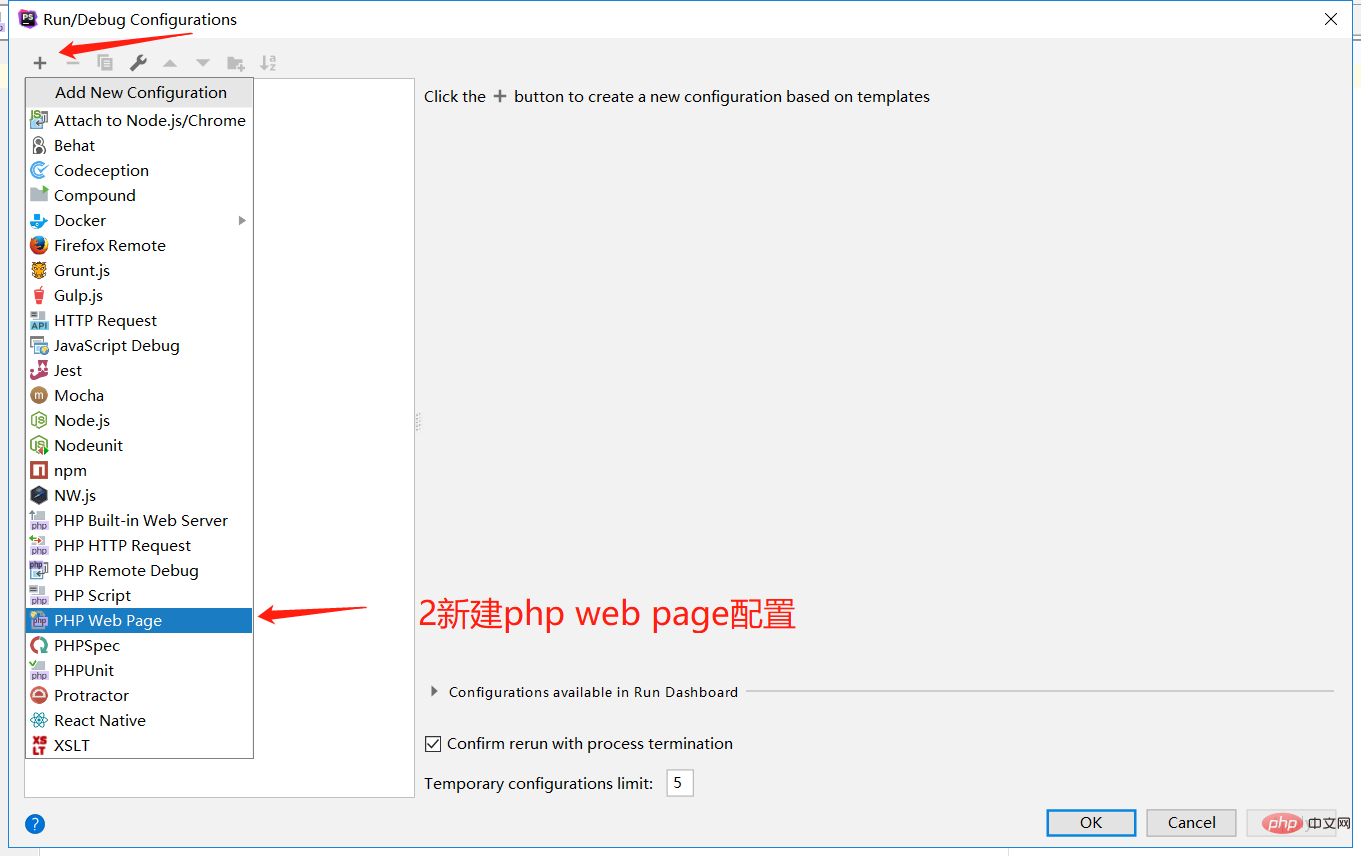
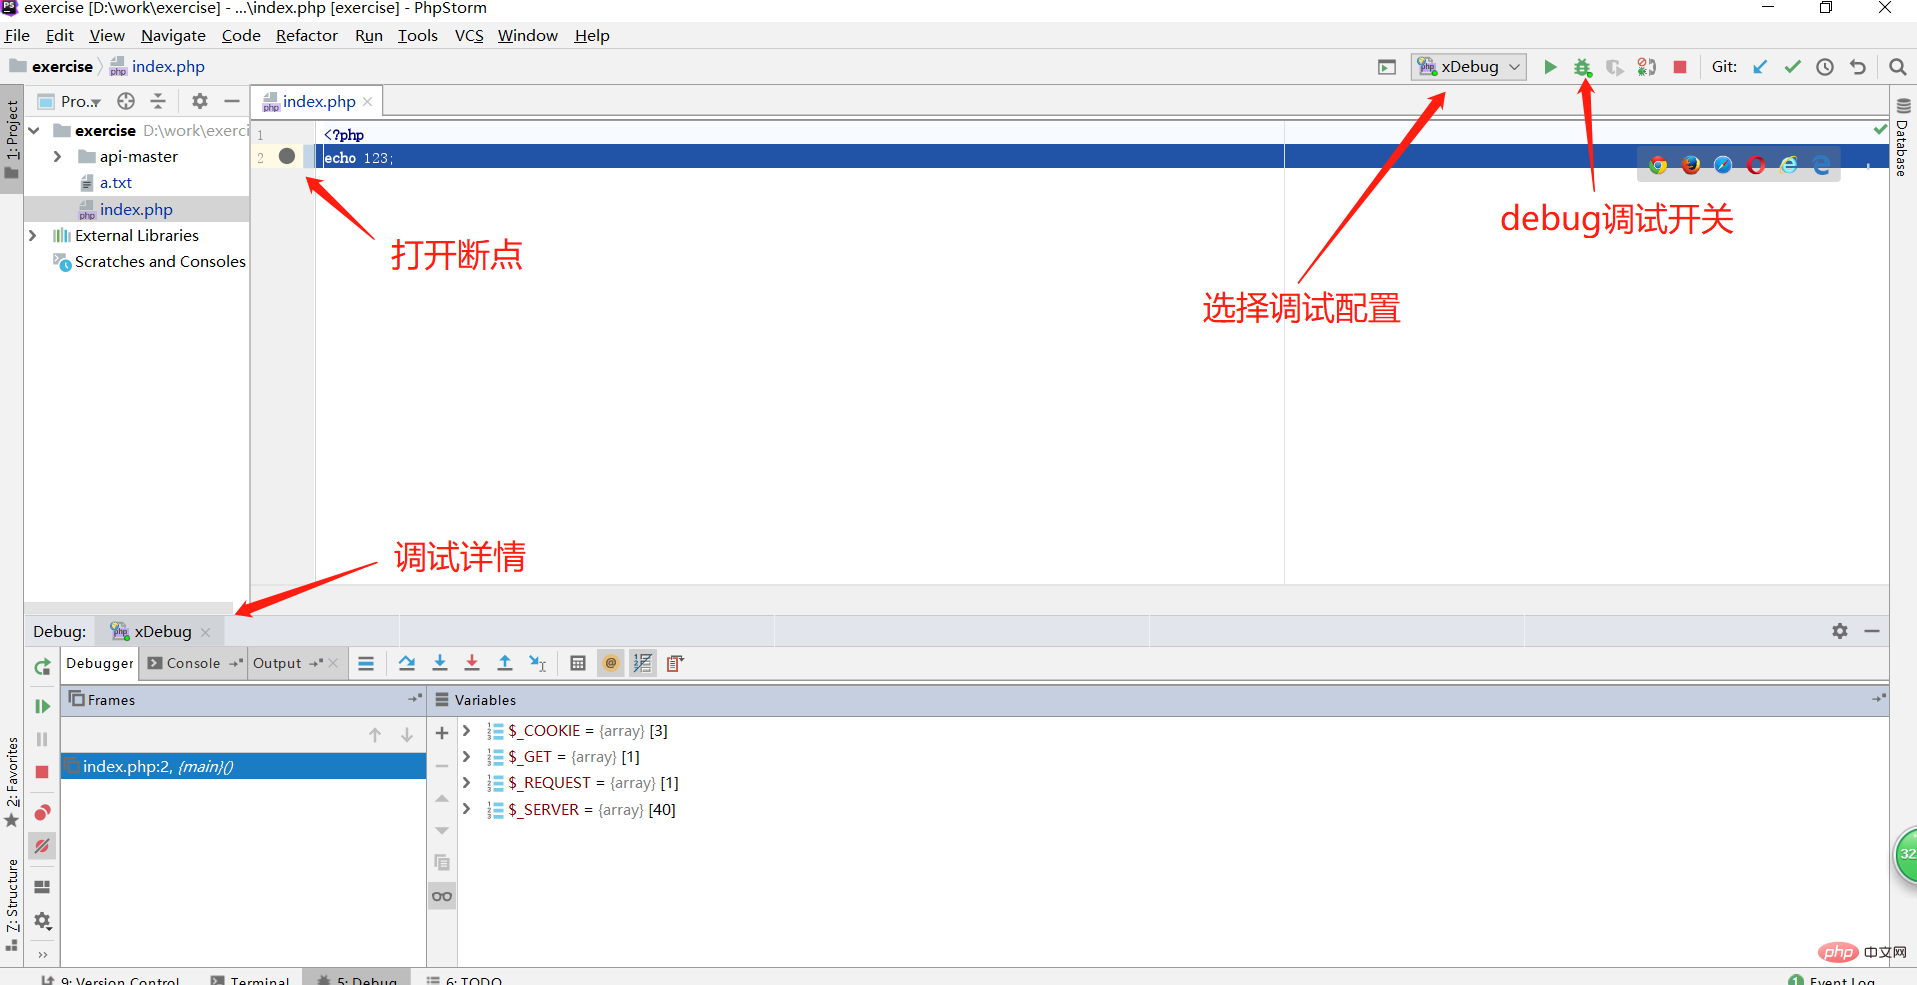
step6 配置phpstorm

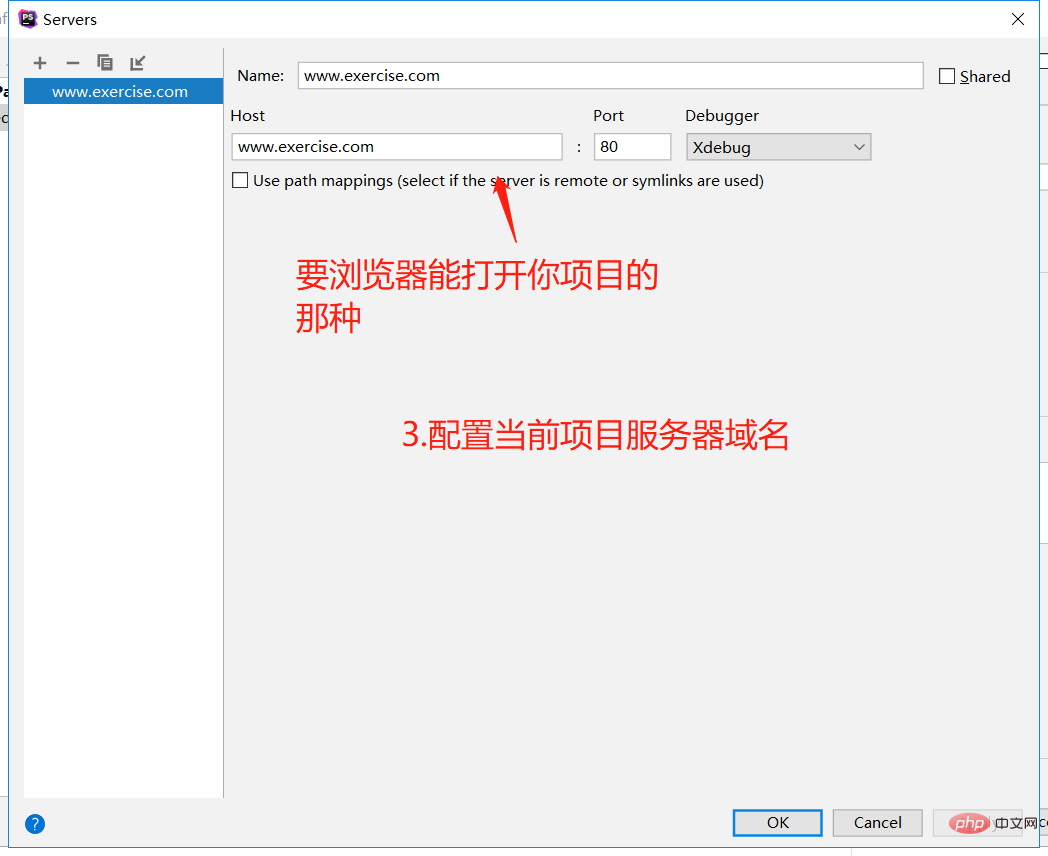
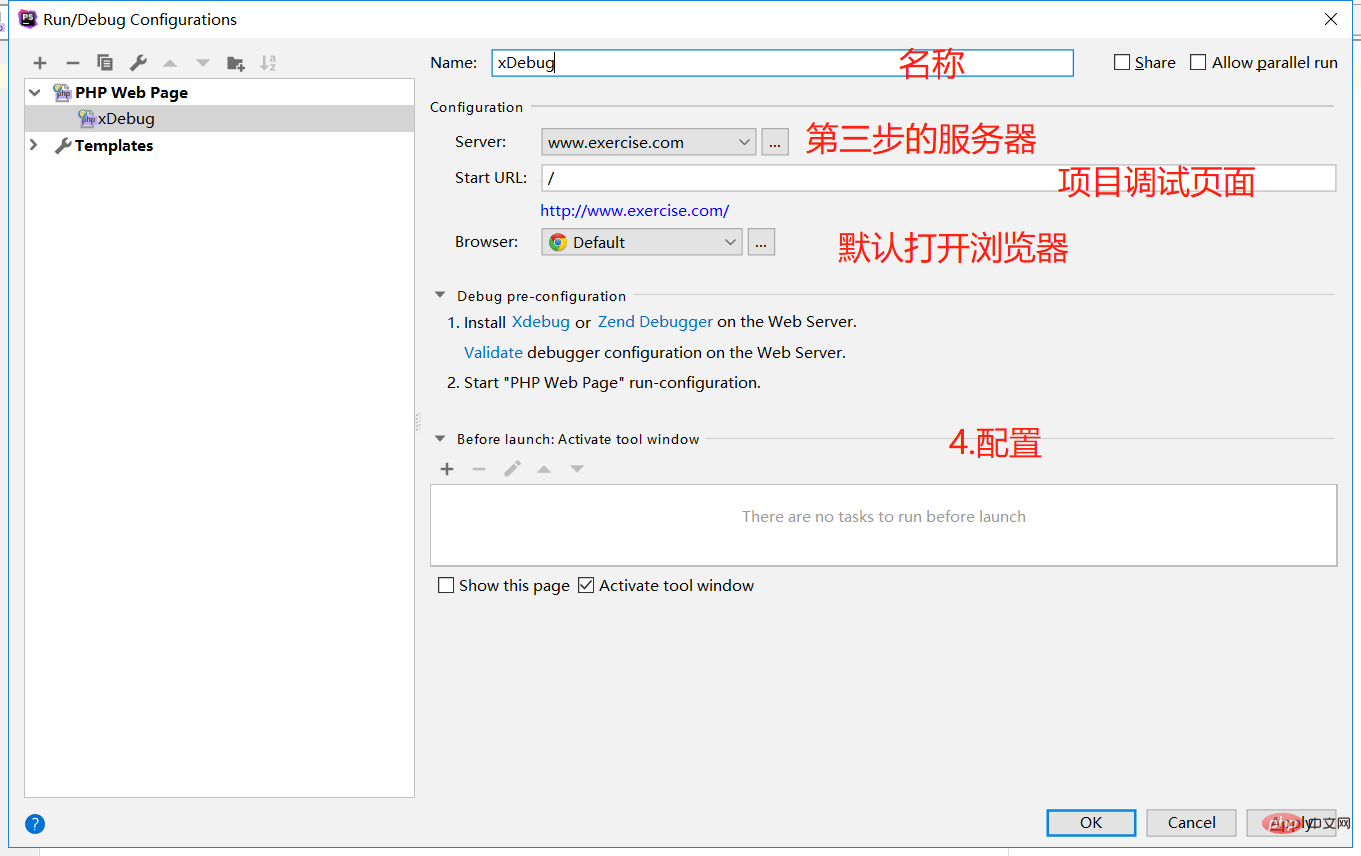
经过上面几个步骤,我们就安装好了php的xdebug扩展,并且配置好了phpstorm中的相关配置,下面就可以使用phpstorm的xdebug功能进行调试工作啦。
以上就是php怎么安装xdebug扩展的详细内容,更多请关注php中文网其它相关文章!
[Xdebug]
zend_extension = D:\phpstudy_pro\Extensions\php\php7.3.4nts\ext\php_xdebug.dll
xdebug.remote_enable = On
xdebug.auto_trace = On
xdebug.remote_autostart = on
xdebug.profiler_enable = on
xdebug.profiler_enable_trigger = off
xdebug.profiler_output_name = cachegrind.out.%t.%p
xdebug.profiler_output_dir = "D:/tmp"
xdebug.show_local_vars=0
xdebug.remote_cookie_expire_time = 3600
max_execution_time=3600
max_input_time=3600
default_socket_timeout = 3600
[xdebug]
xdebug.mode=debug
xdebug.start_with_request=yes


 浙公网安备 33010602011771号