使用postman模拟appium的http请求
Appium是Server,接收http请求,使用Postman模拟请求
1.anyproxy
- 1.1、安装和运行
    #安装
    npm i -g anyproxy
    # 运行anyproxy,端口默认8002
    anyproxy
 注意:测试完不要忘记取消代理设置
```shell
unset HTTP_PROXY
```

- 1.2、浏览器打开localhost:8002
- 1.3、设置环境变量和代理
Mac:export HTTP_PROXY=127.0.0.1:8001
Windows:set HTTP_PROXY 127.0.0.1:8001
2.终端执行脚本,捕捉请求
test.py
# This sample code uses the Appium python client
# pip install Appium-Python-Client
# Then you can paste this into a file and simply run with Python

from appium import webdriver
from time import sleep
caps = {}
caps["platformName"] = "android"
caps["deviceName"] = "domo"
caps["appPackage"] = "com.xueqiu.android"
caps["appActivity"] = ".view.WelcomeActivityAlias"
caps["newCommandTimeout"] = 1200
caps["automationName"] = "UiAutomator2"

driver = webdriver.Remote("http://localhost:4723/wd/hub", caps)
driver.implicitly_wait(20)
sleep(20)
print(driver.session_id)

driver.find_element_by_id("com.xueqiu.android:id/user_profile_icon").click()
sleep(1)
driver.find_element_by_id("com.xueqiu.android:id/tv_login").click()
sleep(1)
driver.find_element_by_id("com.xueqiu.android:id/tv_login_by_phone_or_others").click()
sleep(1)
driver.find_element_by_id("com.xueqiu.android:id/register_phone_number").send_keys("123456789")
sleep(3)
print(driver.session_id)

driver.quit()
3.浏览器查看捕捉的请求
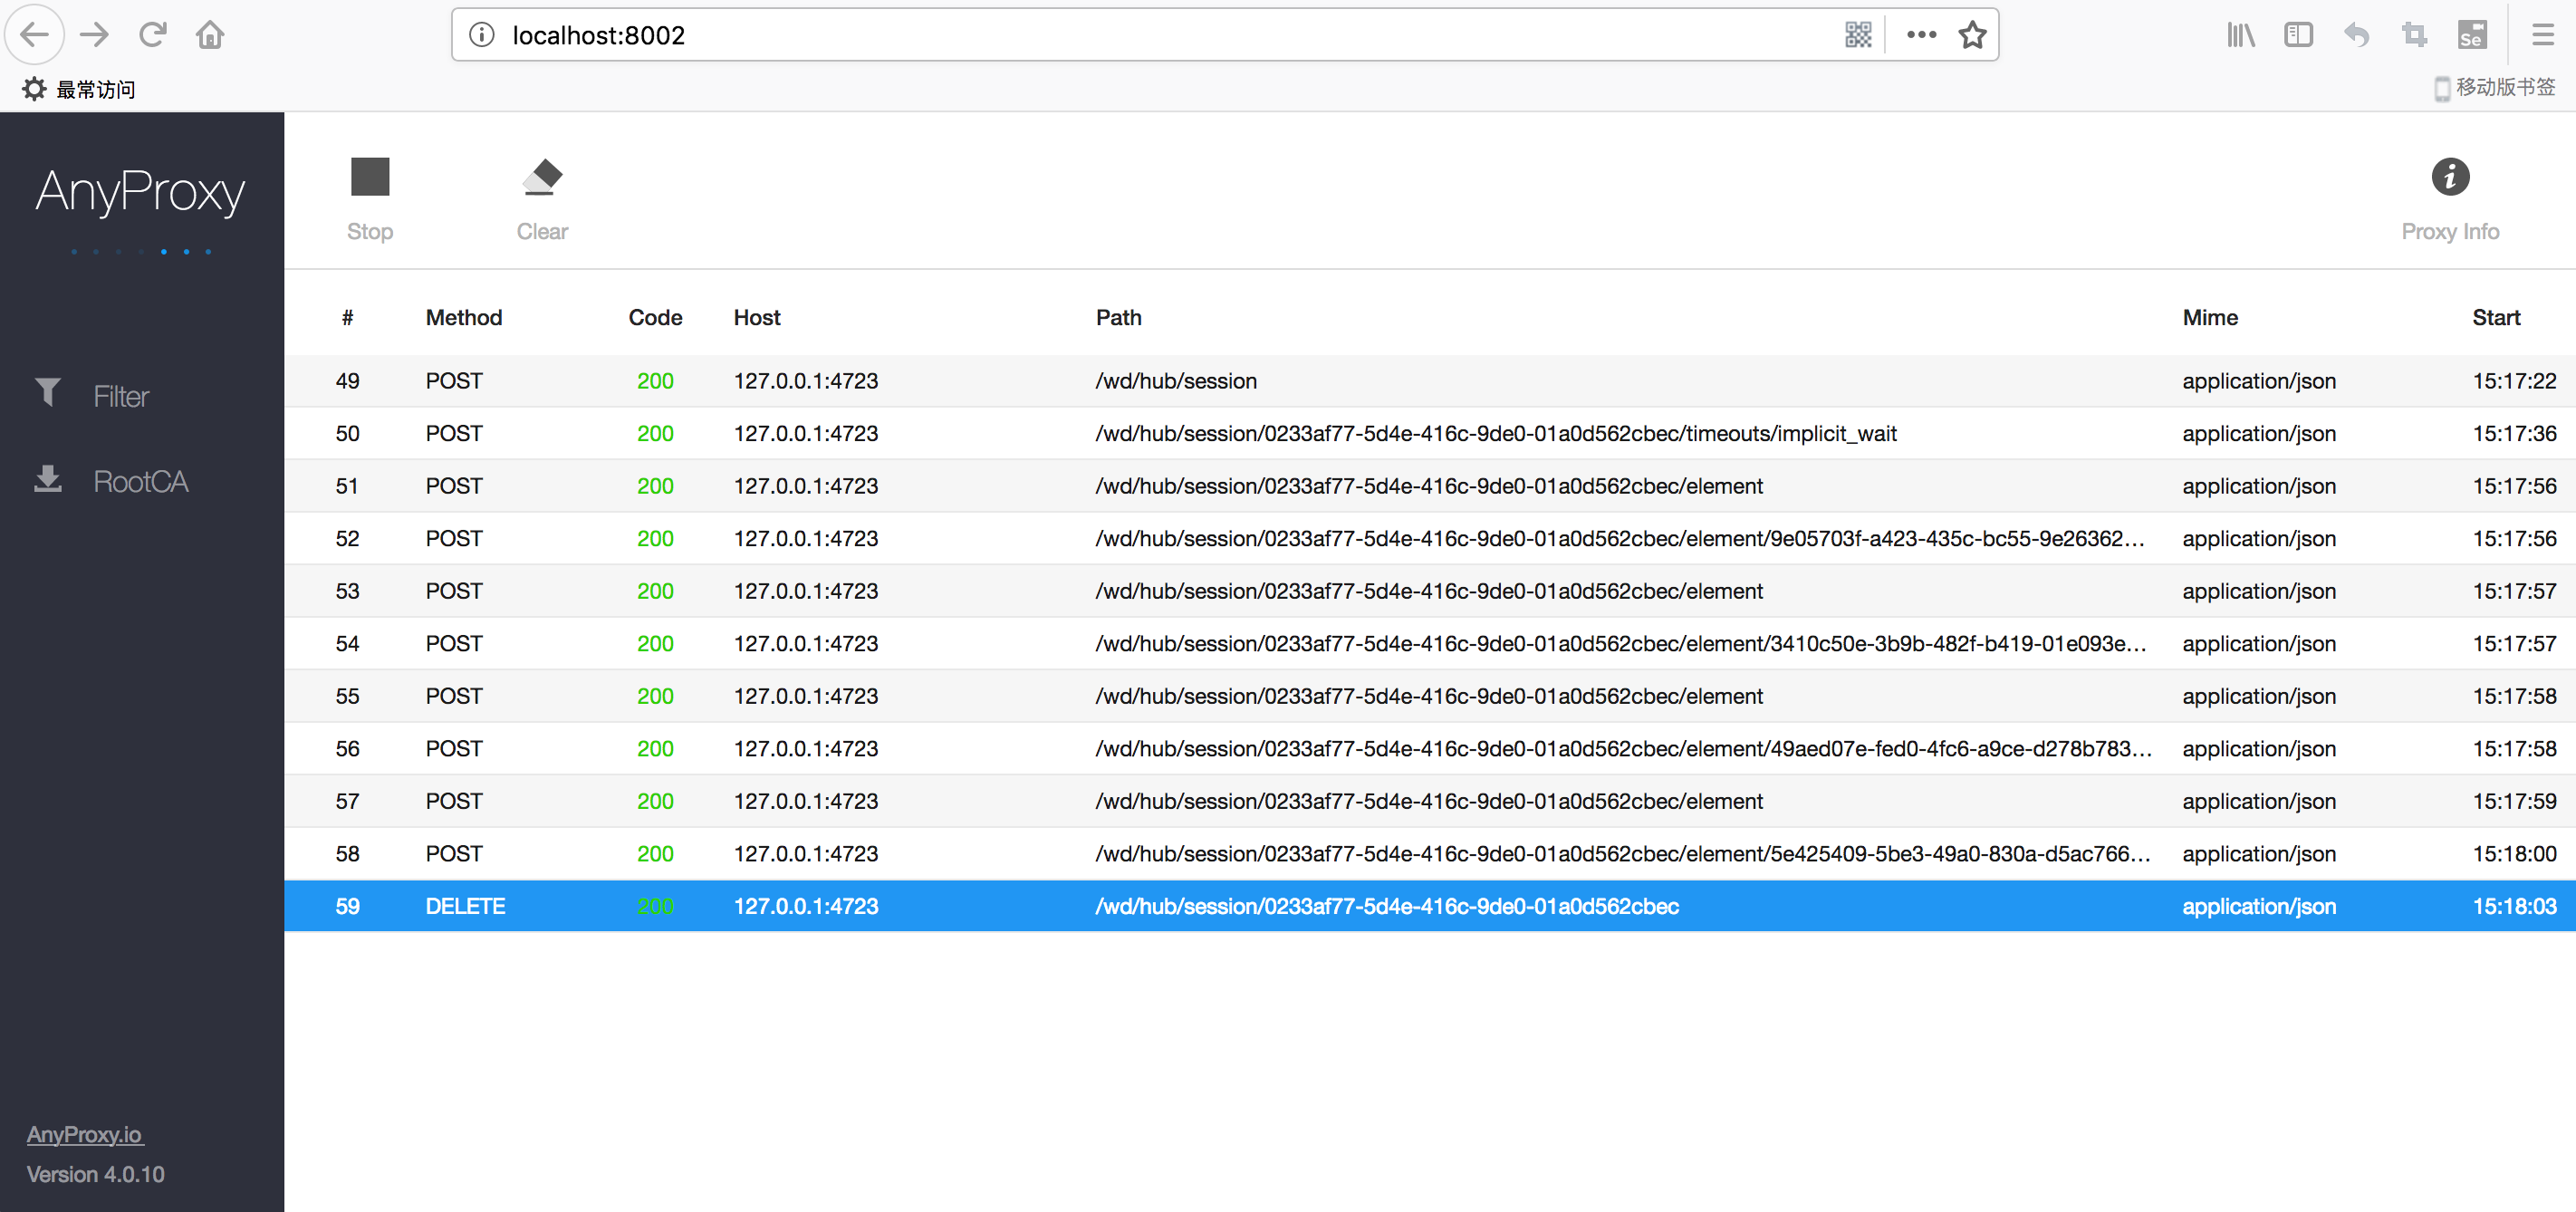
4.Postman模拟脚本发起HTTP请求
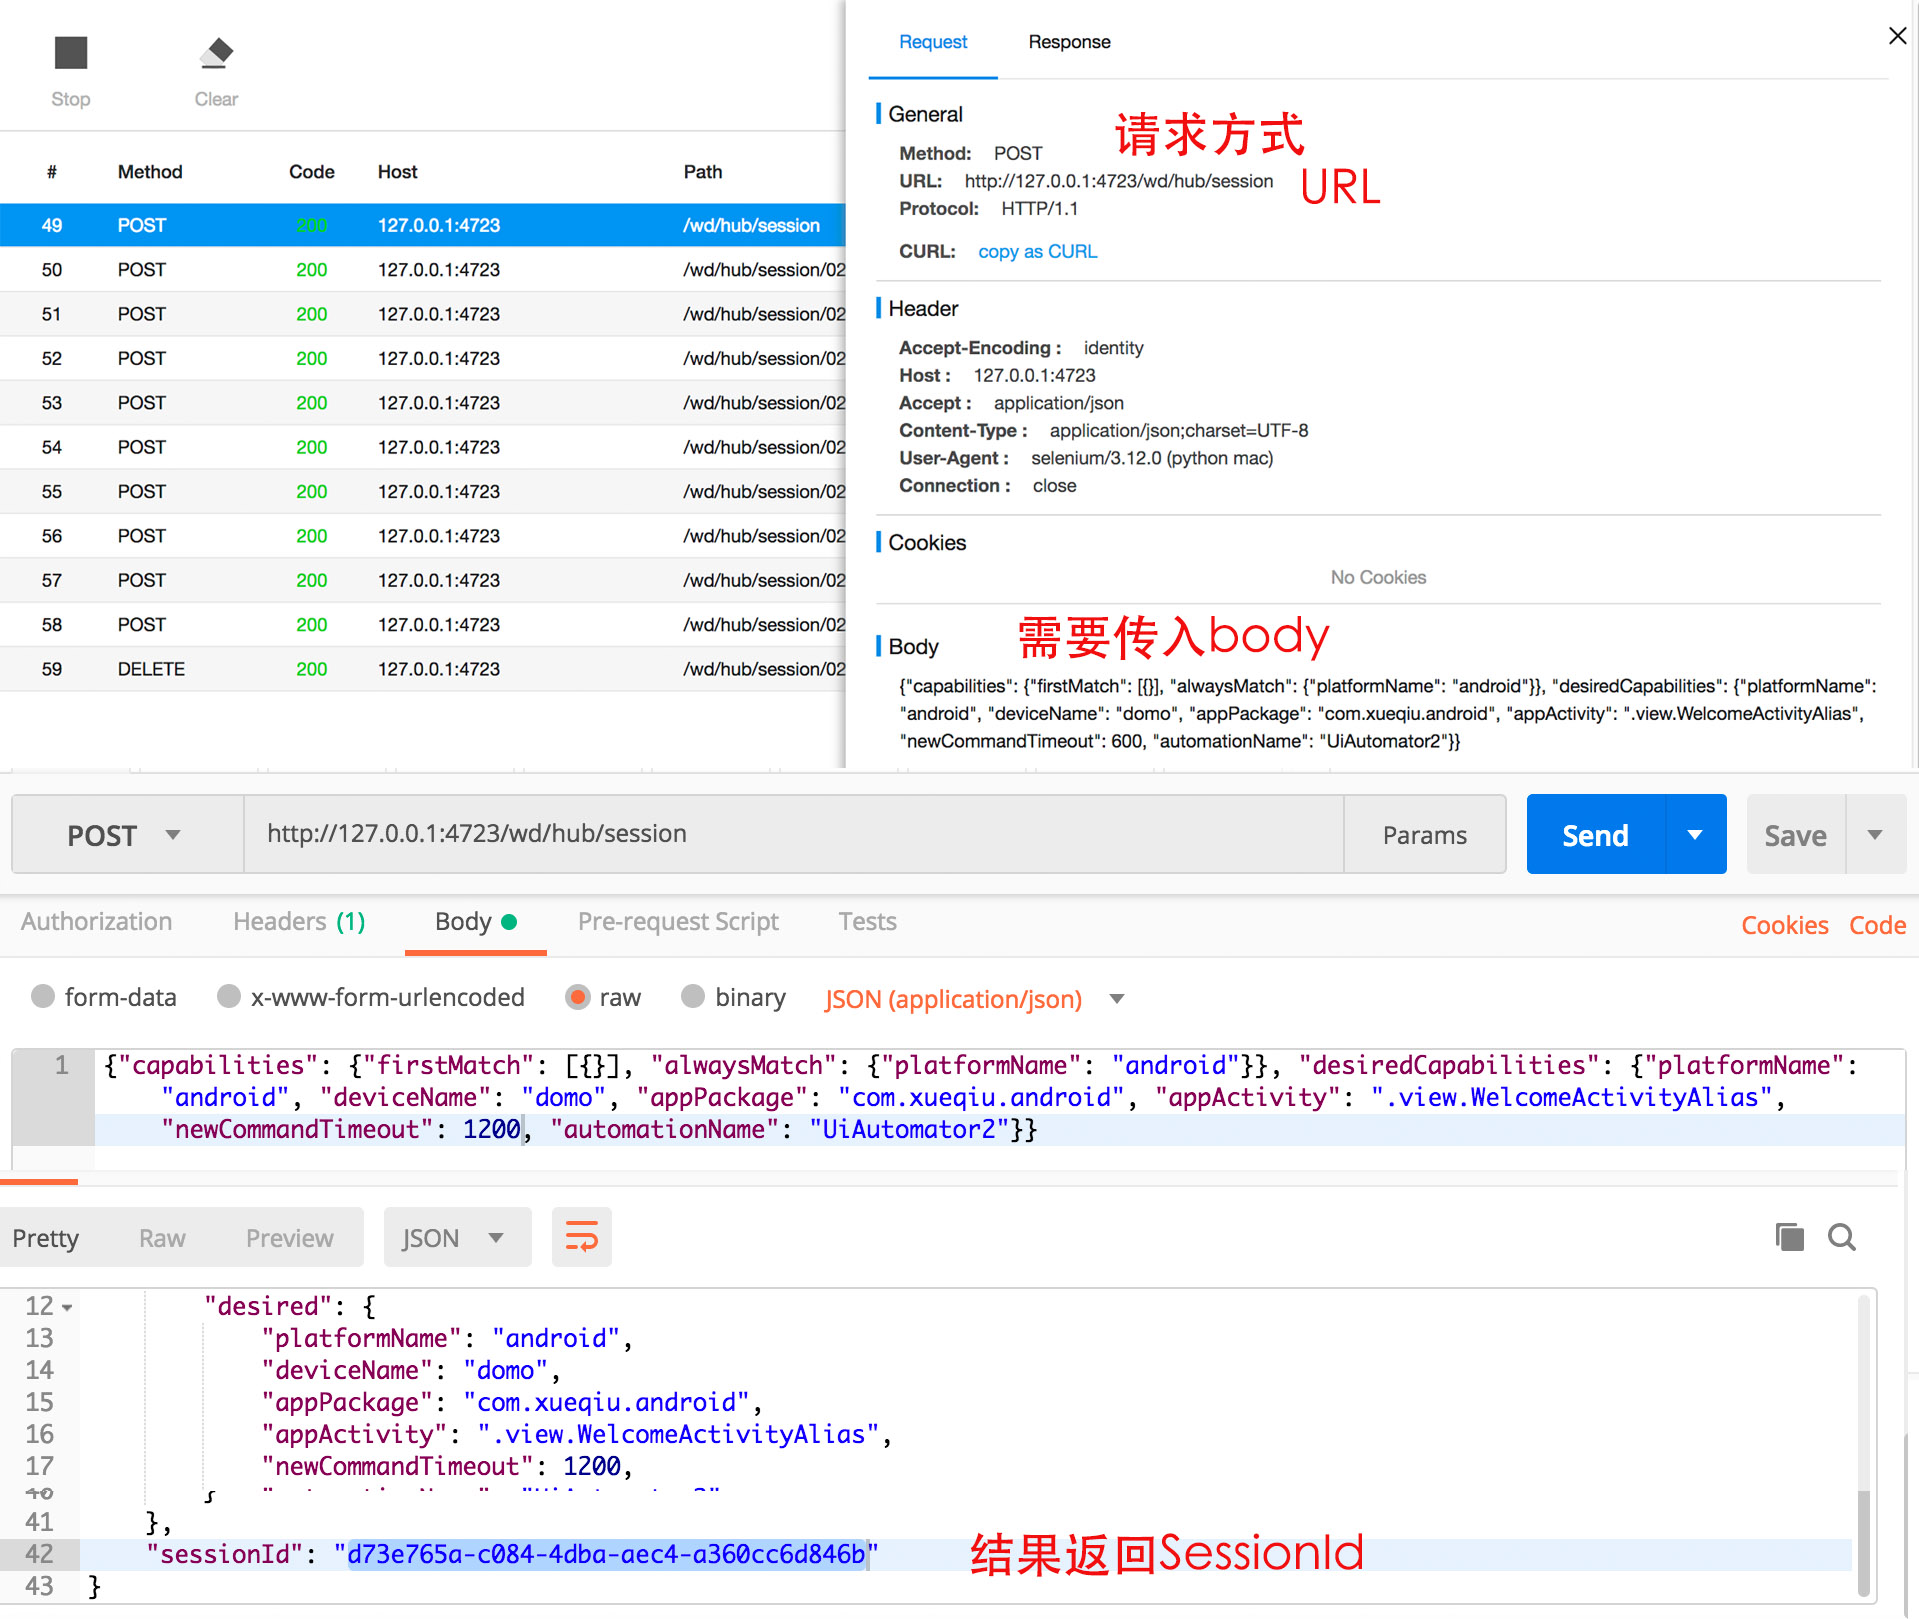
4.1 传入配置,返回SessionId
URL:http://127.0.0.1:4723/wd/hub/session
{"capabilities": {"firstMatch": [{}], "alwaysMatch": {"platformName": "android"}}, "desiredCapabilities": {"platformName": "android", "deviceName": "domo", "appPackage": "com.xueqiu.android", "appActivity": ".view.WelcomeActivityAlias", "newCommandTimeout": 200}}
#对应代码
from appium import webdriver
from time import sleep
caps = {}
caps["platformName"] = "android"
caps["deviceName"] = "domo"
caps["appPackage"] = "com.xueqiu.android"
caps["appActivity"] = ".view.WelcomeActivityAlias"
caps["newCommandTimeout"] = 1200
caps["automationName"] = "UiAutomator2"

driver = webdriver.Remote("http://localhost:4723/wd/hub", caps)
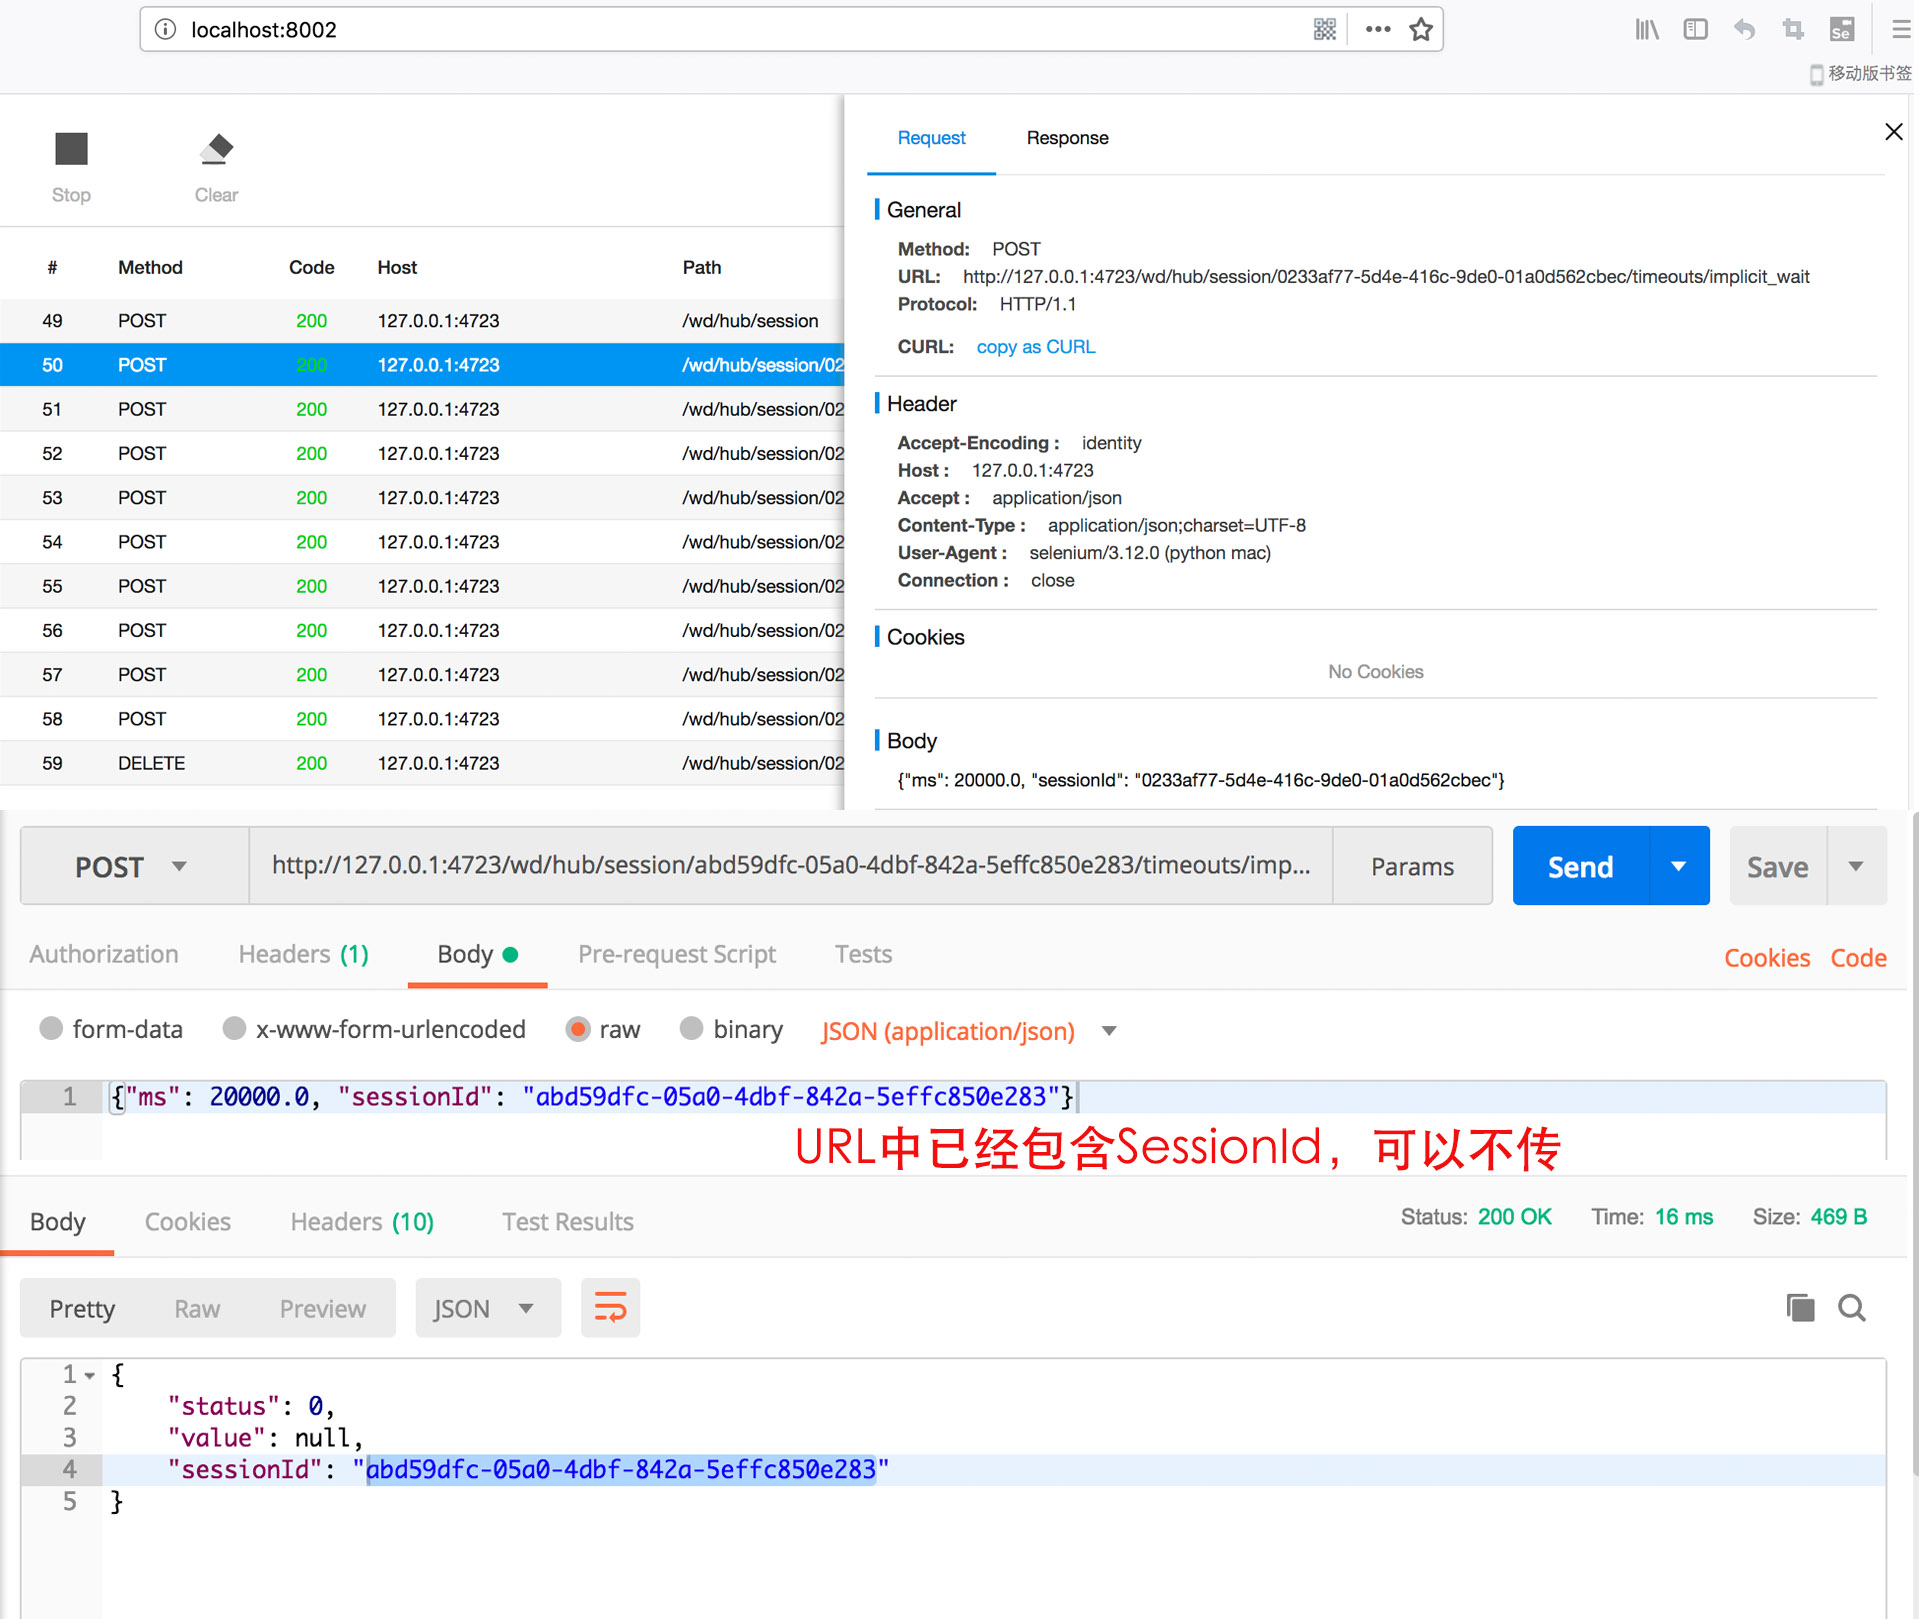
 ## 4.2 等待20秒
URL:http://127.0.0.1:4723/wd/hub/session/${SessionId}/timeouts/implicit_wait
```#python
#对应代码
sleep(20)
```
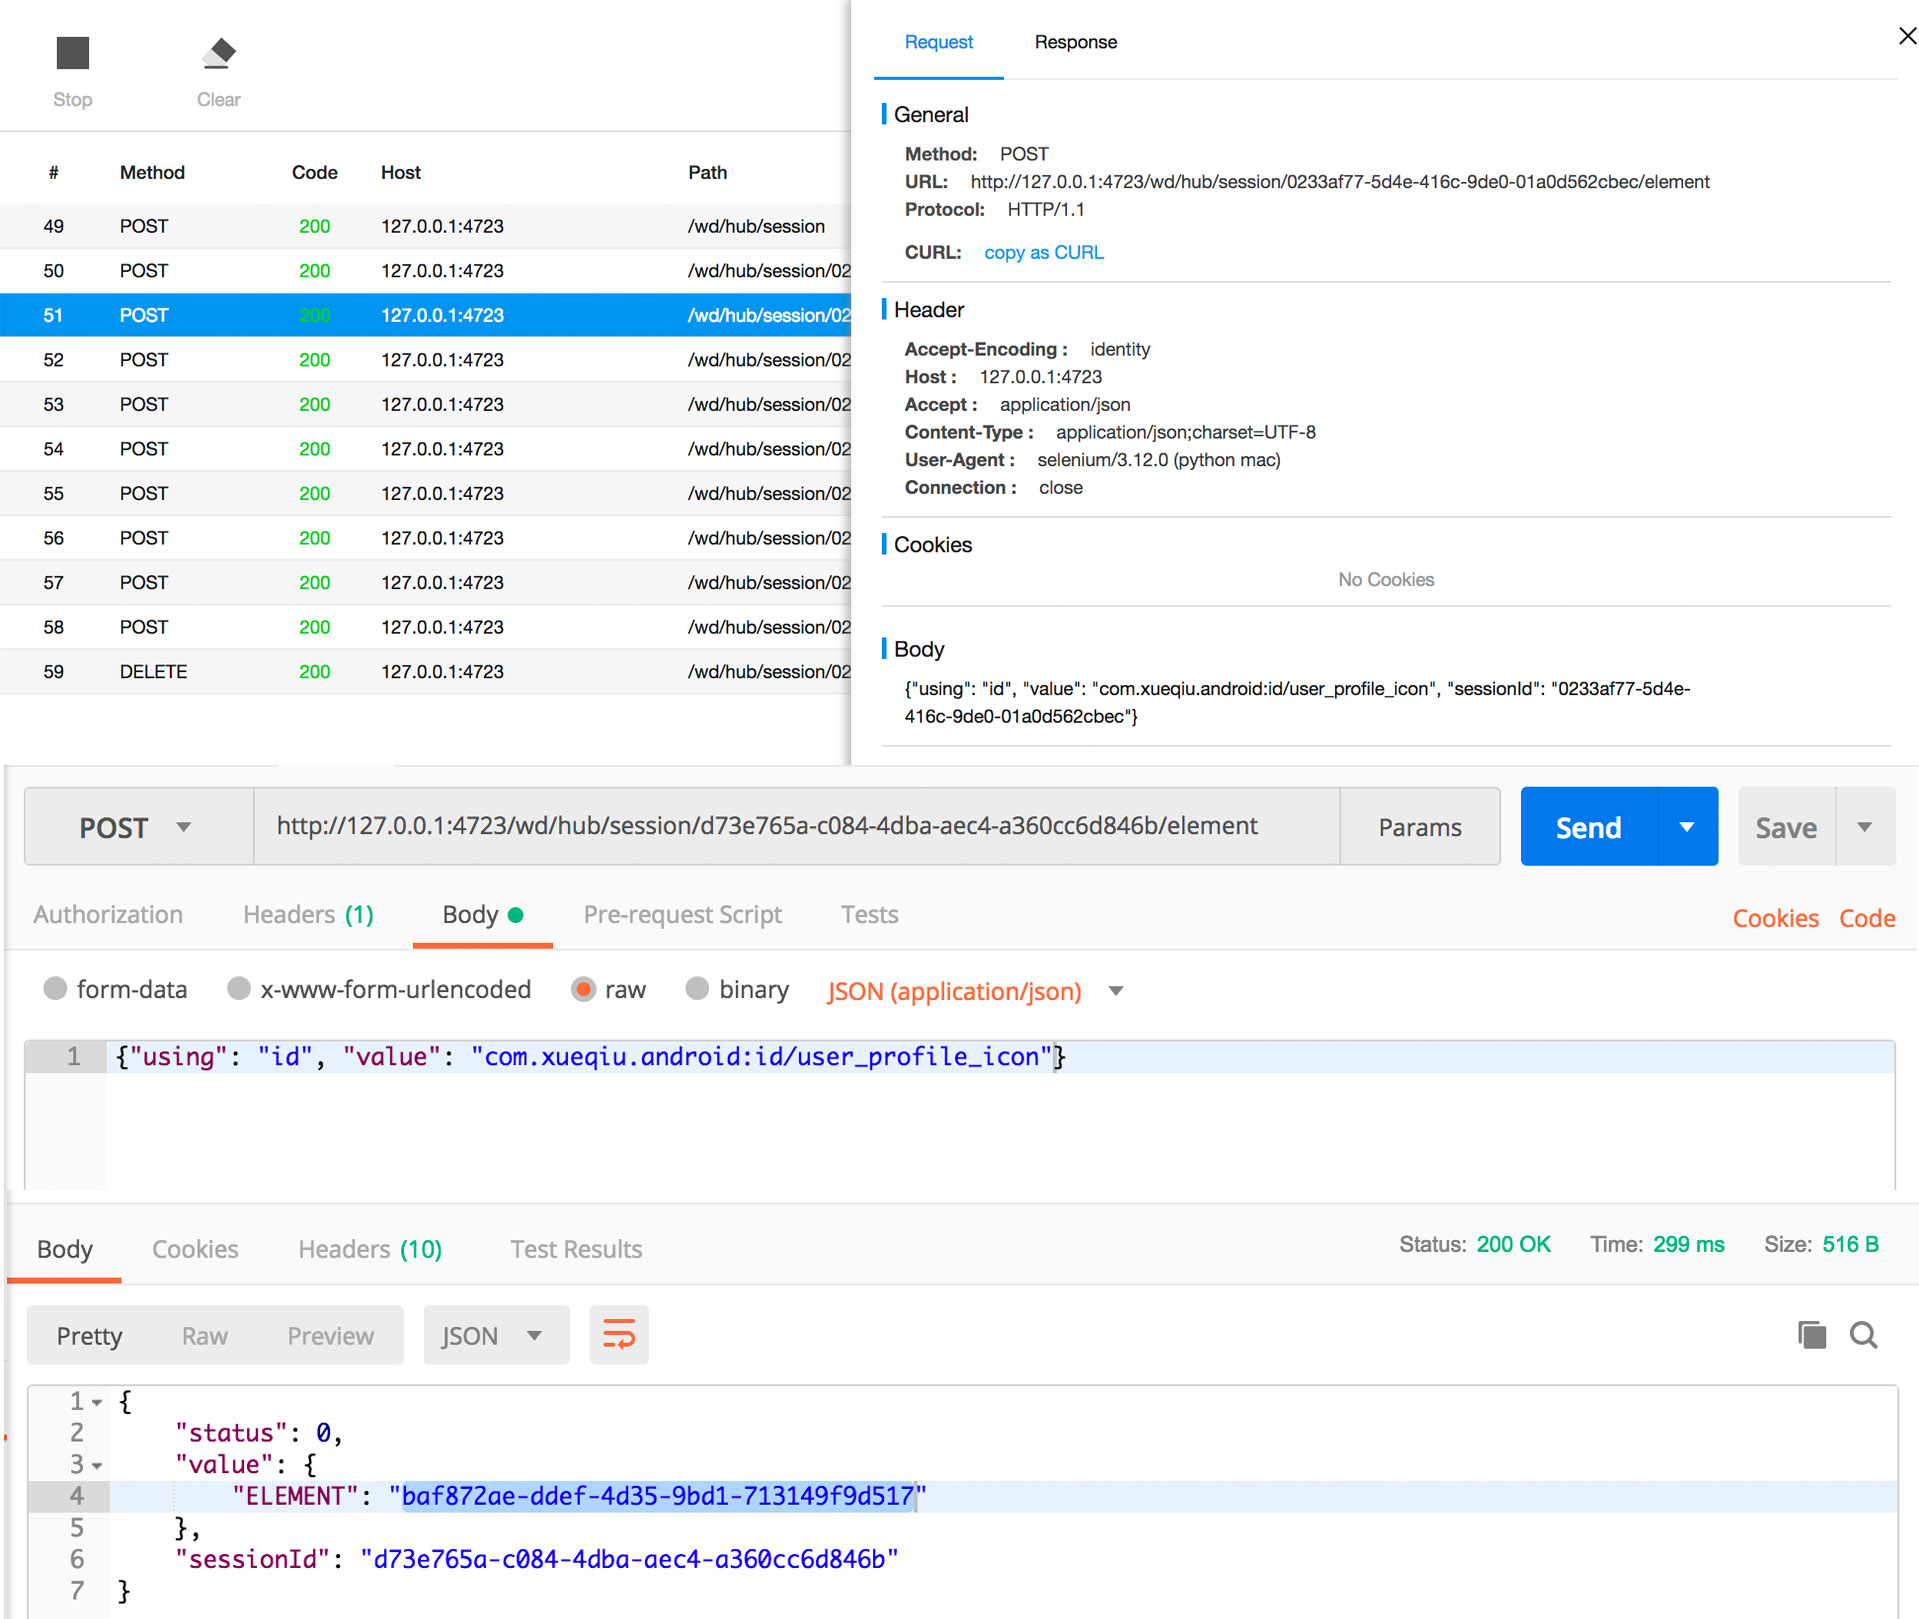
 ## 4.3 传入控件信息,返回ELEMENT的值,在随后的操作中会用到
URL: http://127.0.0.1:4723/wd/hub/session/${SessionId}/element
body传入控件信息:com.xueqiu.android:id/user_profile_icon
 ## 4.4 针对元素进行操作
URL: http://127.0.0.1:4723/wd/hub/session/${SessionId}/element/${Element}/click
```#python
#对应脚本
driver.find_element_by_id("com.xueqiu.android:id/user_profile_icon").click()
```
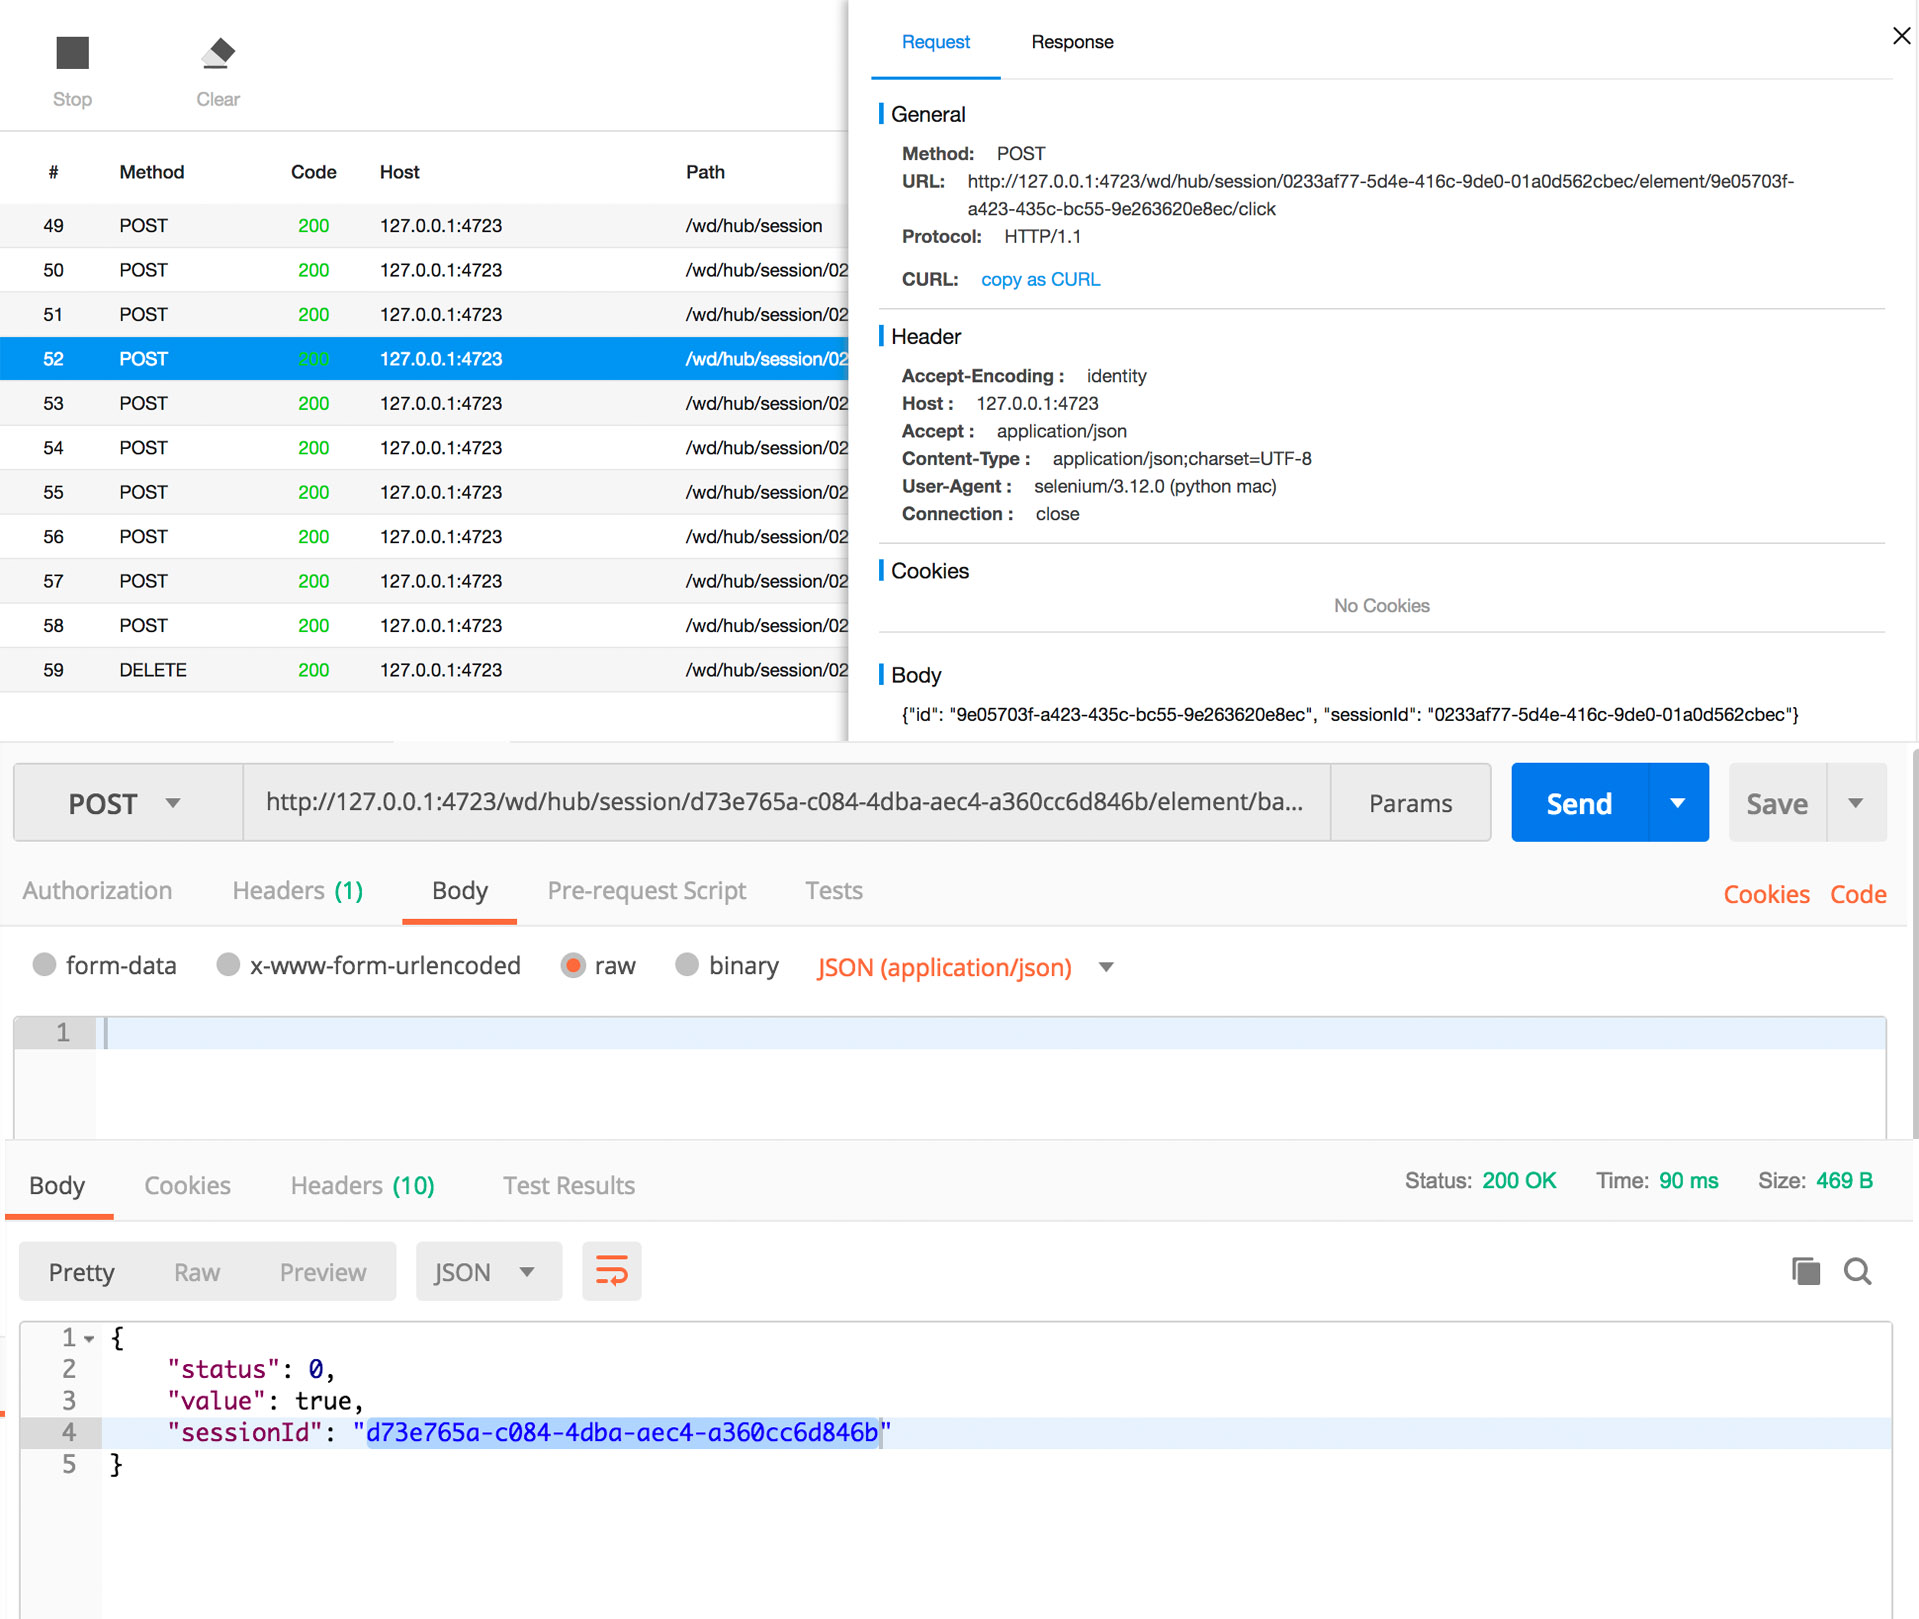
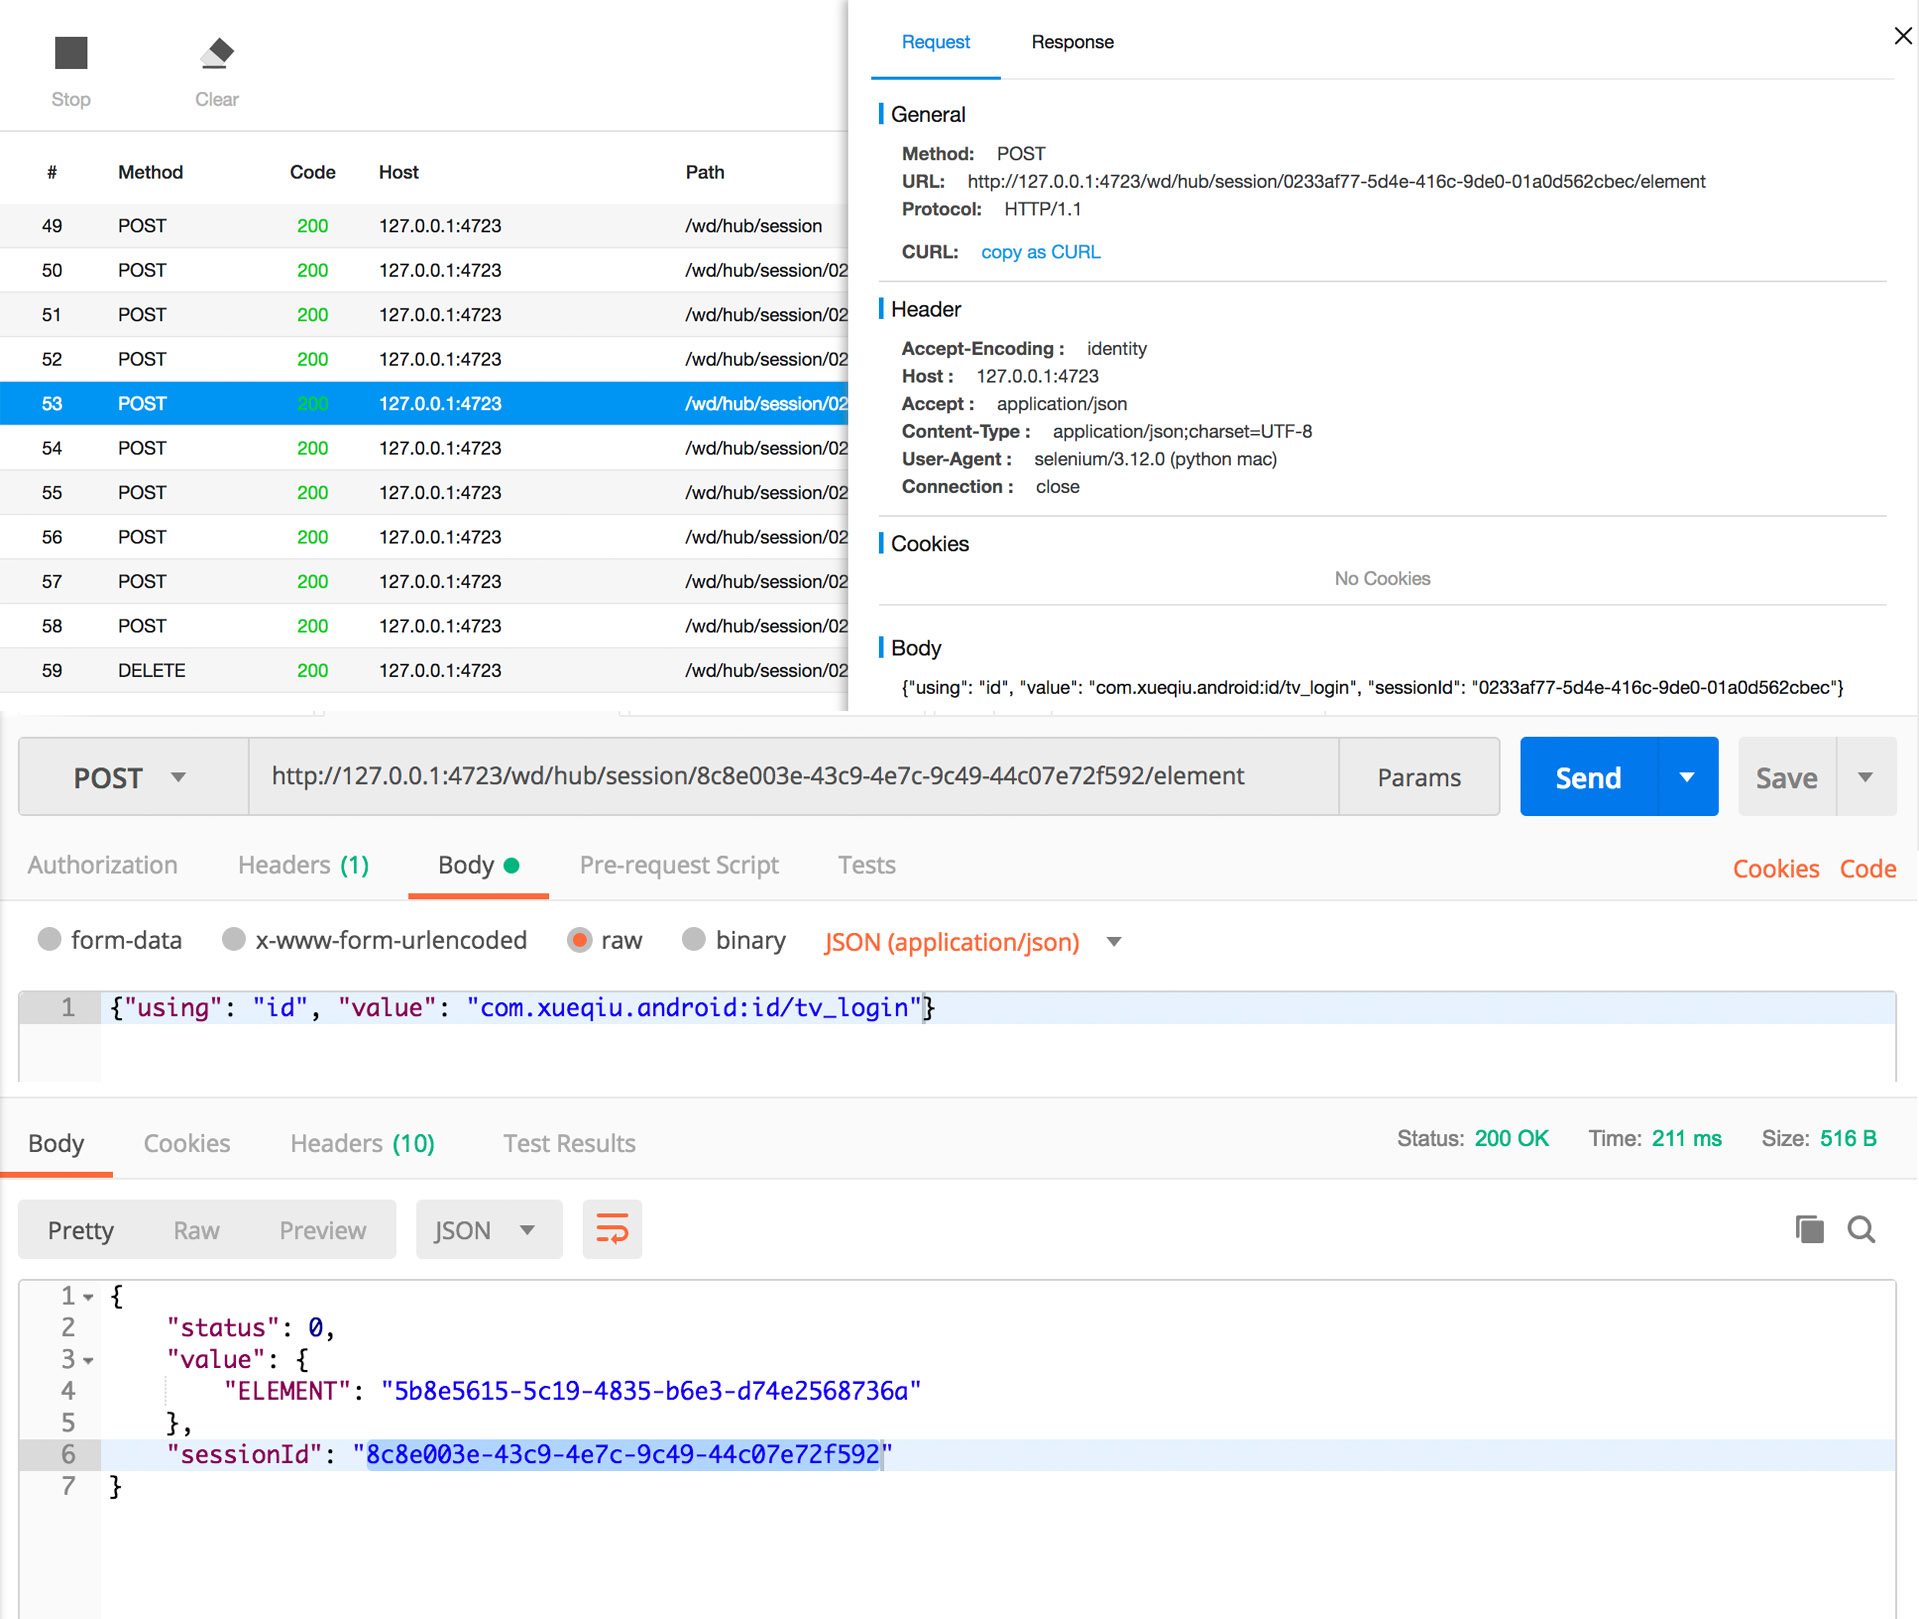
4.5 传入控件信息,返回Element的值
URL: http://127.0.0.1:4723/wd/hub/session/${SessionID}/element
body传入控件信息:com.xueqiu.android:id/tv_login
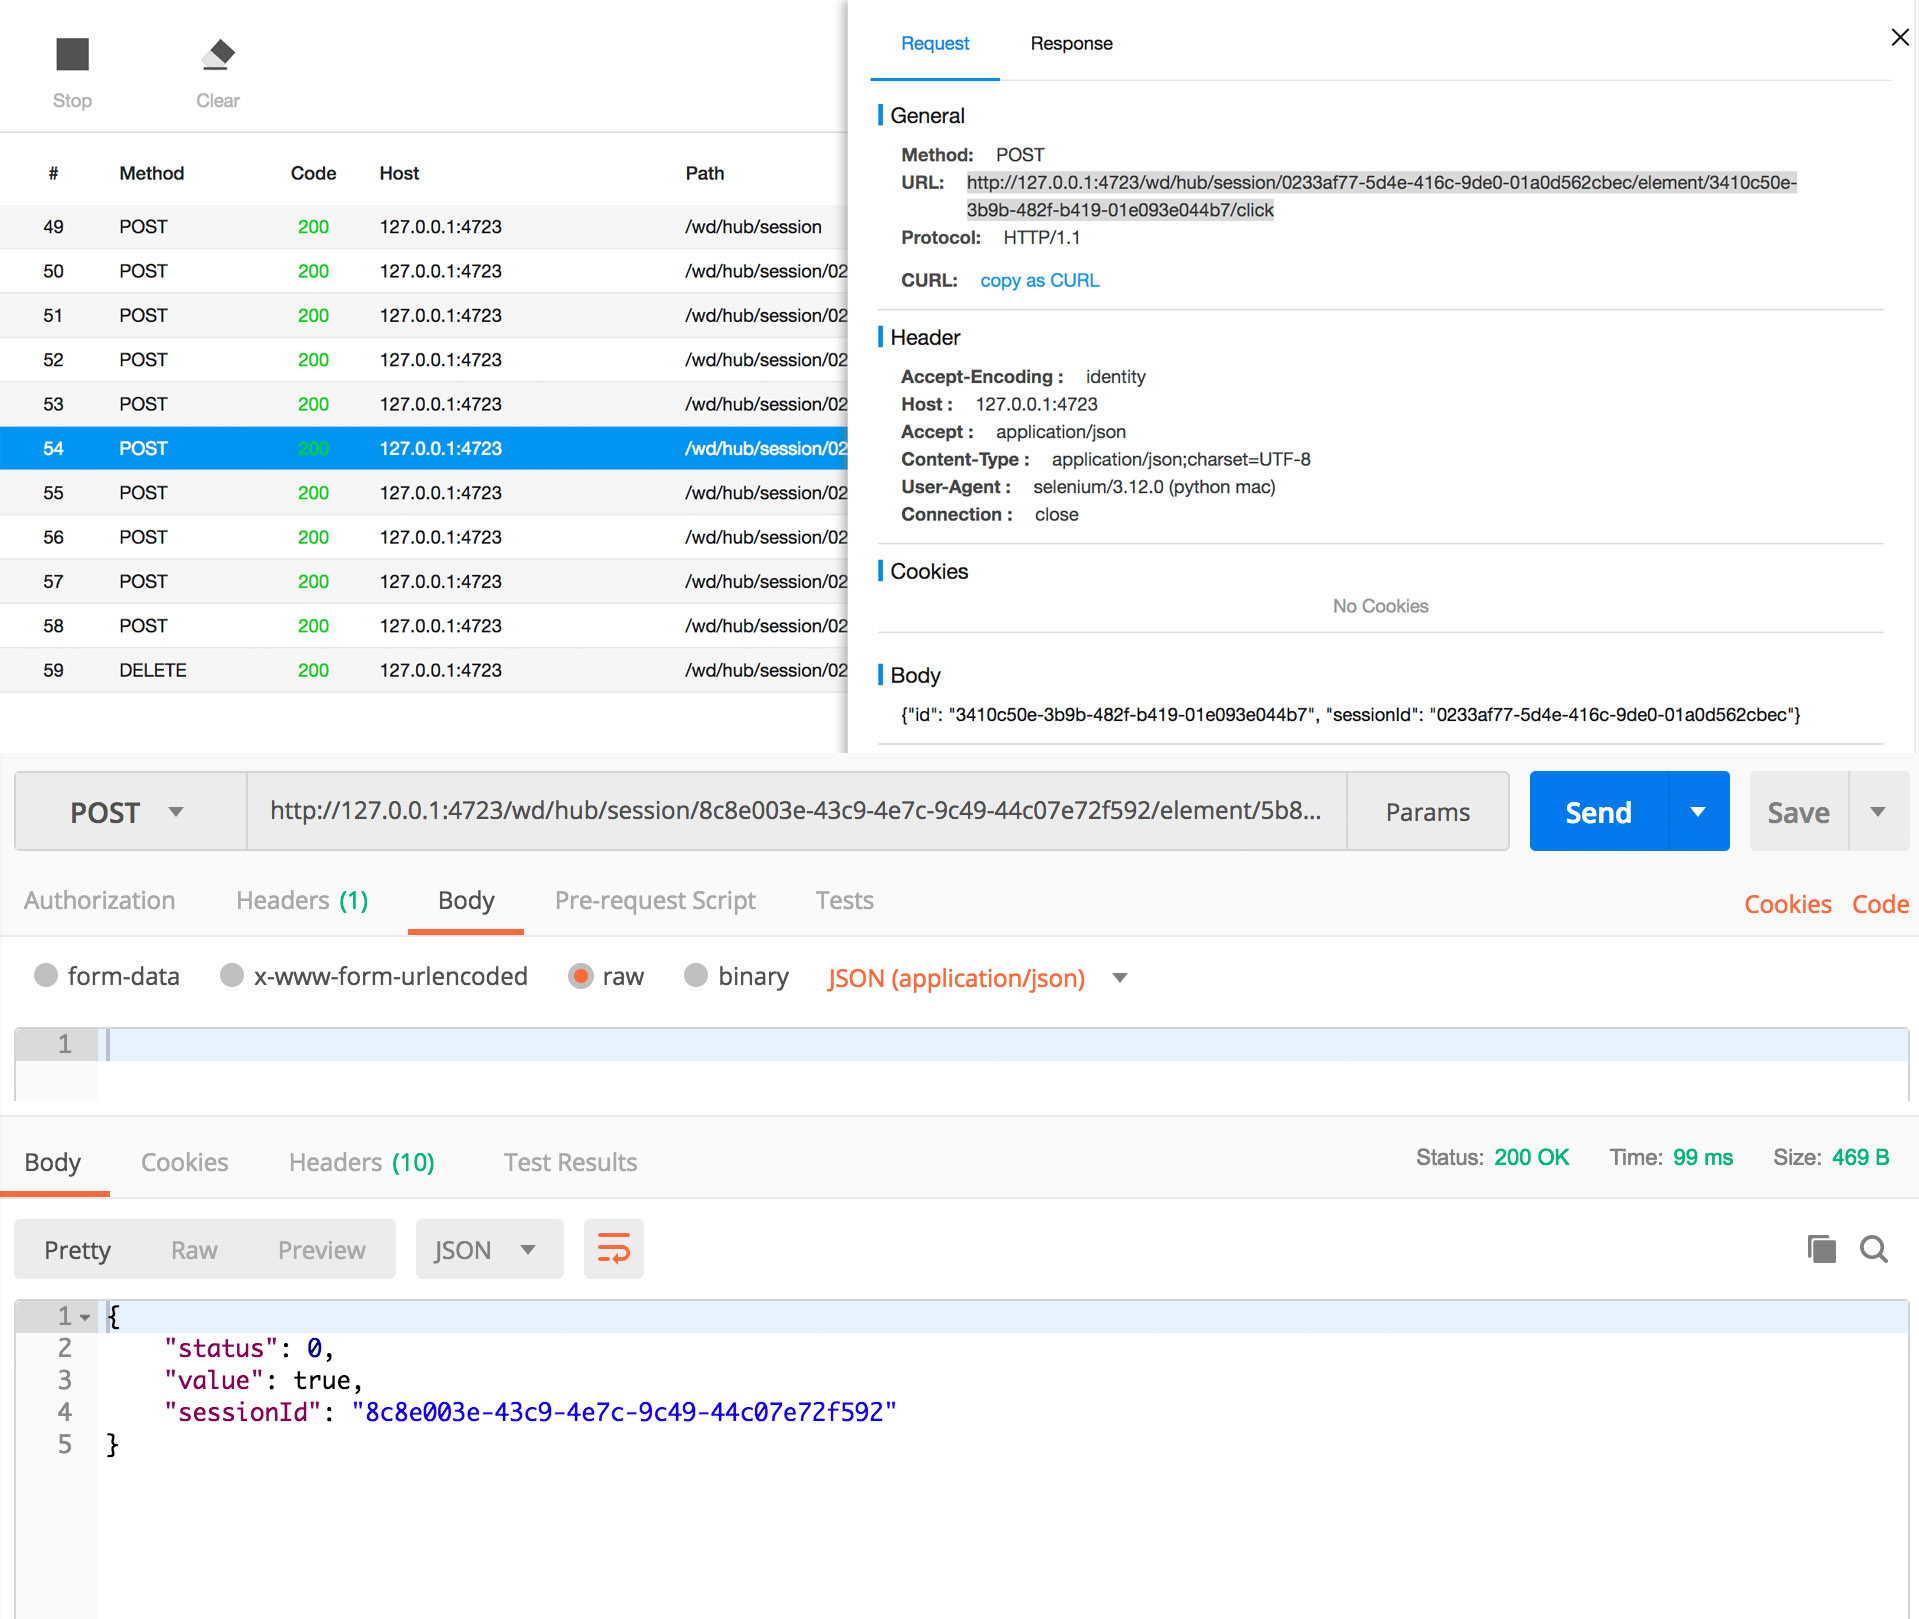
4.6 针对元素进行操作
URL: http://127.0.0.1:4723/wd/hub/session/${SessionId}/element/${ELEMENT}/click
#对应脚本
driver.find_element_by_id("com.xueqiu.android:id/tv_login").click()
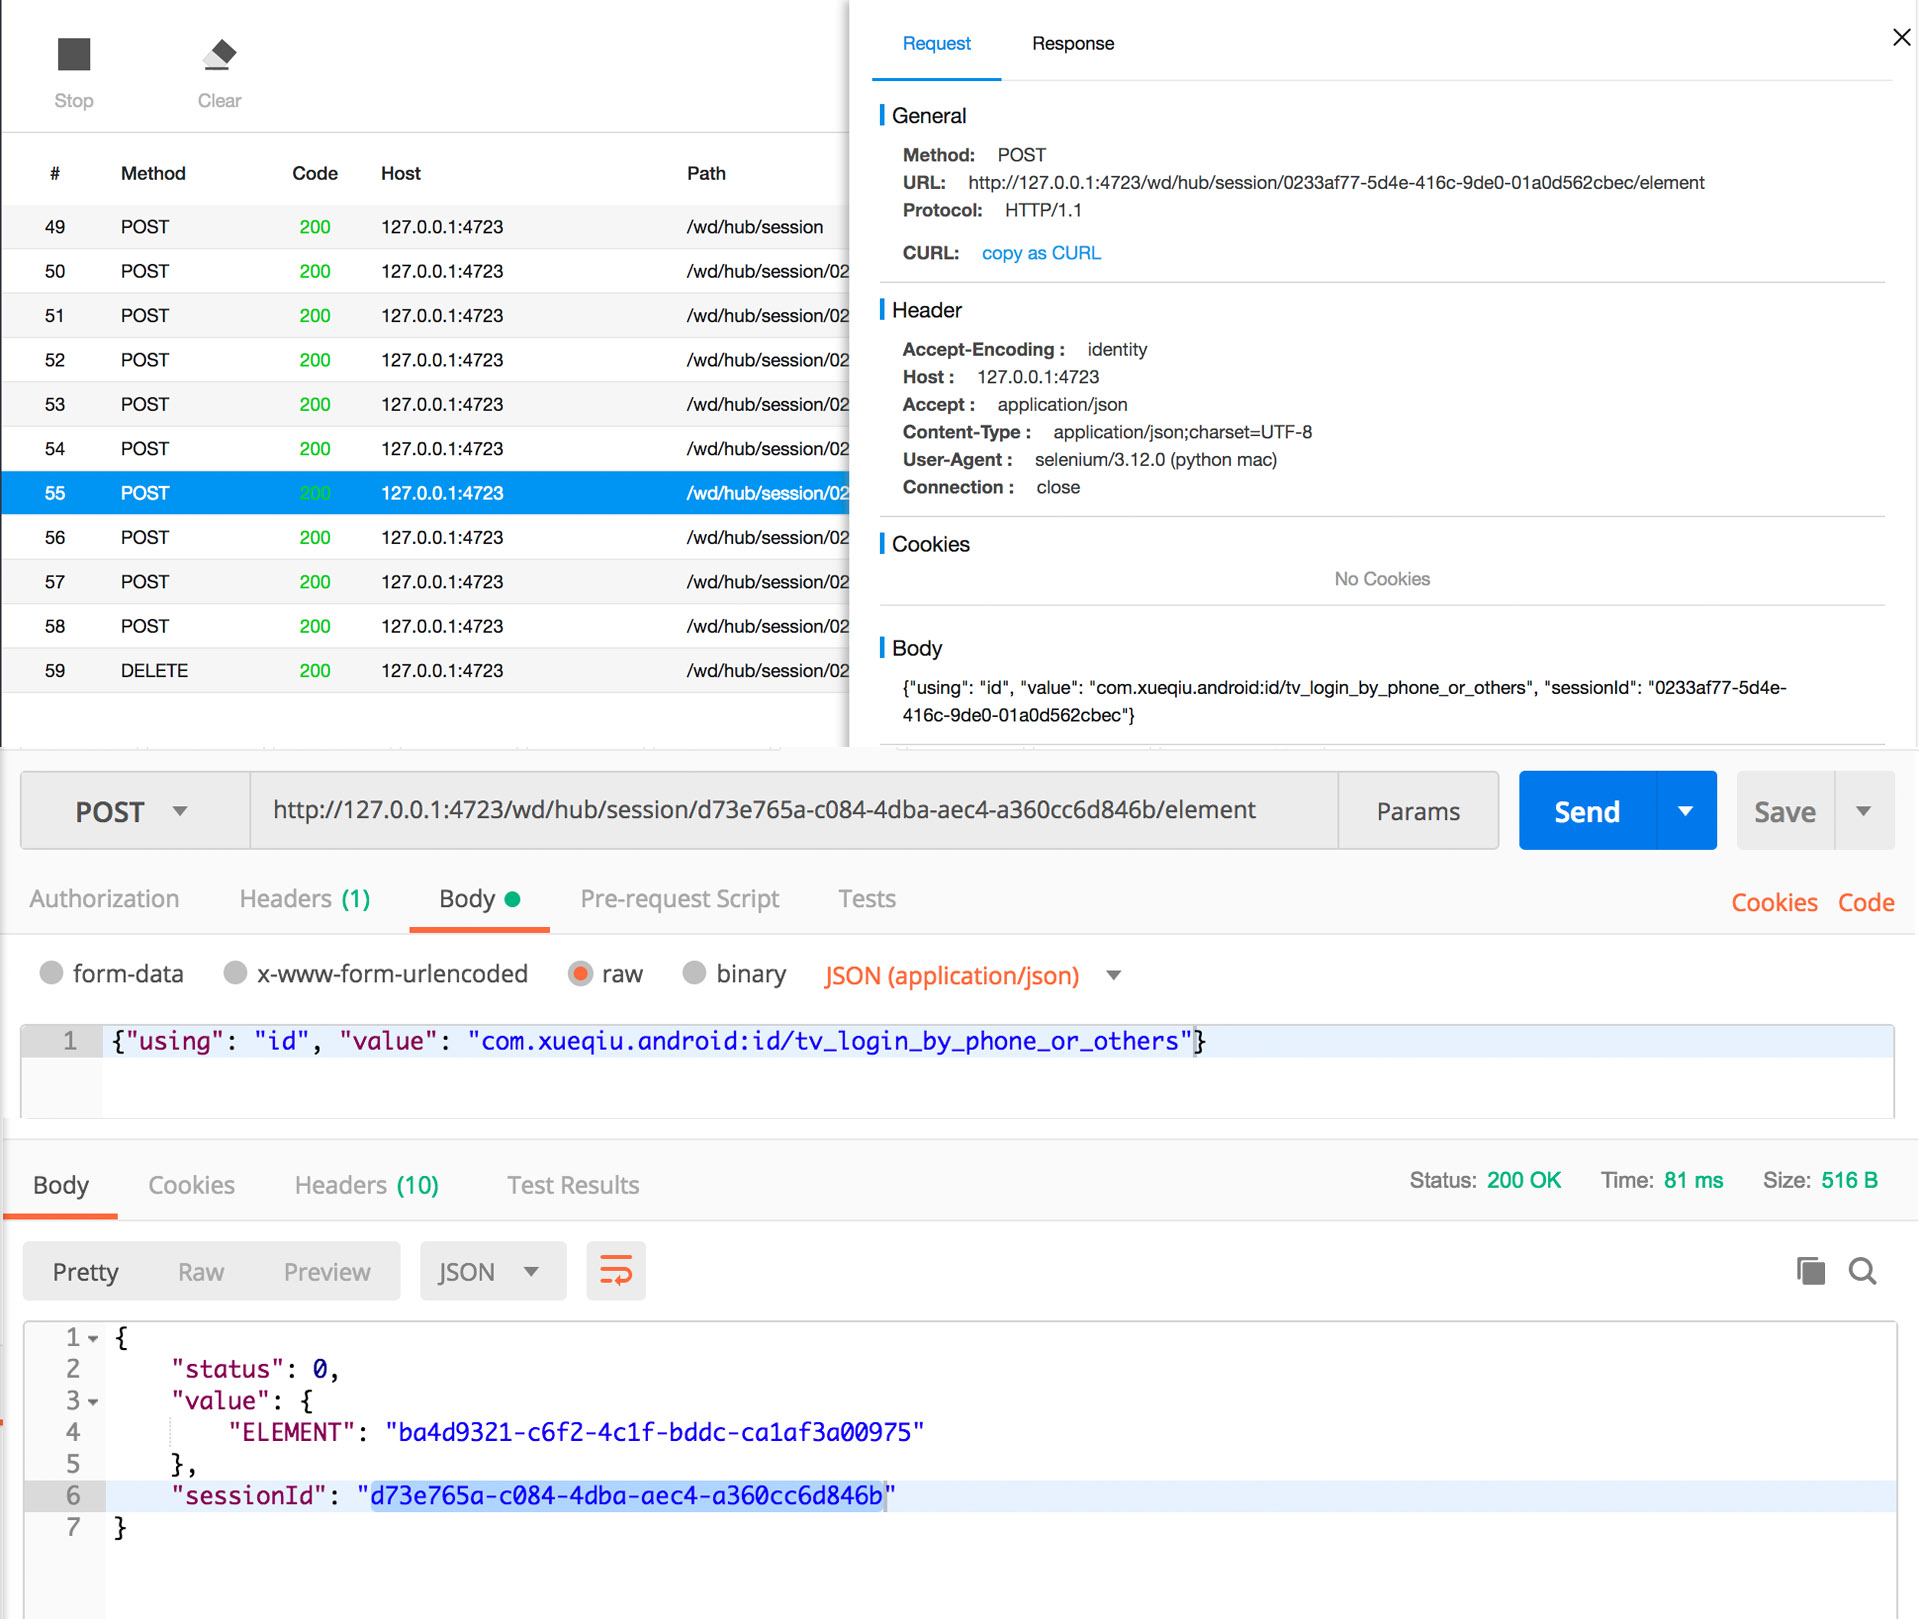
4.7 传入控件信息,返回ELEMENT的值
URL: http://127.0.0.1:4723/wd/hub/session/${SessionId}/element
body传入控件信息: com.xueqiu.android:id/tv_login_by_phone_or_others
4.8 针对元素进行操作
URL:http://127.0.0.1:4723/wd/hub/session/${SessionId}/element/${ELEMENT}/click
#对应脚本
driver.find_element_by_id("com.xueqiu.android:id/tv_login_by_phone_or_others").click()
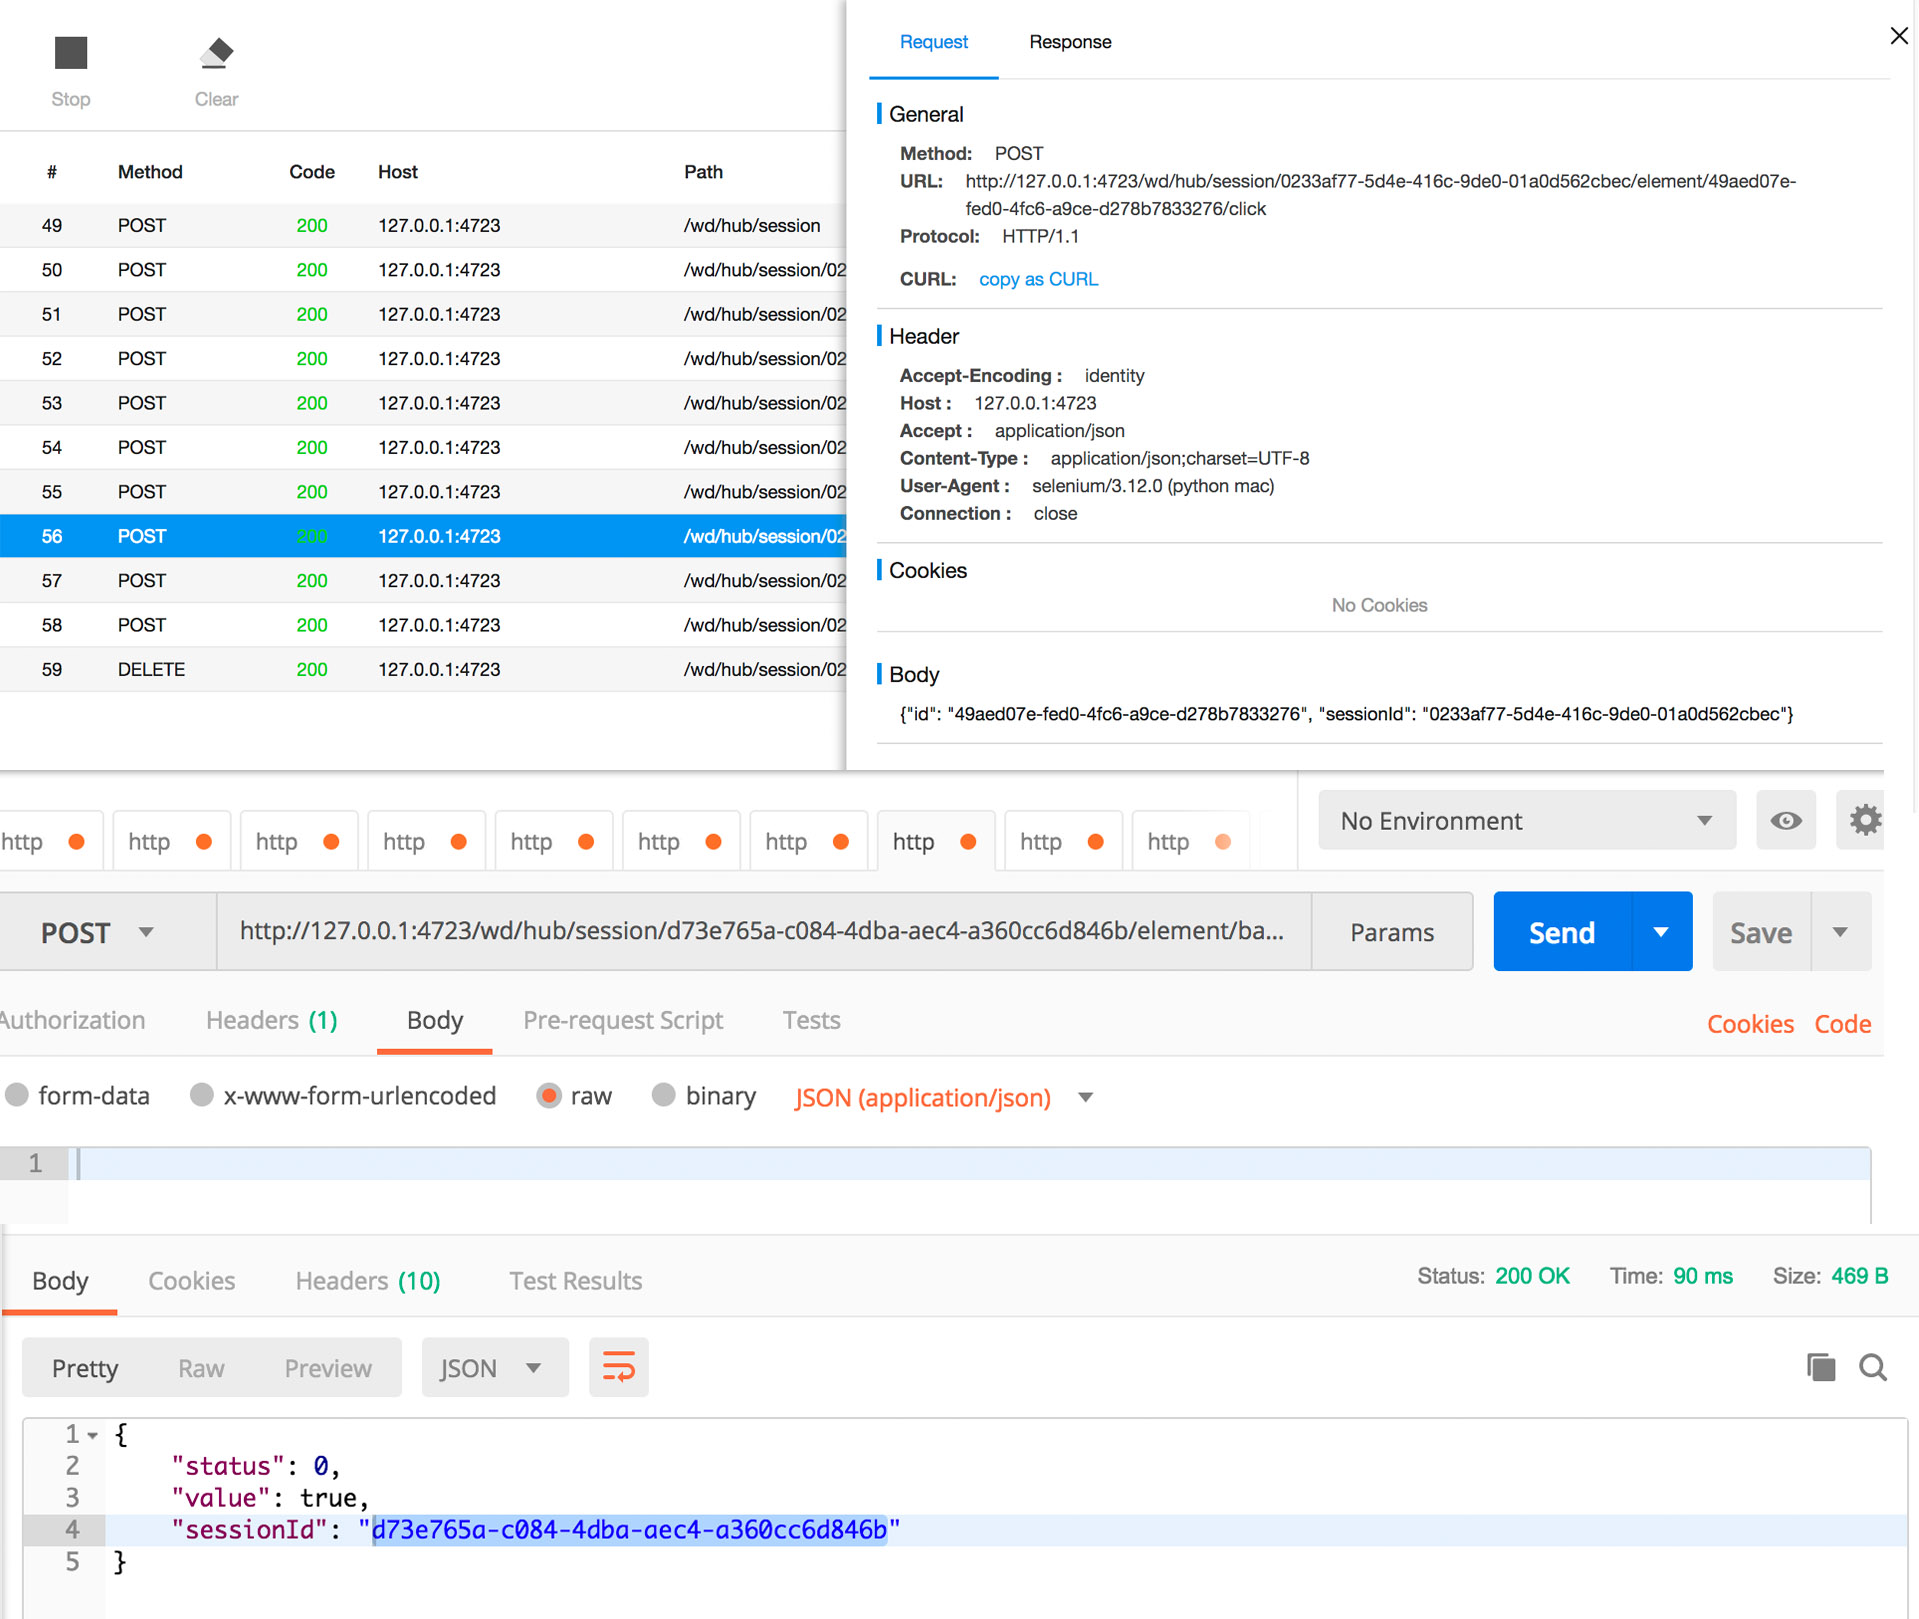
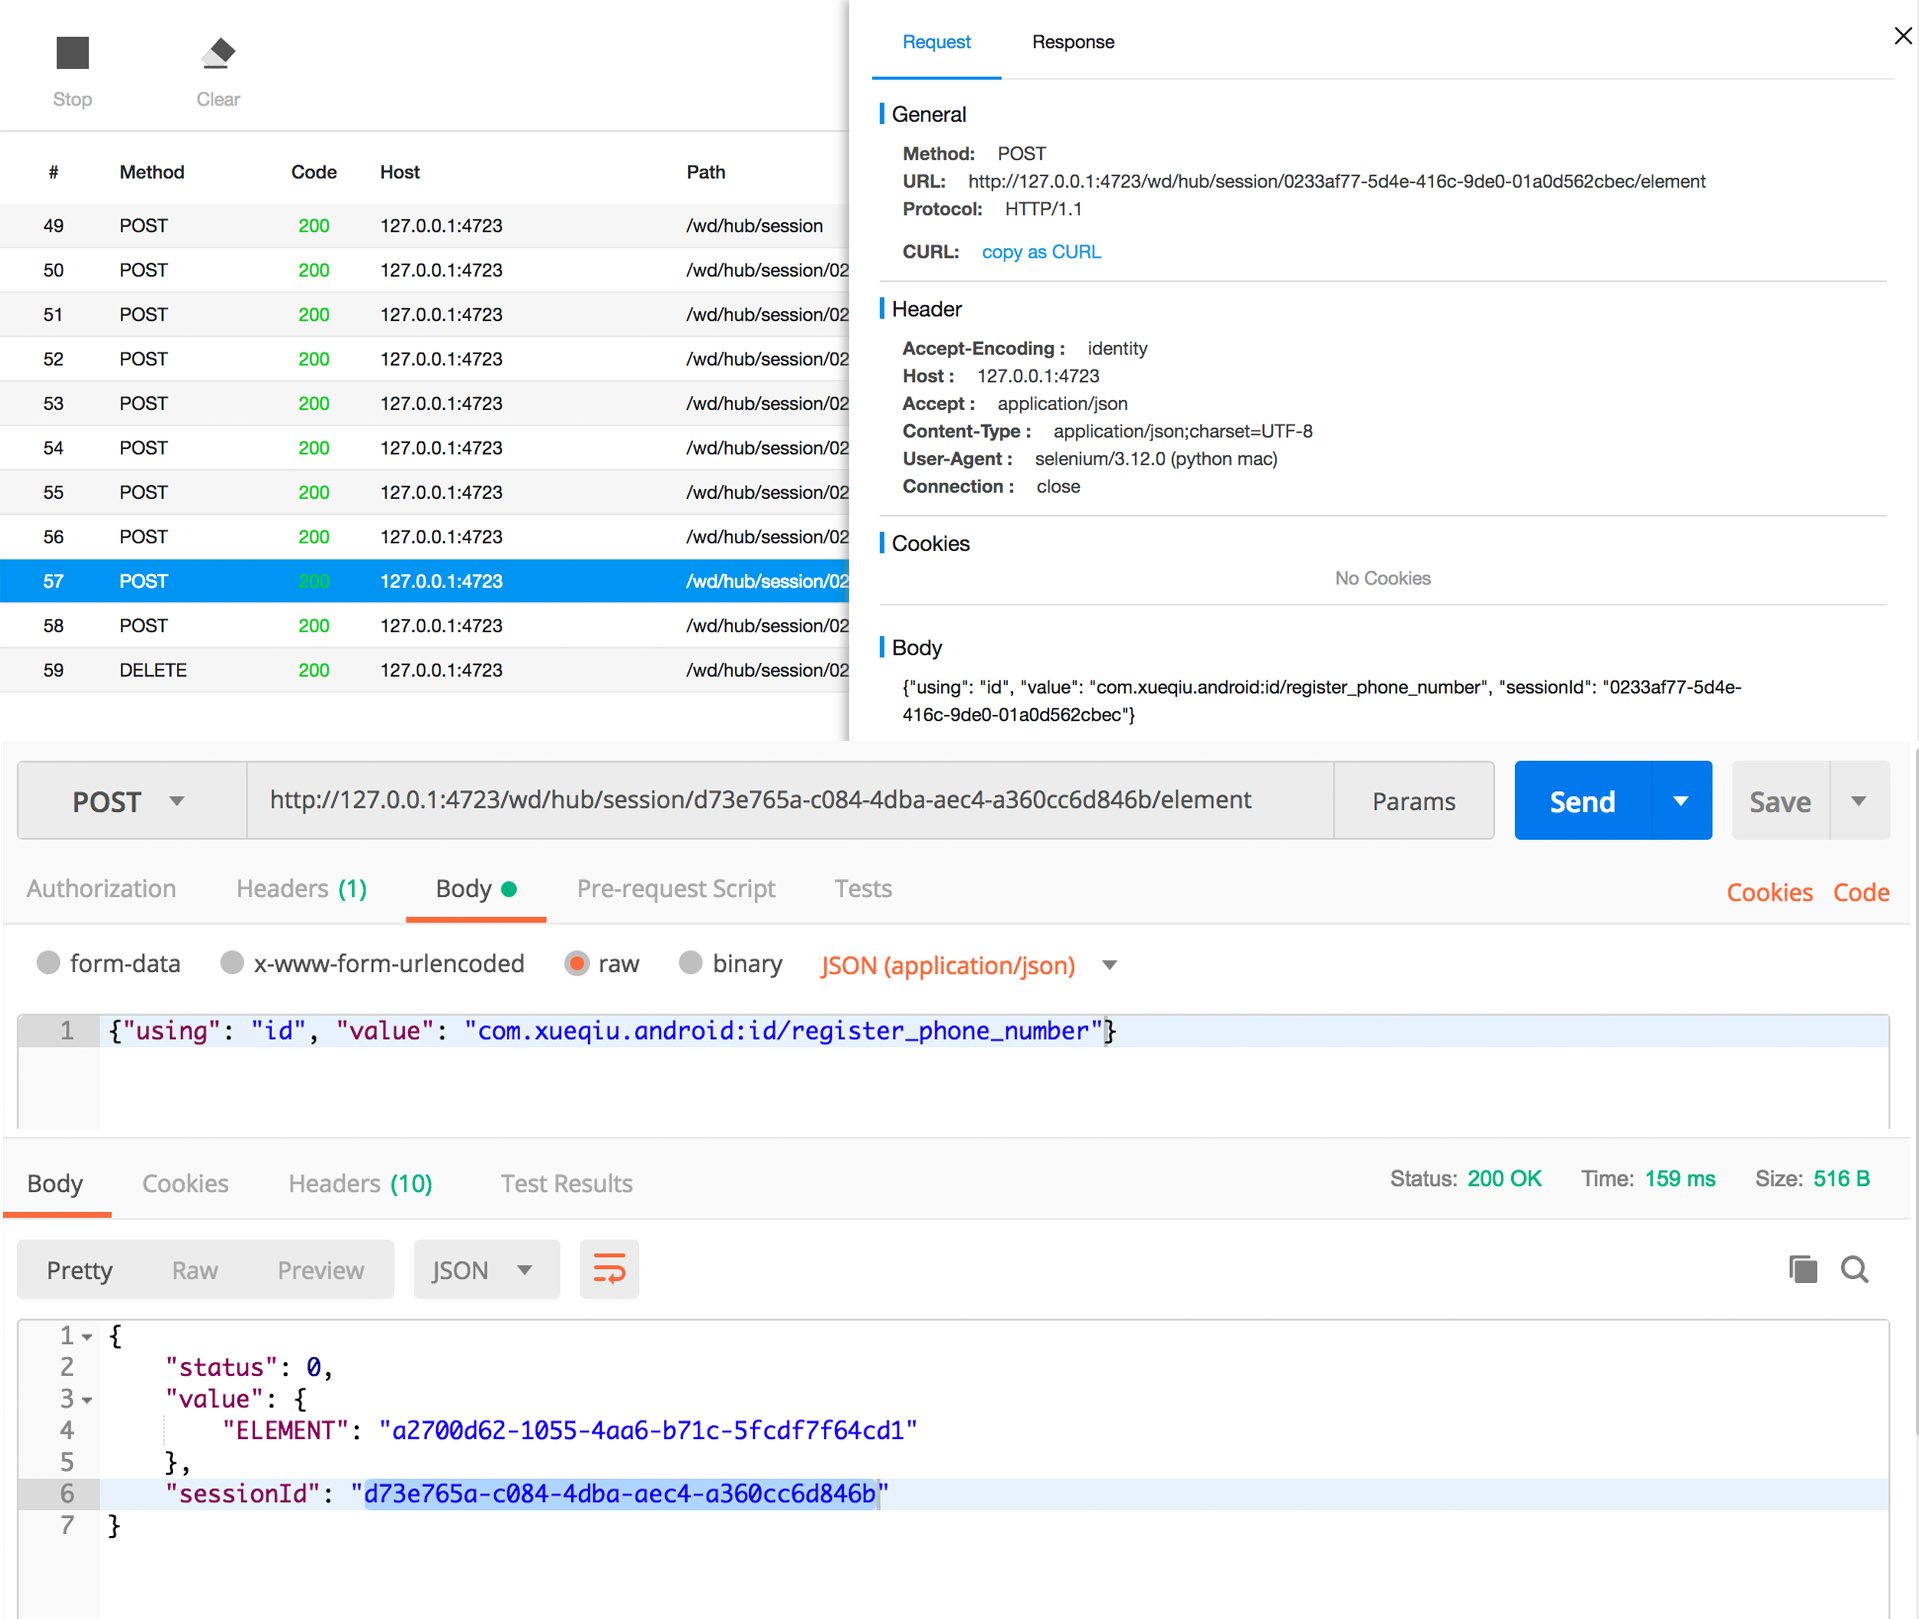
4.9 传入控件信息,返回ELEMENT的值
URL: http://127.0.0.1:4723/wd/hub/session/${SessionId}/element
body传入控件信息: com.xueqiu.android:id/register_phone_number
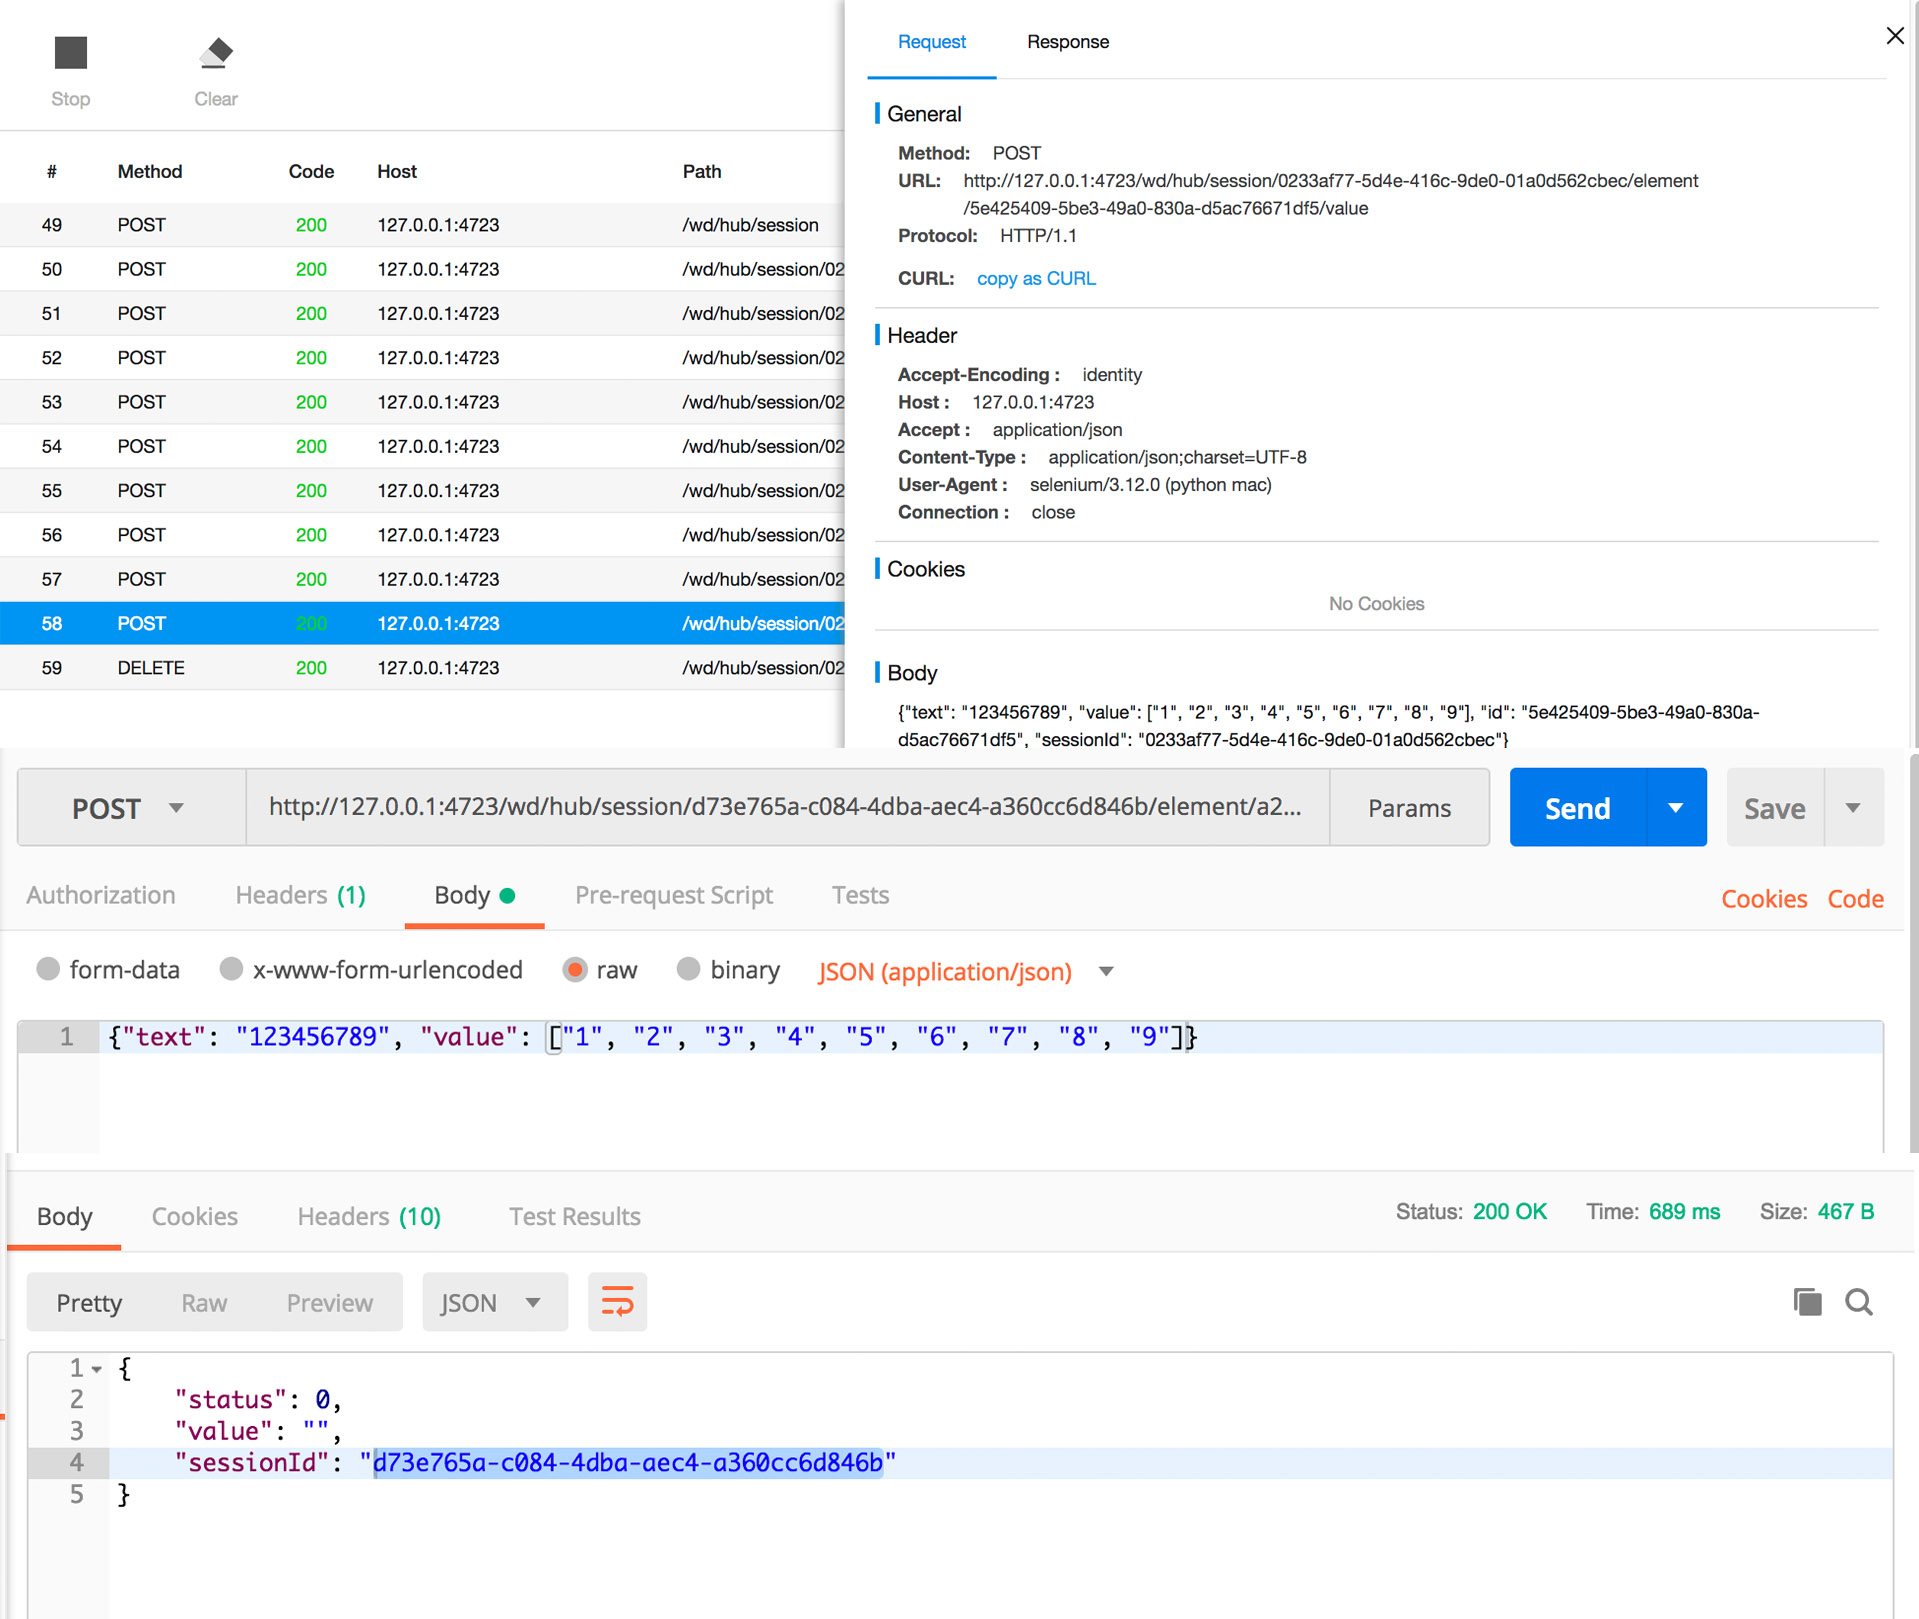
5.10 针对元素进行操作
URL: http://127.0.0.1:4723/wd/hub/session/${SessionId}/element/${ELEMENT}/value
#对应脚本
driver.find_element_by_id("com.xueqiu.android:id/register_phone_number").send_keys("123456789")
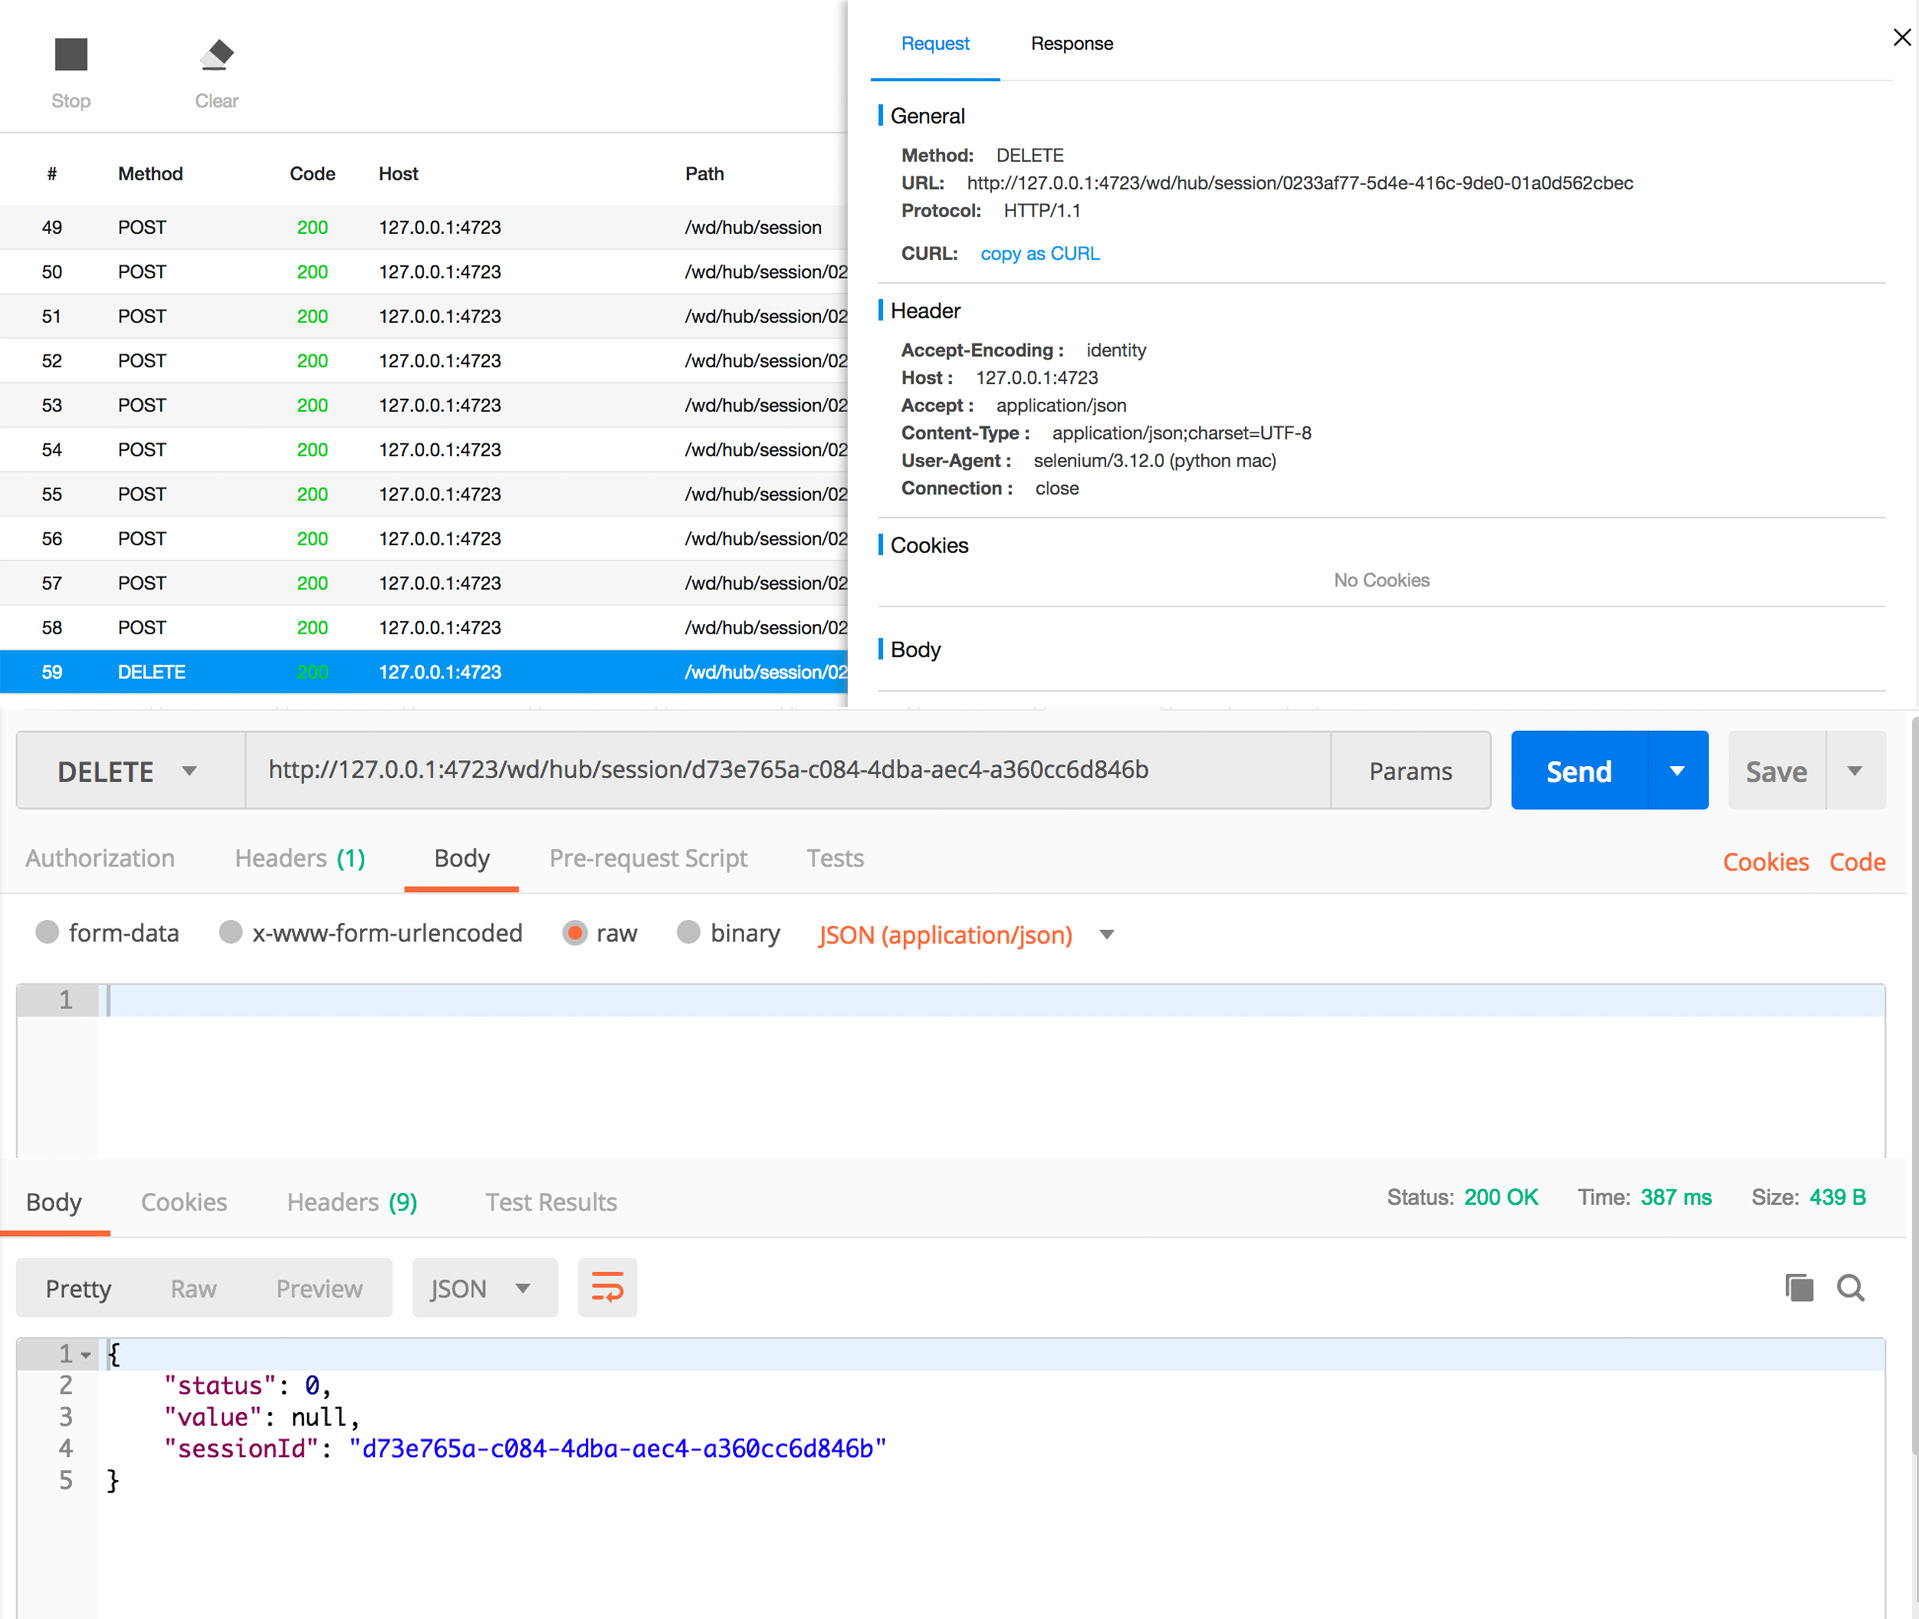
5.11 结束
URL:http://127.0.0.1:4723/wd/hub/session/${SessionId}
#对应脚本
driver.quit()


 浙公网安备 33010602011771号