JavaScript动画实例:爆裂的粒子
1.一个粒子的运动
一个半径为3的实心圆以画布的中心(canvas.width/2,canvas.height/2)为起点,沿着一条曲线进行移动。编写如下的HTML代码。

<!DOCTYPE html>
<html>
<head>
<title>粒子的运动</title>
</head>
<body>
<script>
  var canvas = document.createElement('canvas');
  var ctx = canvas.getContext('2d');
  document.body.appendChild(canvas);
  canvas.width = window.innerWidth;
  canvas.height = window.innerHeight;
  ctx.beginPath();
  ctx.fillStyle = 'rgba(0, 0, 0, 1)';
  ctx.fillRect(0, 0, canvas.width, canvas.height);
  var angle = 90;
  var pos = [canvas.width/2,canvas.height/2];
  var speed = 6;
  var curve = 2.5;
  var index = 1;
  var color = 'rgba(69,204,255,.95)';
  function draw ()
  {
     var radians = angle*Math.PI/180;
     pos[0] += Math.cos(radians)* speed+Math.cos(index);
     pos[1] += Math.sin(radians)* speed+Math.sin(index);
     angle += curve;
     ctx.fillStyle = color;
     ctx.beginPath();
     ctx.arc(pos[0],pos[1],3,0,2*Math.PI);
     ctx.fill();
     fade();
     window.requestAnimationFrame(draw);
  }
  function fade ()
  {
     ctx.beginPath();
     ctx.fillStyle = 'rgba(0, 0, 0, .03)';
     ctx.fillRect(0, 0, canvas.width, canvas.height);
  }
  window.requestAnimationFrame(draw);
</script>
</body>
</html>
在浏览器中打开包含这段HTML代码的html文件,可以在浏览器窗口中呈现出如图1所示的动画效果。
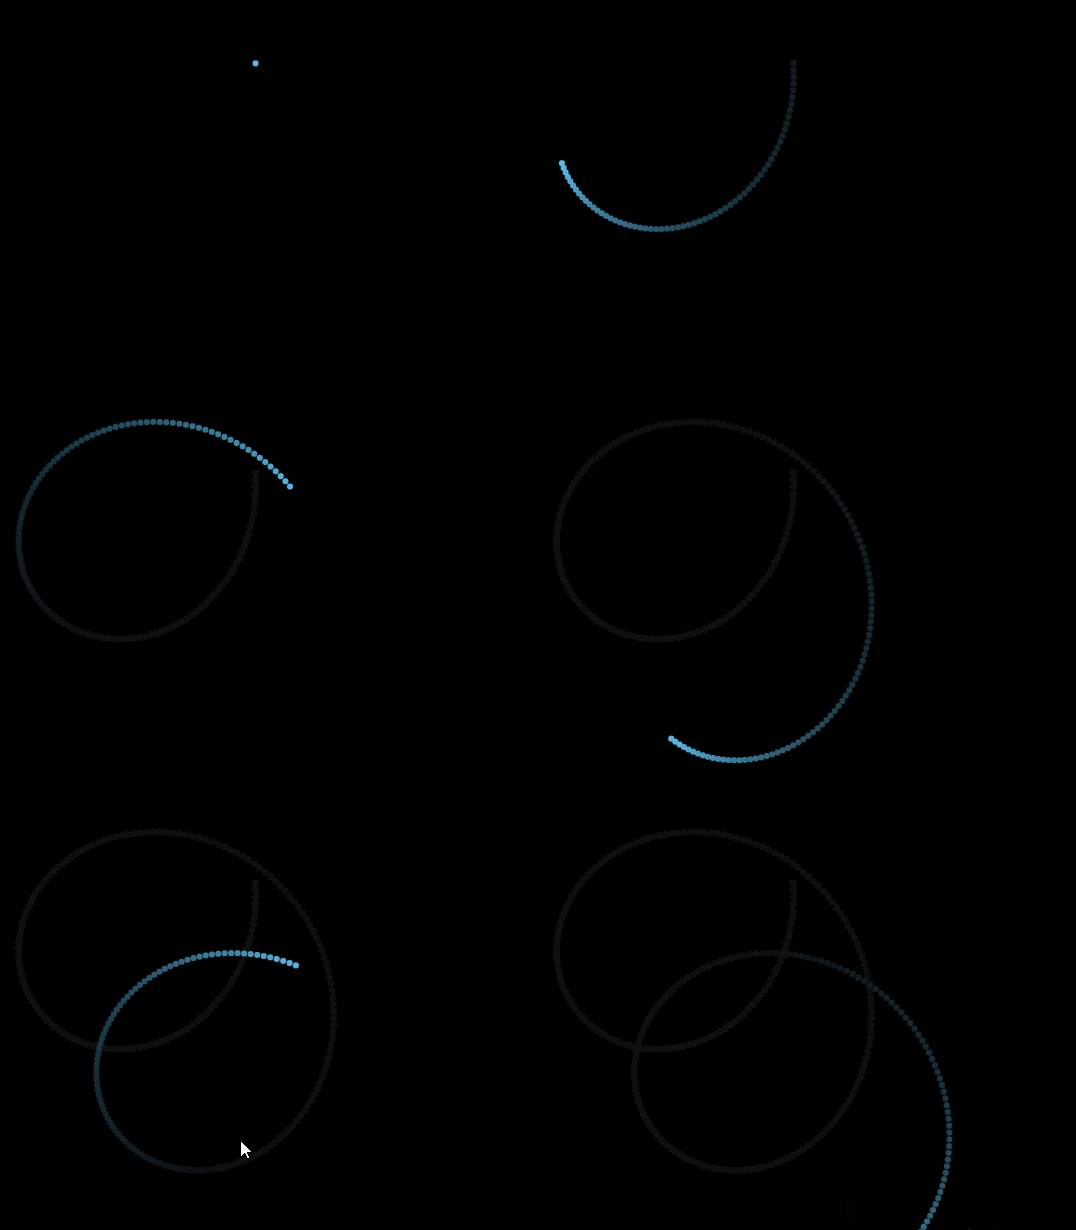
图1 一个实心圆的运动
2.爆裂的粒子
将图1中的半径为3的实心圆作为一个基本粒子,抽象一个粒子对象Particle,该对象有表示粒子运动的起始位置的angle、粒子运动的当前位置pos(初始值为画布中心[canvas.width/2,canvas.height/2])、粒子运动速度speed、粒子运动角度变化量curve、粒子颜色color和例子编号index等属性;为该粒子对象定义move和draw两个方法,分别完成粒子的位置变化和粒子绘制操作。
为设定方便起见,给在画布中心爆裂的粒子预设置3个参数,用变量config来表示。config.num、config.speed和config.curve分别表示3个参数分量。其中,config.num表示画布中爆裂出的粒子个数,由它计算出粒子运动的起始位置angle;config.speed和config.curve则分别对应粒子运动速度speed和粒子运动角度变化量curve。
编写的HTML文件如下。

<!DOCTYPE html>
<html>
<head>
<title>爆裂的粒子</title>
</head>
<body>
<script>
  var canvas = document.createElement('canvas');
  var ctx = canvas.getContext('2d');
  canvas.width = window.innerWidth;
  canvas.height = window.innerHeight;
  document.body.appendChild(canvas);
  var particles = [];
  var colors = [ 'rgba(69,204,255,.95)', 'rgba(73,232,62,.95)',
             'rgba(255,212,50,.95)', 'rgba(232,75,48,.95)',
             'rgba(178,67,255,.95)' ];
  var config = {};
  config.num=150;
  config.speed=1;
  config.curve=0.5;
  ctx.beginPath();
  ctx.fillStyle = 'rgba(0, 0, 0, 1)';
  ctx.fillRect(0, 0, canvas.width, canvas.height);
  ctx.fill();
  particles.length = 0;
  createParticles();
  window.requestAnimationFrame(draw);
  function createParticles()
  {
     var n = config.num;
     for (var i=0; i<n; i++)
     {
        var angle = (360/n)*(i+1);
        particles.push(new Particle(angle,i));
     }
  }
  function draw ()
  {
     for (var i=0; i<particles.length; i++)
     {
        var p = particles[i];
        p.move();
        p.draw();
     }
     fade();
     window.requestAnimationFrame(draw);
  }
  function Particle (angle,index)
  {
     this.angle = angle;
     this.speed = config.speed;
     this.curve = config.curve;
     this.color = colors[index%5];
     this.index = index;
     this.pos = [canvas.width/2, canvas.height/2];
  }
  Particle.prototype.move = function()
  {
    this.angle += this.curve;
    var radians = this.angle*Math.PI/180;
    this.pos[0] += Math.cos(radians)*this.speed+Math.cos(this.index);
    this.pos[1] += Math.sin(radians)*this.speed+Math.sin(this.index);
  }
  Particle.prototype.draw = function ()
  {
     ctx.fillStyle = this.color;
     ctx.beginPath();
     ctx.arc(this.pos[0],this.pos[1],3,0,2*Math.PI);
     ctx.fill();
  }
  function fade ()
  {
     ctx.beginPath();
     ctx.fillStyle = 'rgba(0, 0, 0, .03)';
     ctx.fillRect(0, 0, canvas.width, canvas.height);
     ctx.fill();
  }
</script>
</body>
</html>
在浏览器中打开包含这段HTML代码的html文件,可以在浏览器窗口中呈现出如图2所示的动画效果,150个粒子包在画布中心爆裂开后,四散运动起来。

图2 爆裂的粒子(num=150,speed = 1,curve = 0.5)
为3个参数设定不同的值,可以呈现出不同的动画效果。给出4组不同值的设定,呈现的动画效果分别如图3、图4、图5和图6所示。为避免图形文件过大,下列的动画过程均只录制一个片段。完整的动画演示过程请读者自己打开HTML文件运行程序观看。
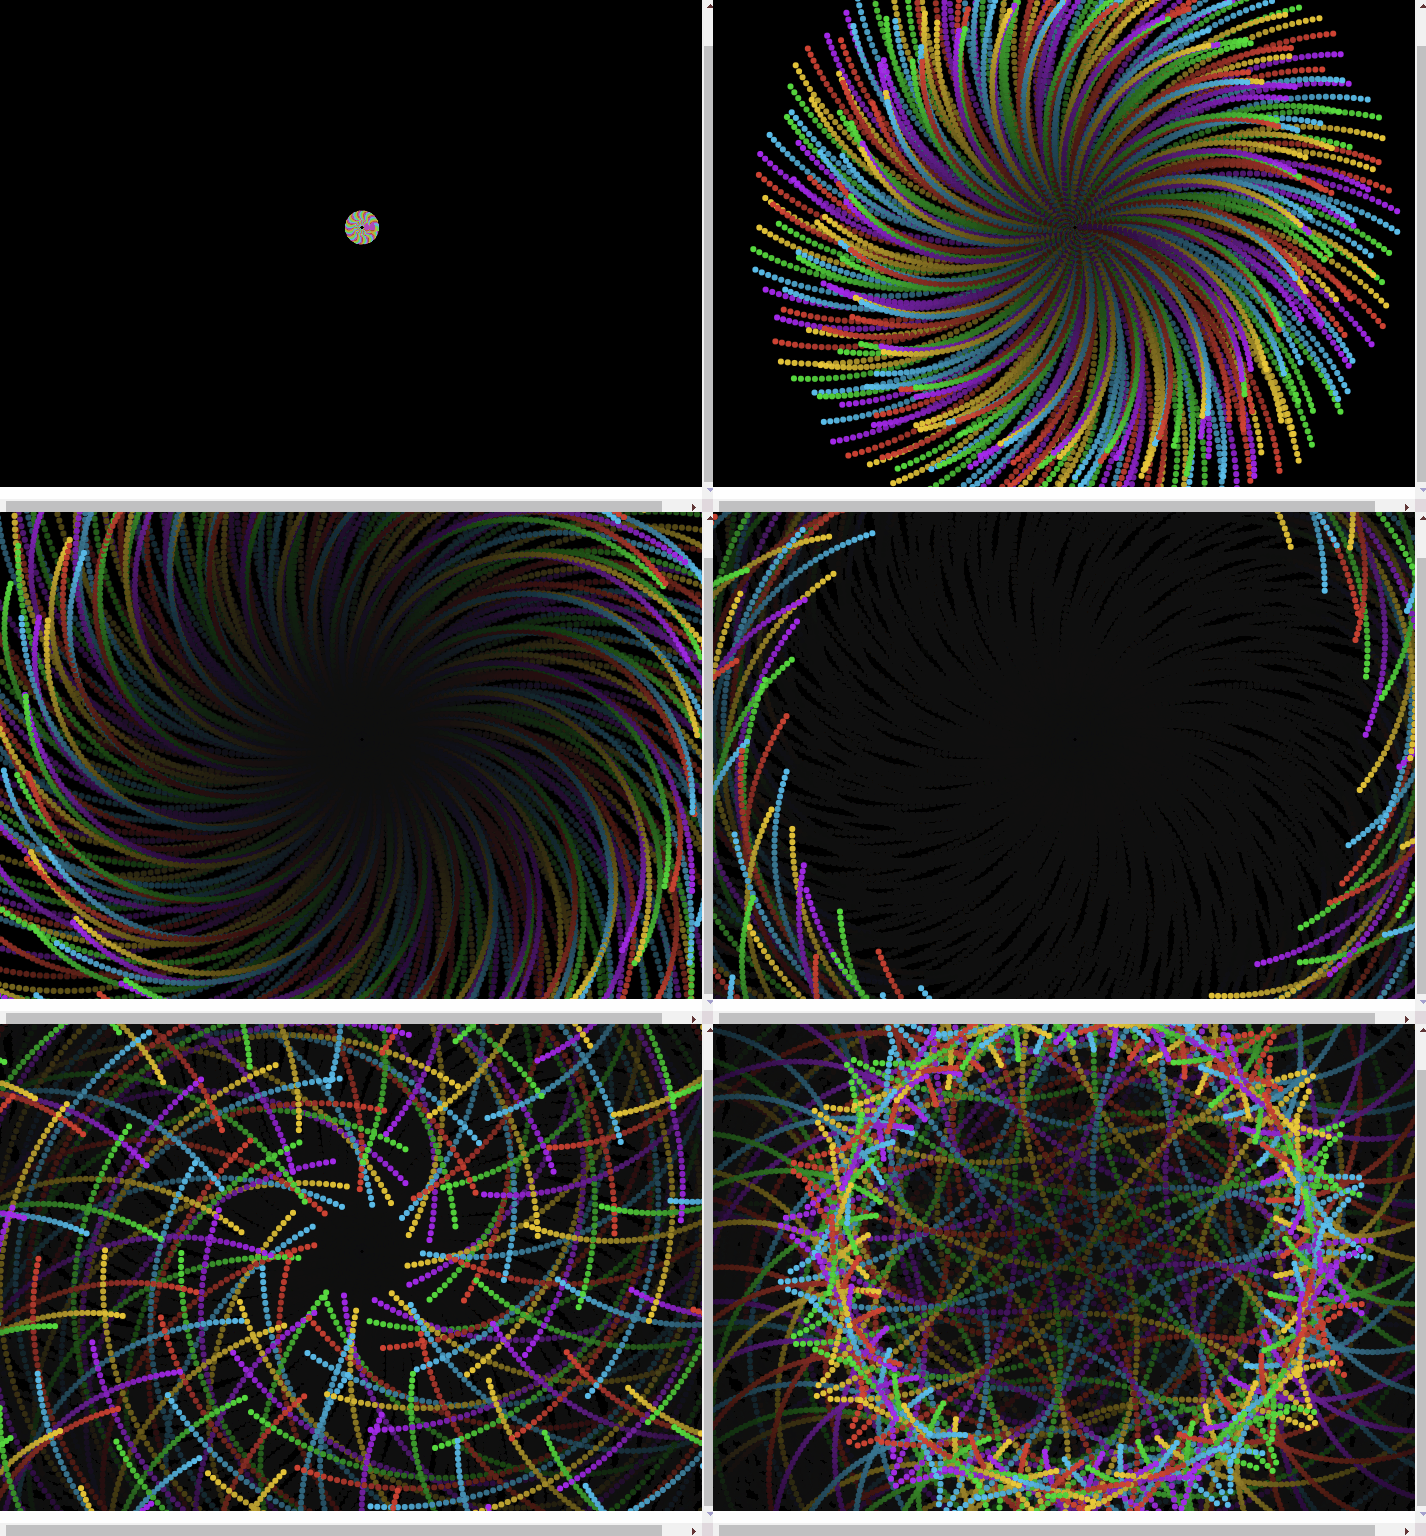
图3 爆裂的粒子(num=300,speed = 6,curve =1.5)

图4 爆裂的粒子(num=300,speed = 2,curve = 1)

图5 爆裂的粒子(num=300,speed = 100,curve =180)
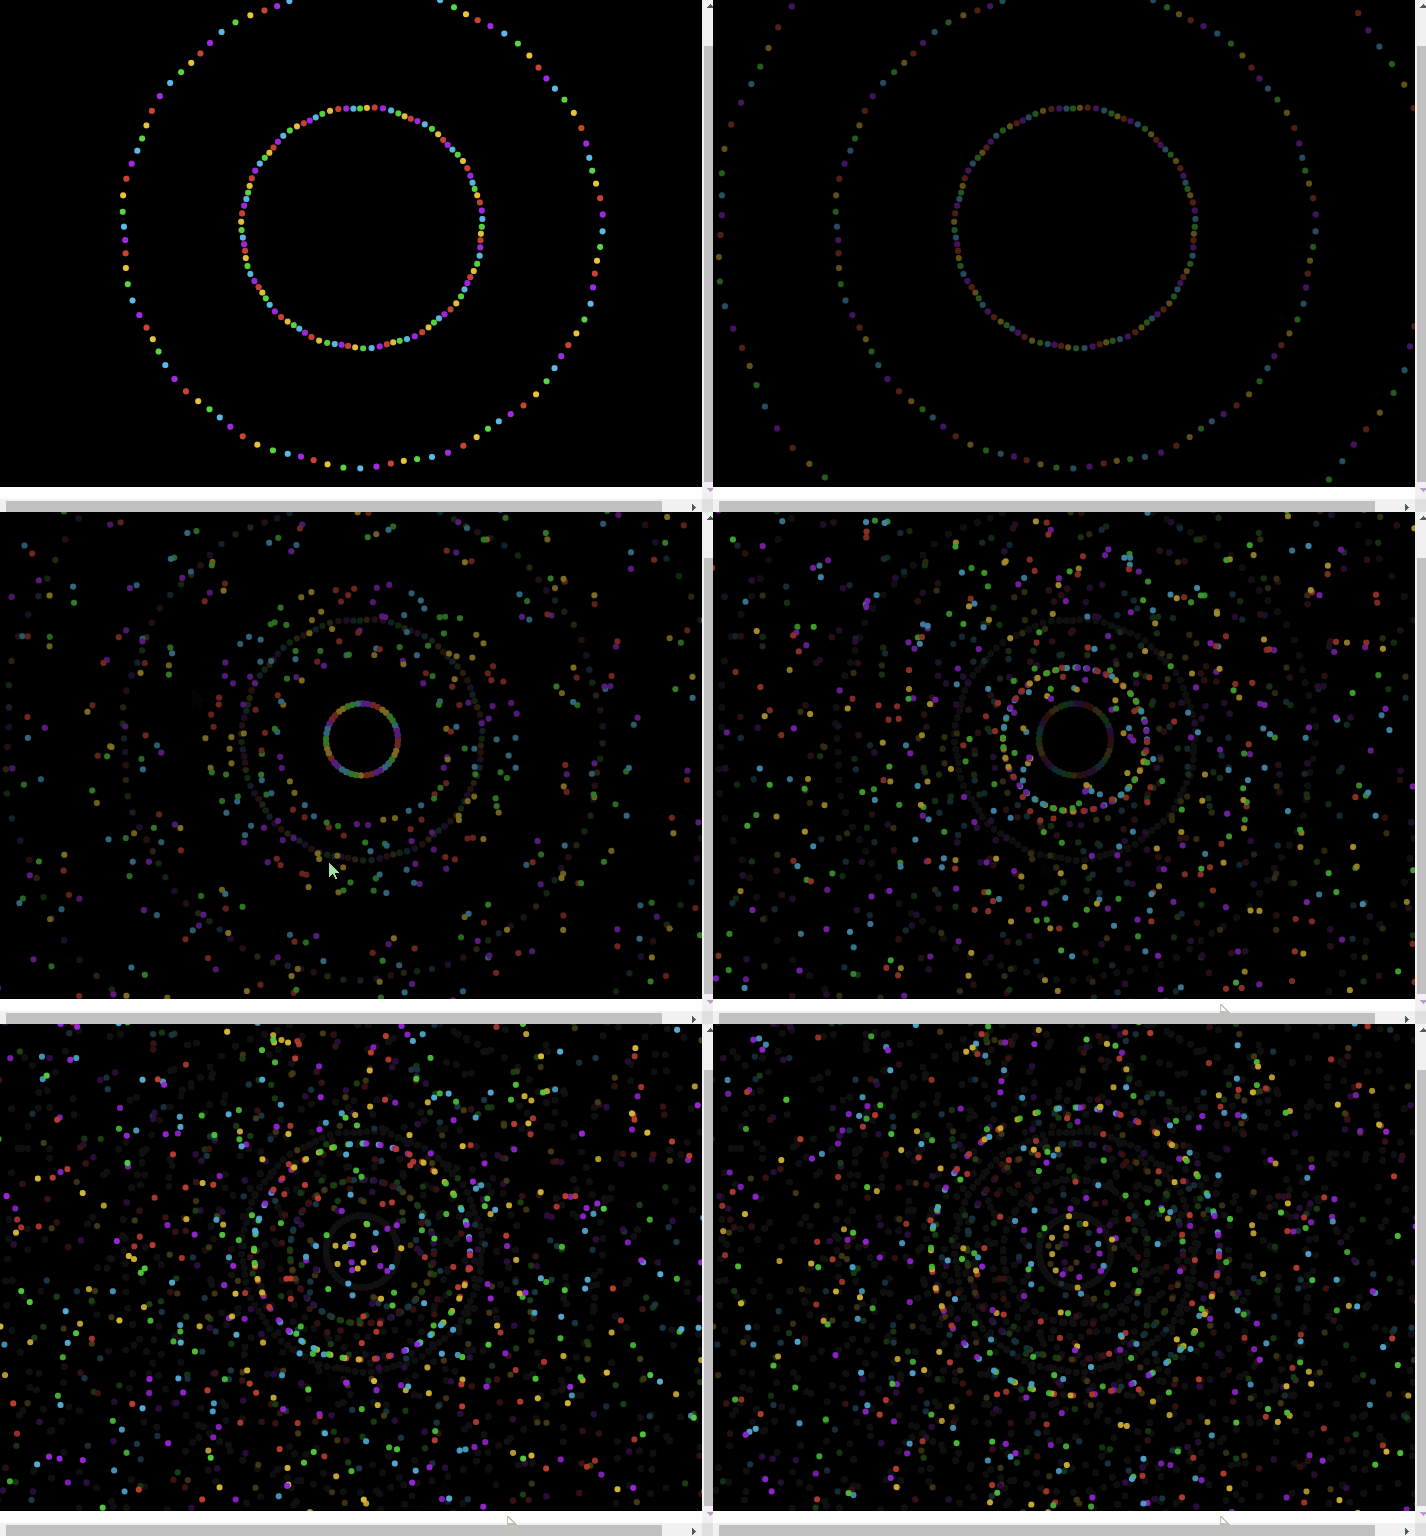
图6 爆裂的粒子(num=100,speed = 120,curve =10)
3.可设置参数的爆裂的粒子动画特效
由图2~图6可知,不同的参数设定,爆裂开来的粒子运动所呈现的动画效果不同。为此,我们提供文本框输入预设数值的方式对3个参数的值进行设定,设定完成后,单击“Burst!”按钮,按设定的参数进行动画效果的呈现。
编写的HTML代码如下。

<!DOCTYPE html>
<html>
<head>
<title>爆裂的粒子(可设置参数)</title>
<style>
  form
  {
    position:absolute;
    top:0;
    left:0;
    z-index:100;
    background-color:rgba(200,200,200,.8);
    padding:8px;
    font-size:90%;
  }
  form input[type=text]
  {
    width:30px;
    border:1px solid #000;
    text-align:center;
  }
  form button
  {
    margin:4px auto;
    border:1px solid #000;
    display:block;
  }
</style>
</head>
<body>
<form id="settings" onsubmit="return false">
  Particles<br/>  <input type="text" id="inNum" value="150"/><br/>
  Speed<br/>  <input type="text" id="inSpeed" value="2"/><br/>
  Curve<br/>  <input type="text" id="inCurve" value="1"/><br/>
  <button id="btnClear">Clear</button>
  <button id="btnSet">Burst!</button><br/>
</form>
<script>
  var canvas = document.createElement('canvas');
  var ctx = canvas.getContext('2d');
  canvas.width = window.innerWidth;
  canvas.height = window.innerHeight;
  document.body.appendChild(canvas);
  var particles = [];
  var config = {};
  var settings = document.getElementById('settings');
  start();
  window.requestAnimationFrame(draw);
  function createParticles()
  {
     var n = config.num;
     for (var i=0; i<n; i++)
     {
        var angle = (360/n)*(i+1);
        particles.push(new Particle(angle,i));
     }
  }
  function draw ()
  {
     for (var i=0; i<particles.length; i++)
     {
        var p = particles[i];
        p.move();
        p.draw();
     }
     fade();
     window.requestAnimationFrame(draw);
  }

  function Particle (angle,index)
  {
     this.angle = angle;
     this.speed = config.speed;
     this.curve = config.curve;
     this.color = randColor(90,255)
     this.index = index;
     this.pos = [canvas.width/2, canvas.height/2];
  }
  Particle.prototype.move = function()
  {
    this.angle += this.curve;
    var radians = this.angle*Math.PI/180;
    this.pos[0] += Math.cos(radians)*this.speed+Math.cos(this.index);
    this.pos[1] += Math.sin(radians)*this.speed+Math.sin(this.index);
  }
  Particle.prototype.draw = function ()
  {
     ctx.fillStyle = this.color;
     ctx.beginPath();
     ctx.arc(this.pos[0],this.pos[1],3,0,2*Math.PI);
     ctx.fill();
  }
  function randColor(min, max)
  {
    var r = Math.floor(Math.random()*(max-min)+min);
    var g = Math.floor(Math.random()*(max-min)+min);
    var b = Math.floor(Math.random()*(max-min)+min);
    return 'rgba('+r+','+g+','+b+',0.95)';
  }
  function fade ()
  {
     ctx.beginPath();
     ctx.fillStyle = 'rgba(0, 0, 0, .03)';
     ctx.fillRect(0, 0, canvas.width, canvas.height);
     ctx.fill();
  }
  function clear ()
  {
     ctx.beginPath();
     ctx.fillStyle = 'rgba(0, 0, 0, 1)';
     ctx.fillRect(0, 0, canvas.width, canvas.height);
     ctx.fill();
     particles.length = 0;
  }
  function start()
  {
        config.num = parseFloat(settings.inNum.value);
        config.speed = parseFloat(settings.inSpeed.value);
        config.curve = parseFloat(settings.inCurve.value);
        createParticles();
  }
  settings.btnSet.addEventListener("click", start);
  settings.btnClear.addEventListener("click", clear);
</script>
</body>
</html>
在浏览器中打开包含这段HTML代码的html文件,可以在浏览器窗口中呈现出如图7所示的动画效果。
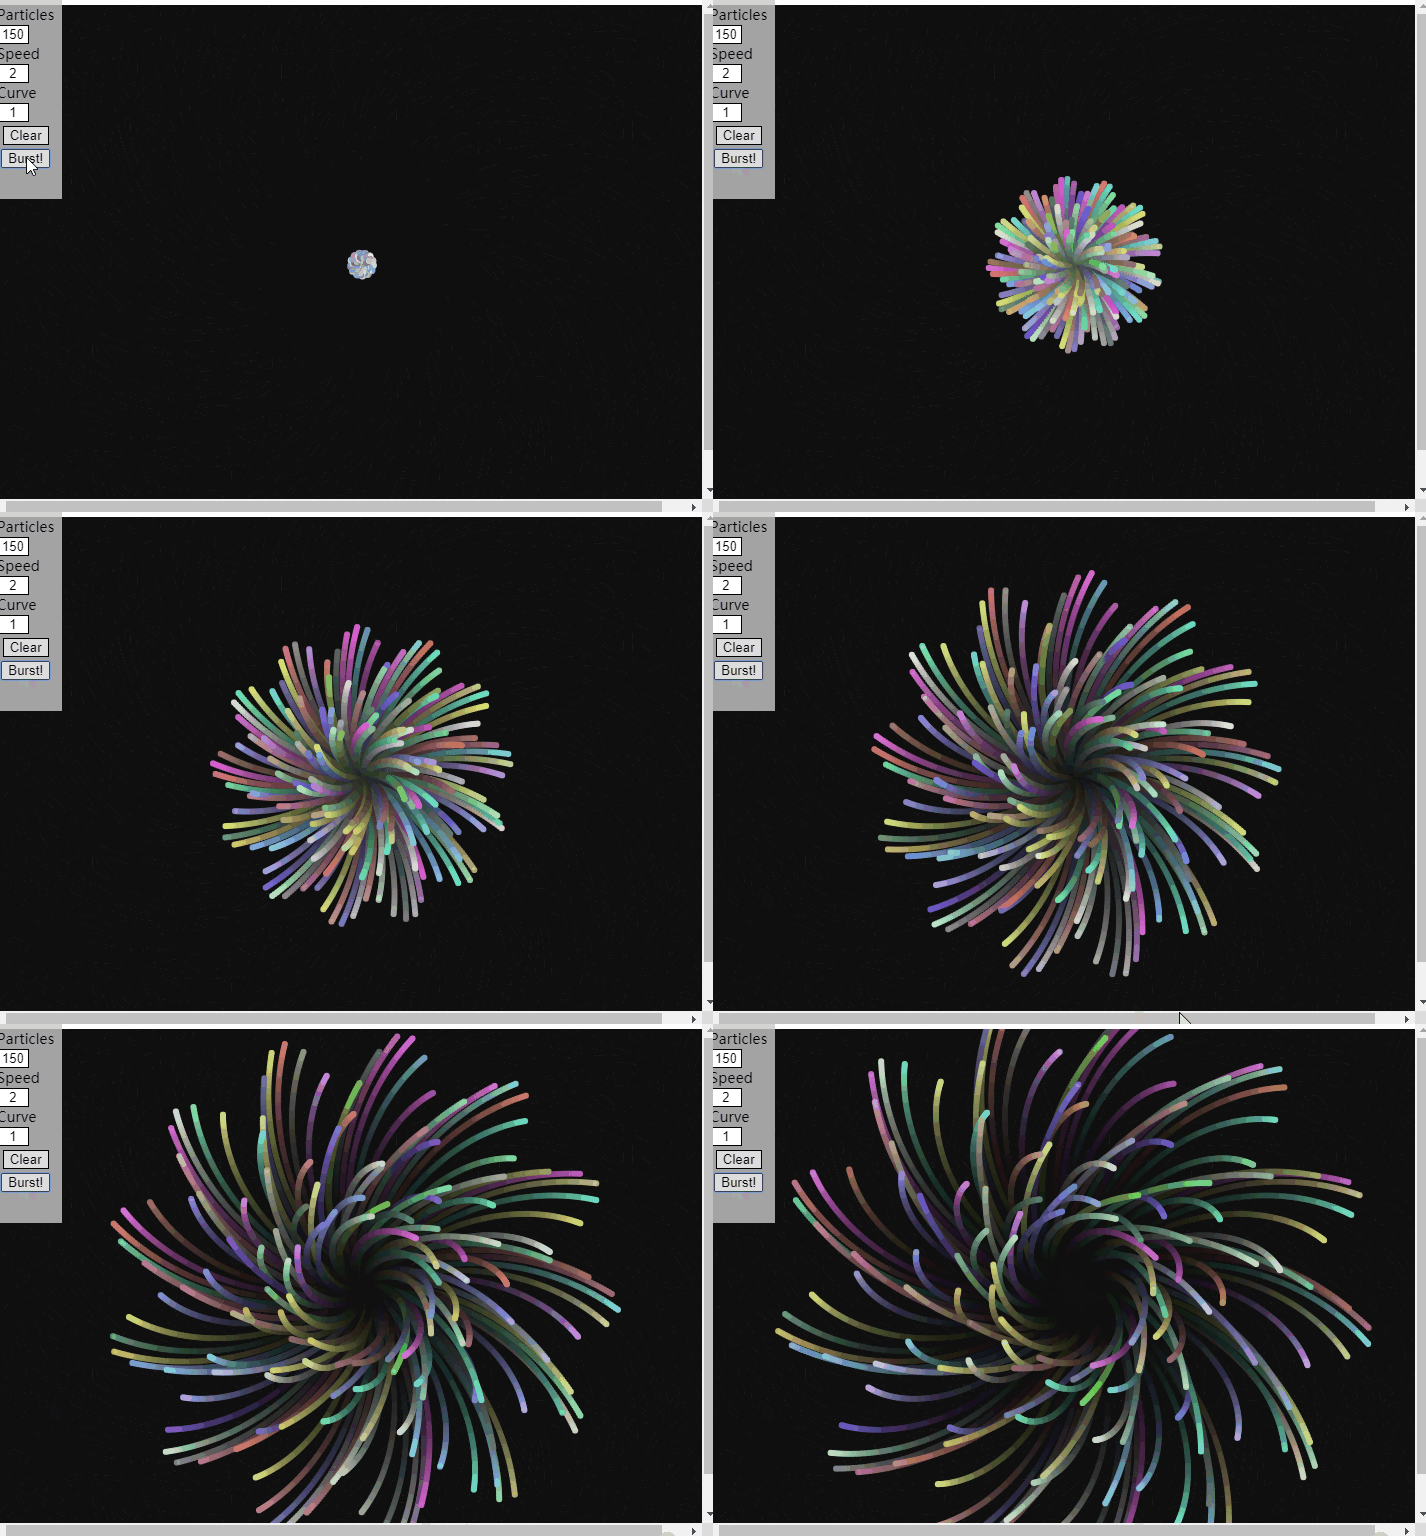
图7 爆裂的粒子(单击一次Burst!按钮)
在页面中,单击“Clear”按钮,会清屏,同时置粒子数组的长度为0,相当于页面中不再有运动的粒子。
单击“Burst!”按钮,会读取设置的参数值,同时调用createParticles();向粒子数组中添加从画布中心爆裂开的粒子。注意:是添加,若数组中原来有运动的粒子,则原来运动的粒子会继续运动。这样,多次单击“Burst!”按钮,会呈现出更多有变化的动画效果。
例如,连续单击三次“Burst!”按钮,在浏览器窗口呈现出如图8所示的动画效果。
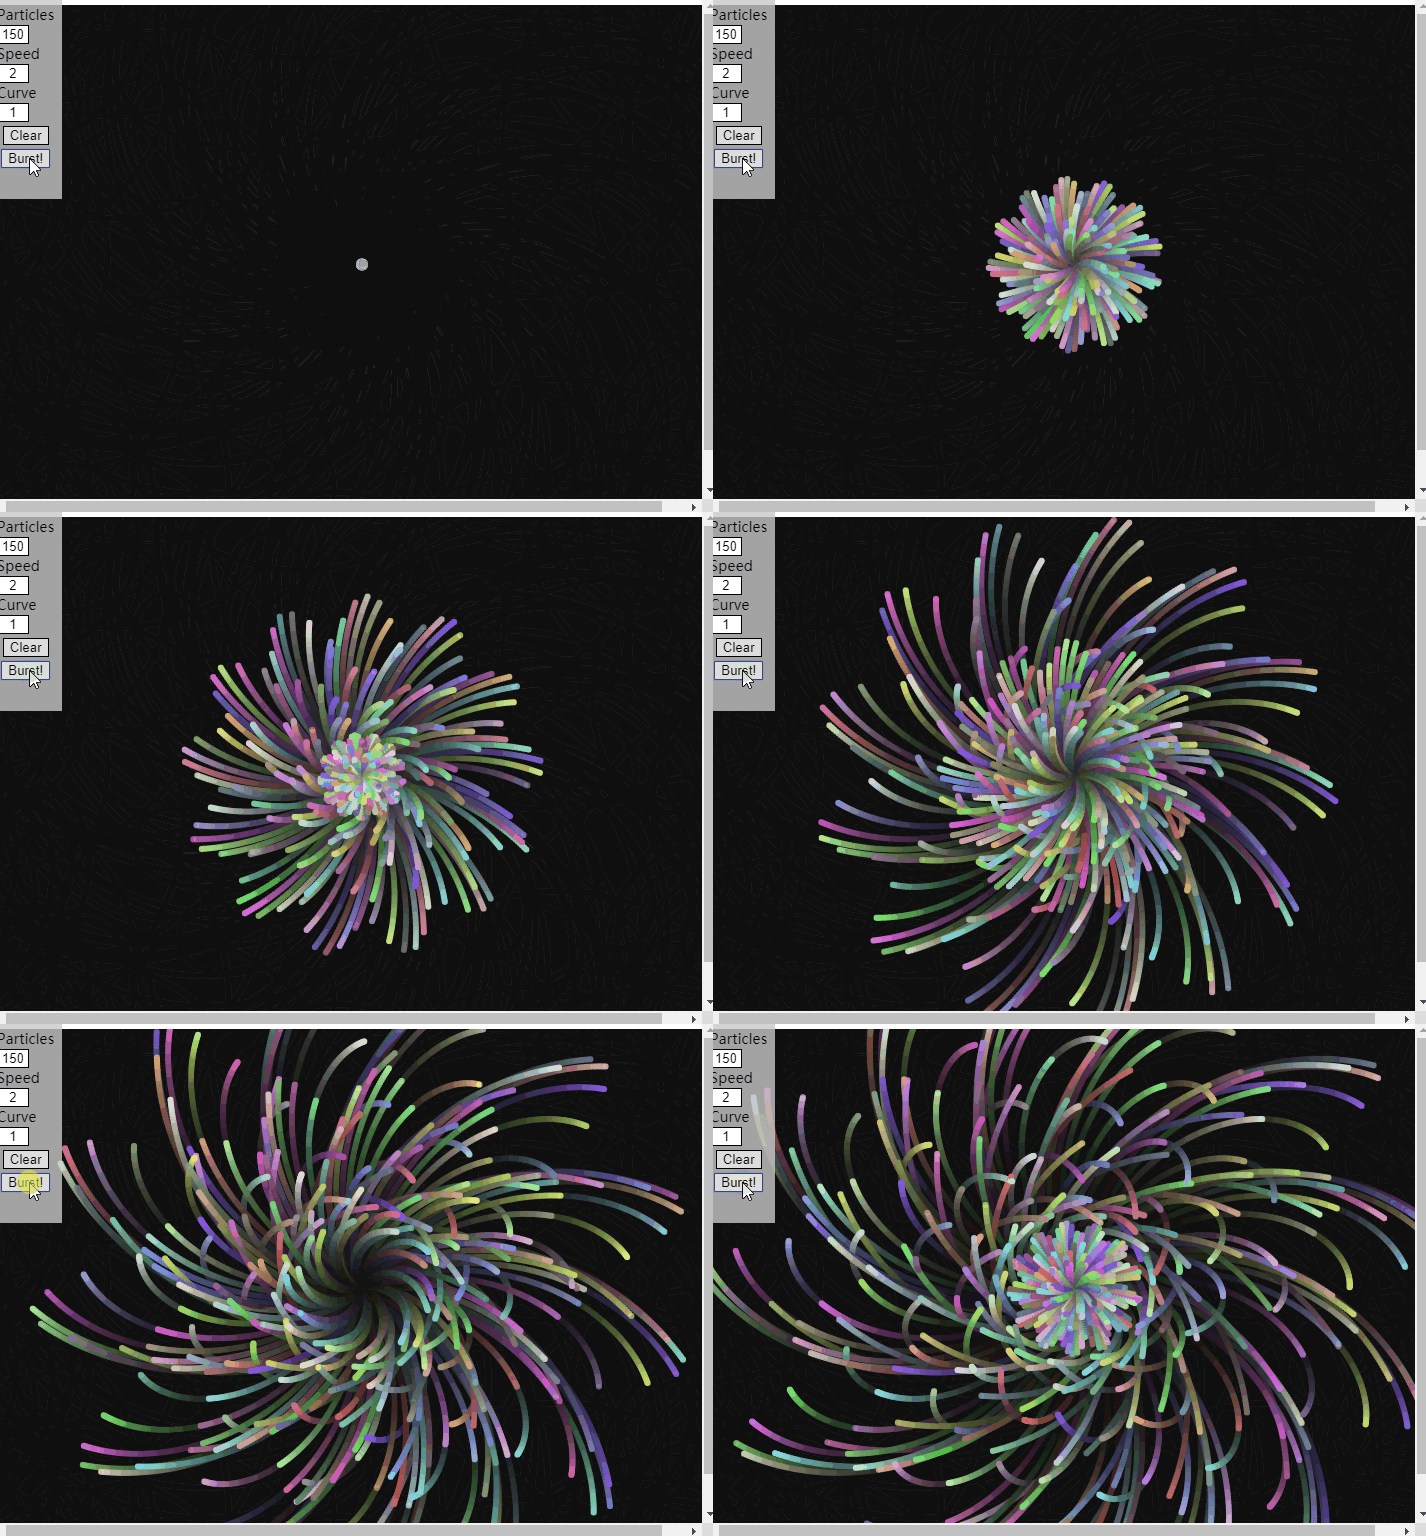
图8 爆裂的粒子(单击三次Burst!按钮)
4.粒子包在画布中心自动爆裂
从图2和图7的动画过程可以看出,一个粒子包在画布中心爆裂开来后,粒子四散运动,逐渐超出画布范围,最终画布一片空白。虽然我们可以像图8的效果那样,通过不断单击“Burst!”按钮在画布中心爆裂开新的粒子包,但这需要人为控制。当然,也可以不断调用createParticles()函数,在画布中心爆裂新的粒子包,但函数调用的时机需要仔细考虑。
一个可行的办法是:每当一个粒子运动超出了画布范围,可以认为该粒子消亡了,从particles数组中删除该粒子对象。当粒子数组particles中剩余的粒子数不足config.num的一半时,自动调用createParticles()函数在画布中心爆裂一个新的粒子包,向粒子数组中添加爆裂的粒子。
编写的HTML文件如下。

<!DOCTYPE html>
<html>
<head>
<title>爆裂的粒子</title>
</head>
<body>
<script>
  var canvas = document.createElement('canvas');
  var ctx = canvas.getContext('2d');
  canvas.width = window.innerWidth;
  canvas.height = window.innerHeight;
  document.body.appendChild(canvas);
  var particles = [];
  var colors = [ 'rgba(69,204,255,.95)', 'rgba(73,232,62,.95)',
                 'rgba(255,212,50,.95)', 'rgba(232,75,48,.95)',
                 'rgba(178,67,255,.95)' ];
  var config = {};
  config.num=150;
  config.speed=1;
  config.curve=0.5;
  ctx.beginPath();
  ctx.fillStyle = 'rgba(0, 0, 0, 1)';
  ctx.fillRect(0, 0, canvas.width, canvas.height);
  ctx.fill();
  particles.length = 0;
  createParticles();
  window.requestAnimationFrame(draw);
  function createParticles()
  {
     var n = config.num;
     for (var i=0; i<n; i++)
     {
        var angle = (360/n)*(i+1);
        particles.push(new Particle(angle,i));
     }
  }
  function draw ()
  {
     for (var i=particles.length-1;i>=0; i--)
     {
        var p = particles[i];
        p.move();
        p.draw();
        if (p.pos[0]<0 || p.pos[0]>canvas.width || p.pos[1]<0 || p.pos[1]>canvas.height)
           particles.splice(i, 1);
     }
     fade();
     if (particles.length<=config.num/2)
         createParticles();
     window.requestAnimationFrame(draw);
  }
  function Particle (angle,index)
  {
     this.angle = angle;
     this.speed = config.speed;
     this.curve = config.curve;
     this.color = colors[index%5];
     this.index = index;
     this.pos = [canvas.width/2, canvas.height/2];
  }
  Particle.prototype.move = function()
  {
    this.angle += this.curve;
    var radians = this.angle*Math.PI/180;
    this.pos[0] += Math.cos(radians)*this.speed+Math.cos(this.index);
    this.pos[1] += Math.sin(radians)*this.speed+Math.sin(this.index);
  }
  Particle.prototype.draw = function ()
  {
     ctx.fillStyle = this.color;
     ctx.beginPath();
     ctx.arc(this.pos[0],this.pos[1],3,0,2*Math.PI);
     ctx.fill();
  }
  function fade ()
  {
     ctx.beginPath();
     ctx.fillStyle = 'rgba(0, 0, 0, .03)';
     ctx.fillRect(0, 0, canvas.width, canvas.height);
     ctx.fill();
  }
</script>
</body>
</html>
在浏览器中打开包含这段HTML代码的html文件,可以在浏览器窗口中呈现出如图9所示的动画效果。
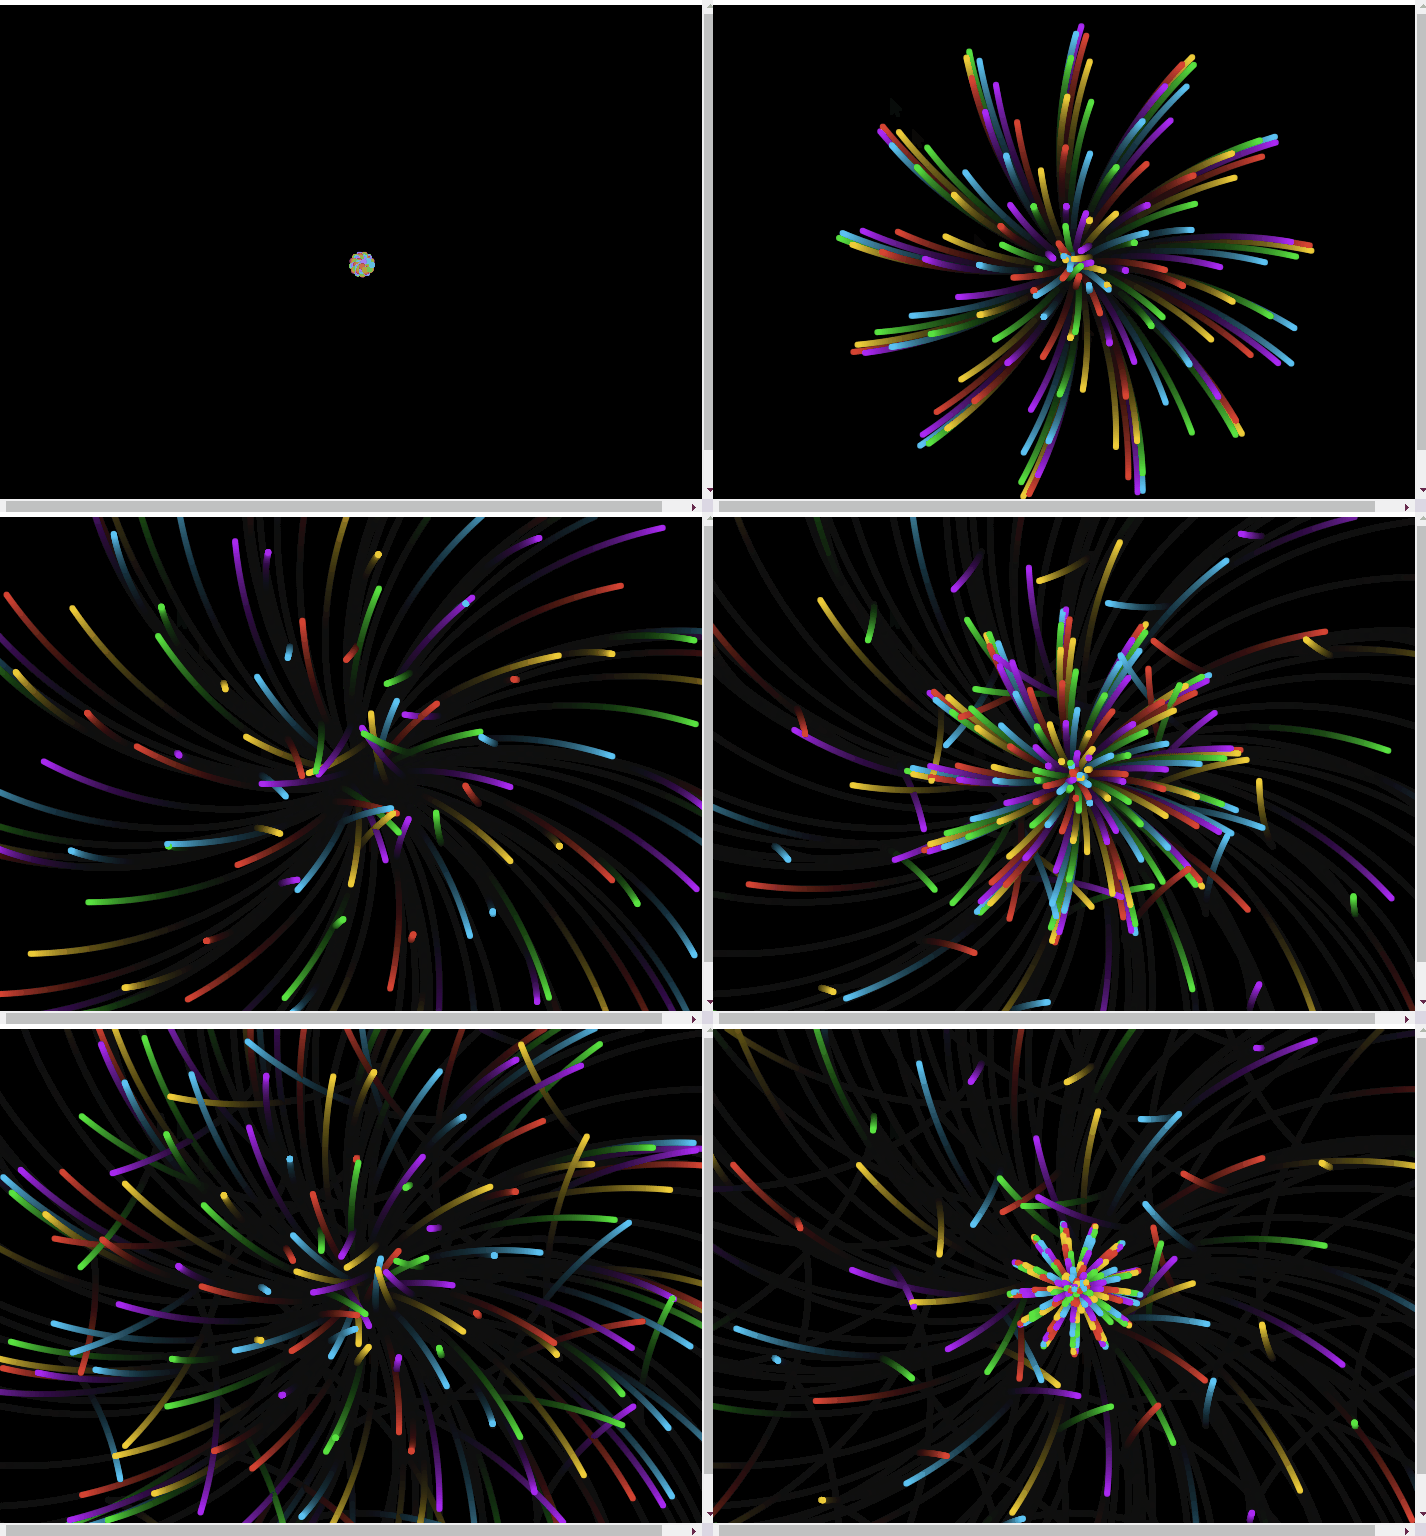
图9 不断爆裂的粒子包
需要说明的是,对于不同的num、speed和curve三个参数的设置,上面的程序大多数情况下运行情况良好。但对于如图6动画效果所设置的3个参数(num=100,speed = 120,curve =10),呈现的动画效果如图10所示。
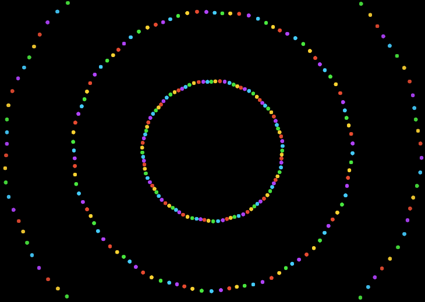
图10 不断爆裂的粒子包(num=100,speed = 120,curve =10)
从图10看出,画面基本静止,这主要由于按给定的参数,粒子移动一次就会超出画布范围,因而不断删除粒子、添加粒子,每个粒子的移动基本是一次性的,即移动一次就超出画布范围消亡了。而图6之所以可以呈现出动画效果是因为移出画布的粒子有可能会自己运动回来。


