centos mysql 笔记(内含vagrant mysql 镜像)
文章很长,而且持续更新,建议收藏起来,慢慢读!疯狂创客圈总目录 博客园版 为您奉上珍贵的学习资源 :
免费赠送 :《尼恩Java面试宝典》 持续更新+ 史上最全 + 面试必备 2000页+ 面试必备 + 大厂必备 +涨薪必备
免费赠送 经典图书:《Java高并发核心编程(卷1)加强版》 面试必备 + 大厂必备 +涨薪必备 加尼恩免费领
免费赠送 经典图书:《Java高并发核心编程(卷2)加强版》 面试必备 + 大厂必备 +涨薪必备 加尼恩免费领
免费赠送 经典图书:《Java高并发核心编程(卷3)加强版》 面试必备 + 大厂必备 +涨薪必备 加尼恩免费领
免费赠送 经典图书:《尼恩Java面试宝典 最新版》 面试必备 + 大厂必备 +涨薪必备 加尼恩免费领
免费赠送 资源宝库: Java 必备 百度网盘资源大合集 价值>10000元 加尼恩领取
《SpringCloud Nginx 高并发核心编程》 环境搭建 - 系列
| 组件 | 链接地址 |
|---|---|
| windows centos 虚拟机 安装&排坑 | vagrant+java+springcloud+redis+zookeeper镜像下载(&制作详解)) |
| centos mysql 安装&排坑 | centos mysql 笔记(内含vagrant mysql 镜像) |
| linux kafka安装&排坑 | kafka springboot (或 springcloud ) 整合 |
| Linux openresty 安装 | Linux openresty 安装 |
| 【必须】Linux Redis 安装(带视频) | Linux Redis 安装(带视频) |
| 【必须】Linux Zookeeper 安装(带视频) | Linux Zookeeper 安装, 带视频 |
| Windows Redis 安装(带视频) | Windows Redis 安装(带视频) |
| RabbitMQ 离线安装(带视频) | RabbitMQ 离线安装(带视频) |
| ElasticSearch 安装, 带视频 | ElasticSearch 安装, 带视频 |
| Nacos 安装(带视频) | Nacos 安装(带视频) |
| 【必须】Eureka | Eureka 入门,带视频 |
| 【必须】springcloud Config 入门,带视频 | springcloud Config 入门,带视频 |
| 【必须】SpringCloud 脚手架打包与启动 | SpringCloud脚手架打包与启动 |
| Linux 自启动 假死自启动 定时自启 | Linux 自启动 假死启动 |
centos mysql 虚拟机镜像
疯狂创客圈网盘,为大家准备了springcloud.box 虚拟机镜像,里边预装了java 、 redis 、zookeeper、kafka、Eureka、springcloud config、mysql 等必须的组件,省去大家准备开发环境的烦恼,何不妙哉。网盘地址请参见【博客园总入口 】

如果真正要自己安装,请使用下面的教程。 这也是笔者的安装笔记,并且会持续进行问题记录。
安装mysql
在CentOS中默认安装有MariaDB,这个是MySQL的分支,但为了需要,还是要在系统中安装MySQL,而且安装完成之后可以直接覆盖掉MariaDB。
1 下载并安装MySQL官方的 Yum Repository
由于CentOS 的yum源中没有mysql,需要到mysql的官网下载yum repo配置文件。下载命令:
[root@localhost ~]# wget -i -c http://dev.mysql.com/get/mysql57-community-release-el7-10.noarch.rpm
执行过程如下:
[root@localhost work]# wget -i -c http://dev.mysql.com/get/mysql57-community-release-el7-10.noarch.rpm
--2020-12-27 02:02:22--  http://dev.mysql.com/get/mysql57-community-release-el7-10.noarch.rpm
.....
HTTP request sent, awaiting response... 200 OK
Length: 25548 (25K) [application/x-redhat-package-manager]
Saving to: ‘mysql57-community-release-el7-10.noarch.rpm’

100%[==================================================================================================>] 25,548       127KB/s   in 0.2s

2020-12-27 02:04:42 (127 KB/s) - ‘mysql57-community-release-el7-10.noarch.rpm’ saved [25548/25548]
使用上面的命令就直接下载了安装用的Yum Repository,大概25KB的样子,
然后进行repo的安装:
rpm -ivh mysql57-community-release-el7-10.noarch.rpm
执行过程如下:
[root@localhost work]# rpm -ivh mysql57-community-release-el7-10.noarch.rpm
warning: mysql57-community-release-el7-10.noarch.rpm: Header V3 DSA/SHA1 Signature, key ID 5072e1f5: NOKEY
Preparing...                          ################################# [100%]
Updating / installing...
   1:mysql57-community-release-el7-10 ################################# [100%]
执行完成后会在/etc/yum.repos.d/目录下生成两个repo文件mysql-community.repo mysql-community-source.repo
使用yum命令即可完成安装
必须进入到 /etc/yum.repos.d/目录后再执行以下脚本, 然后就可以直接yum安装了。
[root@localhost ~]# yum install mysql-server
这步可能会花些时间,安装完成后就会覆盖掉之前的mariadb。
[root@localhost yum.repos.d]# yum install mysql-server
Loaded plugins: fastestmirror
Loading mirror speeds from cached hostfile
 .....
Installed:
  mysql-community-libs.x86_64 0:5.7.32-1.el7 mysql-community-libs-compat.x86_64 0:5.7.32-1.el7 mysql-community-server.x86_64 0:5.7.32-1.el7

Dependency Installed:
  mysql-community-client.x86_64 0:5.7.32-1.el7                         mysql-community-common.x86_64 0:5.7.32-1.el7

Dependency Updated:
  openssl.x86_64 1:1.0.2k-21.el7_9             openssl-libs.x86_64 1:1.0.2k-21.el7_9             postfix.x86_64 2:2.10.1-9.el7

Replaced:
  mariadb-libs.x86_64 1:5.5.44-2.el7.centos

Complete!
启动msyql:
启动MySQL
systemctl start mysqld
登录:
获取安装时的临时密码(在第一次登录时就是用这个密码):grep 'temporary password' /var/log/mysqld.log
[root@localhost yum.repos.d]# grep 'temporary password' /var/log/mysqld.log
2020-12-27T02:34:04.063826Z 1 [Note] A temporary password is generated for root@localhost: LXwH6NSf*kVh
使用临时密码,登录mysql
mysql -u root -p
然后输入密码(刚刚获取的临时密码)LXwH6NSf*kVh
登录成功后,修改密码
1、首先需要设置密码的验证强度等级,设置 validate_password_policy 的全局参数为 LOW 即可,
输入设值语句 “ set global validate_password_policy=LOW; ” 进行设值,
2、当前密码长度为 8 ,如果不介意的话就不用修改了,按照通用的来讲,设置为 6 位的密码,设置 validate_password_length 的全局参数为 6 即可,
输入设值语句 “ set global validate_password_length=6; ” 进行设值,
3、现在可以为 mysql 设置简单密码了,只要满足六位的长度即可,
输入修改语句 “ ALTER USER 'root'@'localhost' IDENTIFIED BY '123456'; ” 可以看到修改成功,表示密码策略修改成功了!!!
执行过程如下:
[root@localhost yum.repos.d]# mysql -u root -p
Enter password:
Welcome to the MySQL monitor.  Commands end with ; or \g.
Your MySQL connection id is 2
Server version: 5.7.32

Copyright (c) 2000, 2020, Oracle and/or its affiliates. All rights reserved.

Oracle is a registered trademark of Oracle Corporation and/or its
affiliates. Other names may be trademarks of their respective
owners.

Type 'help;' or '\h' for help. Type '\c' to clear the current input statement.

mysql> set global validate_password_policy=LOW
    -> ;
Query OK, 0 rows affected (0.03 sec)

mysql> set global validate_password_length=6;
Query OK, 0 rows affected (0.01 sec)

mysql> ALTER USER 'root'@'localhost' IDENTIFIED BY '123456';
Query OK, 0 rows affected (0.04 sec)
注意:一定要记得在写sql的时候要在语句完成后加上" ; "
常用命令
1、启动MySQL
systemctl start mysqld
2、关闭MySQL
systemctl stop mysqld
3、重启MySQL
systemctl restart mysqld
4、查看MySQL运行状态
systemctl status mysqld
5、设置开机启动
systemctl enable mysqld
6、关闭开机启动
systemctl disable mysqld
问题排解
mysql帐号不允许从远程登陆
默认情况下,mysql帐号不允许从远程登陆,只能在localhost登录。本文提供了二种方法设置mysql可以通过远程主机进行连接。
- 一、改表法
在localhost登入mysql后,更改 “mysql” 数据库里的 “user” 表里的 “host” 项,将”localhost”改称”%”
#mysql -u root -p
Enter password:
mysql>use mysql;
mysql>update user set host = '%' where user = 'root';
mysql>select host, user from user;
说明: % 代表任意的客户端,可替换成具体IP地址。
- 二、授权法
例如: 你想myuser使用mypassword(密码)从任何主机连接到mysql服务器的话。
mysql>GRANT ALL PRIVILEGES ON . TO ‘myuser’@’%’IDENTIFIED BY ‘mypassword’ WITH GRANT OPTION;
如果你想允许用户myuser从ip为192.168.1.6的主机连接到mysql服务器,并使用mypassword作为密码
mysql>GRANT ALL PRIVILEGES ON *.* TO 'myuser'@'192.168.1.3'IDENTIFIED BY 'mypassword' WITH GRANT OPTION;
mysql>FLUSH PRIVILEGES
配置默认编码为utf8:
vi /etc/my.cnf
添加
 [mysqld]

 character_set_server=utf8
 init_connect='SET NAMES utf8'
其他配置文件:
/etc/my.cnf 日志文件:/var/log//var/log/mysqld.log
服务启动脚本:/usr/lib/systemd/system/mysqld.service
socket文件:/var/run/mysqld/mysqld.pid
不区分大小写
找到你安装MySQL的时候的my.cnf这个文件
如下图所示:在 mysqld下添加一行
lower_case_table_names=1 (1不区分大小写,0区分大小写,默认为0)
远程连接 Mysql 太慢问题
尝试解决了一下上面的连接超时问题,但是发现并没有什么用,还是会出现上面的问题。于是便怀疑是不是远程连接 Mysql 太慢导致了连接超时?因为我在 CentOS7 服务端和 Windows 本地的 Navicat 连接 mysql 都没问题。在网上查询了下,发现在 mysql 的配置文件 /etc/my.cnf 中增加如下配置参数:
# 注意该配置是加在[mysqld]下面
[mysqld]
skip-name-resolve
然后需要重启 mysql 服务。因为根据说明,如果 mysql 主机查询和解析 DNS 会导致缓慢或是有很多客户端主机时会导致连接很慢。同时,请注意在增加该配置参数后,mysql的授权表中的host字段就不能够使用域名而只能够使用ip地址了,因为这是禁止了域名解析的结果。
从防火墙开放端口,或者关闭防火墙
- 通过systemctl status firewalld查看firewalld状态
[root@localhost yum.repos.d]# systemctl status firewalld
● firewalld.service - firewalld - dynamic firewall daemon
   Loaded: loaded (/usr/lib/systemd/system/firewalld.service; disabled; vendor preset: enabled)
   Active: inactive (dead)
- 如果要关闭防火墙设置,可能通过systemctl stop firewalld这条指令来关闭该功能。
systemctl stop firewalld.service #关闭防火墙
- 启动防火墙
systemctl start firewalld
再次通过systemctl status firewalld查看firewalld状态,显示running即已开启了。
- 增加防火墙放行的规则:
再次执行执行firewall-cmd --permanent --zone=public --add-port=3306/tcp,提示success,表示设置成功,
firewall-cmd --permanent --zone=public --add-port=3306/tcp
- 这样就可以继续后面的设置了。重新加载防火墙
firewall-cmd --reload
说明:开发环境,关闭防火墙即可
报错:Specified key was too long; max key length is 767 bytes
1 ERROR 1071 (42000): Specified key was too long; max key length is 767 bytes
版本5.6 解决方案;通过root账号,设置两个全局变量:
set global innodb_large_prefix=on;
set global innodb_file_format=Barracuda;
报错:MySql Host is blocked because of many connection errors;
具体异常
MySql Host is blocked because of many connection errors; unblock with 'mysqladmin flush-hosts'
- 原因分析:
查看 tomcat 的日志文件,发现在报错开始部分出现了这个错误。经过查询,发现这个错误的 原因 是:同一个 ip 在短时间内产生太多(超过 mysql 数据库 maxconnectionerrors 的最大值)中断的数据库连接而导致的阻塞。
- 解决方法:
进入 CentOS7 服务器:
- 方法一:提高允许的maxconnectionerrors数量(治标不治本):
- 进入 Mysql 数据库查看 maxconnectionerrors: show variables like '%max_connection_errors%';
- 修改 maxconnectionerrors 的数量为 1000: set global max_connect_errors = 1000;
- 查看是否修改成功:show variables like '%max_connection_errors%';
- 方法二:使用 mysqladmin flush-hosts 命令清理一下 hosts 文件:
- 查找 mysqladmin 的路径:whereis mysqladmin
- 执行命令,如:/usr/local/mysql5.5.35/bin/mysqladmin -uroot -pyourpwd flush-hosts
注: 方法二清理 hosts 文件,也可以直接进入 mysql 数据库执行命令:mysql> flush hosts;
一键安装Mysql
下载安装包
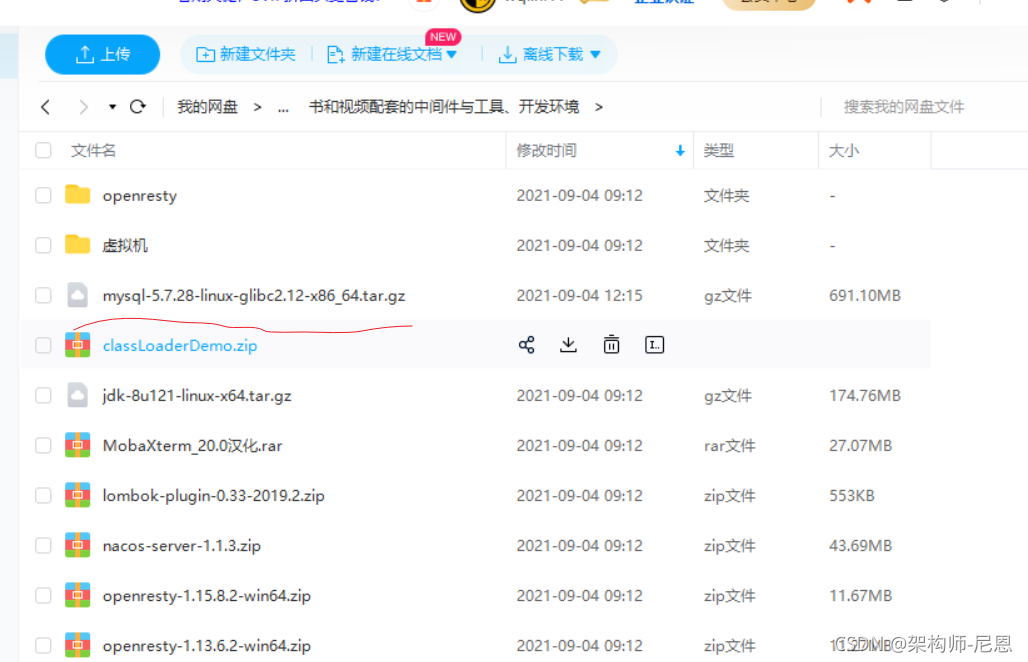
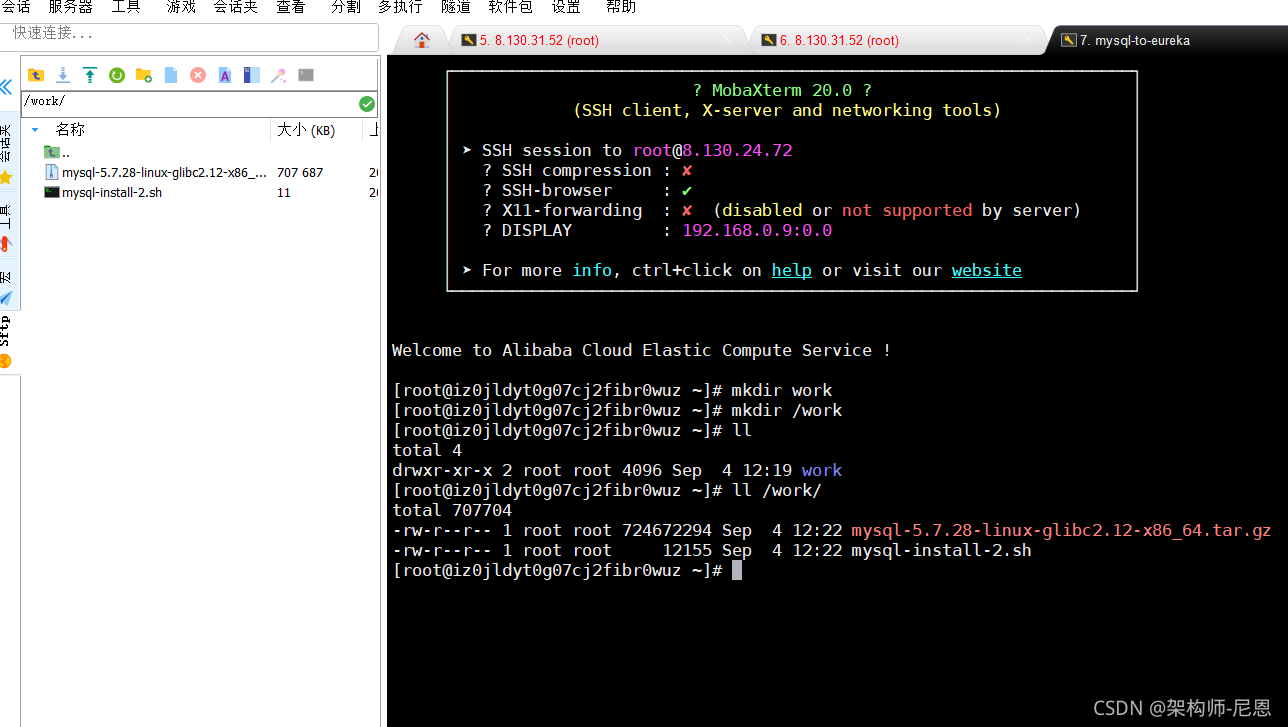
创建/work目录,把压缩包传上去
下载一键安装脚本
把脚本也传到 work目录
执行即可
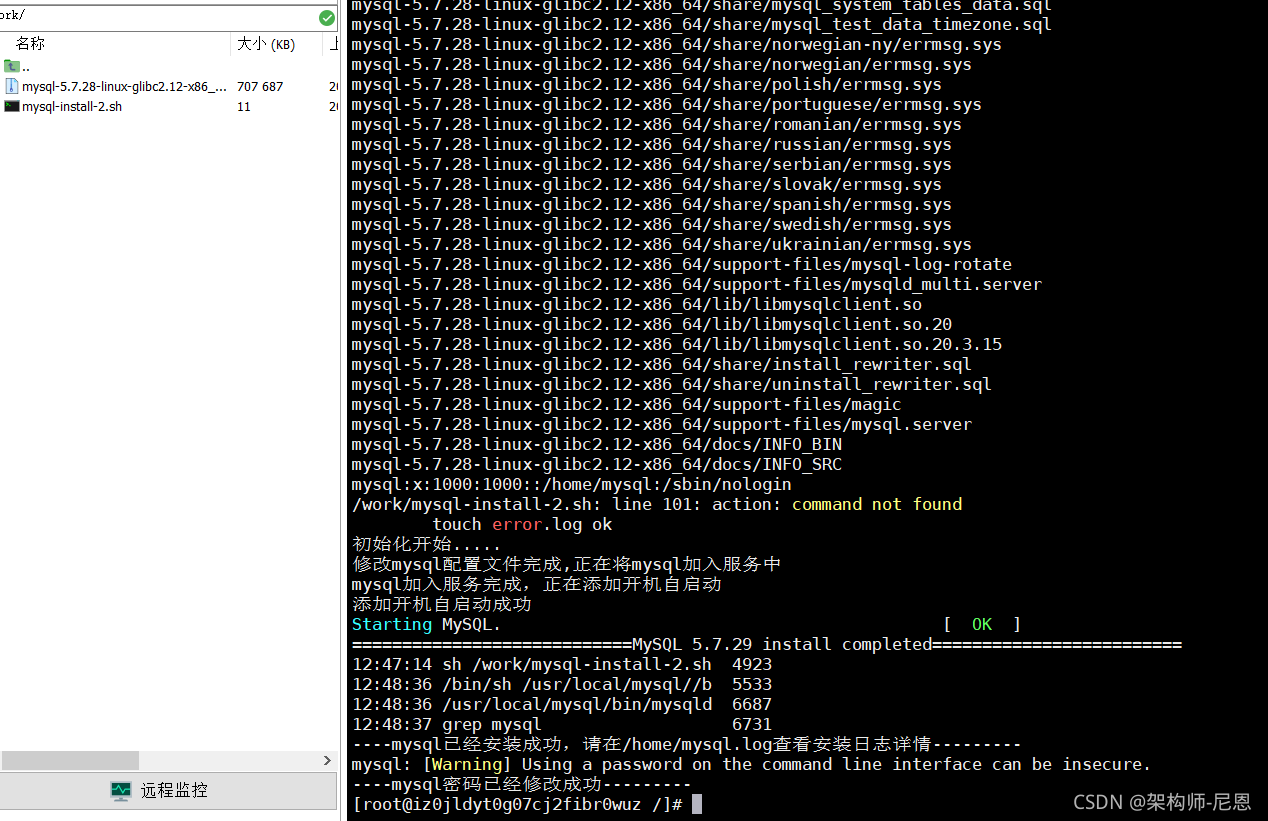
sh /work/mysql-install-2.sh
安装的过程
问题1
root@bigdata-159:/usr/local/mysql# ./bin/mysqld -- defaults-file=/etc/my.cnf --initialize --user=mysql
./bin/mysqld: error while loading shared libraries: libaio.so.1: cannot open shared object file: No such file or directory
解决方法:
[root@example.com data]# yum install -y libaio //安装后在初始化就OK了
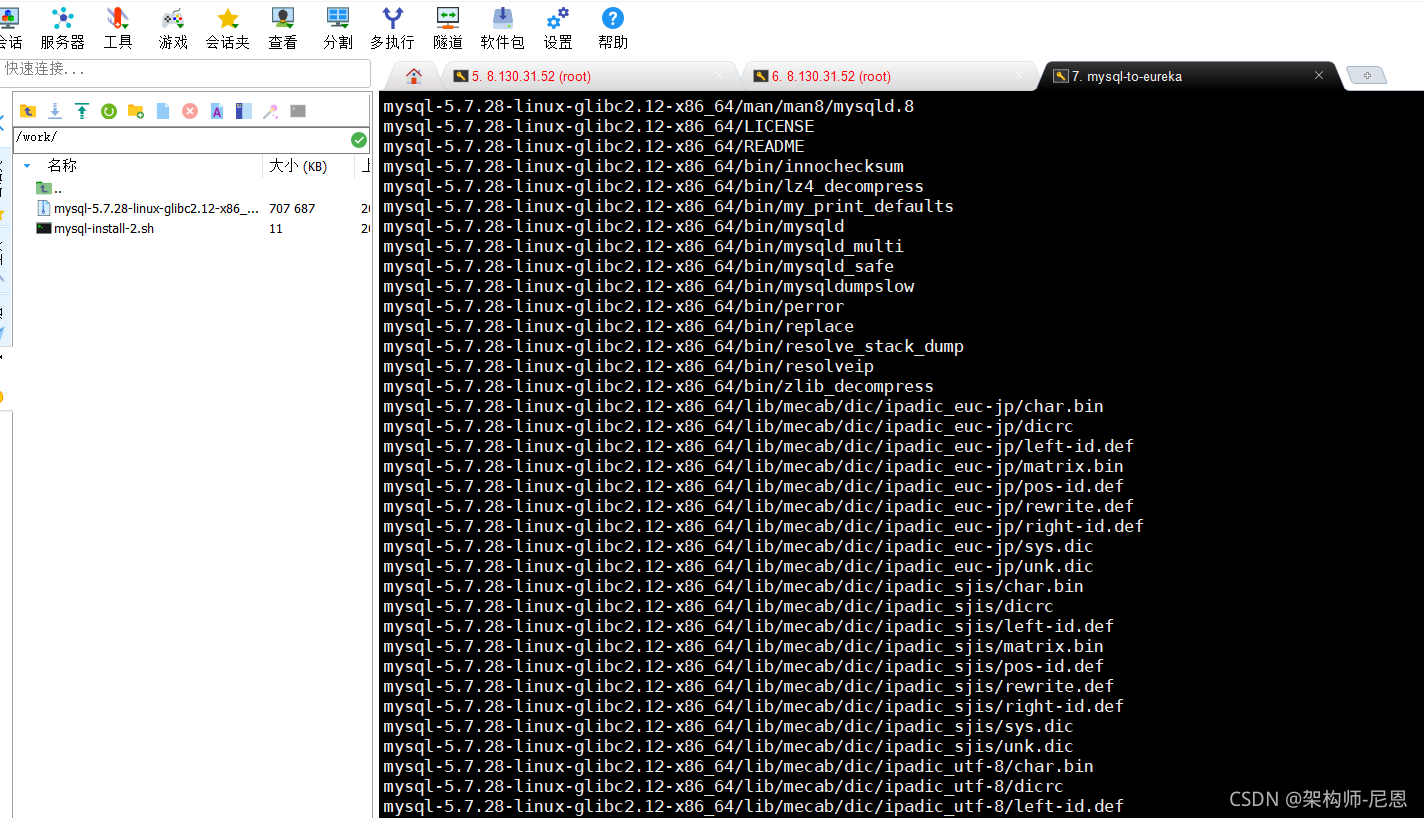
安装成功
脚本的内容如下:
#!/bin/bash


function stopOld() {
    pid=$(ps -ef | grep -v 'grep' | egrep mysqld_safe| awk '{printf $2 " "}')
    if [ "$pid" != "" ]; then
        echo -n $"Shutting down mysqld_safe: "
        kill -9 "$pid"
    else
        echo "mysqld_safe is stopped"
    fi


				pid=$(ps -ef | grep -v 'grep' | egrep mysqld| awk '{printf $2 " "}')
    if [ "$pid" != "" ]; then
        echo -n $"Shutting down mysqld: "
        kill -9 "$pid"
    else
        echo "mysqld is stopped"
    fi
}

echo '尝试停止mysql';
stopOld


#sleep 10s

##define mysql directory configuration variable
Datadir=/data/mysql/data
Binlogdir=/data/mysql/binlog
Logdir=/data/mysql/logs


rm -rf /data/mysql
rm -rf /var/lock/subsys/mysql
rm -rf /usr/sbin/mysqladmin
rm -rf /usr/sbin/mysql
rm -rf  /var/log/mysqld.log


clear
echo "========================================================================="
echo "A tool to auto-compile & install MySQL 5.7.29 on Redhat/CentOS Linux "
echo "========================================================================="
#pkill -9 mysql
#date +%Y-%m-%d-%H-%M
#卸载系统自带的Mysql
#/bin/rpm -e $(/bin/rpm -qa | grep mysql|xargs) --nodeps
#/bin/rpm -e $(/bin/rpm -qa | grep mariadb|xargs) --nodeps
#/bin/rm -f /etc/my.cnf

#set mysql root password
    echo "==========================="
        mysqlrootpwd="$1"
        if [ "$1" = "" ]; then
                mysqlrootpwd="123456"
        fi


# Initialize  the installation related content.
    #Delete Old Mysql program
    rpm -qa|grep mysql
    rpm -e mysql


# cat >>/etc/security/limits.conf<<EOF
# * soft nproc 65535
#* hard nproc 65535
#* soft nofile 6553500
#* hard nofile 6553500
#EOF

# echo "fs.file-max=6553500" >> /etc/sysctl.conf

echo "============================Install MySQL 5.7.29=================================="

#Backup old my.cnf
#rm -f /etc/my.cnf
if [ -s /etc/my.cnf ]; then
    mv /etc/my.cnf /etc/my.cnf.`date +%Y%m%d%H%M%S`.bak
fi
echo "============================MySQL 5.7.29 installing…………========================="


rm -rf /usr/local/mysql
rm -rf /usr/local/mysql/mysql-5.7.28-linux-glibc2.12-x86_64


tar -zxvf /work/mysql-5.7.28-linux-glibc2.12-x86_64.tar.gz -C /usr/local/
ln -s /usr/local/mysql-5.7.28-linux-glibc2.12-x86_64 /usr/local/mysql
grep mysql /etc/passwd
RETVAL=$?
if [ $RETVAL -ne 0 ];then
   useradd mysql -s /sbin/nologin -M
     action "mysql user added successfully" /bin/true
  else
     action " $(echo -e "\e[31;47;5m mysql user already exists\e[0m")" /bin/false
fi

if [ ! -d "$Datadir" ]
then
			mkdir -p  /data/mysql/data
		#	cd /data/mysql/data
		#	touch bogon.pid
			#echo "	bogon.pid ok "

			# chmod -R 775 /var/run/mysqld/
fi


if [ ! -d "$Binlogdir" ]
then
   mkdir -p  /data/mysql/binlog
fi

if [ ! -d "$Logdir" ]
then
   mkdir -p  /data/mysql/logs
		#	touch error.log
	#		echo "	touch error.log ok "

fi

sudo chown -R mysql:mysql /data/mysql
sudo chown -R mysql:mysql /usr/local/mysql
sudo chown -R mysql:mysql /var
#sudo chown -R mysql:mysql /usr/local/mysql


#edit /etc/my.cnf
#SERVERID=`ifconfig eth0 | grep "inet addr" | awk '{ print $2}'| awk -F. '{ print $3$4}'`
cat >>/etc/my.cnf<<EOF
[client]
port            = 3306

[mysql]
auto-rehash
prompt="\\u@\\h [\\d]>"
#pager="less -i -n -S"
#tee=/opt/mysql/query.log

[mysqld]
####: for global
user                                =mysql
basedir                             =/usr/local/mysql/
datadir                             =/data/mysql/data
server_id                           =2333306
port                                =3306
character_set_server                =utf8
explicit_defaults_for_timestamp     =off
log_timestamps                      =system
socket                              =/tmp/mysql.sock
read_only                           =0
skip_name_resolve                   =1
auto_increment_increment            =1
auto_increment_offset               =1
lower_case_table_names              =1
secure_file_priv                    =
open_files_limit                    =65536
max_connections                     =1000
thread_cache_size                   =64
table_open_cache                    =81920
table_definition_cache              =4096
table_open_cache_instances          =64
max_prepared_stmt_count             =1048576

####: for binlog
binlog_format                       =row
log_bin                             =/data/mysql/binlog/mysql-bin
binlog_rows_query_log_events        =on
log_slave_updates                   =on
expire_logs_days                    =7
binlog_cache_size                   =65536
#binlog_checksum                    =none
sync_binlog                         =1
slave-preserve-commit-order         =ON

####: for error-log
log_error                           =/data/mysql/logs/error.log

general_log                         =off
general_log_file                    =/data/mysql/logs/general.log

####: for slow query log
slow_query_log                      =on
slow_query_log_file                 =/data/mysql/logs/slow.log
#log_queries_not_using_indexes      =on
long_query_time                     =1.000000

####: for gtid
#gtid_executed_compression_period   =1000
gtid_mode                           =on
enforce_gtid_consistency            =on

####: for replication
skip_slave_start                     =1
#master_info_repository              =table
#relay_log_info_repository           =table
slave_parallel_type                  =logical_clock
slave_parallel_workers               =4
#rpl_semi_sync_master_enabled        =1
#rpl_semi_sync_slave_enabled         =1
#rpl_semi_sync_master_timeout        =1000
#plugin_load_add                     =semisync_master.so
#plugin_load_add                     =semisync_slave.so
binlog_group_commit_sync_delay       =100
binlog_group_commit_sync_no_delay_count = 10

####: for innodb
default_storage_engine                          =innodb
default_tmp_storage_engine                      =innodb
innodb_data_file_path                           =ibdata1:1024M:autoextend
innodb_temp_data_file_path                      =ibtmp1:12M:autoextend
innodb_buffer_pool_filename                     =ib_buffer_pool
innodb_log_group_home_dir                       =/data/mysql/data
innodb_log_files_in_group                       =3
innodb_log_file_size                            =1024M
innodb_file_per_table                           =on
innodb_online_alter_log_max_size                =128M
innodb_open_files                               =65535
innodb_page_size                                =16k
innodb_thread_concurrency                       =0
innodb_read_io_threads                          =4
innodb_write_io_threads                         =4
innodb_purge_threads                            =4
innodb_page_cleaners                            =4
                 #   4(刷新lru脏页)
innodb_print_all_deadlocks                      =on
innodb_deadlock_detect                          =on
innodb_lock_wait_timeout                        =20
innodb_spin_wait_delay                          =128
innodb_autoinc_lock_mode                        =2
innodb_io_capacity                              =200
innodb_io_capacity_max                          =2000
#--------Persistent Optimizer Statistics
innodb_stats_auto_recalc                        =on
innodb_stats_persistent                         =on
innodb_stats_persistent_sample_pages            =20


innodb_adaptive_hash_index                      =on
innodb_change_buffering                         =all
innodb_change_buffer_max_size                   =25
innodb_flush_neighbors                          =1
#innodb_flush_method                             =
innodb_doublewrite                              =on
innodb_log_buffer_size                          =128M
innodb_flush_log_at_timeout                     =1
innodb_flush_log_at_trx_commit                  =1
innodb_buffer_pool_size                         =4096M
innodb_buffer_pool_instances                    =4
autocommit                                      =1
#--------innodb scan resistant
innodb_old_blocks_pct                           =37
innodb_old_blocks_time                          =1000
#--------innodb read ahead
innodb_read_ahead_threshold                     =56
innodb_random_read_ahead                        =OFF
#--------innodb buffer pool state
innodb_buffer_pool_dump_pct                     =25
innodb_buffer_pool_dump_at_shutdown             =ON
innodb_buffer_pool_load_at_startup              =ON

EOF

	echo '初始化开始.....';

/usr/local/mysql/bin/mysqld --initialize --user=mysql --basedir=/usr/local/mysql  --datadir=/data/mysql/data
Pass=$(grep 'A temporary password' /data/mysql/logs/error.log |awk  '{print $NF}')
#temppasswd=$(cat /data/mysql/logs/error.log | grep 'temporary password' | awk '{print $NF}')

echo '修改mysql配置文件完成,正在将mysql加入服务中';

cp /usr/local/mysql/support-files/mysql.server /etc/init.d/mysqld

echo 'mysql加入服务完成,正在添加开机自启动';

chkconfig --add mysqld
chkconfig  mysqld on
echo '添加开机自启动成功';

/etc/init.d/mysqld start
echo "export PATH=$PATH:/usr/local/mysql/bin" > /etc/profile.d/mysql.sh
source /etc/profile.d/mysql.sh
echo "============================MySQL 5.7.29 install completed========================="
ps -eo start,cmd,pid|grep mysql


#/usr/local/mysql/bin/mysqladmin -uroot -p"$Pass" password $mysqlrootpwd

echo "----mysql已经安装成功,请在/home/mysql.log查看安装日志详情---------"
/usr/local/mysql/bin/mysql -uroot -p"$Pass" --connect-expired-password <<EOF
SET PASSWORD = PASSWORD('123456');
flush privileges;
use mysql;
update user set host = '%' where user = '127.0.0.1';
grant all privileges on *.* to root@'%' identified by '123456';
flush privileges;
EOF
##

echo "----mysql密码已经修改成功---------"

 浙公网安备 33010602011771号