Django rest framework 源码分析 (1)----认证
一、基础
django 2.0官方文档
1 | https://docs.djangoproject.com/en/2.0/ |
安装
pip3 install djangorestframework
假如我们想实现用户必须是登陆后才能访问的需求,利用restframework该如何的去实现,具体的源码流程又是怎么样的呢
为了有一个清晰的认识,先直接上代码,有一个清晰的认识,在剖析源码流程
首先先创建一个应用
python manage.py startapp app01
在应用 app01.views.py 下 的视图函数的代码如下
from rest_framework.views import APIViewfrom rest_framework import exceptions
from rest_framework.request import Request

class MyAuthentication(object):
    def authenticate(self,request):
        token = request._request.GET.get('token')
        # 获取用户名和密码,去数据校验
        if not token:
            raise exceptions.AuthenticationFailed('用户认证失败')
        return ("dog",None)

    def authenticate_header(self,val):
        pass

class DogView(APIView):
    authentication_classes = [MyAuthentication,]

    def get(self,request,*args,**kwargs):
        print(request)
        print(request.user)
        self.dispatch
        ret  = {
            'code':1000,
            'msg':'xxx'
        }
        return HttpResponse(json.dumps(ret),status=201)
在项目的根目录下的urls.py 中添加路由的代码如下:
from app01 import views


urlpatterns = [
    url(r'^dog/', views.DogView.as_view()),
]
如果想实现必须是登陆后才能进行请求的话,只需重写父类中的 authenticate (进行一些逻辑认证)和 authenticate_header 就能达到认证的效果
启动项目,在浏览器中输入
http://127.0.0.1:8000/dog/?token=123
‘携带token返回的结果如下
1 | {"code": 1000, "msg": "xxx"} |
没有携带token返回的结果如下
1 | http://127.0.0.1:8000/dog |

源码分析
那么上面的源码内部又是如何是现代的呢
源码流程图

源码入口先从 dispatch 开始入口
    def dispatch(self, request, *args, **kwargs):
        """
        `.dispatch()` is pretty much the same as Django's regular dispatch,
        but with extra hooks for startup, finalize, and exception handling.
        """
        self.args = args
        self.kwargs = kwargs
        # 对原生的request进行封装
        request = self.initialize_request(request, *args, **kwargs)
        self.request = request
        self.headers = self.default_response_headers  # deprecate?

        try:
            self.initial(request, *args, **kwargs)

            # Get the appropriate handler method
            if request.method.lower() in self.http_method_names:
                handler = getattr(self, request.method.lower(),
                                  self.http_method_not_allowed)
            else:
                handler = self.http_method_not_allowed

            response = handler(request, *args, **kwargs)

        except Exception as exc:
            response = self.handle_exception(exc)

        self.response = self.finalize_response(request, response, *args, **kwargs)
        return self.response
可以看出上面的代码中对原生的request进行了封装
1 2 | request = self.initialize_request(request, *args, **kwargs)self.request = request |
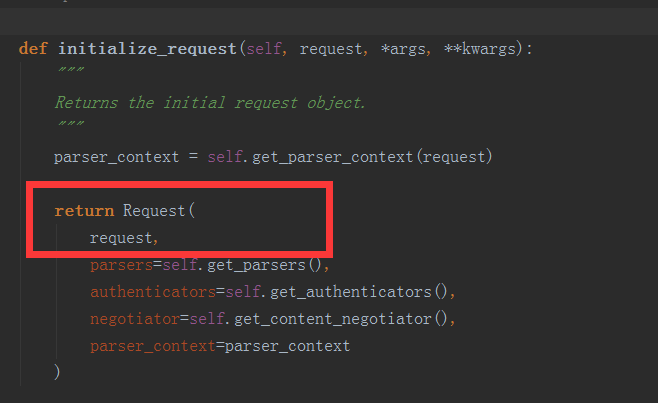
那么它内部做了些什么呢 ,追踪 self.initialize_request 代码如下:
    def initialize_request(self, request, *args, **kwargs):
        """
        Returns the initial request object.
        """
        parser_context = self.get_parser_context(request)

        return Request(
            request,
            parsers=self.get_parsers(),
            authenticators=self.get_authenticators(),
            negotiator=self.get_content_negotiator(),
            parser_context=parser_context
        )
我们可以看到 authenticators=self.get_authenticators() 这个貌似和认证有关系,追踪get_authenticators 代码如下:
    def get_authenticators(self):
        """
        Instantiates and returns the list of authenticators that this view can use.
        """
        return [auth() for auth in self.authentication_classes]
通过上面的代码我们可以看到 其返回的是通过列表生成式返回的一个实例化对象 那么它是通过什么生成这个对象的呢,下面我们来继续追踪 self.authentication_classes 其代码如下所示:
class APIView(View):

    # The following policies may be set at either globally, or per-view.
    renderer_classes = api_settings.DEFAULT_RENDERER_CLASSES
    parser_classes = api_settings.DEFAULT_PARSER_CLASSES
    authentication_classes = api_settings.DEFAULT_AUTHENTICATION_CLASSES
到这里我们发现它是通过读取应用的配置文件,到这里神秘的面纱已经开始解开了,加入我们自己写的类如果自己的内部有 authentication_classes 这个属性,并且其也是一个可迭代的对象,那么根据面向对象的属性,就会执行我们
自己的self.authentication_classes ,而不是默认到配置文件中去找。
对request的总结:
上面对原生的request对象进行了一些封装和获得了认证的实例话对象的列表
执行认证
继续追踪 dispatch 中的 self.initial 代码如下:
    def initial(self, request, *args, **kwargs):
        """
        Runs anything that needs to occur prior to calling the method handler.
        """
        self.format_kwarg = self.get_format_suffix(**kwargs)

        # Perform content negotiation and store the accepted info on the request
        neg = self.perform_content_negotiation(request)
        request.accepted_renderer, request.accepted_media_type = neg

        # Determine the API version, if versioning is in use.
        version, scheme = self.determine_version(request, *args, **kwargs)
        request.version, request.versioning_scheme = version, scheme

        # Ensure that the incoming request is permitted
        self.perform_authentication(request)
        self.check_permissions(request)
        self.check_throttles(request)
根据英文的意思看以看到 self.perform_authentication 的意思是执行认证的意思,让我们追踪其内部的代码如下:
    def perform_authentication(self, request):
        """
        Perform authentication on the incoming request.

        Note that if you override this and simply 'pass', then authentication
        will instead be performed lazily, the first time either
        `request.user` or `request.auth` is accessed.
        """
        request.user
看到其调用的是对原始request封装后的user ,追踪其 内部的user发现其是一个实例属性,代码如下所示

点进去可以看到Request有个user方法
    @property
    def user(self):
        """
        Returns the user associated with the current request, as authenticated
        by the authentication classes provided to the request.
        """
        if not hasattr(self, '_user'):
            with wrap_attributeerrors():
                self._authenticate()# 获取认证对象进行一步步的认证
        return self._user
让我们进行追踪 self._authenticate() 代码如下:
    def _authenticate(self):
        """
        Attempt to authenticate the request using each authentication instance
        in turn.
        """
        for authenticator in self.authenticators:
            try:
                user_auth_tuple = authenticator.authenticate(self)
            except exceptions.APIException:
                self._not_authenticated()
                raise

            if user_auth_tuple is not None:
                self._authenticator = authenticator
                self.user, self.auth = user_auth_tuple
                return

        self._not_authenticated()
执行认证类的authenticate方法
这里分三种情况
1.如果authenticate方法抛出异常,self._not_authenticated()执行后在抛出异常-----就是认证没通过
2.有返回值,必须是元组:(request.user,request.auth)
3.返回None,表示当前认证不处理,等下一个认证来处理
返回值就是例子中的:
1 2 | token_obj.user-->>request.usertoken_obj-->>request.auth |
通过认证自定义的authenticated没有返回值,就执行self._not_authenticated(),相当于匿名用户,
def _not_authenticated(self):
        """
        Set authenticator, user & authtoken representing an unauthenticated request.

        Defaults are None, AnonymousUser & None.
        """
        self._authenticator = None

        if api_settings.UNAUTHENTICATED_USER:
            self.user = api_settings.UNAUTHENTICATED_USER()   #AnonymousUser匿名用户
        else:
            self.user = None

        if api_settings.UNAUTHENTICATED_TOKEN:
            self.auth = api_settings.UNAUTHENTICATED_TOKEN()  #None
        else:
            self.auth = None
因为authenticate方法我们自己重写了,所以当执行authenticate()的时候就是执行我们自己写的认证
父类中的authenticate方法
    def authenticate(self, request):
        return (self.force_user, self.force_token)
我们自己写的
    def authenticate(self,request):
        token = request._request.GET.get('token')
        # 获取用户名和密码,去数据校验
        if not token:
            raise exceptions.AuthenticationFailed('用户认证失败')
        return ("dog",None)
所以到这里我们就搞懂了我们在做用户认证的时候为什么需要重其authenticate的方法了
以上的是我们自己定义的 authentication_classes 它会去我们的类属性中使用我们自己的,只需在需要认证接口的中设置类属性 authentication_classes = [ 认证的逻辑函数 ]
全局认证
假如我们进行全局认证的话,可以在配置文件中设置,通过继承父类的方式来实现,简单的说就是 类属性 authentication_classes 自己不定义使用父类的,看以下的代码:
class APIView(View):

    # The following policies may be set at either globally, or per-view.
    renderer_classes = api_settings.DEFAULT_RENDERER_CLASSES
    parser_classes = api_settings.DEFAULT_PARSER_CLASSES
    authentication_classes = api_settings.DEFAULT_AUTHENTICATION_CLASSES
在以上的代码中我们可以看到authentication_classes = = api_settings.DEFAULT_AUTHENTICATION_CLASSES 我们可以追踪看到代码如下:
def reload_api_settings(*args, **kwargs):
    setting = kwargs['setting']
    if setting == 'REST_FRAMEWORK':
        api_settings.reload()


setting_changed.connect(reload_api_settings)
这是它会去配置文件中读取 REST_FRAMEWORK ,这时后我们可以在配置文件中添加这个配置,里面的键是 DEFAULT_PARSER_CLASSES 值是认证函数的路径
REST_FRAMEWORK = {
    # 全局使用的认证类
    "DEFAULT_AUTHENTICATION_CLASSES":['api.utils.auth.Authtication', ],
}
我们根据上述配置的路径,在应用api建立以下文件 utils/auth.py 代码如下:
class Authtication(BaseAuthentication):
    def authenticate(self,request):
        token = request._request.GET.get('token')
        token_obj = models.UserToken.objects.filter(token=token).first()
        if not token_obj:
            raise exceptions.AuthenticationFailed('用户认证失败')
        # 在rest framework内部会将整个两个字段赋值给request,以供后续操作使用
        return (token_obj.user, token_obj)

    def authenticate_header(self, request):
        pass
这时后所有的接口,必须经过认证后才能访问,但是有的接口是不需要认证的,比如登陆的时候这时,我们可以在登陆的接口中不走父类(apiview) 的认证使用我们自己 的,只需定义定义类属性authentication_classes = [ ] 即可
class AuthView(APIView):
    """
    用于用户登录认证
    """
    authentication_classes = []

    def post(self,request,*args,**kwargs):
        pass
关于匿名用户登陆的设置
有些时候用户是在没有登陆的时候,访问我们的接口,这时候我们称之为匿名的用户,我们可以对其进行简单的设置
    def _authenticate(self):
        """
        Attempt to authenticate the request using each authentication instance
        in turn.
        """
        for authenticator in self.authenticators:
            try:
                user_auth_tuple = authenticator.authenticate(self)
            except exceptions.APIException:
                self._not_authenticated()
                raise

            if user_auth_tuple is not None:
                self._authenticator = authenticator
                self.user, self.auth = user_auth_tuple
                return

        self._not_authenticated()

    def _not_authenticated(self):
        """
        Set authenticator, user & authtoken representing an unauthenticated request.

        Defaults are None, AnonymousUser & None.
        """
        self._authenticator = None

        if api_settings.UNAUTHENTICATED_USER:
            self.user = api_settings.UNAUTHENTICATED_USER()
        else:
            self.user = None

        if api_settings.UNAUTHENTICATED_TOKEN:
            self.auth = api_settings.UNAUTHENTICATED_TOKEN()
        else:
            self.auth = None
在上面的源码中我们可以看到 匿名用户默认的request.user=AnonymousUser, request.auth = None ,我们来写一个接口来简单的认证以下
class UserInfoView(APIView):

    authentication_classes = []

    def get(self,request,*args,**kwargs):
        print(request.user)
        print(request.auth )
        return HttpResponse('用户信息')
为其 配置url
url(r'^api/v1/info/$', views.UserInfoView.as_view()),
在浏览器中输入
1 | http://127.0.0.1:8000/api/v1/info/ |
测试的结果如下:

源码中的user 和token 的设置如下:
        if api_settings.UNAUTHENTICATED_USER:
            self.user = api_settings.UNAUTHENTICATED_USER()
        else:
            self.user = None

        if api_settings.UNAUTHENTICATED_TOKEN:
            self.auth = api_settings.UNAUTHENTICATED_TOKEN()
我们可以看到 对user 和 token 的设置,我们可以定义一个函数,所以我们可以这样设置,
REST_FRAMEWORK = {
    # 全局使用的认证类
    "DEFAULT_AUTHENTICATION_CLASSES":['api.utils.auth.FirstAuthtication','api.utils.auth.Authtication', ],
    # "UNAUTHENTICATED_USER":lambda :"匿名用户",
    "UNAUTHENTICATED_USER": None
    "UNAUTHENTICATED_TOKEN":None,
}
测试的结果如下:

drf的内置认证类
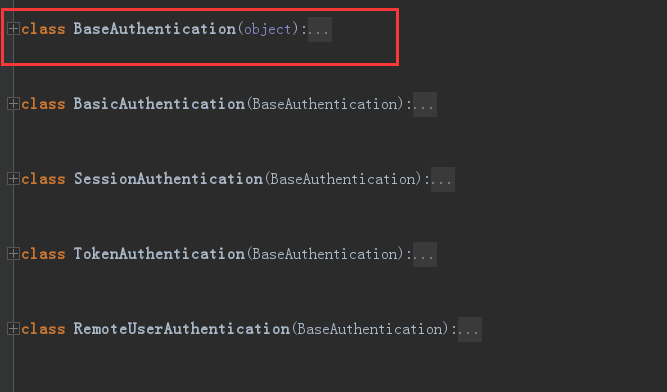
rest_framework里面内置了一些认证,我们自己写的认证类最好都要继承内置认证类 "BaseAuthentication"
from rest_framework.authentication import BasicAuthentication
BaseAuthentication源码:
class BaseAuthentication(object):
    """
    All authentication classes should extend BaseAuthentication.
    """

    def authenticate(self, request):
        """
        Authenticate the request and return a two-tuple of (user, token).
        """
        #内置的认证类,authenticate方法,如果不自己写,默认则抛出异常
        raise NotImplementedError(".authenticate() must be overridden.")

    def authenticate_header(self, request):
        """
        Return a string to be used as the value of the `WWW-Authenticate`
        header in a `401 Unauthenticated` response, or `None` if the
        authentication scheme should return `403 Permission Denied` responses.
        """
        #authenticate_header方法,作用是当认证失败的时候,返回的响应头
        pass
其它内置认证类
rest_framework里面还内置了其它认证类,我们主要用到的就是BaseAuthentication,剩下的很少用到

总结
自己写认证类方法梳理
(1)创建认证类
- 继承BaseAuthentication --->>1.重写authenticate方法;2.authenticate_header方法直接写pass就可以(这个方法必须写)
(2)authenticate()返回值(三种)
- None ----->>>当前认证不管,等下一个认证来执行
- raise exceptions.AuthenticationFailed('用户认证失败') # from rest_framework import exceptions
- 有返回值元祖形式:(元素1,元素2) #元素1复制给request.user; 元素2复制给request.auth
(3)局部使用
- authentication_classes = [BaseAuthentication,]
(4)全局使用
1 2 3 4 | #设置全局认证REST_FRAMEWORK = { "DEFAULT_AUTHENTICATION_CLASSES":['API.utils.auth.Authentication',]} |


【推荐】国内首个AI IDE,深度理解中文开发场景,立即下载体验Trae
【推荐】编程新体验,更懂你的AI,立即体验豆包MarsCode编程助手
【推荐】抖音旗下AI助手豆包,你的智能百科全书,全免费不限次数
【推荐】轻量又高性能的 SSH 工具 IShell:AI 加持,快人一步
· 基于Microsoft.Extensions.AI核心库实现RAG应用
· Linux系列:如何用heaptrack跟踪.NET程序的非托管内存泄露
· 开发者必知的日志记录最佳实践
· SQL Server 2025 AI相关能力初探
· Linux系列:如何用 C#调用 C方法造成内存泄露
· 终于写完轮子一部分:tcp代理 了,记录一下
· 震惊!C++程序真的从main开始吗?99%的程序员都答错了
· 别再用vector<bool>了!Google高级工程师:这可能是STL最大的设计失误
· 单元测试从入门到精通
· 【硬核科普】Trae如何「偷看」你的代码?零基础破解AI编程运行原理