2- sanic项目结构
项目结构
通过前面的讲解,我们了解了`Sanic`的运行方式以及编写一个好的配置方案,是不是想要立马编写一个应用练练手呢?别急,请先看完这一章节,了解一下你要写的应用得用什么样的结构。
在`github`上也看了不少的`Python`项目吧,相信你也清楚,一个项目,在最外层他们应该是一样的,简单概括下,大概是下面这样的结构:
``` shell
pro_name
├── docs # 项目文档说明
├── src or pro_name/# 项目名称
├── tests # 测试用例
├── README.md # 项目介绍
└──requirements.txt # 该项目依赖的第三方库
```
那接下来需要讨论的,就是 `src` 或者说`pro_name`(这个就看你心情命名了,一般与最外层一样的名字)的内部结构该是什么样的呢?
本章将写一个 `rss` 解析展示的项目用做演示。
普通的项目结构
一个普通的项目:
- 不需要添加后续模块功能
- 快速开发使用,不需要维护
- 无较复杂的前端需求
- 用完就走
那么就可以像 `demo01` 中一样,只需要添加一个 [run.py]或者叫做 `app.py` 文件(反正这是一个启动文件,命名可随意),不论是配置、路由都写在一起就好了。
新建一个项目如下:
```
sample01
├── docs
│   └── demo.md
├── src
│   └── run.py
├── tests
├── .gitignore
└──requirements.txt
```
任意一个 `rss` 源,假设项目需要将其中的文章标题以及链接提取并展示出来,比如以json格式返回,这属于很简单的功能,可以说只有一段逻辑,`run.py` 内容如下:
需要安装的包
pip install feedparser

pip install jinjia2


from sanic import Sanic
from sanic.response import json
from feedparser import parse

app = Sanic()


@app.route("/")
async def index(request):
    url = "http://blog.howie6879.cn/atom.xml"
    feed = parse(url)
    articles = feed['entries']
    data = []
    for article in articles:
        data.append({"title": article["title_detail"]["value"], "link": article["link"]})
    return json(data)


if __name__ == "__main__":
    app.run(host="0.0.0.0", port=8000)
访问浏览器
http://0.0.0.0:8000/
会返回一串json的代码如下:
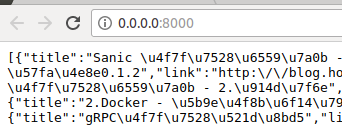
我们想象地一样,返回了一串`json`,接下来,问题升级,我想要将标题链接用页面展示,该怎么弄?
很容易想到,我们需要一个页面模板来承载数据,然后将json数据写入到页面模板中,最后用 `jinja2` 的 `template` 将其渲染。
道理我们都懂,`Sanic`具体需要怎么渲染呢?说白了就是对`jinja2`的使用,如下:
from sanic import Sanic
from sanic.response import json, text, html
from feedparser import parse
from jinja2 import Template

app = Sanic()

# 后面会使用更方便的模板引用方式
template = Template(
    """
    <!DOCTYPE html>
<html lang="en">
<head>
    <meta charset="UTF-8">
    <title>rss阅读</title>
    <meta name="viewport" content="width=device-width, initial-scale=1">
</head>
<body>
<article class="markdown-body">
    {% for article in articles %}
    <b><a href="{{article.link}}">{{article.title}}</a></b><br/>
    <i>{{article.published}}</i><br/>
    <hr/>
    {% endfor %}
</article>
</body>
</html>
    """
)


@app.route("/")
async def index(request):
    url = "http://blog.howie6879.cn/atom.xml"
    feed = parse(url)
    articles = feed['entries']
    data = []
    for article in articles:
        data.append({"title": article["title_detail"]["value"], "link": article["link"]})
    return json(data)


@app.route("/html")
async def rss_html(request):
    url = "http://blog.howie6879.cn/atom.xml"
    feed = parse(url)
    articles = feed['entries']
    data = []
    for article in articles:
        data.append(
            {"title": article["title_detail"]["value"], "link": article["link"], "published": article["published"]})
    html_content = template.render(articles=data)
    return html(html_content)


if __name__ == "__main__":
    app.run(host="0.0.0.0", port=8000)
对上面的代码做出一些解释
1 首先使用的是jinjia2的模板template= Template(‘’‘HTML字符串’‘’),在里面写入HTML文档,挖好坑,等待数据打进去
2 然后调用template.render(接受的是元祖或者字典都行)方法,把需要传入的参数放进去
3 通过return 返回即可
运行起来,然后输入
http://0.0.0.0:8000/html
就可以看到被展示出来的页面^_^

假设需要编写前端页面比较多,那么你就需要添加`statics` 以及 `templates` 文件夹用来管理各个界面模块,具体下面会介绍。
项目结构具体说明
当编写的项目过于复杂,我都会将其当做一个第三方包来管理项目中涉及的各种模块
这样,你的应用下面的模块引用起来就会特别方便,就像使用一个第三方模块一样,灵巧且方便。
每个项目的内部分布以及命名可能不一样(甚至目录比应该或多或少),但大体意思可能差不多,下面介绍本次项目 `src` 下的一些文件目录结构:
sample02
├── docs
│   └── demo.md
├── src
│   ├── config # 配置
│   ├── statics # css、js、img
│   ├── templates # Jinja2模板
│   └── views # 路由、逻辑处理
│   | ├── __init__.py
│   |
|   ——── run.py # 启动文件
├── tests
└── requirements.txt

对上述结构进行解释说明
config是一个包,里面的congig.py是对项目的共有配置添加到Config的类属性中,dev_congif.py和dev_config.py存放的是一些私有的配置,分别继承共有配置Congig类,最后在__init__.py中通过系统环境变量的判断来选择导入那个私有的配置,返回CONFIG对象。
views也是一个包,主要实现的是路由和视图函数的处理逻辑
run.py是一个启动的文件,在这里配置静态文静,公有的和私有的配置
好了,项目的结构到这里就介绍完了,下面开始往里面填充代码了
congig包
在congig的包中创建config.py代码如下所示
import os


class Config():
    """
    Basic config
    """
    # Application config
    TIMEZONE = 'Asia/Shanghai'
    BASE_DIR = os.path.dirname(os.path.dirname(__file__))

    #  /home/zhangbiao/Desktop/Sanic-For-Pythoneer-master/examples/demo03/sample02/src
在config包中创建dev_config.py放一些私有的配置(继承共有的配置),代码如下所示
#!/usr/bin/env python
from .config import Config


class DevConfig(Config):
    # Application config
    DEBUG = True
在config包中创建pro_config.py放一些私有的配置(继承共有的配置),代码如下所示:
#!/usr/bin/env python
from .config import Config


class ProConfig(Config):
    # Application config
    DEBUG = False
最后在__init__.py中通过获取系统的变量来选择该用那个私有的配置+公有的配置,返回CONFIG对象,代码如下:
#!/usr/bin/env python
import os


def load_config():
    """
    Load a config class
    """

    mode = os.environ.get('MODE', 'DEV')
    try:
        if mode == 'PRO':
            from .pro_config import ProConfig
            return ProConfig
        elif mode == 'DEV':
            from .dev_config import DevConfig
            return DevConfig
        else:
            from .dev_config import DevConfig
            return DevConfig
    except ImportError:
        from .config import Config
        return Config


CONFIG = load_config()
views包
views包主要是实现路由和逻辑处理,在其内部创建rss.py代码如下:
#!/usr/bin/env python
from sanic import Sanic
from sanic.response import json, text, html
from feedparser import parse
from jinja2 import Environment, PackageLoader, select_autoescape

import sys

# https://github.com/channelcat/sanic/blob/5bb640ca1706a42a012109dc3d811925d7453217/examples/jinja_example/jinja_example.py
# 开启异步特性  要求3.6+
enable_async = sys.version_info >= (3, 6)

app = Sanic()

# jinjia2 config
env = Environment(
    loader=PackageLoader('views.rss', '../templates'),
    autoescape=select_autoescape(['html', 'xml', 'tpl']),
    enable_async=enable_async
    )


async def template(tpl, **kwargs):
    template = env.get_template(tpl)
    rendered_template = await template.render_async(**kwargs)
    return html(rendered_template)


@app.route("/")
async def index(request):
    url = "http://blog.howie6879.cn/atom.xml"
    feed = parse(url)
    articles = feed['entries']
    data = []
    for article in articles:
        data.append({"title": article["title_detail"]["value"], "link": article["link"]})
    return json(data)


@app.route("/html")
async def rss_html(request):
    url = "http://blog.howie6879.cn/atom.xml"
    feed = parse(url)
    articles = feed['entries']
    data = []
    for article in articles:
        data.append({
            "title": article["title_detail"]["value"],
            "link": article["link"],
            "published": article["published"]
        })

    return await template('rss.html', articles=data)
在views.py的__init__.py中导入app供启动文件去调用,代码如下:
#!/usr/bin/env python
from .rss import app
启动文件
在项目的目录下创建启动文件run.py,并对项目进行配置代码如下:
# !/usr/bin/env python
import sys

sys.path.append('../')
from src.views import app
from src.config import CONFIG


app.static('/statics', CONFIG.BASE_DIR + '/statics')
app.config.from_object(CONFIG)

if __name__ == "__main__":
    app.run(host="0.0.0.0", port=8000,debug=app.config.DEBUG)
静态目录
在项目的目录下创建静态目录statics,放一些静态的文件(css,js等)
在其内部创建css/main.css代码如下所示:
.markdown-body {
    box-sizing: border-box;
    min-width: 200px;
    max-width: 980px;
    margin: 0 auto;
    padding: 45px;
}

@media (max-width: 767px) {
    .markdown-body {
        padding: 15px;
    }
}
templates模板目录
在项目的目录下创建templates模板目录,主要放的是一些html文件
在其内部创建rss.html代码如下所示
<!DOCTYPE html>
<html lang="en">
<head>
    <meta charset="UTF-8">
    <title>rss阅读</title>
    <meta name="viewport" content="width=device-width, initial-scale=1">
    <link rel="stylesheet" href="https://github.com/sindresorhus/github-markdown-css/blob/gh-pages/github-markdown.css">
    <link rel="stylesheet" href="/statics/css/main.css">
</head>
<body>
<article class="markdown-body">
    {% for article in articles %}
    <b><a href="{{article.link}}">{{article.title}}</a></b><br/>
    <i>{{article.published}}</i><br/>
    <hr/>
    {% endfor %}
</article>
</body>
</html>
至此整个项目的结构就介绍完成了
以上代码转自 代码地址

 浙公网安备 33010602011771号